Linux in a device based on the Altera SoC FPGA chip: restore lost functionality
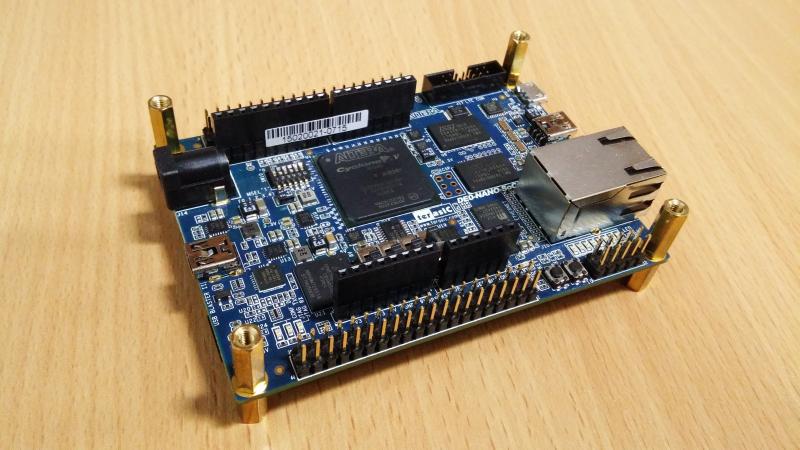
Some time ago, the DE0-Nano-SoC developer kit, built on the basis of the Altera Cyclone V chip, came into my hands. For each of these tasks, a scheme is created for the FPGA and a program is written for the HPS. The schema for the FPGA is created in the Quartus II environment and, during the development process, is downloaded to the FPGA via the JTAG interface via a USB blaster. When the circuit is finally debugged, it is recorded on the SD card as a firmware file. Then, when you need to use a board for one purpose or another, the necessary firmware is taken, loaded into the FPGA by a command like
cat hardware.rbf > /dev/fpga0 Everything went on as usual, but one day I updated the Linux kernel in the board - what I was talking about in this article . And now, after a while, it turned out that the FPGA manager, which allowed the firmware to be loaded into the FPGA in a similar way, disappeared from the list of drivers. The first thought was that I forgot to include the driver in the configuration when building the kernel. However, to my surprise, it was soon discovered that among the sources of the kernel, this driver is not in principle! Of course, it would be possible to load the firmware into the FPGA in other ways, of which there are at least three more. But this method was the most operational and convenient for me, which is why it was decided to restore the lost functionality. If you are interested in how this was done - welcome under cat.
Small lyrical digression
To solve the problem, first of all it was necessary to find the source code of the FPGA manager. Naturally, the first thing was examined repositories Altera. And again, I was surprised that this driver was not in them. I had to search all over the githab and as a result, the source code was found in the Terrasica repositories. And here again the rake was formed: Terasik has not published anything on the githaba for a long time and the freshest kernel was version 3.12. As a result, the source codes of the FPGA manager taken from this repository refused to be compiled for new kernels due to the fact that they used some “obsolete” structures that were simply eliminated from the new versions. To remake the driver for new realities, something did not bother me. Therefore, the search was continued and in the end it ended with success - there were adapted driver source codes in the repository of a certain Mr. from Canada with the nickname xaxaxa . For that he bowed low.
')
So let's start
Details of the kernel assembly can be viewed in my previous article - further, in order not to repeat, I will refer to it from time to time. All further narration will be built on the assumption that the entire kernel build process, described in that article, has already been completed and all the kernel sources are in the same place safe and sound.
1. Run the terminalka and enter the root-mode - in order not to type sudo command every time:
sudo -i At the same time / root will be our home directory - we will do everything in it.
2. Download the source code of the FPGA manager from here and put it in the /root/linux-socfpga-4.1/drivers/fpga/ directory
We also take away from here the fpga.h header and write it to the /root/linux-socfpga-4.1/include/linux/ directory
3. Edit the file /root/linux-socfpga-4.1/drivers/Kconfig - add one line to it:
source "drivers/fpga/Kconfig" Where exactly to add it - does not matter. The main thing is that it should not be the very first or the very last line of the file. I added it right after the first line. It turned out like this:
menu "Device Drivers" source "drivers/fpga/Kconfig" source "drivers/amba/Kconfig" ... 4. Edit the file /root/linux-socfpga-4.1/drivers/Makefile - add one line to it:
obj-$(CONFIG_FPGA) += fpga/ Where exactly to add it - again, does not matter. I added it immediately after the initial comments. It turned out like this:
# # Makefile for the Linux kernel device drivers. # # 15 Sep 2000, Christoph Hellwig <hch@infradead.org> # Rewritten to use lists instead of if-statements. # obj-$(CONFIG_FPGA) += fpga/ obj-y += irqchip/ ... 5. Run the alter script, which will launch a new BASH and tweak some environment variables in it (for example, PATH). All compilation actions will be carried out without leaving this BASH:
cd /root/altera/15.0/embedded ./embedded_command_shell.sh 6. Create several environment variables:
export ARCH=arm export CROSS_COMPILE=arm-linux-gnueabihf- export LOADADDR=0x8000 7. Go to the directory with the kernel sources and add the FPGA manager driver to the kernel configuration:
cd /root/linux-socfpga-4.1 make menuconfig This will open a pseudographic window with menus. Go to the submenu Device Drivers . Here we will see that in the first place there is a new submenu of FPGA devices - we go into it. Inside there will be an FPGA Framework driver - we add it to the kernel: press the space on it twice - at the same time, an asterisk appears in front of it, indicating that this driver will be built into the kernel. Immediately after performing these actions, another Altera driver will appear in the list - we turn it on too: double click on it:
Since we did not reset the configuration to the initial state with the make socfpga_defconfig command , the rest of the settings should remain in the same state - as we set them in the process of building the kernel .
Exit the menu - press Exit until we exit . To the question - whether it is necessary to save the configuration - we answer Yes .
8. Compile the kernel:
make uImage Since the kernel was compiled by us earlier, now it will take very little time to rebuild it with new drivers.
9. Add information about FPGA-manager to the device tree.
To do this, add the following lines to the /root/linux-socfpga-4.1/arch/arm/boot/dts/socfpga.dtsi file:
fpgamgr: fpgamgr@0xff706000 { compatible = "altr,fpga-mgr-1.0", "altr,fpga-mgr"; transport = "mmio"; reg = <0xFF706000 0x1000 0xFFB90000 0x1000>; interrupts = <0 175 4>; }; These lines can be added to the soc block.
For example, here.
... qspi_clk: qspi_clk { #clock-cells = <0>; compatible = "altr,socfpga-gate-clk"; clocks = <&f2s_periph_ref_clk>, <&main_qspi_clk>, <&per_qspi_clk>; clk-gate = <0xa0 11>; }; }; }; fpgamgr: fpgamgr@0xff706000 { compatible = "altr,fpga-mgr-1.0", "altr,fpga-mgr"; transport = "mmio"; reg = <0xFF706000 0x1000 0xFFB90000 0x1000>; interrupts = <0 175 4>; }; gmac0: ethernet@ff700000 { compatible = "altr,socfpga-stmmac", "snps,dwmac-3.70a", "snps,dwmac"; altr,sysmgr-syscon = <&sysmgr 0x60 0>; reg = <0xff700000 0x2000>; interrupts = <0 115 4>; ... 10. Convert the device tree file into a binary format:
make socfpga_cyclone5_sockit.dtb 11. Copy the kernel and .dtb-file to the card in the FAT32 partition. I will not repeat: on how to do this, described in detail in subsection 13 of the kernel assembly section of this article .
That's all - the kernel build process with the FPGA manager driver is complete.
Health check
We put the SD-card in the board, boot and check operation.
To do this, first look at the contents of the / dev directory - the fpga0 driver file should appear in it:
Well, at the end of the download some firmware in the FPGA:
Voila! Everything works as expected.
Thank you all for your attention!
Source: https://habr.com/ru/post/267273/
All Articles