How to make friends C ++ and QML

They sent me as a test task. You need to write Qt chess using C ++ and QML. QML has not studied it before, only heard and read about it, so I decided that I would write only using C ++ and the Qt library. I wrote, sent, returned and asked to rewrite the graphic part in QML. There is nothing to do, I sat down to study this miracle and rewrote the graphic part. Now I want to share my experience.
I will not describe the whole process of writing chess, I will only describe the process of understanding QML. I think this article will help beginners in QML.
Let's start
The application window is divided into 2 parts: in the left board with figures; in the right protocol of moves (it is necessary according to the task) and control buttons (New game, Exit, Save, etc ... e.)
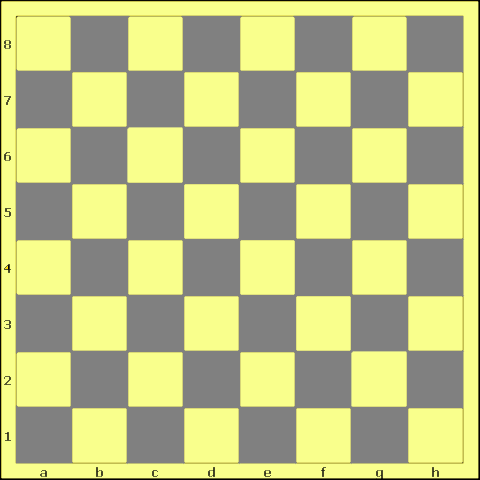
We need, in QML, to recreate the chessboard and the pieces on it. All the mathematics of moves is written in C ++.
As we work with QML and Widgets we connect QT + = qml quick declarative . We will work with QML 1.1, since the Declarative module does not know how to work with QML 2.0. We use Declarative , because only it is compatible with QWidget. All other components for working with QML no.
')
Prepare a QDeclarativeView , override this class:
File decl.h
#ifndef DECL_H #define DECL_H #include <QtWidgets> #include <QtDeclarative> class MyDecl : public QDeclarativeView { Q_OBJECT protected: virtual void mouseReleaseEvent(QMouseEvent *me); public: MyDecl(QWidget *parent = 0); ~MyDecl(); signals: void declMouseRelease(int x, int y); }; #endif // DECL_H Decl.cpp file
#include "decl.h" MyDecl::MyDecl(QWidget *parent) : QDeclarativeView(parent) { } MyDecl::~MyDecl() { } void MyDecl::mouseReleaseEvent(QMouseEvent *me) { emit declMouseRelease(me->x(), me->y()); } Why do this? The fact is that the management of figures is carried out with the mouse. To receive a signal from QML is difficult, so we will send a signal to the handler from this widget.
Now we create an object in the main class of the program:
MyDecl *decl; We connect our future QML file to it, set variables and display them on the window. We do this in the constructor:
decl = new QDeclarativeView; decl->engine()->rootContext()->setContextProperty("w1x", 0); decl->engine()->rootContext()->setContextProperty("w1y", 0); decl->engine()->rootContext()->setContextProperty("w1a", 0); decl->engine()->rootContext()->setContextProperty("w1c", 0); decl->engine()->rootContext()->setContextProperty("w1t", "texture.png"); decl->setSource(QUrl(QStringLiteral("qrc:/Images/main.qml"))); connect(decl, SIGNAL(declMouseRelease(int,int)), SLOT(getBoardMouse(int,int))); QHBoxLayout *mainWindow = new QHBoxLayout; QVBoxLayout *boardLayout = new QVBoxLayout; boardLayout->addWidget(decl,0, Qt::AlignTop | Qt::AlignLeft); mainWindow->addLayout(boardLayout, 4); Place the widget on which the QML part is drawn, top-left, so as not to do calculations for the mouse displacement. The coordinates of the board (0; 0) will correspond to the coordinates of the widget (0; 0).
Why we need variables w1x , w1y , w1c , w1t , w1a will be described below.
Now create and connect to the project main.qml
import QtQuick 1.1 Rectangle { width: 480 height: 480 Image { x: 0 y: 0 source: "Textures/board.png" } } For now we are only loading a chessboard.
Now it is necessary to place figures on it.
import QtQuick 1.1 Rectangle { width: 480 height: 480 Image { x: 0 y: 0 source: "Textures/board.png" Rectangle { x: w1x y: w1y width: 56 height: 56 color: w1c ? "#8000ff80" : "#00000000" Image { x: 0 y: 0 source: w1t visible: w1a } } } } Let's see what is written here.
Inside the Image, we placed the Rectangle size 56x56 (this is exactly the size of one square on the board, in this implementation). The coordinates will depend on some variables w1x and w1y . Coordinates are relative to the parent object, in this case, Image (board). Inside the cell, create an Image object - this will be a chess piece. Set the coordinates to it (0; 0), it will move along with the parent Rectangle. The texture for the figure will be specified in the variable w1t . The variable w1c is needed to determine whether this shape is selected, if selected, the Rectangle is filled with a light green color. The figure can be killed and we will not need to draw it, for this w1a is responsible.
The variables w1x , w1y , w1c , w1t , w1a are set / changed from C ++.
decl->engine()->rootContext()->setContextProperty("w1x", piece.x); decl->engine()->rootContext()->setContextProperty("w1y", piece.y); decl->engine()->rootContext()->setContextProperty("w1c", piece.choice); decl->engine()->rootContext()->setContextProperty("w1a", piece.active); decl->engine()->rootContext()->setContextProperty("w1t", piece.source); In setContextProperty, the first parameter is the name of the parameter in QML, it can be set dynamically using a QString . The second is the value. And according to these values, the values in QML change.
This process was described for the 1st figure, and there are only 32 of them. For such an amount, the technique is not very convenient. Therefore, there is a slightly different solution.
First, change the graphic part to QML. Create a new object:
PieceSprite.qml file
iimport QtQuick 1.1 Rectangle { property string texture: "" property bool active: true width: 56 height: 56 Image { x: 0 y: 0 source: parent.texture visible: parent.active } Behavior on x { NumberAnimation { duration: 500 easing.type: Easing.InOutQuad } } Behavior on y { NumberAnimation { duration: 500 easing.type: Easing.InOutQuad } } } Added parameters texture and active . For Image (shape), we track the change of x and y coordinates, so that the figures move smoothly (add motion animation).
Modify main.qml by adding a new object to it and create all the shapes using JavaScript
import QtQuick 1.1 Rectangle { id: appWindow width: 480 height: 480 Image { x: 0 y: 0 source: "Images/Textures/board.png" Component.onCompleted: { var component = Qt.createComponent("PieceSprite.qml"); var compName; var sprite; for (var i = 1; i <= 16; i++) { for (var c = 0; c < 2; c++) { if (c == 1) { compName = "wp" + i; } else { compName = "bp" + i; } sprite = component.createObject(appWindow); if (sprite == null) { // Error Handling console.log("Error creating object"); } else { sprite.x = 0; sprite.y = 0; sprite.active = false; sprite.objectName = compName; } } } } } } We give names for the objects - wp for white pieces and bp for black ones, plus a sequence number from 1 to 16. By these names we will refer to our figures.
Now in C ++, in the constructor, we remove the definition of variables:
decl = new QDeclarativeView; decl->setSource(QUrl(QStringLiteral("qrc:/Images/main.qml"))); connect(decl, SIGNAL(declMouseRelease(int,int)), SLOT(getBoardMouse(int,int))); QHBoxLayout *mainWindow = new QHBoxLayout; QVBoxLayout *boardLayout = new QVBoxLayout; boardLayout->addWidget(decl,0, Qt::AlignTop | Qt::AlignLeft); mainWindow->addLayout(boardLayout, 4); To change the parameters of objects in QML, create a function:
void Chess::setQmlPieceParametr(const piece &p, bool setTexture) { char pColor = p.white ? 'w' : 'b'; // / int x = offset_x + (p.cell.x() * piece_size); // int y = offset_y + BOARD_SIZE - (p.cell.y() * piece_size); // Y QString compColor = p.choise ? "#8000ff80" : "#00000000"; // , QString compName = QString("%1p%2").arg(pColor).arg(p.pId); // QObject *pieceSprite = decl->rootObject()->findChild<QObject*>(compName); // QML if (pieceSprite) { // , pieceSprite->setProperty("x", x); pieceSprite->setProperty("y", y); pieceSprite->setProperty("active", p.active); pieceSprite->setProperty("color", compColor); if (setTexture) { // pieceSprite->setProperty("texture", QString("Images/Textures/%1").arg(pColor) + p.texture); } } } The function allows you to set parameters for a single shape. Due to the fact that the cells on the board do not start from the edge, but the height is considered from below, it is necessary to recalculate the coordinates.
The shape parameters are stored in the piece structure.
struct piece { QPoint cell; int type; bool first_step; QString texture; bool white; bool choise; bool active; int pId; }; Here, in fact, that's all. Link to the project in GoogleDocks .
Thanks if you read it.
PS: It so happened that I had to use Declarative . This is not good and I do not recommend using it in my applications.
Source: https://habr.com/ru/post/266985/
All Articles