BabylonJS Tutorial - Creating a Base Scene
I think you’ve heard about WebGL technology. Let me introduce you to one wonderful framework for this technology - BabylonJS. This is an open-source framework for displaying two and three-dimensional graphics through the HTML5 Canvas element.
In the first lesson, I suggest you create the first scene using this framework.
The first thing you need is to download the framework itself — a kindly attached link . Of all the files you need only babylon.2.1.js from the dist folder.
')
The second is any code editor, I use Notepad ++.
Now, let's proceed directly to creating the scene:
First you need to create a basic web page of the standard HTML 5. Call it the standard name - index.html
On this page we will post:
Frame
Style sheet
Next, inside the head tag, we add a style element and expand it by adding page and canvas styles:
Framework connection
Also, we will connect the framework itself - this is a JS file with the corresponding name:
Canvas
Getting to the page body (body element). Inside the tag, add a canvas element with the identifier #renderCanvas:
This element will be used by the framework to display your creation.
Below, we add a script element and expand it:
And let's work directly with the framework.
Scene.
The first thing we need to do is initialize the framework and tell it which canvas element to interact with:
After you initialized BabylonJS and told him where to display the result, call the createScene function to create the scene:
As you can see, the last line is clearly not related to the scene creation function. With the clearColor function we paint the scene blue. We'll talk more about the function in the following lessons.
Now you need to look at the scene through something, right? Camera!
This is a free camera, controlled by keyboard and mouse. I will tell you more about the camera in the following lessons.
And of course the same lighting! Otherwise, nothing will be visible:
Adding these lines will give you realistic lighting. In the following lessons I will tell you about the different types of lighting. Do not dwell on this yet.
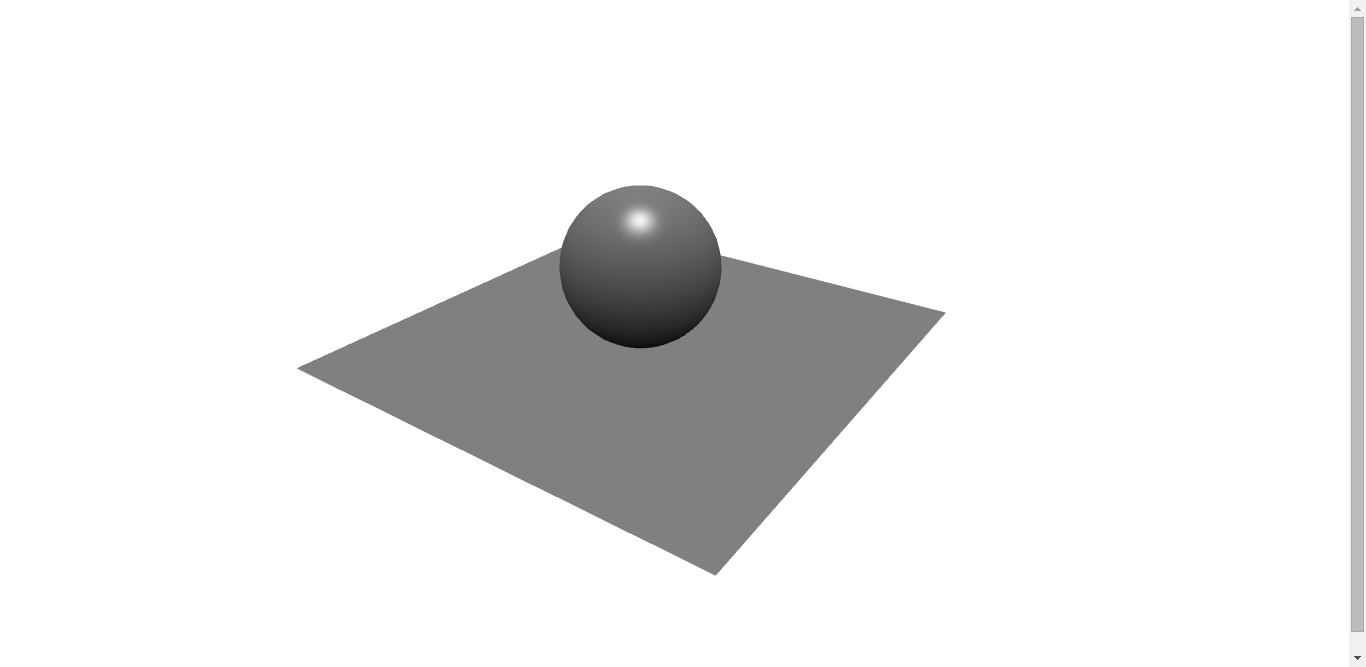
Now, actually, we will add a sphere and a plane to the scene:
The scene is ready! But do not rush to save the file and watch what you put there. First, the framework does not yet know that the scene is ready. So do it:
Secondly, add these two lines to automatically scale the scene for any resolution:
Now everything is ready! See you in the next lessons!
In the first lesson, I suggest you create the first scene using this framework.
The first thing you need is to download the framework itself — a kindly attached link . Of all the files you need only babylon.2.1.js from the dist folder.
')
The second is any code editor, I use Notepad ++.
Now, let's proceed directly to creating the scene:
First you need to create a basic web page of the standard HTML 5. Call it the standard name - index.html
On this page we will post:
- Framework (elements html, head, body)
- Style Sheet (style element inside head tag)
- Connected framework (script element, inside the head tag, with a link to the js file)
- Canvas (canvas element inside the body tag)
- Scene (open script element inside body tag)
Frame
<!DOCTYPE html> <html xmlns="http://www.w3.org/1999/xhtml"> <head> <meta http-equiv="Content-Type" content="text/html" charset="utf-8"> <title>BabylonJS</title> </head> <body> </body> </html> Style sheet
Next, inside the head tag, we add a style element and expand it by adding page and canvas styles:
<style> html. body { overflow: hidden; width: 100%; height: 100%; margin: 0; padding: 0; } #renderCanvas { width: 100%; height: 100%; touch-action: none; } </style> Framework connection
Also, we will connect the framework itself - this is a JS file with the corresponding name:
<script src="babylon.js"></script> Canvas
Getting to the page body (body element). Inside the tag, add a canvas element with the identifier #renderCanvas:
<canvas id="renderCanvas"></canvas> This element will be used by the framework to display your creation.
Below, we add a script element and expand it:
<script> </script> And let's work directly with the framework.
Scene.
The first thing we need to do is initialize the framework and tell it which canvas element to interact with:
var canvas = document.querySelector("#renderCanvas"); var engine = new BABYLON.Engine(canvas, true); After you initialized BabylonJS and told him where to display the result, call the createScene function to create the scene:
var createScene = function (){ var scene = new BABYLON.Scene(engine); scene.clearColor = new BABYLON.Color3(0, 0, 1); As you can see, the last line is clearly not related to the scene creation function. With the clearColor function we paint the scene blue. We'll talk more about the function in the following lessons.
Now you need to look at the scene through something, right? Camera!
var camera = new BABYLON.FreeCamera("camera1", new BABYLON.Vector3(0, 5, -10), scene); camera.setTarget(BABYLON.Vector3.Zero()); camera.attachControl(canvas, false); This is a free camera, controlled by keyboard and mouse. I will tell you more about the camera in the following lessons.
And of course the same lighting! Otherwise, nothing will be visible:
var light = new BABYLON.HemisphericLight("light1", new BABYLON.Vector3(0, 1, 0), scene); light.intensity = 0.5; Adding these lines will give you realistic lighting. In the following lessons I will tell you about the different types of lighting. Do not dwell on this yet.
Now, actually, we will add a sphere and a plane to the scene:
var sphere = BABYLON.Mesh.CreateSphere("sphere1", 16, 2, scene); sphere.position.y = 1; var ground = BABYLON.Mesh.CreateGround("ground1", 6, 6, 2, scene); The scene is ready! But do not rush to save the file and watch what you put there. First, the framework does not yet know that the scene is ready. So do it:
return scene; }; var scene = createScene(); engine.runRenderLoop(function (){ scene.render(); }); Secondly, add these two lines to automatically scale the scene for any resolution:
window.addEventListener("resize", function (){ engine.resize(); }) Ready code
<!DOCTYPE html> <html xmlns="http://www.w3.org/1999/xhtml"> <head> <meta http-equiv="Content-Type" content="text/html" charset="utf-8"> <title>BabylonJS</title> <style> html. body { overflow: hidden; width: 100%; height: 100%; margin: 0; padding: 0; } #renderCanvas { width: 100%; height: 100%; touch-action: none; } </style> <script src="babylon.js"></script> </head> <body> <canvas id="renderCanvas"></canvas> <script> // <canvas> var canvas = document.querySelector("#renderCanvas"); var engine = new BABYLON.Engine(canvas, true); // ------------------------------------------------------------- // . var createScene = function (){ var scene = new BABYLON.Scene(engine); scene.clearColor = new BABYLON.Color3(0, 0, 1); // var camera = new BABYLON.FreeCamera("camera1", new BABYLON.Vector3(0, 5, -10), scene); camera.setTarget(BABYLON.Vector3.Zero()); camera.attachControl(canvas, false); // var light = new BABYLON.HemisphericLight("light1", new BABYLON.Vector3(0, 1, 0), scene); light.intensity = 0.5; // var sphere = BABYLON.Mesh.CreateSphere("sphere1", 16, 2, scene); sphere.position.y = 1; // var ground = BABYLON.Mesh.CreateGround("ground1", 6, 6, 2, scene); return scene; }; // ------------------------------------------------------------- // , var scene = createScene(); engine.runRenderLoop(function (){ scene.render(); }); // window.addEventListener("resize", function (){ engine.resize(); }) </script> </body> </html> Now everything is ready! See you in the next lessons!
Source: https://habr.com/ru/post/266959/
All Articles