Technical website audit with Screaming Frog SEO Spider

For most people, a general site audit is a rather complicated and time-consuming task, but with tools such as Screaming Frog SEO Spider (SEO Spider) the task can become much simpler for both professionals and beginners. Convenient interface Screaming Frog provides an easy and fast operation, but the variety of configuration options and functionality can make it difficult to get acquainted with the program, the first steps in communicating with it.
The following instructions are intended to demonstrate the various ways that Screaming Frog can be used primarily for auditing sites, but also for other tasks.
Basic principles of site scanning
How to scan the entire site.
By default, Screaming Frog scans only the subdomain you are visiting. Any additional subdomain Spider encounters is considered an external link. In order to scan additional subdomains, you need to make adjustments in the Spider configuration menu. By selecting the "Crawl All Subdomains" option, you can be sure that Spider will analyze any links that are found on the subdomains of your site.
')

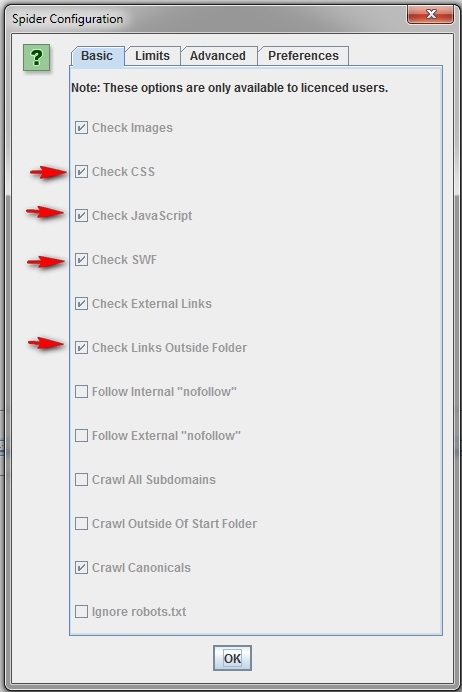
To speed up scanning do not use images, CSS, JavaScript, SWF or external links.
How to scan a single directory.
If you want to limit scanning to a specific folder, simply enter the URL and click on the “start” button without changing the default settings. If you made changes to the preset settings, you can reset them using the File menu.

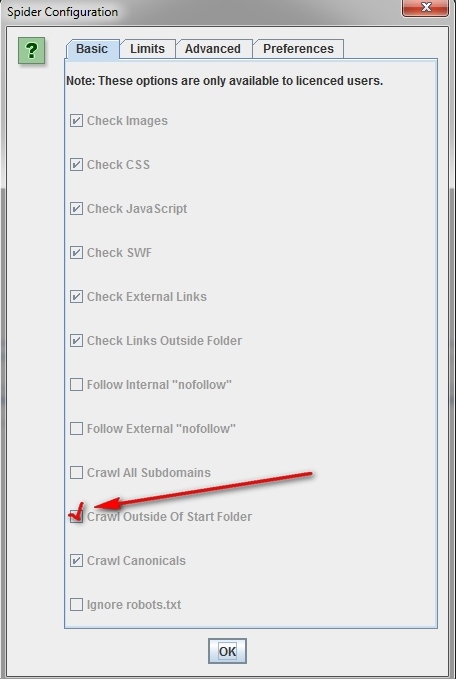
If you want to start scanning from a specific folder, and then go on to analyze the remaining part of the subdomain, then before you start working with the URL you need, first go to the Spider section called “Configuration” and select the option “Crawl Outside Of Start Folder.
How to scan a set of defined subdomains or subdirectories.
To take into account a specific list of subdomains or sub-pathologists, you can use RegEx to set the rules for inclusion (Include settings) or exclusions (Settings) for certain items in the "Configuration" menu.
In the example below, all pages of havaianas.com were selected for scanning, except for the “About” pages in each individual subdomain (exception). The following example shows how to scan the English-language pages of subdomains of the same site (inclusion).
If you want to scan the list of all pages of my site.
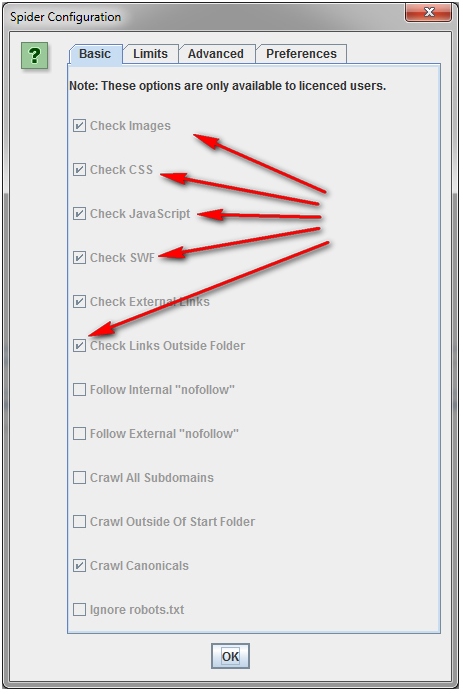
By default, Screaming Frog scans all JavaScript images, CSS, and flash files that Spider encounters. To analyze only HTML, you need to uncheck the options “Check Images”, “Check CSS”, “Check JavaScript” and “Check SWF” in the menu “Configuration” Spider. Spider will be launched without taking into account the specified positions, which will allow you to get a list of all pages on the site that are internally linked. After the scan is completed, go to the “Internal” tab and filter the results using the HTML standard. Click on the “Export” button to get a complete list in CSV format.

Tip: If you intend to use the specified settings for subsequent scans, then Screaming Frog will give you the opportunity to save the specified options.
If you want to scan the list of all pages in a specific subdirectory.
In addition to “Check Images”, “Check CSS”, “Check JavaScript” and “Check SWF” in the “Configuration” Spider menu you will need to select “Check Links Outside Folder”. That is, you exclude these options from Spider, which will provide you with a list of all pages of the selected folder.
If you want to scan the list of domains that your client has just redirected to your commercial site.
In ReverseInter.net, add the URL of this site, then click the link in the upper table to find sites that use the same IP address, DNS server, or GA code.
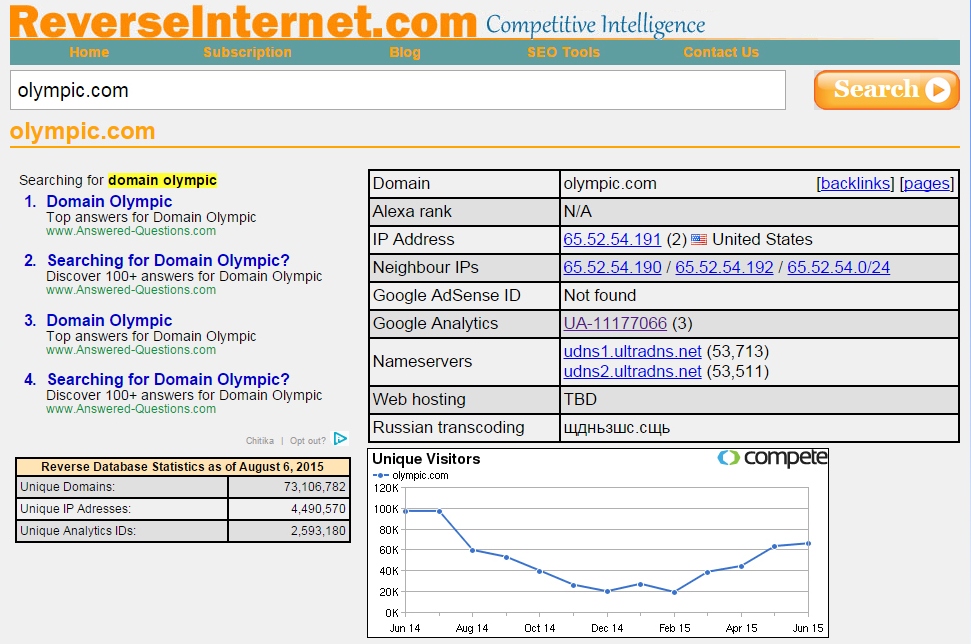
Further using the Google Chrome extension called Scraper, you can find a list of all links with an anchor to “visit the site.” If Scraper is already installed, then you can launch it by clicking the mouse anywhere on the page and selecting the “Scrape similar” item. In the pop-up window, you will need to change the XPath request to the following:
// a [text () = 'visit site'] / @ href.
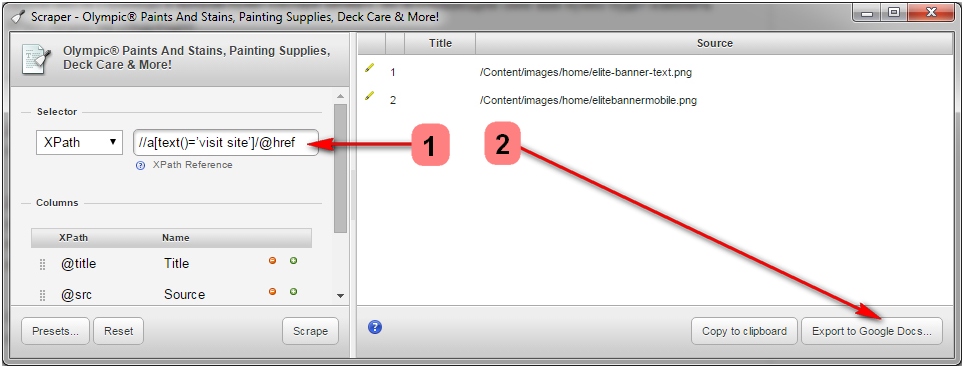
Then click “Scrape” and after “Export to Google Docs”. From the Word document, you can later save the list as a .csv file.
Further this list you can load in Spider and start scanning. When the Spider finishes working, you will see the corresponding status in the “Internal” tab. Or, you can go to “Response Codes” and use the “Redirection” position to filter the results to see all domains that have been redirected to a commercial site or anywhere else.
Please note that when uploading .csv files to Screaming Frog, you must select the appropriate CSV format type, otherwise the program will crash.
Tip: You can also use this method to identify domains that refer to competitors and identify how they were used.
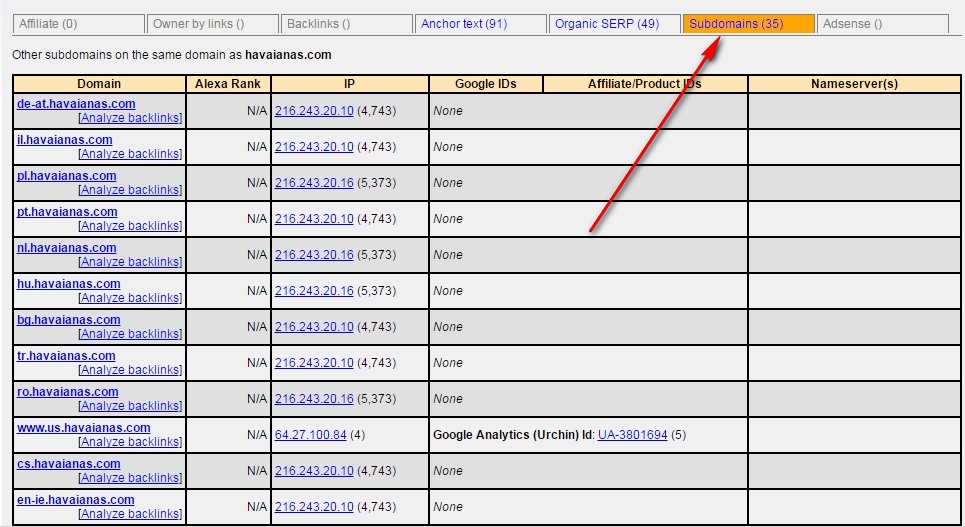
How to find all the subdomains of the site and check the internal links.
Fill in ReverseInternet with the root URL of the domain, then click on the “Subdomains” tab to see the list of subdomains.
After that, enable Scrape Similar to build a list of URLs using an XPath query:
// a [text () = 'visit site'] / @ href.
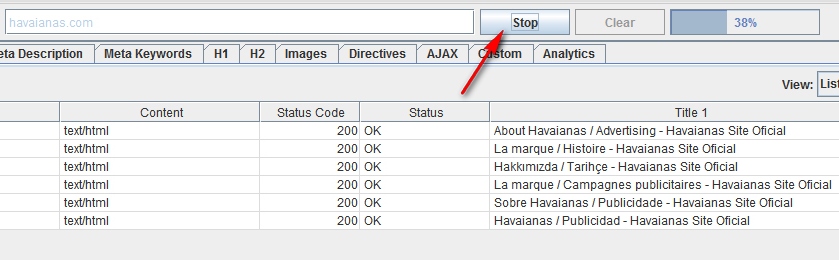
Export the results in .csv format, then upload the CSV file to Screaming Frog using the “List” mode. When the Spider is finished, you can view status codes, as well as any links on subdomain pages, anchor entries, and even duplicate page headers.
How to scan a commercial or any other large site.
Screaming Frog is not designed to crawl hundreds of thousands of pages, but there are several measures to prevent program crashes when scanning large sites. First, you can increase the amount of memory used by the Spider. Secondly, you can disable the scanning of a subdirectory and work only with certain fragments of the site, using the inclusion and exclusion tools. Thirdly, you can turn off the scanning of images, javascript, css and flash files by focusing on html. This saves memory resources.
Tip: If earlier when scanning large sites you had to wait a very long time for the operation to complete, Screaming Frog allows you to pause the procedure for using large amounts of memory. This valuable option allows you to save the results already obtained until the moment when the program is supposedly ready to fail, and to increase the memory size.
At the moment, this option is enabled by default, but if you plan to scan a large site, it is better to make sure that in the Spider configuration menu, in the Advanced tab, there is a tick in the Pause On High Memory Usage field.
How to scan a site hosted on an old server.
In some cases, older servers may not be able to process a given number of URL requests per second. To change the scan speed in the “Configuration” menu, open the “Speed” section and in the pop-up window, select the maximum number of threads that should be enabled at the same time. In this menu you can also select the maximum number of URLs requested per second.
Tip: If you find a large number of server errors in the scan results, go to the Advanced tab in the Spider configuration menu and increase the Response Timeout value and the number of new request attempts (5xx Response Retries). This will allow you to get the best results.
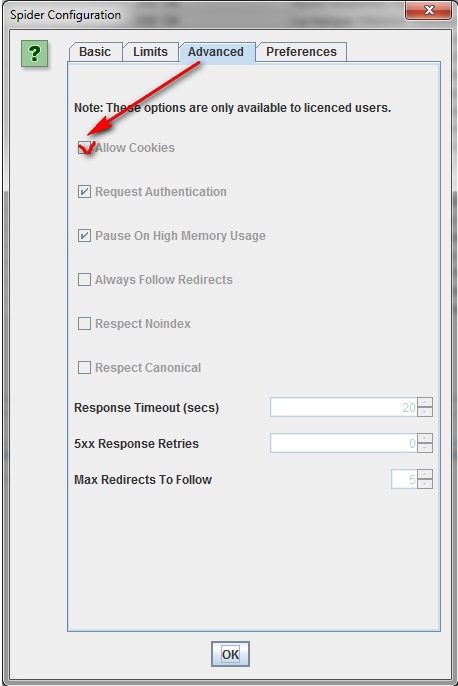
How to scan a site that requires cookies.
Although search robots do not accept cookies, if you need to allow cookies while scanning the site, simply select “Allow Cookies” in the “Advanced” tab of the “Configuration” menu.
How to scan a site using a proxy or other user agent.
In the configuration menu, select "Proxy" and enter the appropriate information. To scan using another agent, select “User Agent” in the configuration menu, then select a search bot from the drop-down menu or enter its name.
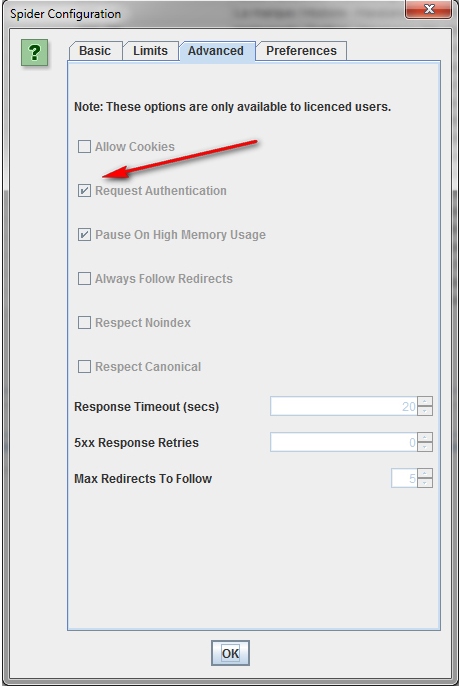
How to scan sites that require authorization.
When the Screaming Frog Spider enters the page requesting identification, a window pops up in which you need to enter your login and password.
In order to continue without this procedure, in the configuration menu, in the Advanced tab, uncheck the “Request Authentication” option.
Internal links
What to do when you need to get information about external and internal links of the site (anchors, directives, relink, etc.).
If you do not need to check the site image, JavaScript, Flash or CSS, then exclude these options from the scan mode to save memory resources.
After the Spider scan completes, use the Advanced Export menu to export CSV from the All Links database. This will provide you with all the reference locations and their corresponding anchor entries, directives, etc.
To quickly count the number of links on each page, go to the “Internal” tab and sort the information through the “Outlinks” option. Everything to be above the 100th position may require additional attention.
How to find broken internal links to a page or site.
As always, do not forget to exclude images, JavaScript, Flash or CSS from scanned objects in order to optimize the process.
After the end of Spider scanning, filter the results of the Internal panel using the Status Code function. Every 404th, 301st and other status codes will be well viewed.
When you click on each individual URL in the scan results in the bottom of the program window you will see the information. By clicking on “In Links” in the bottom window, you will find a list of pages that link to the selected URL, as well as anchor entries and directives used on these pages. Use this feature to identify internal links that require updating.
To export in CSV format a list of pages containing broken links or redirections, use the “Advanced Export” menu option “Redirection (3xx) In Links” or “Client Error (4xx) In Links” or “Server Error (5xx) In Links ".
How to identify broken outgoing links on a page or site (or all broken links at the same time).
Similarly, we first focus on scanning HTML-content, while not forgetting to leave a tick in the "Check External Links".
When the scan is complete, select the “External” tab in the top window and use the “Status Code” to filter the content to identify URLs with status codes other than 200. Click on any particular URL in the scan results and then select the “In Links” tab in the bottom window - you will find a list of pages that point to the selected URL. Use this information to identify links that require updating.
To export a complete list of outbound links, click on “Export” in the “Internal” tab. You can also set a filter to export links to external images, javascript, css, flash and pdf. To restrict exporting to pages only, sort through the “HTML” option.
To get a complete list of all the locations and anchor entries of outgoing links, select the “All Out Links” item in the “Advanced Export” menu and then filter the “Destination” column in the exported CSV to exclude your domain.
How to find redirect links.
After the scan is completed, select the "Response Codes" panel in the top window and then sort the results using the "Redirection (3xx)" option. This will get a list of all internal and outgoing links that will redirect. Applying the filter "Status Code", you can split the results by type. When you click "In Links" in the bottom window, you can see all the pages that use the redirect links.
If you export information directly from this tab, you will see only the data that is displayed in the upper window (the original URL, the status code and the place where the redirection takes place).
To export a complete list of pages containing redirect links, you should select "Redirection (3xx) In Links" in the "Advanced Export" menu. This will return a CSV file that includes the location of all the redirect links. To show only internal redirects, filter the contents in a CSV file with data about your domain using the “Destination” column.
Tip: On top of two exported files, use VLOOKUP to match the “Source” and “Destination” columns with the location of the final URL.
An example of a formula is as follows:
= VLOOKUP ([@ Destination], 'response_codes_redirection_ (3xx) .csv'! $ A $ 3: $ F $ 50.6, FALSE). Where “response_codes_redirection_ (3xx) .csv” is a CSV file containing redirect URLs and “50” is the number of lines in this file.
Site content
How to identify pages with non-informative content (the so-called "thin content" - "current content").
After Spider completes its work, go to the “Internal” panel, set filtering by HTML, and then scroll to the right to the “Word Count” column. Sort the content of the pages according to the word count principle to identify those with the least amount of text. You can drag the “Word Count” column to the left, placing it next to the corresponding URLs, making the information more revealing. Click on the “Export” button in the “Internal” tab if you prefer to work with data in CSV format.
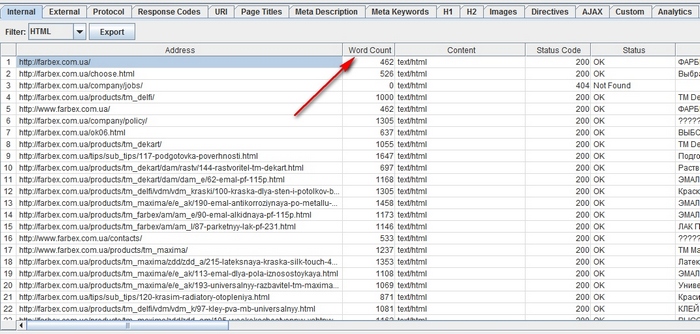
Remember that Word Count allows you to estimate the volume of the placed text, but it does not really give any information about whether this text is just the names of goods / services or a block optimized for keywords.
If you want to select a list of links to images from specific pages.
If you have already scanned the entire site or a separate folder, simply select the page in the upper window, then click “Image Info” in the lower window to view the images that were found on this page. Images will be listed in the “To” column.
Tip: Right-click on any entry in the bottom window to copy or open the URL.

You can view images on a single page by scanning this particular URL. Make sure that the depth of the scan in the Spider's scan configuration settings is "1". After the page is scanned, go to the Images tab, and you will see all the images that Spider was able to detect.
Finally, if you prefer CSV, use the “Advanced Export” menu, the “All Image Alt Text” option to see a list of all the images, their location and any associated replacement text.
How to find images that have no replacement text or images that have a long Alt text.
First of all, you need to make sure that the “Check Images” item is selected in the “Configuration” menu of the Spider. When the scan is complete, go to the Images tab and filter the content using the Missing Alt Text or Alt Text Over 100 Characters options. By clicking on the “Image Info” tab in the bottom window, you will find all the pages on which at least some images are placed. Pages will be listed in the "From" column.

However, in the Advanced Export menu, you can save time and export All Image Alt Text (All images, or Images Missing Alt Text) to CSV format.
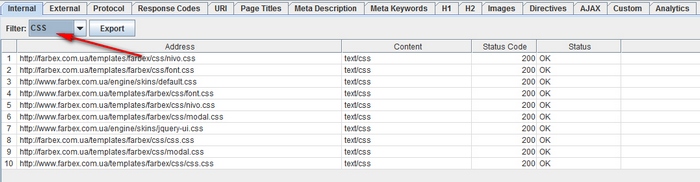
How to find on the site every CSS file.
In the Spider configuration menu before scanning, select “Check CSS”. At the end of the process, filter the analysis results in the Internal panel using the CSS option.
How to find javascript files.
In the Spider configuration menu before scanning, select “Check JavaScript”. At the end of the process, filter the analysis results in the Internal panel using the JavaScript option.
How to identify all jQuery plugins used on the site and their location.
First of all, make sure that “Check JavaScript” is selected in the configuration menu. After the scan is completed, apply the “JavaScript” filter in the “Internal” panel, and then search for “jQuery”. This will allow you to get a list of files with plugins. Sort the list by the “Address” option for more convenient viewing. Then browse the “InLinks” in the bottom window or export the information to CSV. To find pages that use files, work with the “From” column.
At the same time, you can use the “Advanced Export” menu to export “All Links” to CSV and filter the “Destination” column to view only URLs from “jquery”.
Tip: Not all jQuery plugins are bad for SEO. If you see a site that uses jQuery, then it will be reasonable to make sure that the content you intend to index is included in the source code of the page and is displayed when the page loads, and not after that. If you are not sure about this aspect, then read about the plugin on the Internet to learn more about how it works.
How to determine where the site is located flash.
Before scanning, select “Check SWF” in the configuration menu. And when Spider completes its work, filter the results in the “Internal” panel by the value “Flash”.

Remember that this method only allows you to find .SWF files located on the page. If the plugin is pulled out via javascript, you will have to use a custom filter.
How to find on the site internal PDF-documents.
After scanning is completed, filter the Spider results using the “PDF” option in the “Internal” panel.
How to identify content segmentation within a site or group of pages.
If you want to find pages on the site that contain unusual content, install a custom filter that detects HTML print not relevant to this page. This should be done before the launch of the Spider.
How to find pages that have social sharing buttons.
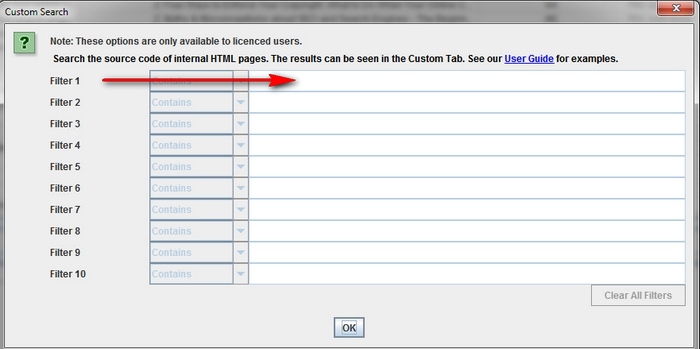
To do this, before running Spider, you will need to install a custom filter. To install it, go to the configuration menu and click “Custom”. After that enter any code fragment from the source code of the page.
In the given example, the task was to find pages containing the “Like” button of the social network Facebook, respectively, a filter of the format “http://www.facebook.com/plugins/like.php” was created for them.
How to find pages using iframe.
To do this, you must set the <iframe tag to the corresponding custom filter.
How to find pages containing embedded video or audio content.
To do this, set a custom filter for the embed code snippet under Youtube or any other media player used on the site.
Meta data and directives
How to find pages with long, short or missing headings, meta description or meta keywords
When the scan is complete, go to the “Page Titles” tab and filter the content through “Over 70 Characters” to see excessively long page headers. The same can be done in the “Meta Description” and “URL” panels. Exactly the same algorithm can be used to define pages with missing or short headers and meta data.

How to find pages with duplicate headings, meta description or meta keywords
When the scan is complete, go to the Page Titles tab and filter the contents through Duplicate to see duplicate page titles. The same can be done in the “Meta Description” and “URL” panels.
How to find duplicate content and / or URLs that should be redirected / rewritten / canonized.
When Spider completes its work, go to the URL tab and filter the results using Underscores, Uppercase or Non ASCII Characters, revealing URLs that could potentially be rewritten into a more standard structure. Filter through the “Duplicate” tool to see pages that have multiple URL versions. Use the “Dynamic” filter to recognize URLs that include parameters.
In addition, if you go to the “Internal” panel through the “HTML” filter and scroll further to the right to the “Hash” column, you will see a unique sequence of letters and numbers on each page. If you click “Export”, you can use conditional formatting in Excel to highlight duplicate values in this column, eventually showing that the pages are identical and should be considered.
How to identify pages that contain meta-directives.
After scanning, go to the "Directives" panel. To see the type of directive, just scroll to the right and see which columns are filled. Alternatively, use a filter to find any of the following tags:
- Index;
- Noindex;
- Follow;
- Nofollow;
- Noarchive;
- Nosnippet;
- Noodp;
- Noydir;
- Noimageindex;
- Notranslate;
- Unavailable_after;
- Refresh;
- Canonical.
How to determine that the robots.txt file works as expected.
By default, Screaming Frog will correspond to robots.txt. As a priority, the program will follow directives made specifically for the user agent. If there are none, then the Spider will follow any directives for the Google bot. If there are no special directives for Googlebot, Spider will follow global directives adopted for all user agents. In this case, Spider will select only one set of directives, without affecting all subsequent ones.
If you need to block some parts of the site from Spider, then use the syntax of the usual robots.txt with the user agent Screaming Frog SEO Spider for this purpose. If you want to ignore robots.txt, then simply select the appropriate option in the program's configuration menu.
How to find and check Schema or other microdata.
To find each page containing Schema markup or other microdata, you need to use custom filters. In the “Configuration” menu, click on “Custom” and enter the marker you are looking for.
To find each page that contains Schema markup, simply add the following code snippet to the custom filter: itemtype = http: //schema.org.
To find a specific type of markup you will have to be more specific. For example, using the custom filter ‹span itemprop =” ratingValue ”› allows you to find all the pages that contain the Schema markup for building ratings.
You can use 5 different filters for scanning. After that, you just have to click "OK" and enlighten the site or the list of pages with a software scanner.
When the Spider is finished, select the “Custom” tab in the upper window to see all the pages with the marker you are looking for. If you specify more than one custom filter, you can view them alternately, switching between the filter pages in the scan results.
Site Map
How to create a sitemap (sitemap) in XML.
After the spider has finished scanning your site, click on “Advanced Export” and select “XML Sitemap”.
Save your sitemap, and then open it in Excel. Select "Read Only" and open the file "As an XML table". In this case, a message may come out that some schemes cannot be integrated. Just click on the “Yes” button.
After the site map appears in a tabular form, you can easily change the frequency, priority and other settings. Be sure to ensure that the Sitemap contains only one preferred (canonical) version of each URL, with no parameters and other duplicate factors.
After making any changes, save the file in XML mode.
How to find out your existing XML Sitemap file.
First of all, you will need to create a copy of the Sitemap on your PC. You can save any live sitemap by going to the URL and saving the file or importing it into Excel.
After that, go to the Screaming Frog menu called “Mode” and select “List”. After at the top of the page, click on “Select File”, select your file and start scanning. When Spider completes its work, you can see any redirections, 404 errors, duplicate URLs, etc. in the “Internal” tab, in the “Sitemap dirt” section.
General troubleshooting tips
How to determine why some sections of my site are not indexed or ranked.
I wonder why some pages are not indexed? First, make sure that they do not fall into robots.txt and are not marked as noindex. Secondly, you need to make sure that the spiders can get to the pages of the site to check the internal links. After the spider scans your site, export the list of internal links as a CSV file using the HTML filter in the Internal tab.
Open a CSV document and in the second sheet copy the list of URLs that are not indexed or ranked. Use VLOOKUP to see if similar problem URLs are in the scan results.
How to check if the site has been successfully redesigned / redesigned.
You can use the screaming frog to find out if the old URLs were redirected. The “List” mode will help in this, through which you can check the status codes. If the old URLs give a 404 error, then you will know exactly which of them require redirection.
How to find slow loading site pages.
After the scanning process is completed, go to the tab “Response Codes” and sort the column “Response Time” on a large-to-small basis to find pages that may suffer from a slow download speed.
How to find malware or spam on the site.
First of all, you need to identify traces left by malware or spam. Next in the configuration menu, click on “Custom” and enter the name of the marker you are looking for. For one scan, you can analyze up to 5 such markers. Fill in all the necessary and then click on "OK" to explore the entire site or a list of pages on it.
When the process is complete, go to the “Custom” tab, located in the top window, to view all the pages on which the “traces” of the fraudulent and virus programs that you specified were found. If you specify more than one custom filter, then the results for each will be displayed in a separate window, and you will be able to familiarize yourself with them by moving from one filter to another.
PPC and analytics
How to simultaneously check the list of all URLs used for contextual advertising.
Save the address list in .txt or .csv format and change the mode settings from “Mode” to “List”. After select your file to download and click on "Start". View in the “Internal” tab the status code for each page.
Scraping
How to collect meta data from a series of pages.
Do you have a bunch of URLs where it’s important to get as much information as possible? Turn on “Mode” mode, then load the list of addresses in .txt or .csv format. After Spider completes the work, you can see the status codes, outgoing links, the number of words and, of course, the meta data for each page in your list.
How to make a scraping site for all pages containing a specific marker.
First of all, you will need to deal with the marker itself - to determine what exactly you need. After that, in the “Configuration” menu, click on “Custom” and enter the name of the marker you are looking for. Remember that you can enter up to 5 different markers. Then click on “OK” to start the scanning process and filter the site pages by the presence of specified “traces” on them.
The example shows the situation when you need to find all the pages that contain the words “Please Call” in the sections concerning the cost of goods. For this, the HTML code from the source code of the page was found and copied.
After scanning, you need to go to the “Custom” section in the top window to view a list of all pages containing the specified marker. If more than one marker was entered, the information on each of them will be submitted in a separate window.
Tip: This method is good if you do not have direct access to the site. If you need to obtain data from the client's site, then it will be much easier and faster to ask him to take the necessary information directly from the database and transfer it to you.
URL rewriting
How to find and delete session IDs or other parameters from crawled URLs.
To identify URLs with ID sessions or other parameters, simply scan the site with the default settings. When Spider completes its work, go to the “URL” tab and apply the “Dynamic” filter to see all URLs containing the required parameters.
To remove the parameters from the display on the scanned pages, select “URL Rewriting” in the configuration menu. Then in the “Remove Parameters” panel, click “Add” to add the parameters that you want to remove from the URL and click “OK”. To activate the changes you need to run Spider again.
How to rewrite scanned URLs (for example, change .com to .co.uk or write down all URLs in lower case).
To rewrite any of the addresses worked by the spider, select “URL Rewriting” in the configuration menu, then in the “Regex Replace” panel, click on “Add” and add RegEx to what you need to replace.
After you have made all the required corrections, you can check them in the “Test” panel by entering test URLs in the “URL before rewriting” window. The string “URL after rewriting” will be updated automatically, following the parameters you specified.
If you need to rewrite all URLs in lower case, then simply select “Lowercase discovered URLs” in the Options panel.
Do not forget to re-launch Spider after making changes, so that they enter into their rights.
Keyword Analysis
How to find out which pages of competitor sites have the most value.
In general, competitors will try to expand link popularity and drive traffic to their most valuable pages by linking them internally. Any SEO competitor who pays attention will also build a strong link between the corporate blog and the most important pages of the site.
Find the most significant pages of a competitor's site by scanning, and then go to the “Internal” panel and sort the results in the “Inlinks” column according to the principle “from large to small” to see which pages have the most internal links.
To view pages related to a competitor’s corporate blog, uncheck the “Check links outside folder” checkbox in the Spider configuration menu and scan the blog folder / subdomain. Then in the “External” panel, filter the results using the search by the URL of the main domain. Scroll to the end of the page to the right and sort the list in the "Inlinks" column to see the pages that are linked most often.
Tip: For the convenience of working with the program table, move the columns left and right using the Drag and Drop method.
How to find out what anchor competitors use for internal linking.
In the Advanced Export menu, select All Anchor Text to export CSV containing anchor site entries and find out their location and bindings.
How to find out which meta keywords competitors use on their site.
After the spider has finished scanning, look in the “Meta Keywords” panel to view the list of meta keywords found on each individual page. Sort the “Meta Keyword 1” column alphabetically to make the information more indicative.
Reference build
How to analyze potential link locations.
After collecting a list of URLs, you can scan them in “List” mode to collect as much information about the pages as possible. After the scan is complete, check the status codes in the Response Codes panel and examine the outgoing links, link types, anchor entries, and directives in the Out Links panel. This will give you an idea of which sites link to these pages and how.
To view the Out Links panel, make sure that the URL of interest is selected in the upper window.
You will probably want to use custom filters to determine if there are already links in these places.
You can also export a full list of links by clicking on the “All Out Links” option in the Advanced Export Menu panel. This will allow you to get not only links leading to third-party sites, but also to show internal links to individual pages of your list.
How to find broken links for external advertising.
So, there is a site from which you would like to receive links to your own resource. Using Screaming Frog, you can find broken links to the site’s pages (or to the entire site) and then, contacting the owner of the resource you like, suggest that he replace broken links with links to your resource, where possible.
How to check backlinks and view anchors.
Upload your list of backlinks and launch Spider in “List” mode. After that, export the full list of external links by clicking on “All Out Links” in the “Advanced Export Menu” menu. This will provide you with the URL and anchor text / alt text for all links on these pages. After that, you can filter the “Destination” column in the CSV file to determine if your site is relinked and which anchor text / Alt text it includes.
How to make sure that backlinks have been successfully removed.
To do this, you need to set a custom filter that contains the root domain of the URL, then load your list of backlinks and run Spider in “List” mode. After the scan is complete, go to the “Custom” panel to view a list of pages that continue to link to you.
Tip: Remember that by right-clicking on any URL in the top scan results window, you can, in particular:
- Copy or open URL.
- Run rescan address or remove it from the list.
- Export information about the URL or image available on this page, inbound and outbound links.
- Check the indexing of the page in Google, Bing and Yahoo.
- Check backlinks pages in Majestic, OSE, Ahrefs and Blekko.
- View cached version.
- View old versions of the page.
- Open robots.txt for the domain in which the page is located.
- Run a search for other domains on the same IP.
Conclusion
So, we have examined in detail all aspects of using the program Screaming Frog. We hope that our detailed instructions will help you to make the site audit more simple and at the same time quite effective, while providing an opportunity to save a lot of time.
Source: https://habr.com/ru/post/266915/
All Articles