Guide to the implementation of 2D platformer (the end)
The end of the translation of the article "guide to the implementation of 2D platformers."
Start
It is similar to the tile (smooth) method, but instead of using large tiles, a picture is used to check collisions for each pixel. This allows you to work out the game better, but it also significantly increases the complexity, uses more memory and requires something similar to the graphic editor to create levels. Such a mask is usually not used directly for visualization, so additional tools are needed - for example, a large graphic image (substrate), individually for each level. Due to these problems, this technique is quite rare to use, but it allows for better results than tile-based options. This method is convenient for creating a dynamic environment - the destruction can simply be “drawn” into a bit mask for changing the level. A good example is the Worms series.
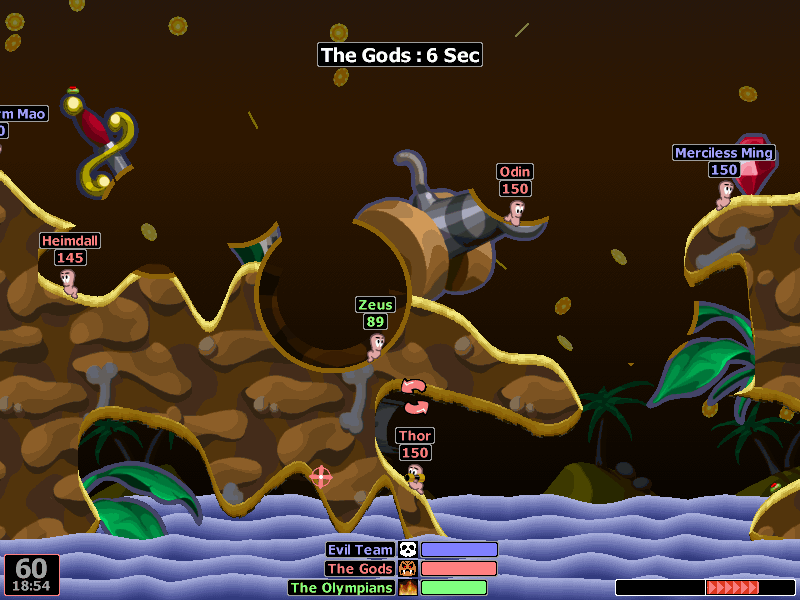
Worms World Party with destructible topography
Examples: Worms, Talbot's Odyssey
')
How it works
The main idea is very close to the tile (smooth) algorithm - we just decide that each pixel is a tile, and we implement the exact same algorithm. Everything will work with one small exception - biases. Since the slopes are now completely determined by the relative position of the two nearest tiles, the previous technique will not work and will have to use a much more complex algorithm instead. Other elements, like stairs, are also becoming smarter.
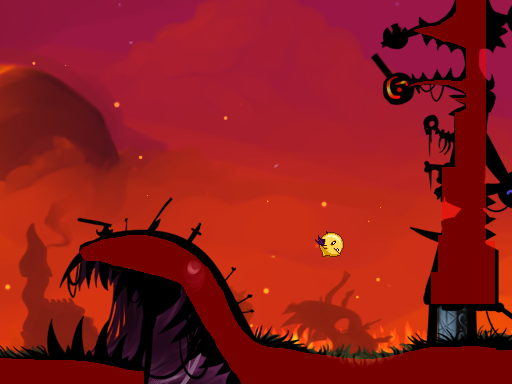
Talbot's Odyssey, with a collision mask overlaid on top of the game.
Biases are the main reason why this implementation is extremely difficult to do right. Unfortunately, they are usually mandatory, since there is no point in using this implementation without biases. Smooth change of level geometry is the main reason why you are forced to use this system.
Here is a rough algorithm used in Talbot's Odyssey:
Since this system has no differences in movement - the character moves down or falls, you will most likely have to count the number of frames that the character does not touch the floor to determine whether he can jump and change the animation. In Talbot, this value is 10 frames.
Another trick here is an effective calculation of how many pixels you can move before colliding with something. There are other possible complicating factors, such as one-sided platforms (working in exactly the same way as in the tile approach) and steep inclines along which the player slides down, but cannot climb them (which are rather complicated and beyond the scope of this article) . In general, this technique requires a large amount of fine adjustment of values and is actually less stable than tile approaches with a grid. I would recommend it only if you need to have very detailed terrain.
This technique uses vector data (lines or polygons) to define the edges of the collision zone. Despite the very great complexity in the correct development, it is becoming more common due to the abundance of physics engines, such as Box2D, which are suitable for the implementation of this technique. It gives all the charm of the technique of bitmasks, but without a huge memory overload and uses a completely different level editing method.
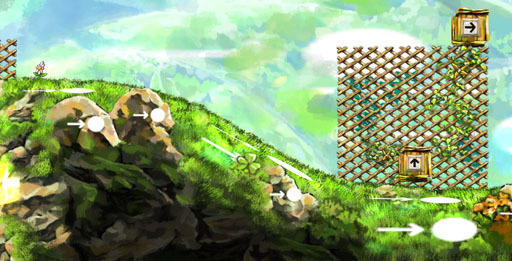
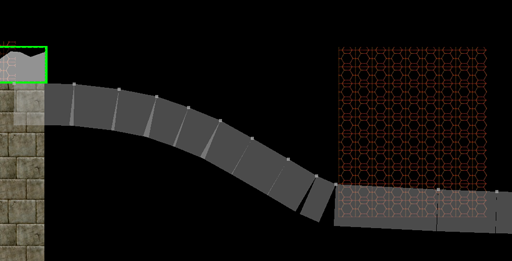
Braid (level editor), with visible layers (top) and collision polygons (bottom)
Examples: Braid, Limbo
How it works
Here are two basic approaches to implementation:
Obviously, the second option is much more popular (although I suspect that the creator of Braid went the first way) - it is much easier and allows you to do many other interesting things with physics in the game. But in my opinion, you need to be very careful, going this way, because you can make the game too ordinary, uninteresting physical-platformer (meaning the similarity of games on the behavior on this engine. Comment. Per.).
This approach also has its own unique problems. For example, it can sometimes be difficult to say whether a player is standing on the floor (due to rounding errors), has rested against a wall or slides down a slope. When using the physics engine, friction can be a big problem, because you want the friction to be large on the floor, but small on the sides of the tile.
They solve this in different ways, but the most popular solution is to divide the character into several different polygons, each with a different role: this is how the main body (optional) is obtained, then a thin rectangle for the legs and two thin rectangles for the sides, as well as another for the head. Sometimes they are narrowed so as not to get stuck in obstacles. They can be with different physics settings, and the response (callbacks) to the collision can serve to determine the state of the character. For more information, use sensors (non-colliding objects that use to check the intersection). Basic cases include determining whether a character is close enough to the floor to make a jump, or does he push a wall, etc.
Depending on the type of movement that you have chosen (except, perhaps, type number 1), there are several considerations.
Super Mario World (low acceleration), Super Metroid (medium acceleration), Mega Man 7 (high acceleration)
One of the factors that affects the feel of the platformer is the acceleration of the character. Acceleration is a measure of speed change. When it is low, the character takes a long time to reach maximum speed, or stop if the player releases the controller. If implemented incorrectly, this causes the feeling that the character is “slippery” and does not give good control. Such a movement is often associated with the games of the Super Mario series. When the acceleration is high, the character needs very little (or no need at all) time to accelerate from zero to maximum speed, or vice versa, which causes a very fast response, “jerky” control, as can be seen in the Mega Man series (I believe Mega Man actually uses infinite acceleration, as it even stops at full speed).
Even if the game has no concept of acceleration in the horizontal plane, it most likely uses it to jump in an arc. Otherwise the jump shape would be triangular.
How it works
Implementing acceleration is actually very simple, but there are a few pitfalls.
Two methods of acceleration:
It is important to add acceleration to the speed before moving the character, otherwise you will create a delay of one frame in the control (lag).
When a character crashes into an obstacle, it’s a good idea to zero its speed along this axis, but this may not be enough. The speed may be greater than the distance to the object. In some implementations, as a result of a collision at high speed, a character can penetrate an obstacle. In this case, you need to find the correction value (the depth of the intersection) and move the character back to this value, or find a different speed one frame before the intersection. (approx. lane)
Super Metroid, Samus performs Space Jump (with a Screw Attack bonus)
Jumping in the game is as simple as checking whether the player is on the ground (or if he has been on the ground in the last n frames more often) and, if so, give him a starting negative speed along the y axis (in physical terms, an impulse). And let gravity do the rest.
Here are four options that allow the player to control the jump:
Black Thorne, the character performs a long animation before shooting back
In many games, your character will play the animation before it actually performs the action. However, in action games, it will upset the player - “DO NOT DO IT!” For smoothness, you still need to have proactive animations for jumping and running, but you need to take care of how the game responds. You can make such animations purely cosmetic, and the action itself to work out immediately.
Start
Type 3: Bitmasks
It is similar to the tile (smooth) method, but instead of using large tiles, a picture is used to check collisions for each pixel. This allows you to work out the game better, but it also significantly increases the complexity, uses more memory and requires something similar to the graphic editor to create levels. Such a mask is usually not used directly for visualization, so additional tools are needed - for example, a large graphic image (substrate), individually for each level. Due to these problems, this technique is quite rare to use, but it allows for better results than tile-based options. This method is convenient for creating a dynamic environment - the destruction can simply be “drawn” into a bit mask for changing the level. A good example is the Worms series.
Worms World Party with destructible topography
Examples: Worms, Talbot's Odyssey
')
How it works
The main idea is very close to the tile (smooth) algorithm - we just decide that each pixel is a tile, and we implement the exact same algorithm. Everything will work with one small exception - biases. Since the slopes are now completely determined by the relative position of the two nearest tiles, the previous technique will not work and will have to use a much more complex algorithm instead. Other elements, like stairs, are also becoming smarter.
Slopes
Talbot's Odyssey, with a collision mask overlaid on top of the game.
Biases are the main reason why this implementation is extremely difficult to do right. Unfortunately, they are usually mandatory, since there is no point in using this implementation without biases. Smooth change of level geometry is the main reason why you are forced to use this system.
Here is a rough algorithm used in Talbot's Odyssey:
- Combining the acceleration and the direction of motion to calculate the vector of the position change (how far to move along each axis)
- We process each axis separately, starting with the one with the larger difference.
- For horizontal movement, move the player's AABB rectangle 3 pixels up, so that he can climb slopes.
- Scan further, checking all obstacles and the bit mask itself to determine how many pixels you can move before colliding with an obstacle. We dig to a new position.
- If it was a horizontal movement, we move up as many pixels as necessary (generally it should be no more than three) to climb the slope.
- If at the end of the movement any pixel of the character intersects with any obstacle, remove the movement along this axis.
- According to the result of the last condition, we do the same for the other axis.
Since this system has no differences in movement - the character moves down or falls, you will most likely have to count the number of frames that the character does not touch the floor to determine whether he can jump and change the animation. In Talbot, this value is 10 frames.
Another trick here is an effective calculation of how many pixels you can move before colliding with something. There are other possible complicating factors, such as one-sided platforms (working in exactly the same way as in the tile approach) and steep inclines along which the player slides down, but cannot climb them (which are rather complicated and beyond the scope of this article) . In general, this technique requires a large amount of fine adjustment of values and is actually less stable than tile approaches with a grid. I would recommend it only if you need to have very detailed terrain.
Type 4: Vector
This technique uses vector data (lines or polygons) to define the edges of the collision zone. Despite the very great complexity in the correct development, it is becoming more common due to the abundance of physics engines, such as Box2D, which are suitable for the implementation of this technique. It gives all the charm of the technique of bitmasks, but without a huge memory overload and uses a completely different level editing method.
Braid (level editor), with visible layers (top) and collision polygons (bottom)
Examples: Braid, Limbo
How it works
Here are two basic approaches to implementation:
- To process motion and collisions independently, similar to bitmasks, but using polygons for rendering object intersections and motion.
- Use a physics engine (for example Box2D)
Obviously, the second option is much more popular (although I suspect that the creator of Braid went the first way) - it is much easier and allows you to do many other interesting things with physics in the game. But in my opinion, you need to be very careful, going this way, because you can make the game too ordinary, uninteresting physical-platformer (meaning the similarity of games on the behavior on this engine. Comment. Per.).
Complex objects
This approach also has its own unique problems. For example, it can sometimes be difficult to say whether a player is standing on the floor (due to rounding errors), has rested against a wall or slides down a slope. When using the physics engine, friction can be a big problem, because you want the friction to be large on the floor, but small on the sides of the tile.
They solve this in different ways, but the most popular solution is to divide the character into several different polygons, each with a different role: this is how the main body (optional) is obtained, then a thin rectangle for the legs and two thin rectangles for the sides, as well as another for the head. Sometimes they are narrowed so as not to get stuck in obstacles. They can be with different physics settings, and the response (callbacks) to the collision can serve to determine the state of the character. For more information, use sensors (non-colliding objects that use to check the intersection). Basic cases include determining whether a character is close enough to the floor to make a jump, or does he push a wall, etc.
Key Considerations
Depending on the type of movement that you have chosen (except, perhaps, type number 1), there are several considerations.
Acceleration
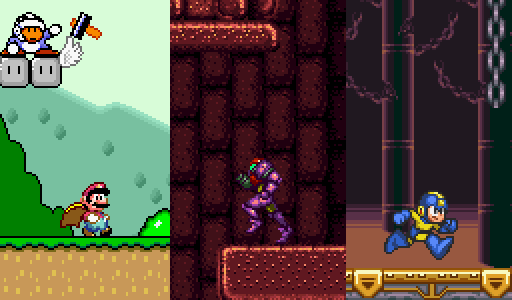
Super Mario World (low acceleration), Super Metroid (medium acceleration), Mega Man 7 (high acceleration)
One of the factors that affects the feel of the platformer is the acceleration of the character. Acceleration is a measure of speed change. When it is low, the character takes a long time to reach maximum speed, or stop if the player releases the controller. If implemented incorrectly, this causes the feeling that the character is “slippery” and does not give good control. Such a movement is often associated with the games of the Super Mario series. When the acceleration is high, the character needs very little (or no need at all) time to accelerate from zero to maximum speed, or vice versa, which causes a very fast response, “jerky” control, as can be seen in the Mega Man series (I believe Mega Man actually uses infinite acceleration, as it even stops at full speed).
Even if the game has no concept of acceleration in the horizontal plane, it most likely uses it to jump in an arc. Otherwise the jump shape would be triangular.
How it works
Implementing acceleration is actually very simple, but there are a few pitfalls.
- Determine xTargetSpeed. It must be 0 if the player does not touch the control, -maxSpeed if he presses to the left or + maxSpeed if he presses to the right.
- Define yTargetSpeed. It must be 0 if the player is on the platform or + terminalSpeed otherwise.
- For each axis, increase the current speed in the direction of the target speed using weighted average or incremental acceleration.
Two methods of acceleration:
- Weighted average: acceleration is a number (“a”) from 0 (no change) to 1 (instantaneous acceleration). Use this value to linearly interpolate between the target and the current speed and set the result as the current speed.
vector2f curSpeed = a * targetSpeed + (1-a) * curSpeed; if (fabs(curSpeed.x) < threshold) curSpeed.x = 0; if (fabs(curSpeed.y) < threshold) curSpeed.y = 0; - Incremental acceleration: we determine the direction for adding acceleration (using a function that returns 1 for numbers greater than 0 and -1 for numbers less than zero), then we check to see if it’s missing.
vector2f direction = vector2f(sign(targetSpeed.x - curSpeed.x), sign(targetSpeed.y - curSpeed.y)); curSpeed += acceleration * direction; if (sign(targetSpeed.x - curSpeed.x) != direction.x) curSpeed.x = targetSpeed.x; if (sign(targetSpeed.y - curSpeed.y) != direction.y) curSpeed.y = targetSpeed.y;
It is important to add acceleration to the speed before moving the character, otherwise you will create a delay of one frame in the control (lag).
When a character crashes into an obstacle, it’s a good idea to zero its speed along this axis, but this may not be enough. The speed may be greater than the distance to the object. In some implementations, as a result of a collision at high speed, a character can penetrate an obstacle. In this case, you need to find the correction value (the depth of the intersection) and move the character back to this value, or find a different speed one frame before the intersection. (approx. lane)
Jump Control
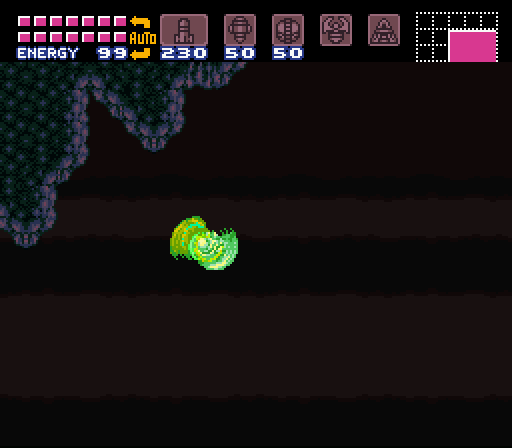
Super Metroid, Samus performs Space Jump (with a Screw Attack bonus)
Jumping in the game is as simple as checking whether the player is on the ground (or if he has been on the ground in the last n frames more often) and, if so, give him a starting negative speed along the y axis (in physical terms, an impulse). And let gravity do the rest.
Here are four options that allow the player to control the jump:
- Impulse: can be seen in games like Super Mario World and Sonic the Hedgehog. The jump retains inertia (in terms of speed), which the character had before the jump. In some games this is the only option to influence the arc of a jump, as in real life. There is nothing to do here, it will be so until you do something to stop it.
- Acceleration in the air: just like that, getting control of horizontal movement when you are in the air. Despite the physical impossibility, this is a very popular feature, as it makes the character more manageable. Almost every platformer has this feature, except for games similar to Prince of Persia. Basically, the acceleration received in the air is greatly reduced, so the pulse is still important. However, some games (like Mega Man) give full control in the air.
- Lifting control: another physically impossible action, but also popular, as it gives even greater control over the character. The longer you press the jump button, the higher the character flies. This is usually done by suppressing gravity or continuing to add momentum to the character (but at the same time reducing the added impulse) while the button is pressed. There is a time limit on the action if you don’t want the character to jump endlessly. You can imagine this implementation as a very short work of the jet pack - it was delayed longer, it flew higher (approx. Lane).
- Multiple jumps: already being in the air, some games allow the player to jump again, sometimes an infinite number of times (like Space Jump in Super Metroid or flying to Talbot's Odyssey), or a limited number of jumps to the touch of the earth (“double jump” is the most frequent choice). This can be achieved by keeping the counter, which increases with each jump and decreases when on the ground (more carefully update this value, otherwise you can reset it immediately after the first jump) and allow further jumps if the counter scored a small value. Sometimes the second jump is shorter than the first, or it works only when lifting - if you start to fall, the second jerk cannot be done. You can include other restrictions - Space Jump only works if you are already doing a spinning jump and just started to fall.
Animations
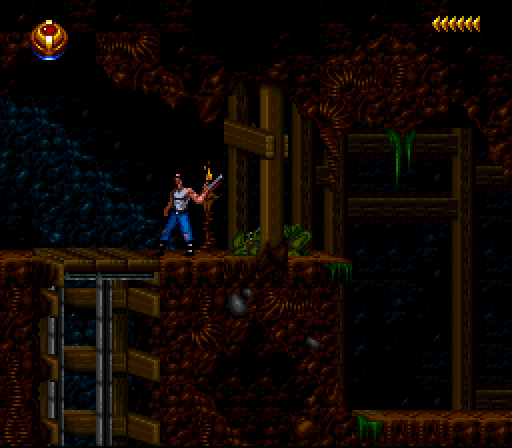
Black Thorne, the character performs a long animation before shooting back
In many games, your character will play the animation before it actually performs the action. However, in action games, it will upset the player - “DO NOT DO IT!” For smoothness, you still need to have proactive animations for jumping and running, but you need to take care of how the game responds. You can make such animations purely cosmetic, and the action itself to work out immediately.
Source: https://habr.com/ru/post/266237/
All Articles