Meet Moto CMS 3
 Hello! In this publication, I would like to share with you my experience with a relatively new Moto CMS 3 and tell you about the recent case when I urgently needed to make a website to one of my clients. According to the modest technical task of the customer, a business card site was needed (like Landing) on the theme of landscape architecture. Deadlines, as usual, "yesterday." Previously, I used products from Moto developers (mostly Flash and HTML) and very often created websites on their platforms, but together we found a suitable template that was created specifically for the new version of Moto CMS 3 , which I had to work with .
In this article - a short story about the innovations of the new CMS, as well as working with one of the templates.
In fact, all work with the template is carried out in several steps, and this is precisely the main beauty of working with templates. The first step is to install the site on the hosting and further configure the admin panel.
1. As it was said on the site of developers, all the work on installing the site on the hosting will take no more than 5 minutes. The only thing you need to check is the parameters of the hosting server and the presence of some functions: PHP 5.3 or 5.4 and the Zend Guard Loader module. If the server settings meet these conditions, then all that is left for you to do is simply upload the template to the hosting and proceed with the activation of Moto CMS 3.
')
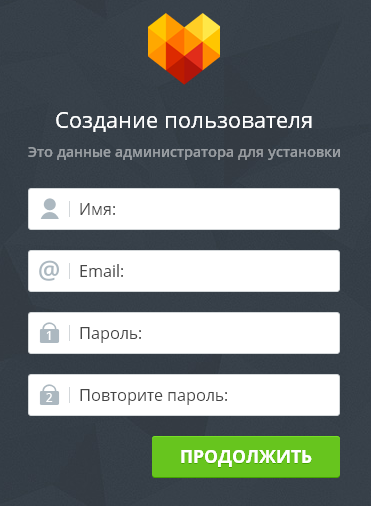
2. Product activation takes even less time, it took me 5-10 minutes with coffee. You will be prompted to select a language (English is the default), and then - database settings, as well as an administrator account.
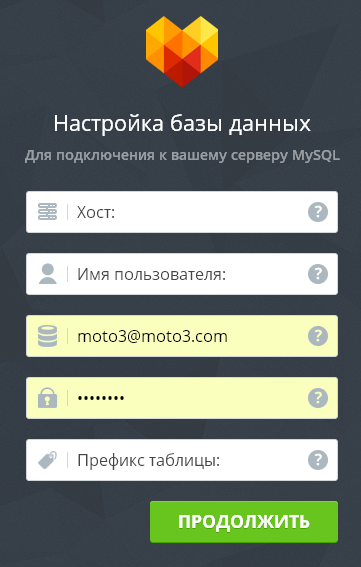
Then it remains to confirm the installation of the template on the server by clicking on the “Install” button and after completion - on the “Start” button. Actually, that's all, now we can start working with the new version of “Moto CMS 3”.

3. We proceed to setting up the admin panel, for which we enter the login and password. Before us is a menu through which it is proposed to choose what we will work with. First of all, go to the "Settings" section, where we specify the title and address of the site, the icon, the admin language, etc.

In the “Analytics” section there are two blocks, “Google Analytics” and “Google Webmaster” - they need a Google account, so let's postpone for later, since the main task is to make the site itself, while optimizing it and setting up tracking You can do it later.
Also in the settings there is a button "Updates", there we can update our template. If, of course, a new version came out (news about the update coming to the specified e-mail), then we just need to click the Update button, wait for the update to download, and then click the Continue button. That is, in fact, all that concerns the basic settings of the admin panel.
4. In the section "Media Library" files are downloaded directly from the admin. A couple of times faced with the restriction of downloading files due to the size - this is possible if you use a very simple hosting and it has a restriction. Work with the media library is simple as a world, the main advantages:
- file size 50mb
- creating and editing images directly from the admin panel
- Support for many formats (jpeg / jpg / png / gif / ico, mp3 / mp4, swf / avi, zip / pdf)
- File filtering (all, all images, all videos)
5. Widgets in the third version have a very nice design and easy operation.
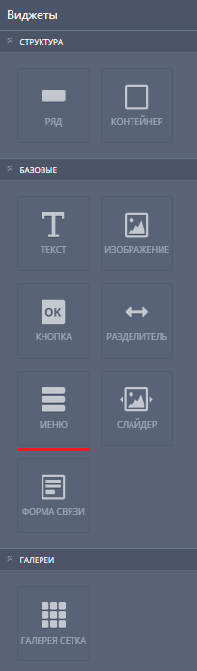 Out of the box are the following:
- Embedded code
- Slider
- Feedback form
- Gallery grid
- Video
- iFrame widget
- google map
- Social buttons
- Menu
- Separator
- Button
- Image
- Text
- Container
- Row
To edit a customer's template, I needed to use only a few widgets and edit them further. In Moto CMS 3 it is very easy to navigate in the tools, it is very difficult even for a beginner to get lost there. Working with editing individual elements is step-by-step, thus it greatly saves our time and simplifies the work as a whole. For example, working with the "Menu" (screen on the left).
Go to the “Menu” section in the left column or simply click on the menu in the admin panel.
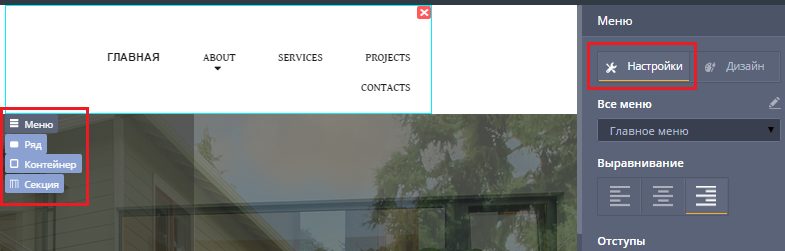
Before us appeared the menu settings window, its shape and location (row, container, section).
And the button itself with the settings in the form of a "pencil", when clicked, I began to edit the menu. All actions and work with widgets are very convenient and do not require much effort. As you noticed, I changed the “Home” button in just a few mouse clicks.
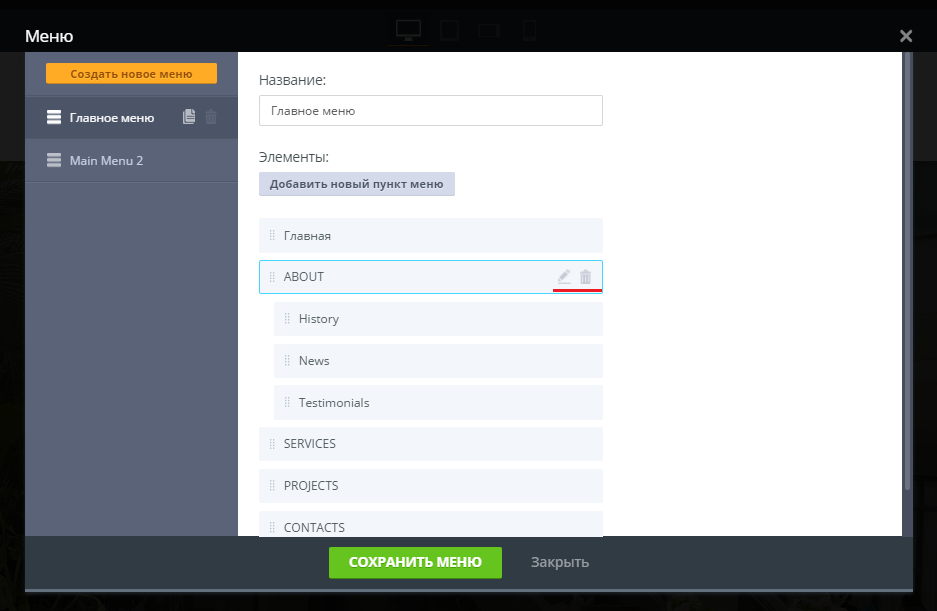
You can adjust or change any menu content, add categories, rename, point them to the path and create subcategories. To work with the menu style, use the right column (where there are tools for working with styles), as well as in working with the main design. Changing the text style in the menu itself is as easy as working with the Text widget itself (it allows you to paste text into any area of the site):

Moto CMS 3 has many great widgets and functions, and you can describe them for quite a while. In short, this is convenient work, the minimum workload of the admin panel, simple navigation and competent, step-by-step construction of working with widgets ensures quick execution of the tasks set.
I would like to note that Moto CMS 3 has an updated Drag-and-drop editor that allows you to transfer design elements and modules effortlessly.
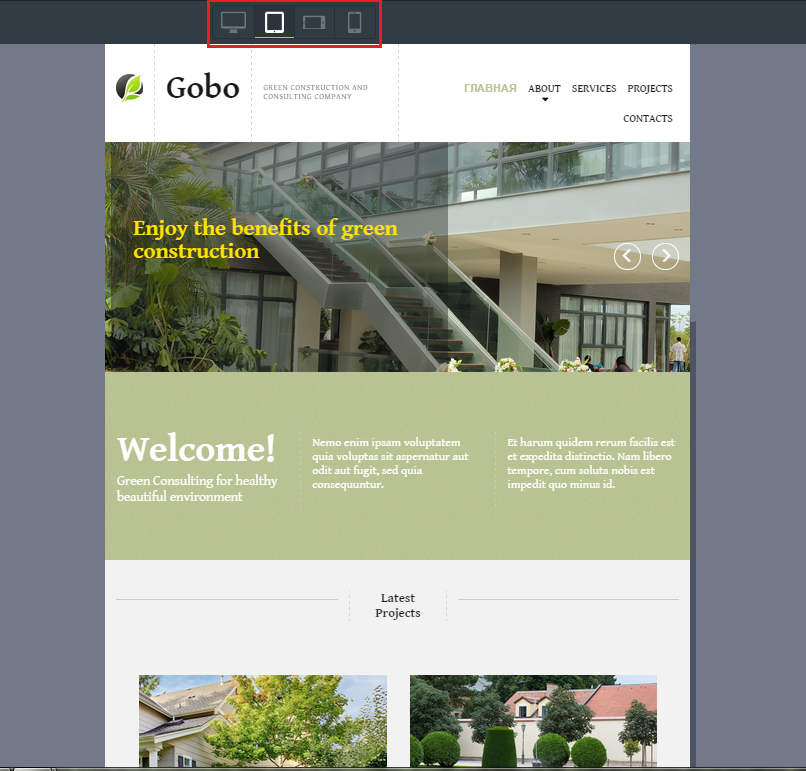
Another pleasant thing is adaptability, which in the Moto CMS 3 version allows you to simultaneously work with several versions of the site for different devices: a computer, a smartphone or a tablet. And this is a very significant factor, as the mobile Internet daily walks around the planet, and not all sites can respond to the availability of new devices and their requests.

The previous version of Moto CMS could not boast of such functions, which sometimes complicated the work even if it was necessary to make a simple landing page. Moto CMS 3, on the contrary, has been sharpened to create a simple and convenient one-member. The main tools located in the admin panel have easy management and editing of internal elements. Creating a Landing with an adaptive layout took about two weeks of work, with Moto CMS 3 did it in a day (from “dating” to the result).
"Turnkey" all the fun cost $ 199. Perhaps someone will pay a high price for the template (especially at the current rate). However, if we consider the future profitability of the site and the prospect of its development, this is a very small initial investment with the condition that, in fact, together with the template comes quality design, on which you could spend a lot of good time. Alas, a business without an investment is often just a good story. And so we created a website with the customer in just 1 day. Of course, the site will be further refined and edited, but only minor elements remain, namely the creation of a logo and further promotion. I want to add that, working with Moto CMS admin panels, websites have very fast indexing and simple optimization of all content.
How to try any template for free
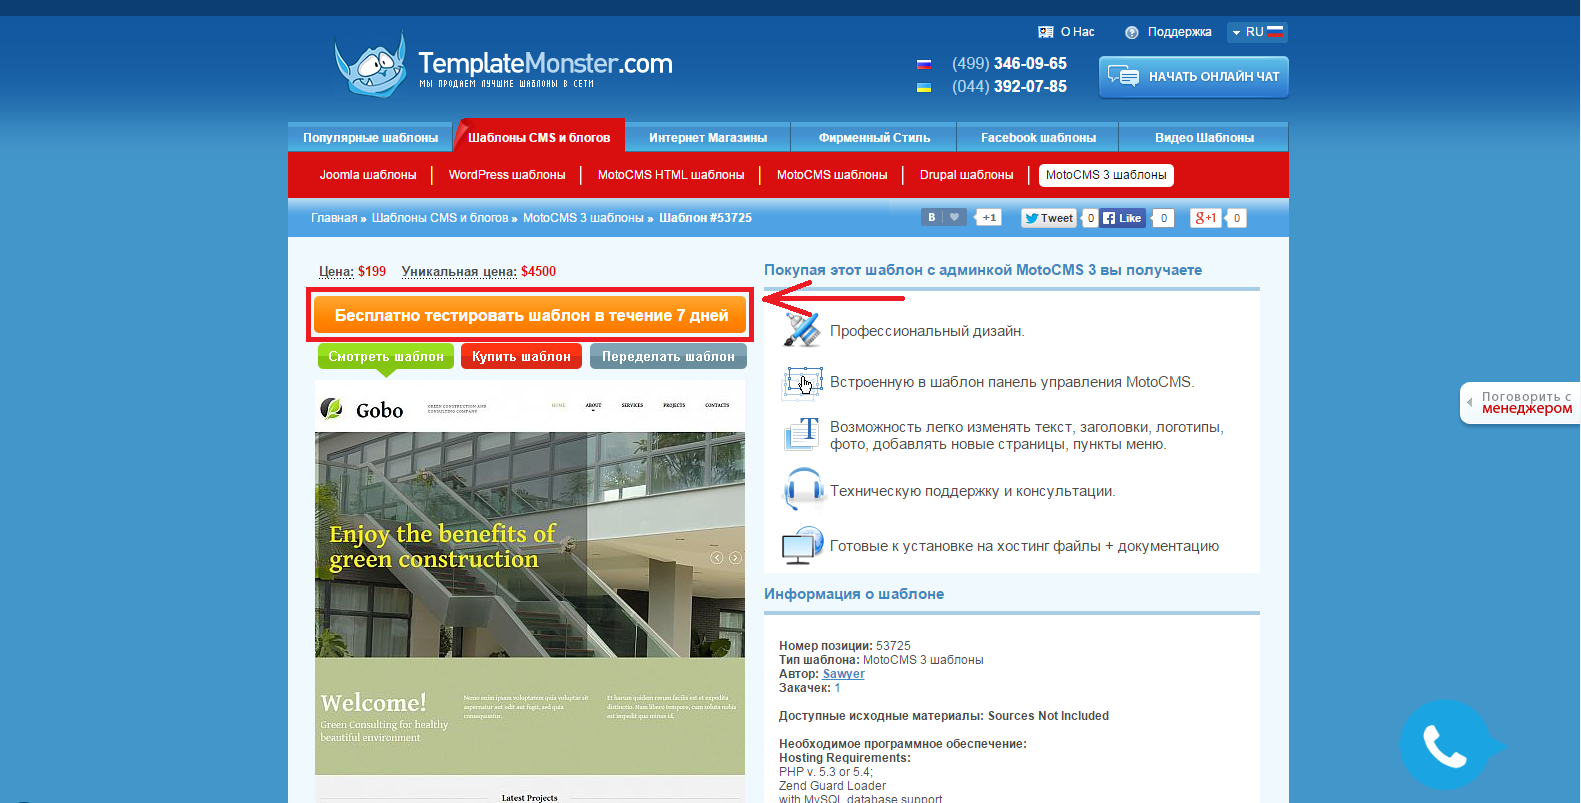
Most recently, the TemplateMonster website has an opportunity to test the template you like and get acquainted with the capabilities of the admin panel before purchasing it. In order to do this, you just need to go to the site , find the Moto CMS3 template and when choosing a template, click on the “Test the template for free” button.
Next, fill in the required fields, which include email and phone number (enter the number should be real, because you will receive an SMS with a confirmation code):
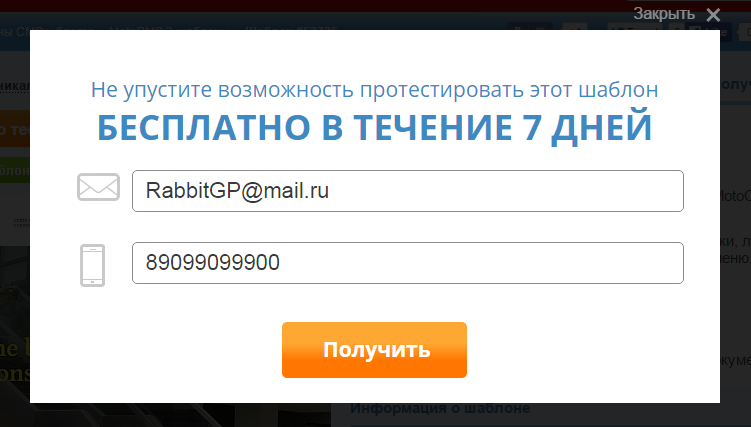
After filling out the form, click "Get", enter the code from the SMS message and click "Next":
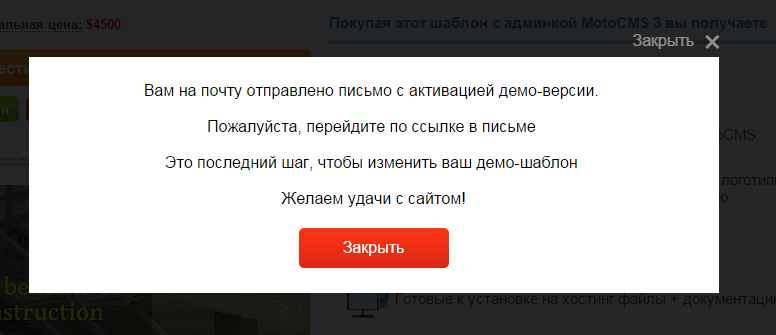
A letter will be sent to the specified mailbox containing a link that gives us access to free testing of the selected template. Thus, you yourself can see and appreciate all the functionality and availability for regular users of the Moto CMS3 admin panel.
Next, fill in the required fields, which include email and phone number (enter the number should be real, because you will receive an SMS with a confirmation code):
After filling out the form, click "Get", enter the code from the SMS message and click "Next":
A letter will be sent to the specified mailbox containing a link that gives us access to free testing of the selected template. Thus, you yourself can see and appreciate all the functionality and availability for regular users of the Moto CMS3 admin panel.
Video reviews of several templates:
A full selection of ready-made templates for MotoCMS 3 can be found here .
Have a nice work.
Source: https://habr.com/ru/post/265905/
All Articles