Atmospheric scattering in the video The Blacksmith
At the planning stage of The Blacksmith, we abandoned the fog modes built into Unity in favor of a more flexible and integrated solution. In order to convey the depth and scale of large stage shots, we needed the most realistic atmospheric dispersion.

Starting to create a component for atmospheric scattering, we studied the simulation models presented in the Multiple Scattering Report and the Multiple Anisotropic Scattering. and Sky Light ), and tried to put them into practice. After several experiments with prototypes of shots, we were finally convinced that we needed a model that would provide ample opportunity to customize the artistic effects for each shot. In other words, we were looking for a solution that would allow us not only to realistically recreate physical parameters, but also, if necessary, to sacrifice physics for the sake of an artistic effect. In this case, the performance of the video in real time should not have suffered, so we decided to do most of the calculations at the level of vertices, and not at the level of pixels.
We set out to simulate the combined effects of Rayleigh scattering and Mie scattering on the basis of physical models. In addition, we added a third element, which was called “height scattering”. Unlike physical models, within the framework of our solution, we used ordinary HDR textures instead of procedurally generating sky and clouds. The obvious disadvantage of this approach is that it makes it very difficult to set up a dynamic change of the time of day (which we did not need for the video). But, on the other hand, we were able to complete the artistic setting of the sky.
Rayleigh scattering
')
Rayleigh scattering of sunlight in the atmosphere gives the sky a blue color during the day and an orange-red hue at sunrise and sunset.
In the video The Blacksmith we do not have the sun as such - we limited ourselves to modeling colors and the propagation / attenuation of light as a result of the scattering of the sun's rays. A visual analogue of the sun can be added directly to the sky texture, represented as an element of Mie scattering or as a sprite. In fact, the density of our Rayleigh scattering is reduced to an exponential function based on the Rayleigh phase function. But at the same time, we have more opportunities to add and extract data from this formula. We simulated the scattering of light without changing the wavelength, so in this case the density was a scalar value. With the help of HDR Color Ramp, we diversified the shades of light attenuation at the horizon and at the zenith, and also used the distance function to create the final colors.
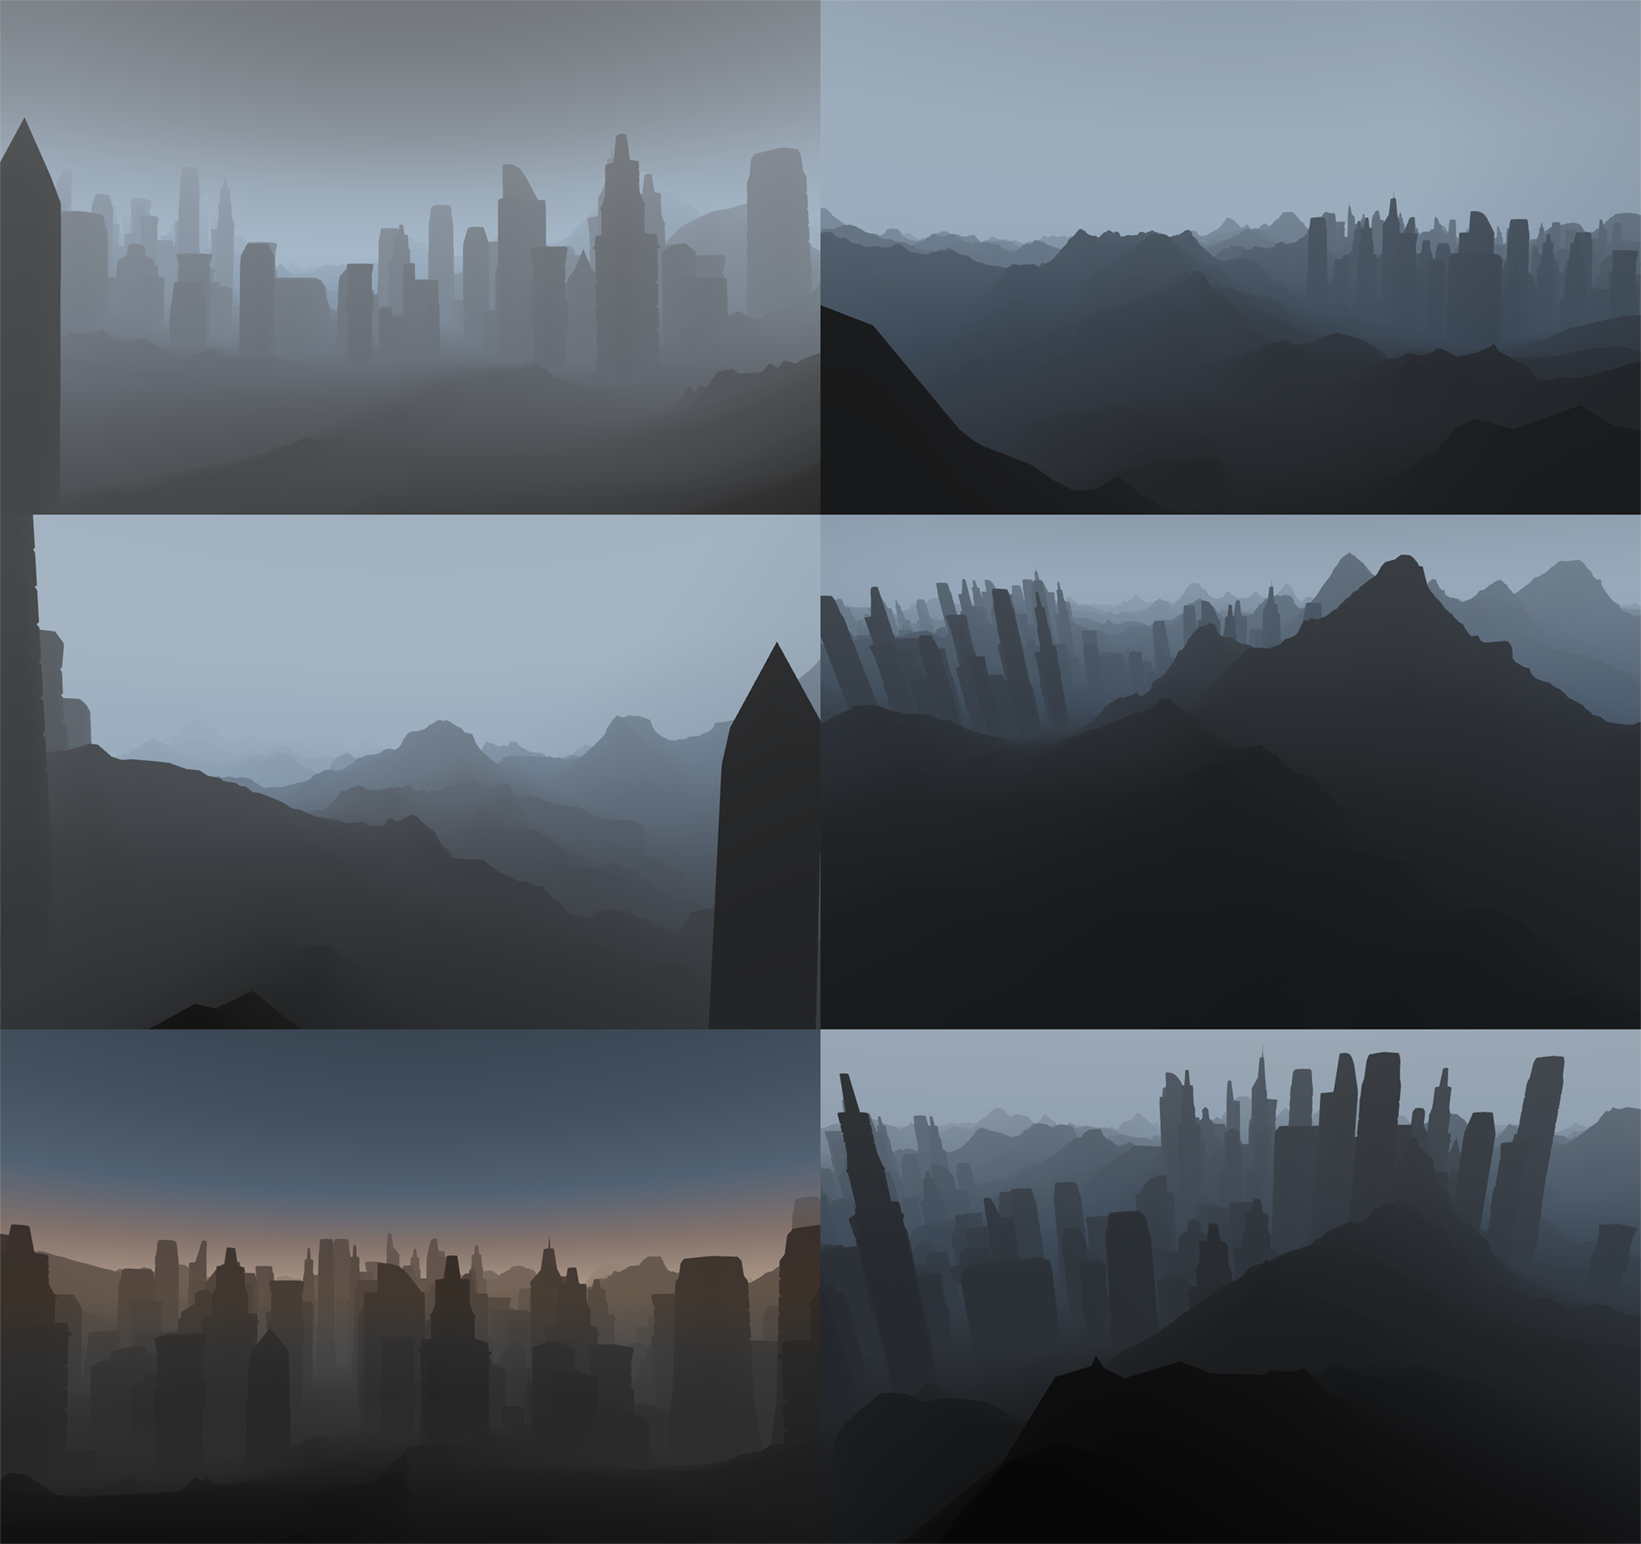
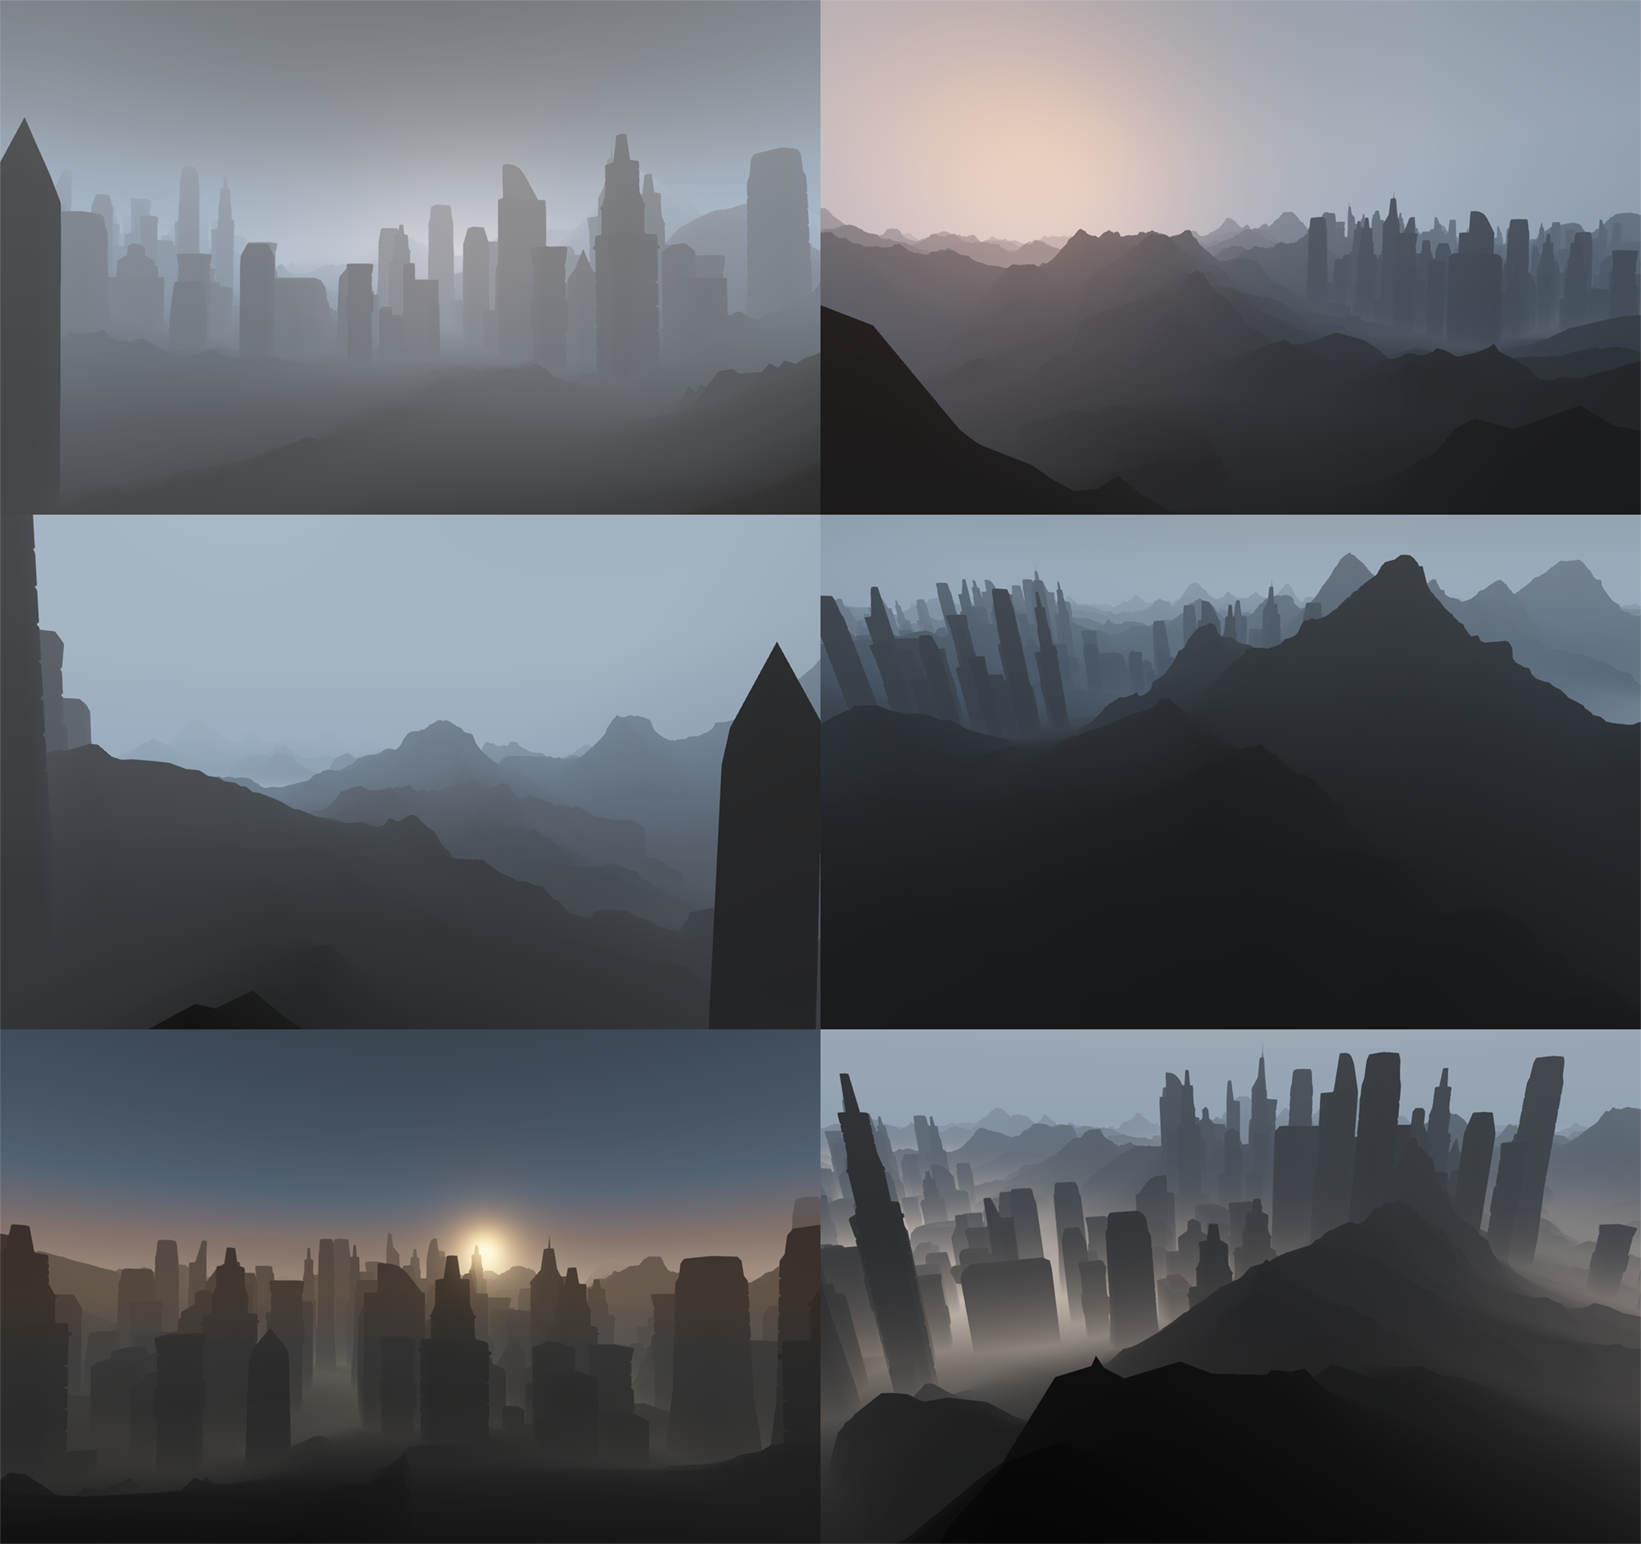
Rayleigh scattering in various configurations.
Scattering mi
As a result of MI scattering, we see a bright halo around the sun, a gray haze of clouds and smog in industrial areas. Unlike Rayleigh scattering, which distributes light almost evenly, Mie scattering is characterized by optical anisotropy.
We used Mi scattering primarily to create halos and haze around the sun. Given the fact that our simulation of Rayleigh scattering ignored the sun, we compensated for this by increasing the intensity of the colors. From a technical point of view, the Rayleigh and Mie functions in our simulation are very similar, with the exception of the phase function applied to the output values. As in many other projects, we used the Heny – Greenstein scattering function to adjust the anisotropy parameter.
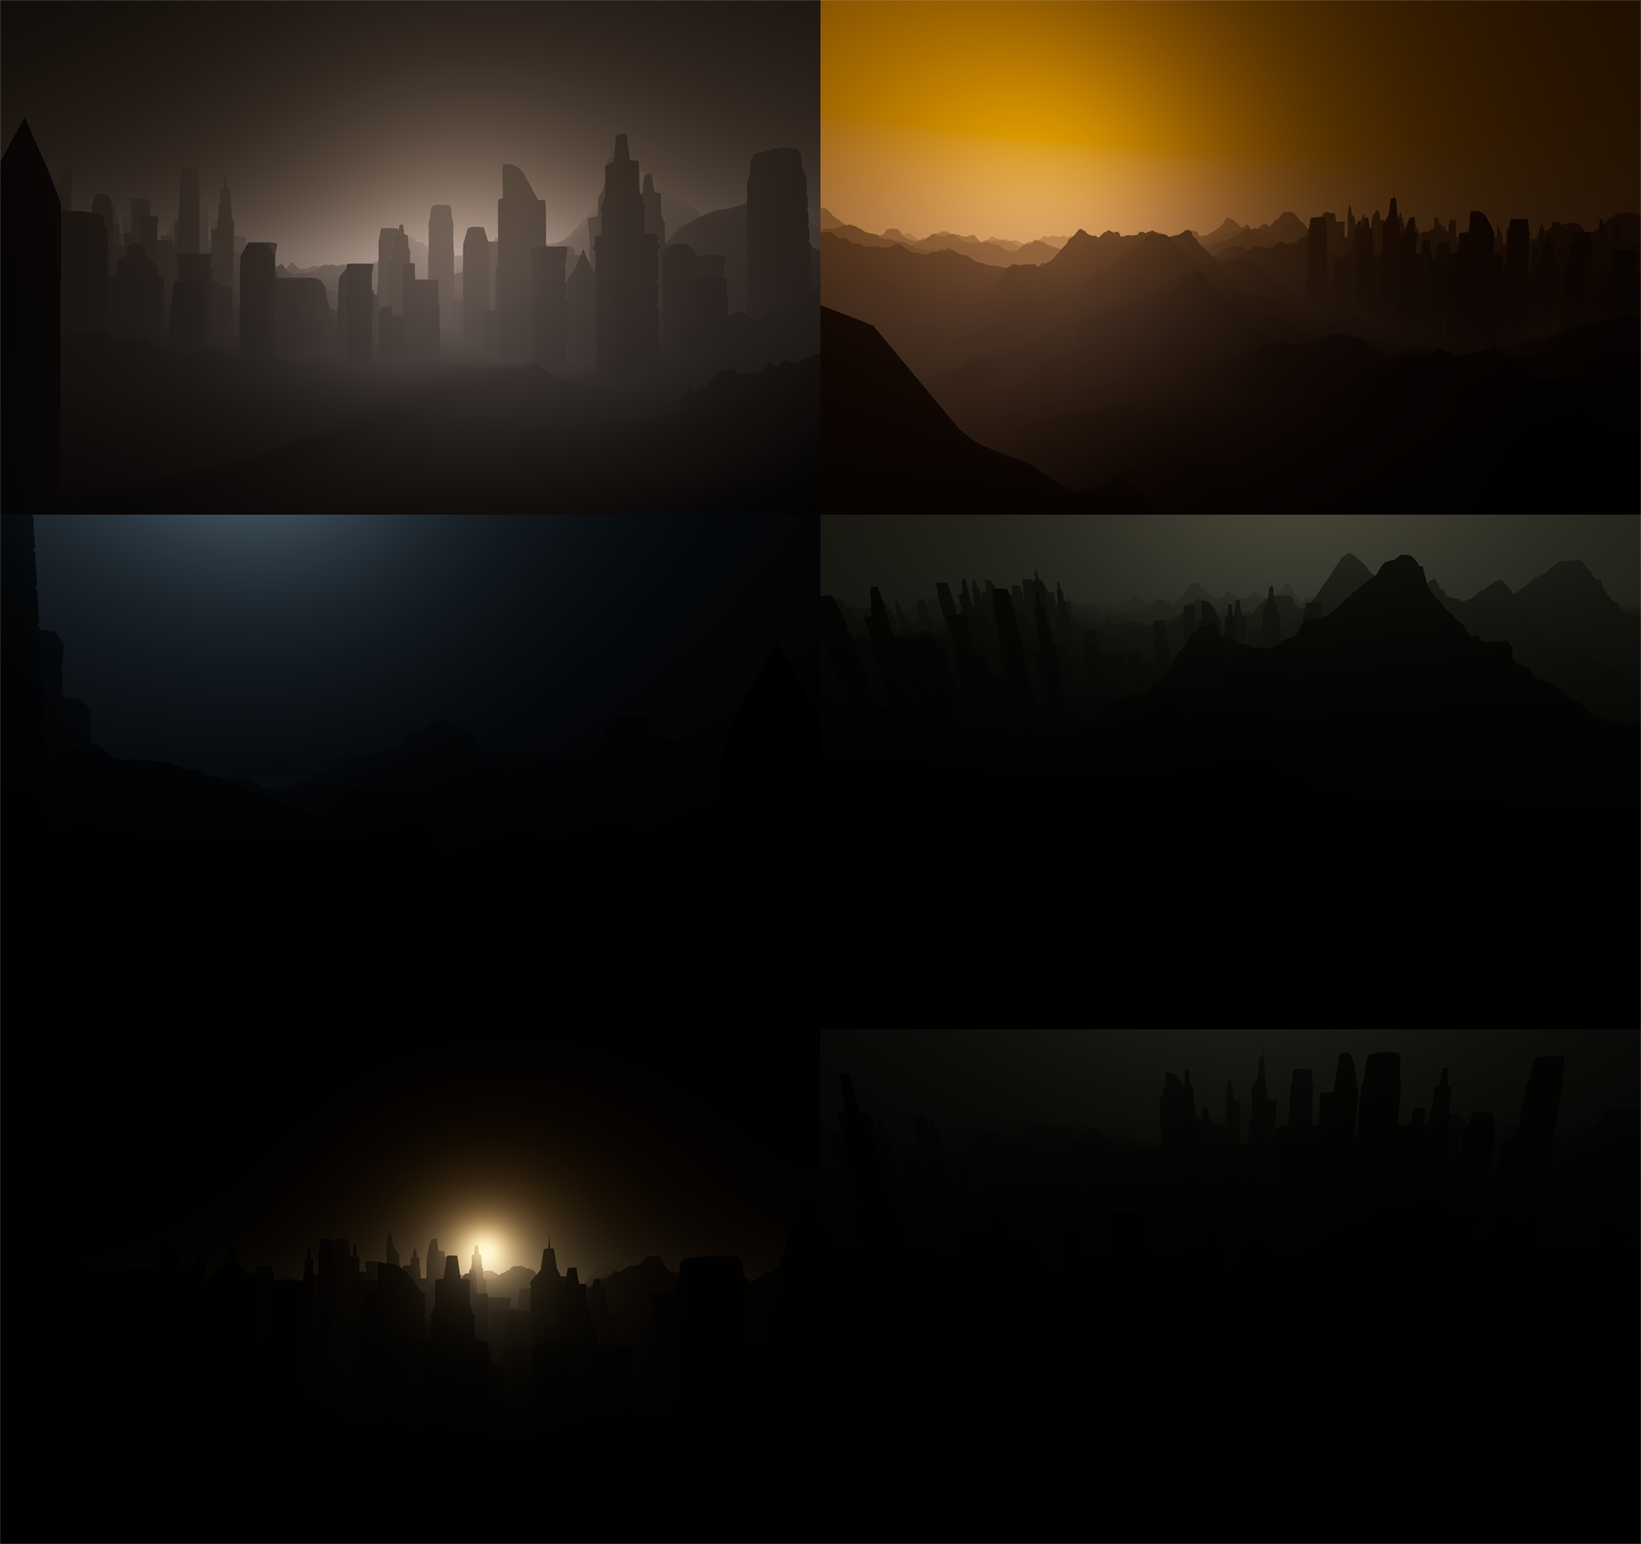
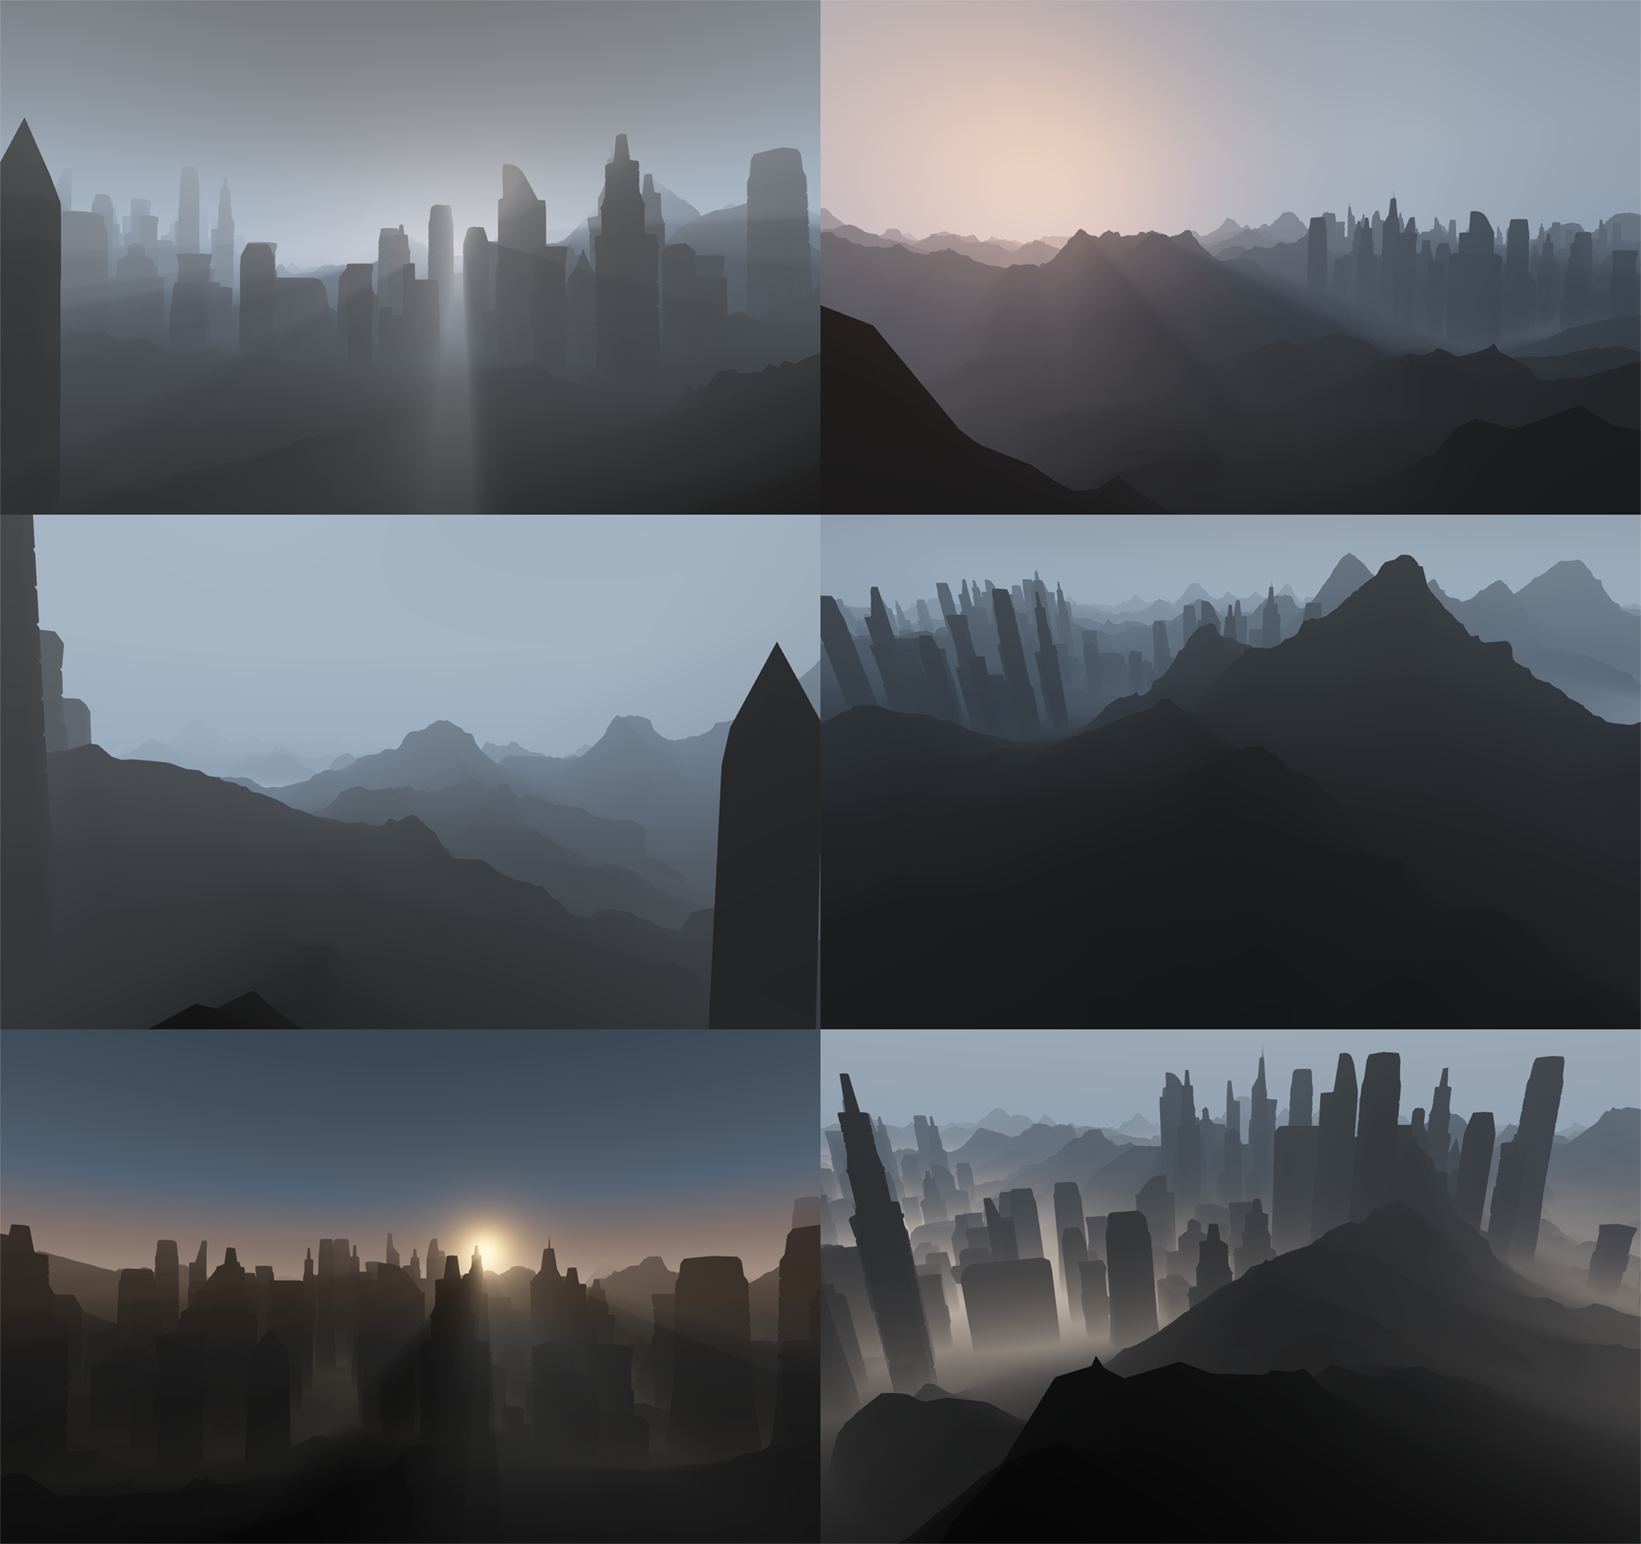
Mi scattering in various configurations.
Readers who are familiar with research papers on this topic may not agree with our choice of titles. In this sense, we really allowed ourselves some liberties. The fact is that many experts use the term “Rayleigh scattering” to describe atmospheric scattering, and the term “Mie scattering” to denote haze around the sun. Therefore, we decided to adhere to these terms.
Height scatter
This element includes various atmospheric dispersion effects occurring at low altitudes: lowland fog, surface haze and stratus clouds.
In this case, we found a fairly simple solution: we calculated the density based on the distance from the specified sea level, then we scaled it by exponential density and painted it in the desired color.
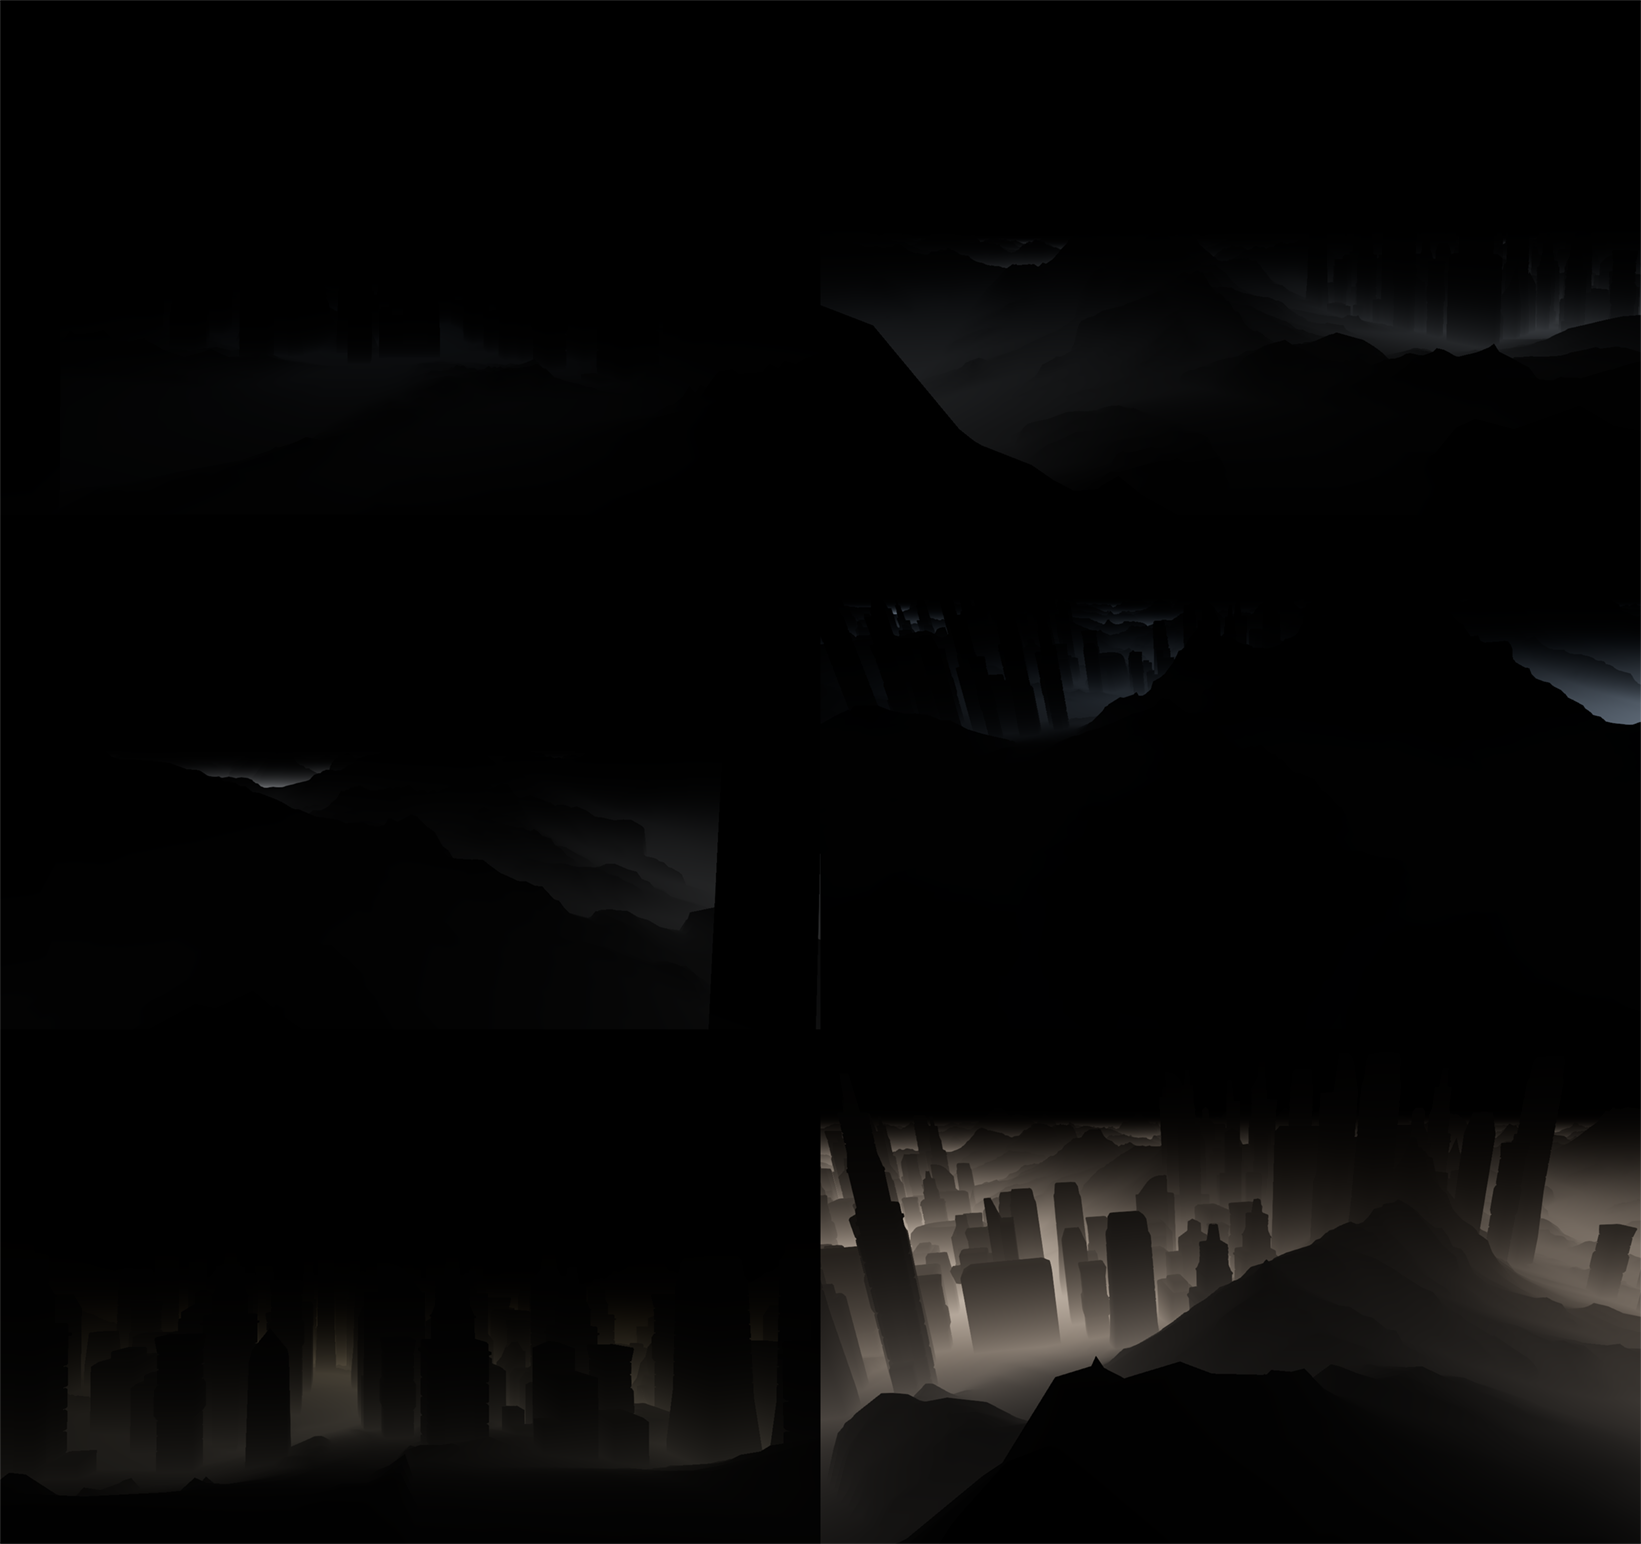
Scattering in height in various configurations.
Light obstruction
Sunlight can not only be scattered towards and away from the viewer - it can also be absorbed by particles between the viewer and the source of light. To simulate this effect, we needed a separate solution.
We traced the beams of the directional light using a cascading shadow map and calculated the obstruction in the reduced off-screen buffer. To apply the scatter to the pixels of the final image, we increased the resolution of the shadow map using an edge-aware filter and created the final color for each pixel. At this stage, we are faced with certain difficulties. Considering the fact that our solution was designed solely for single scattering, we could not just take in and obscure all the absorbed light, because then the image would be very dark and unnatural. On the other hand, a more complicated and expensive solution for multiple scattering, we also had nothing. In the end, we decided to simply add an indirect lighting factor — that is, the ability to manually set the percentage of direct and indirect scattering.
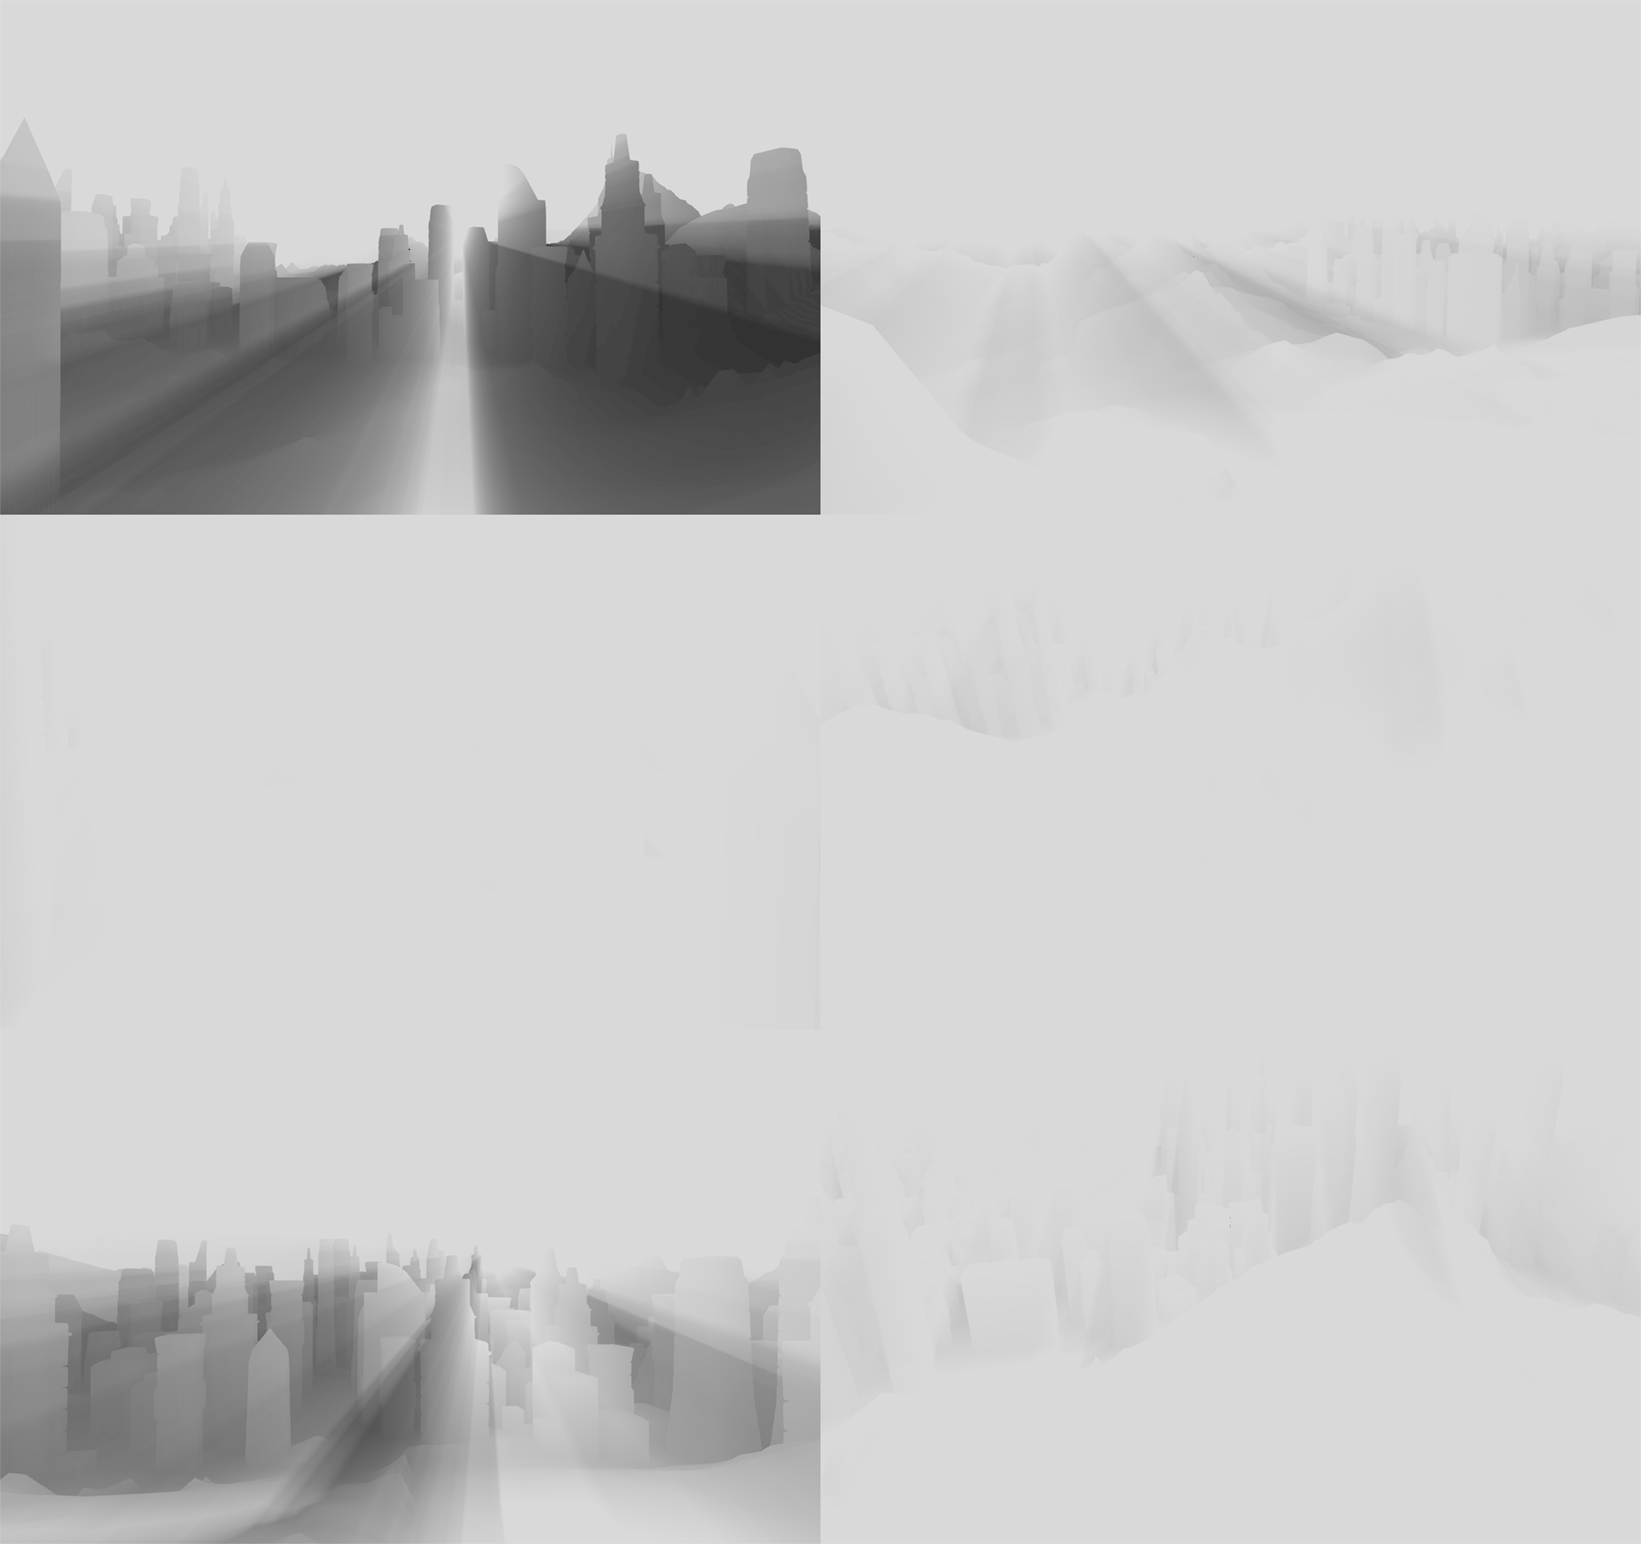
Obstruction of light in various configurations.
Combining effects
So, it remains to bring all the effects of the final image to a common denominator. Combining all three elements, we got a realistic color composition.
Combined effects of Rayleigh scattering, Mie scattering and scattering height.
Then we made a more detailed adjustment of the attenuation values of the direct and indirect illumination in the buffer.
Combined scattering effects with light obstruction.
Finally, it remains to impose atmospheric scattering on the picture. To do this, we darkened the transmitted image in the amount of attenuation and illuminated the amount of light propagation. Here's what we got:
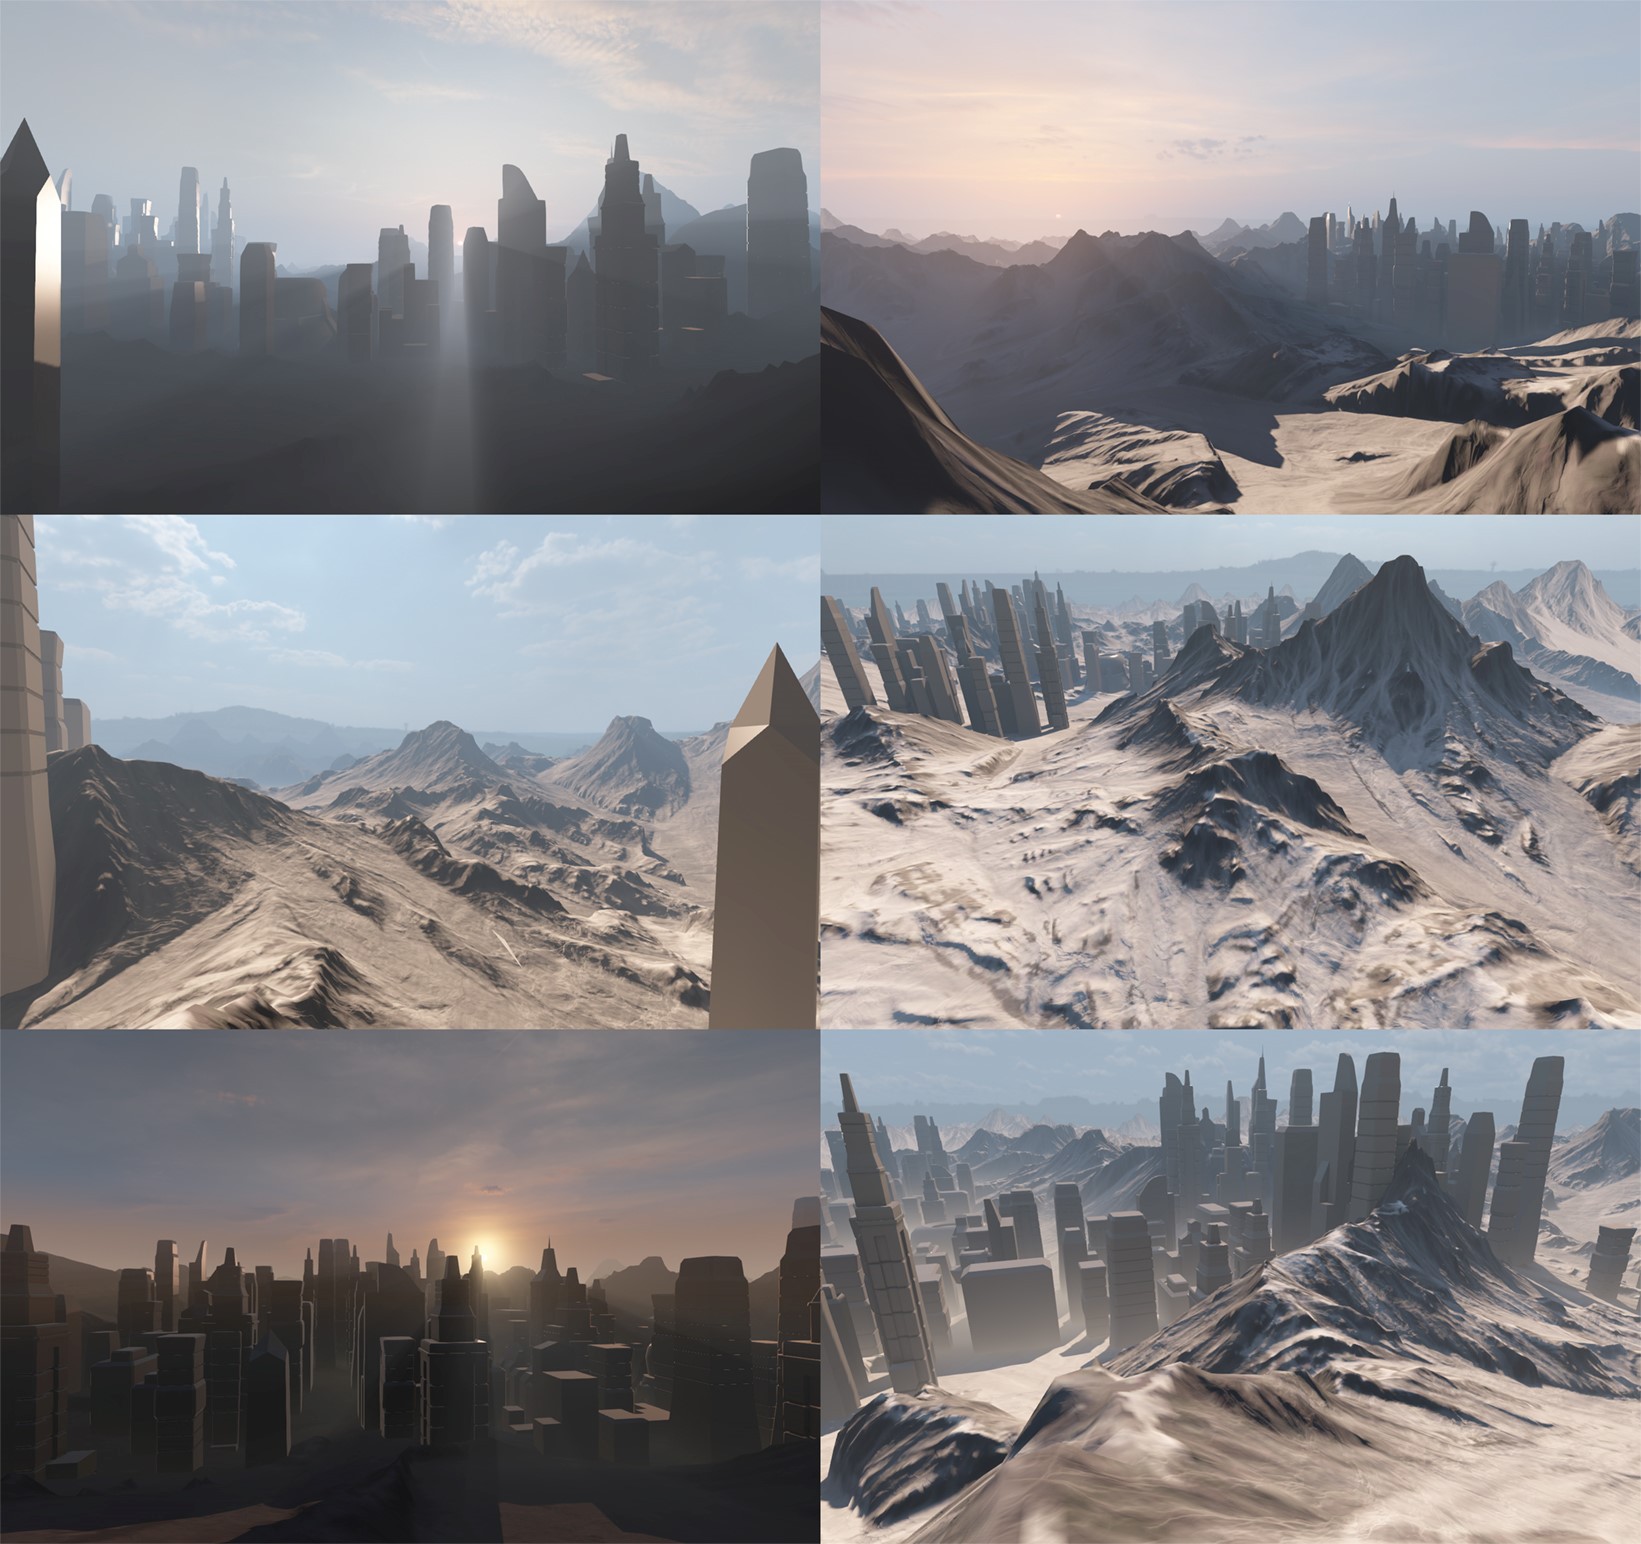
The final composition.
Starting to create a component for atmospheric scattering, we studied the simulation models presented in the Multiple Scattering Report and the Multiple Anisotropic Scattering. and Sky Light ), and tried to put them into practice. After several experiments with prototypes of shots, we were finally convinced that we needed a model that would provide ample opportunity to customize the artistic effects for each shot. In other words, we were looking for a solution that would allow us not only to realistically recreate physical parameters, but also, if necessary, to sacrifice physics for the sake of an artistic effect. In this case, the performance of the video in real time should not have suffered, so we decided to do most of the calculations at the level of vertices, and not at the level of pixels.
We set out to simulate the combined effects of Rayleigh scattering and Mie scattering on the basis of physical models. In addition, we added a third element, which was called “height scattering”. Unlike physical models, within the framework of our solution, we used ordinary HDR textures instead of procedurally generating sky and clouds. The obvious disadvantage of this approach is that it makes it very difficult to set up a dynamic change of the time of day (which we did not need for the video). But, on the other hand, we were able to complete the artistic setting of the sky.
Rayleigh scattering
')
Rayleigh scattering of sunlight in the atmosphere gives the sky a blue color during the day and an orange-red hue at sunrise and sunset.
In the video The Blacksmith we do not have the sun as such - we limited ourselves to modeling colors and the propagation / attenuation of light as a result of the scattering of the sun's rays. A visual analogue of the sun can be added directly to the sky texture, represented as an element of Mie scattering or as a sprite. In fact, the density of our Rayleigh scattering is reduced to an exponential function based on the Rayleigh phase function. But at the same time, we have more opportunities to add and extract data from this formula. We simulated the scattering of light without changing the wavelength, so in this case the density was a scalar value. With the help of HDR Color Ramp, we diversified the shades of light attenuation at the horizon and at the zenith, and also used the distance function to create the final colors.
Rayleigh scattering in various configurations.
Scattering mi
As a result of MI scattering, we see a bright halo around the sun, a gray haze of clouds and smog in industrial areas. Unlike Rayleigh scattering, which distributes light almost evenly, Mie scattering is characterized by optical anisotropy.
We used Mi scattering primarily to create halos and haze around the sun. Given the fact that our simulation of Rayleigh scattering ignored the sun, we compensated for this by increasing the intensity of the colors. From a technical point of view, the Rayleigh and Mie functions in our simulation are very similar, with the exception of the phase function applied to the output values. As in many other projects, we used the Heny – Greenstein scattering function to adjust the anisotropy parameter.
Mi scattering in various configurations.
Readers who are familiar with research papers on this topic may not agree with our choice of titles. In this sense, we really allowed ourselves some liberties. The fact is that many experts use the term “Rayleigh scattering” to describe atmospheric scattering, and the term “Mie scattering” to denote haze around the sun. Therefore, we decided to adhere to these terms.
Height scatter
This element includes various atmospheric dispersion effects occurring at low altitudes: lowland fog, surface haze and stratus clouds.
In this case, we found a fairly simple solution: we calculated the density based on the distance from the specified sea level, then we scaled it by exponential density and painted it in the desired color.
Scattering in height in various configurations.
Light obstruction
Sunlight can not only be scattered towards and away from the viewer - it can also be absorbed by particles between the viewer and the source of light. To simulate this effect, we needed a separate solution.
We traced the beams of the directional light using a cascading shadow map and calculated the obstruction in the reduced off-screen buffer. To apply the scatter to the pixels of the final image, we increased the resolution of the shadow map using an edge-aware filter and created the final color for each pixel. At this stage, we are faced with certain difficulties. Considering the fact that our solution was designed solely for single scattering, we could not just take in and obscure all the absorbed light, because then the image would be very dark and unnatural. On the other hand, a more complicated and expensive solution for multiple scattering, we also had nothing. In the end, we decided to simply add an indirect lighting factor — that is, the ability to manually set the percentage of direct and indirect scattering.
Obstruction of light in various configurations.
Combining effects
So, it remains to bring all the effects of the final image to a common denominator. Combining all three elements, we got a realistic color composition.
Combined effects of Rayleigh scattering, Mie scattering and scattering height.
Then we made a more detailed adjustment of the attenuation values of the direct and indirect illumination in the buffer.
Combined scattering effects with light obstruction.
Finally, it remains to impose atmospheric scattering on the picture. To do this, we darkened the transmitted image in the amount of attenuation and illuminated the amount of light propagation. Here's what we got:
The final composition.
Source: https://habr.com/ru/post/265545/
All Articles