Platform for Android on Unity3D
Perhaps, even after the release of the new UI, the creation of an interface for Android remained a sore subject for many.
The new system “UI”, which appeared in Unity 4.6, has greatly simplified the lives of developers, but still, I would like to clarify some points that relate to Android.
Of the benefits:
- Powerful tool kit
-Correct scaling at different resolutions, which in turn eliminates a bunch of extra work
- Support touch control without additional settings
-Fibility and ease of use
The article will be divided into two parts.
')
The first (basic) is for those who are just starting to use Unity3D. The second is, in fact, the very implementation of management for the platform for Android.
Part one
1) To start, create a new scene File> New Scene.
2) In the “Assets” folder, create two more folders: “Scripts” and “Sprites”.
3) Next, the sprites that I have prepared are added to the “Sprites” folder.
Sprites:


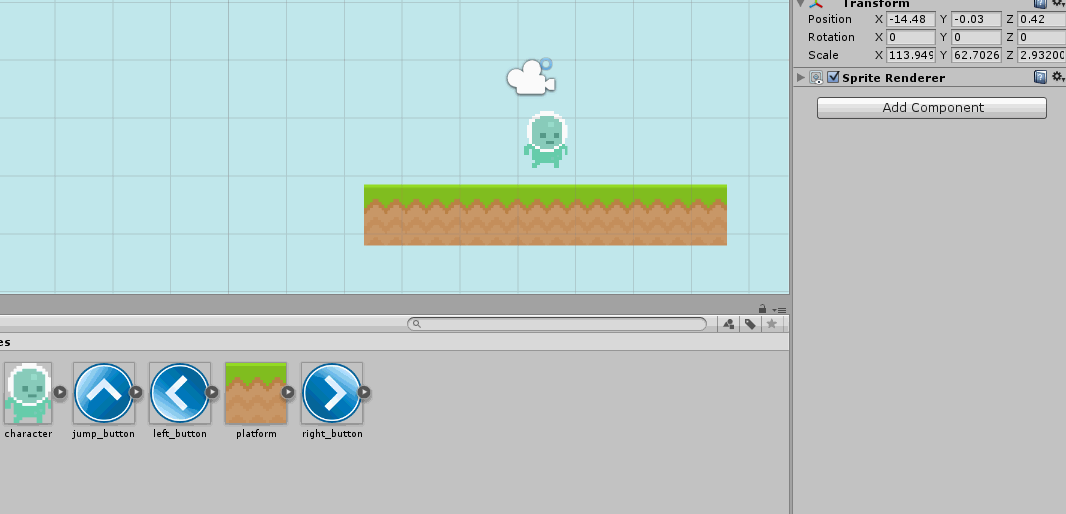
We put Filter Mode on the point “Point” platform and character, since they are made in pixel art.

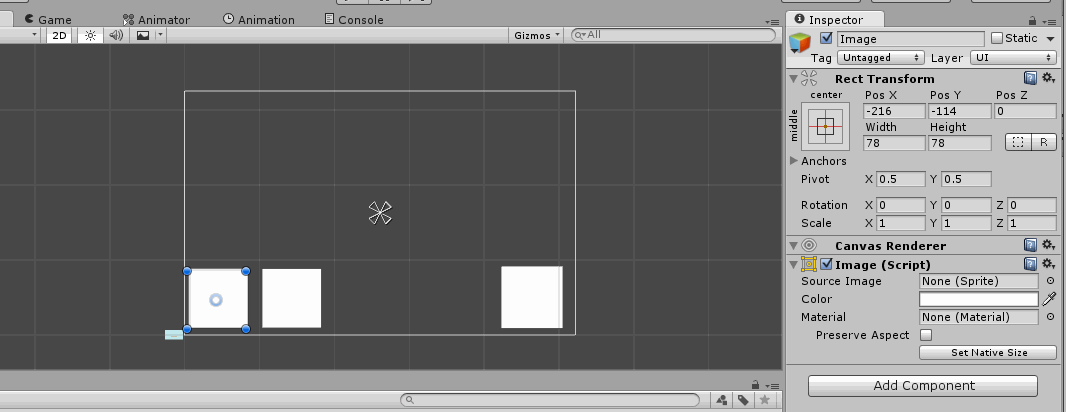
We drag the character's sprite onto the stage, a couple of platform sprites and a background (after having increased it in size).
You should have something like this:

Add our character components such as: Rigidbody2D, CircleCollider2D and freeze the possibility of rotation along the Z axis.
All platforms add component: BoxCollider2D.
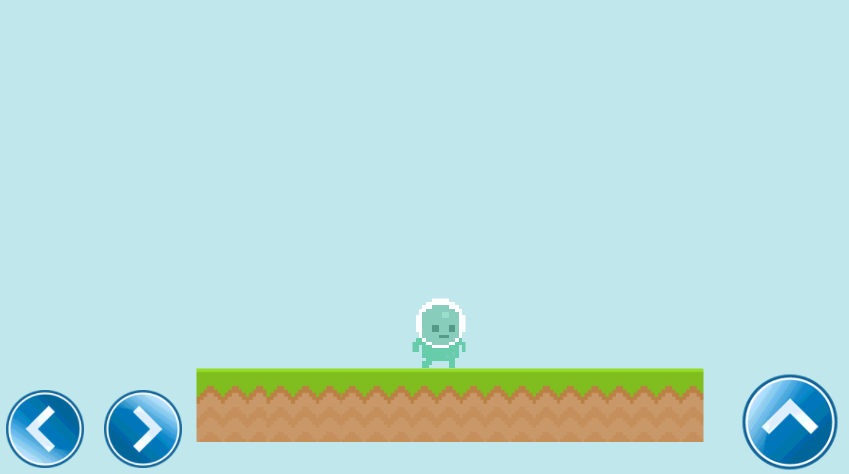
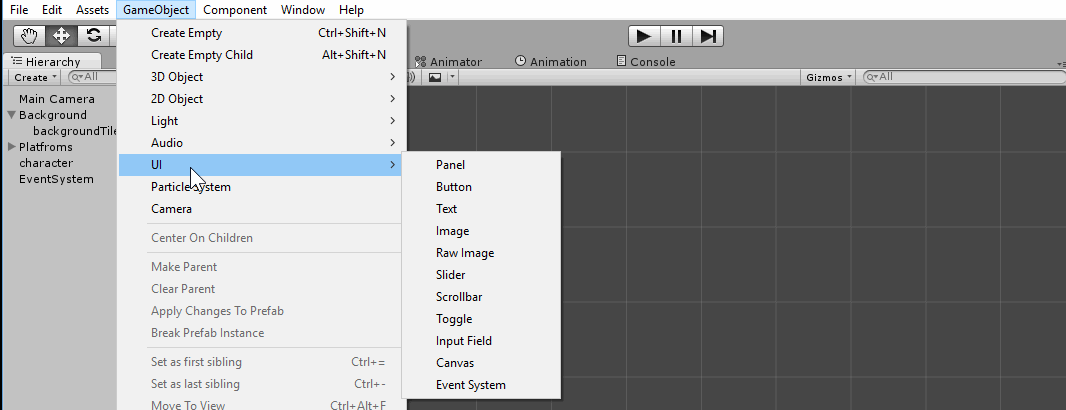
4) Add three Images to the scene via GameObject> UI> Image.
This is our future interface (buttons: right, left, jump).
Customize the size and go further:
Image'am left set “binding” to the left bottom edge, and the right - to the bottom right.
For each Image'a Source Image dragging your sprite.
The result should be:

That's the end of the first part.
In the second part, we move on to the scripting and add functionality to the buttons.
Part two
We now turn to the main:
1) Create a new script in the “Scripts” folder and name it “CharController” (we will write in C #).
Paste the code into it:
using UnityEngine; using System.Collections; public class CharController : MonoBehaviour { public Rigidbody2D rb2d; public float playerSpeed; public float jumpPower; public int directionInput; public bool groundCheck; public bool facingRight = true; void Start() { rb2d = GetComponent<Rigidbody2D>(); } void Update() { if ((directionInput < 0) && (facingRight)) { Flip(); } if ((directionInput > 0) && (!facingRight)) { Flip(); } groundCheck = true; } void FixedUpdate() { rb2d.velocity = new Vector2(playerSpeed * directionInput, rb2d.velocity.y); } public void Move(int InputAxis) { directionInput = InputAxis; } public void Jump(bool isJump) { isJump = groundCheck; if (groundCheck) { rb2d.velocity = new Vector2(rb2d.velocity.x, jumpPower); } } void Flip() { facingRight = !facingRight; Vector3 theScale = transform.localScale; theScale.x *= -1; transform.localScale = theScale; } } “Simplicity is the key to success” - in our case it is. Movement and jumping of the character were implemented through separate void'y.
Hang this script on the character. Glue the whole thing together, we will help the Event System.
2) For convenience, rename the “buttons” so as not to get confused.
For example: "leftButton", "rightButton", "jumpButton".
Add an Event Trigger component to each button.

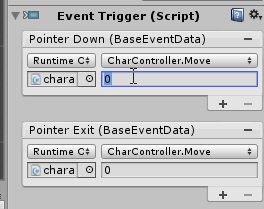
Now, with the “Left” button in the Event Trigger component, create two new events - PointerDown and PointerExit.
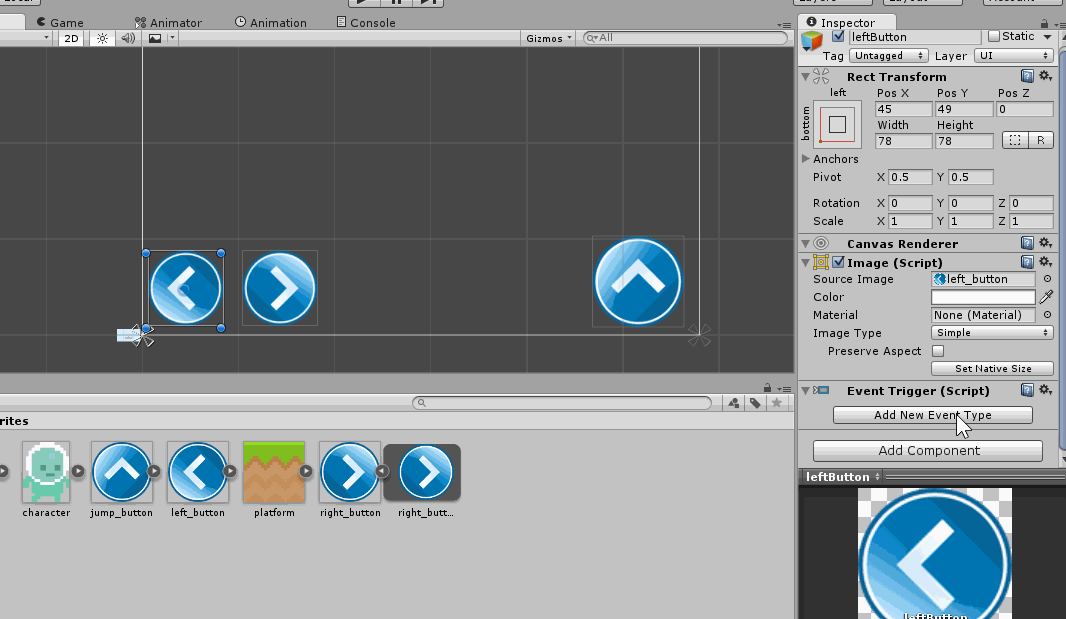
In PointerDown and PointerExit create one event, drag each of our characters (on which the script must hang). Click on the drop-down menu and find our script “CharController”> void “Move (int)”.
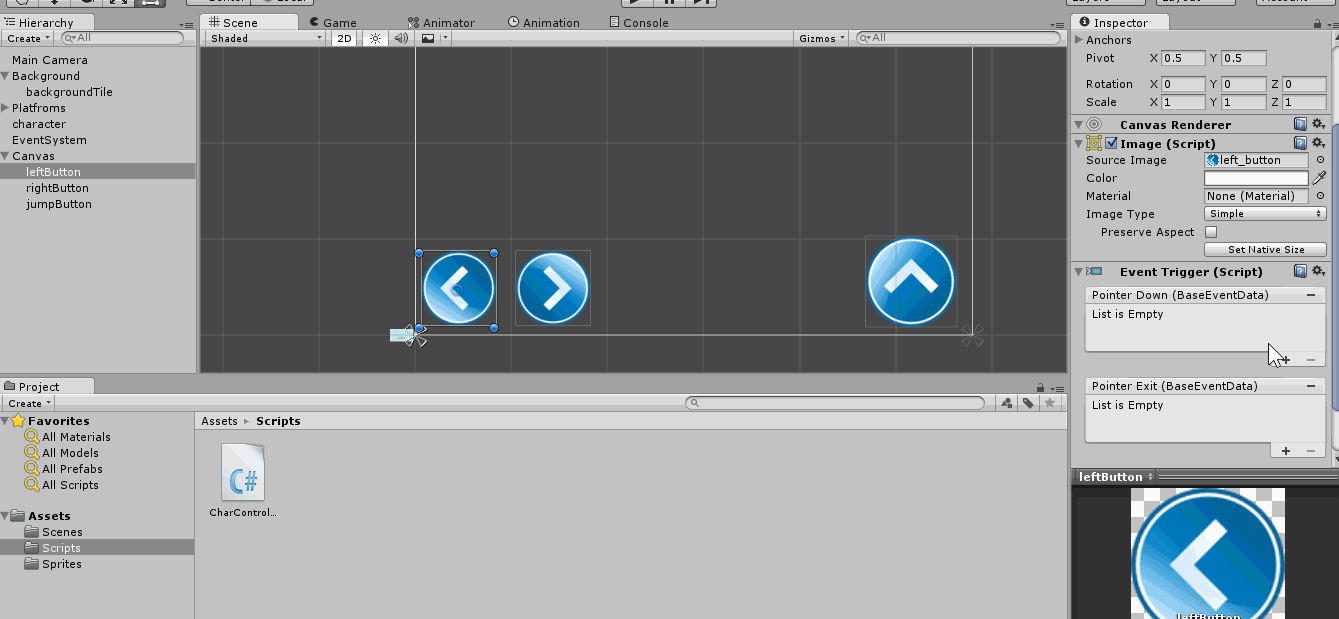
We will carry out similar manipulations with the “Right” button.
Button “Jump” add only PointerEnter> CharController> Jump (bool).
3) It's time to set the values.
Character:
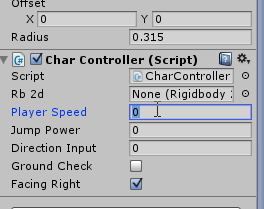
“Left” button:
For the “Right” button, we also change the value in PointerDown, but to “1”.
4) Run our project:
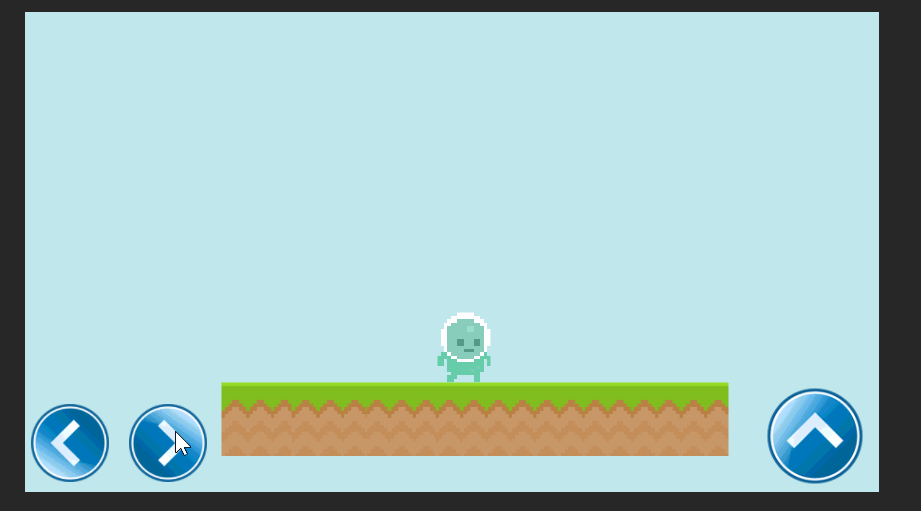
That's all!
Of course, it’s impossible to call this article “Development from A to Z”, but I think many will now find it easier to make control for Android. Thank you all for your attention.
PS I would be very happy advice and criticism.
Source: https://habr.com/ru/post/264611/
All Articles