Game Development with Unity and Intel RealSense 3D Cameras

The process of creating computer games includes a set of standard tasks that developers constantly face. This, for example, accounting for physical laws, the collision of objects, triggering events (beeps, scoring, etc.) and the response to the actions of players using the joystick, mouse and keyboard. The implementation of these functions for each target platform separately can take a lot of time. To avoid this, developers use a game engine with support for standard functionality. This allows you to pay more attention to complex tasks.
Unity 3D is an excellent cross-platform solution from Unity Technologies. It is designed to develop games for computers, game consoles, mobile devices and web browsers. Unity 3D provides support for various programming languages, such as C ++, C #, Unity Script (similar to JavaScript), and Boo.
This article is intended for both beginners and experts. To help those who have never worked with Unity before, we will start with a small example of how to use this product. Then, I’ll tell you how to use the Intel RealSense SDK and the Intel RealSense 3D Camera to track gestures and how to create a simple C # game.
To work, you will need Visual Studio, Unity, Intel RealSense SDK, and Intel RealSense 3D Camera.
Download, install and configure Visual Studio
Download the free version of Unity. It works under Microsoft Windows * and Apple Mac * OS X *. To complete the installation, go through the free registration.
The program given in this article for example is written in C #. MonoDevelop is used by default as a cross-platform integrated development environment in Unity. Unity can also be used with Microsoft Visual Studio , which is especially convenient for .NET developers. First you need to connect Visual Studio to Unity. In the drop-down menu, select Edit -> Preferences .... A settings window will appear on the screen. Select External Tools in the panel on the left side (Figure 1). Click MonoDevelop next to the External Script Editor field and select the Visual Studio .exe file by clicking the Browse ... button. Install Visual Studio using the default settings. The path to the program launch file should be as follows.
C: \ Program Files (x86) \ Microsoft Visual Studio 12.0 \ Common7 \ IDE \ devenv.exe .
This is all that is required to connect.
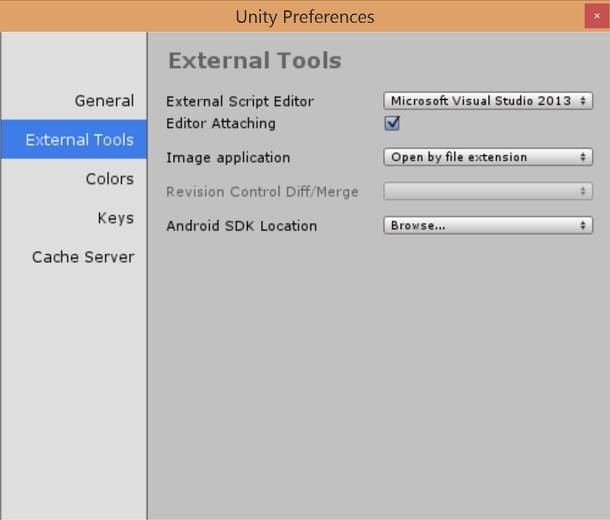
Figure 1. Selecting Visual Studio * in Unity *
')
Wednesday
Go to the Unity environment settings. The main screen consists of several windows. You can place them manually or choose a standard location. We chose Tall in the Layout drop-down menu in the upper right corner of the screen.

Figure 2. Window position selection
Scene window and game window
The first large window (Fig. 3) is intended for plotting, that is, for placing game objects. Usually 3D format is used for it. To change the position of the scene object, just drag it. Immediately above the main screen is the game tab. It shows the finished image, how the user sees it.

Figure 3. Scene construction window

Figure 4. Game window
Hierarchy window
The hierarchy window (Fig. 5) contains a list of objects used, such as objects from the game itself, cameras, scene lighting, interface elements and audio recordings. To create new objects, use the GameObject menu or the Create window.

Figure 5. Hierarchy window
Properties window
When you select an object in the hierarchy window, its properties window will appear (Fig. 6). Their set can be expanded by adding additional elements. To do this, click Add Component . For example, an object can be assigned the properties of a solid body so that gravity acts on it in the game.

Figure 6. Properties window
Project window
A list of project files, such as scenes and game objects, audio recordings, images and scripts, is presented in the project window (Fig. 7). When you select a file, information about its properties and a preview window will appear on the screen. If you double-click a script file, it will open in the appropriate development environment.
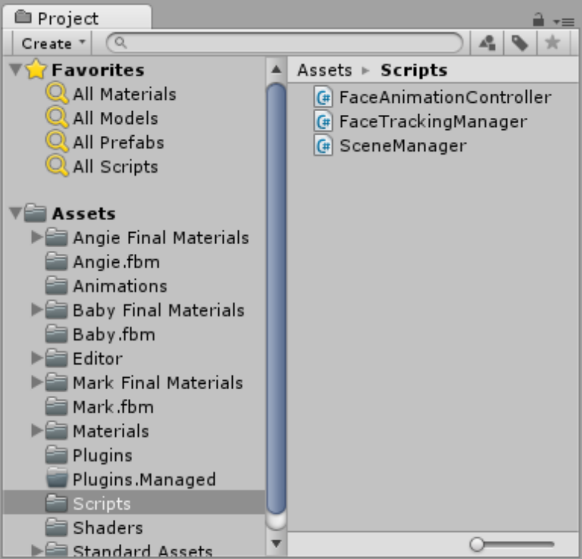
Figure 7. Project window
Creating a simple game
In the early 70s, Nolan Bushnell, the founder of Atari, released a game that later became very popular. It was called Pong and was the simplest table tennis simulator. The game was as follows. The ball moves on the screen. Each player controls the racket by moving it vertically. If someone fails to hit the ball, his opponent gets one point. Let's figure out how to implement this game using Unity.
To create a new project, click File -> New Project . Call it PingPongUnity .

Figure 8. Creating a new project
Rackets
First, create a racket. In the hierarchy window, click Create -> 3D Object -> Cube . To change the shape and location of the rackets, select the cube created and specify the desired parameters in the settings window. In our example, we called the object Paddle1 and changed its shape (see the Transform column). Specify the following values in the scale X column : 0.5, Y: 3, Z: 1 . Specify the following coordinates in the column Position X: -9, Y: 1, Z: 0 . So we created the first racket. In the hierarchy window, right-click on the racket and select Duplicate in the context menu. A copy of the created racket will appear on the screen. It remains only to rename it in Paddle2 and change the value of X in the Position column to 9 .
In order for the rackets to move according to physical laws, we will have to add a RigidBody component by clicking the Add Components button for each of them. So we can control the movement of the rackets and their collision with the ball. So far, our ball just flies through the racket, and does not bounce off of it. This is not exactly what is required. To avoid this, you should set certain restrictions on the properties of objects. Those objects that will satisfy these restrictions, call RigidBody . Rackets can only move up and down, so in the Freeze Rotation column you need to select x , y and z , and in the Freeze Position column only x .
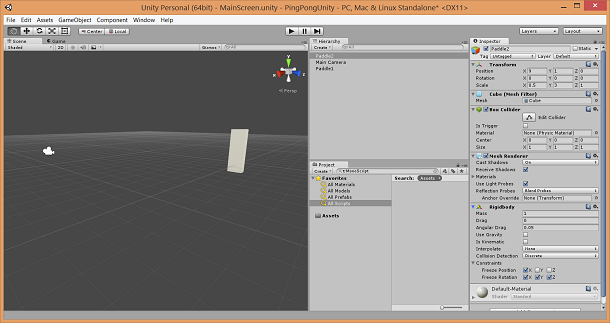
Figure 9. Rackets
Walls
For this game you also need to create two walls (top and bottom) so that the ball bounces off them and does not fly out of the field. For this we need cubic objects again. In the hierarchy window, click Create -> 3D Object -> Cube again. Name the created object WallBelow . It will be slightly longer than the racket, so in the scale column, specify the following values X: 23, Y: 1, Z: 1 . In the Position column, specify the following X: 0, Y: -5, Z: 0 .
To create a second wall, just copy the first one and rename it to WallAbove . Now just change the value of Y-Position to 7 .

Figure 10. Walls
Ball
It remains to create the last, most important object of the game - the ball. In the set of standard forms provided in Unity, is already necessary. In the hierarchy window, click Create -> 3D Object -> Sphere . Change the name to Ball , in the Position column enter the following values X: 0, Y: 1, Z: 0 . In order for the ball to move as needed, you must enable the RigidBody restrictions by clicking on the Add Components button and uncheck Use gravity .

Figure 11. Ball
Changing the viewing angle and scene lighting
So far, the angle is selected unsuccessfully. To fix this, you need to change the camera settings. In the hierarchy window, select the standard Main Camera . Switch view format from 3D to 2D. This can be done in the Projection section. Instead of Perspective (3D), select Orthographic (2D) . Now the screen shows the vertical projection of the scene. Change the Size to 10 .
If you want to rotate the camera, click the axes icon.

Figure 12. Camera rotation can be enabled by clicking on the axes icon
We have installed all the necessary camera settings. However, the scene remains too dark. To add lighting, open the hierarchy window and click Create -> Light -> Directional Light. All changes are displayed in the game window.

Figure 13. The game window
Let's run the ball!
The field is ready, but all the objects are still in place. If you now start the game, the ball will fall down and this will all end. To fix this, just add a few lines of C # code to the game. Click the Create button in the project window and create a new script file called Ball for a C # program. Drag it onto the ball in the hierarchy window or in the scene display window to link it to the game object. Now when you select a ball in the properties window, information about the script file will appear.
Double-clicking the C # file opens the selected development environment (MonoDevelop or Microsoft Visual Studio). Each newly created file contains an automatically implemented standard class. It is called MonoBehavior and is the interface for the Unity API. The Start method performs initialization and preparation for the start of the game. The gaming environment, like a TV, processes several images per second. One image is called frame. The Update method is run each time before the frame is displayed. In this way, what we call the game loop is realized. That is, game objects can act independently of the player’s actions.
In our case, you need to set the direction of the ball at the beginning of the game. This can be done in the Start method. See program snippet below.
using UnityEngine; public class Ball : MonoBehaviour { private float _x; private float _y; // void Start () { _x = GetRandomPositionValue(); _y = GetRandomPositionValue(); GetComponent<Rigidbody>().velocity = new Vector3(Random.Range(5,10) * _x, Random.Range(5,10) * _y, 0); Debug.Log("x: " + _x); Debug.Log("y: " + _y); } private float GetRandomPositionValue() { if (Random.Range(0, 2) == 0) { return -1; } return 1; } // void Update () { } } Code snippet 1. Choosing the direction of the ball. Implementation in C #
Component section - the most informative part of the implementation. Each game logic has its own component. In the above code snippet, the GetComponent method is used to access the Rigidbody component of the current game object. Rigidbody is responsible for the effect of gravitational forces on an object. In the program, we create a new vector Vector3 and assign it to velocity (velocity, Rigidbody property). The coordinates of the vector are set randomly.
Starting the game again, we see that the ball now falls in an arbitrary direction. Facing the wall, it begins to move sideways, and we need it to bounce.
Let's use the Physic Material section and select the necessary physical properties for the ball. In the project window, click the Create button. Enter the name Bouncy . It remains only to change some properties in order to achieve the desired jumping ability of the ball. In the properties window, set the value to 0 for the Dynamic Friction and Static Friction parameters. For bounciness, enter 1 . Friction Combine should be as low as possible, and Bounce Combine as high as possible.

Figure 14. Setting the physical properties of the material
To apply the selected settings to the game objects, you need to do the following. Click Edit -> Project Settings -> Physics . Drag a property set called Bouncy to the default property set of default material . Set the Bounce Threshold to 0.1 . Now the ball will jump like a rubber.

Figure 15. Setting the bouncy properties in the PhysicsManager window
Racket control with gestures
The game is almost ready. All objects are in place, and the ball moves as we wanted. It remains only to learn how to manage the rackets. For this, it is best to use a 3D camera - the latest input device, which is already widely used with Microsoft Xbox * and Kinect *, as well as embedded in some new Ultrabook models. 3D camera is not so expensive, so do not miss the opportunity to buy it. For software implementation, you need the Intel RealSense SDK . This kit can be downloaded for free. Examples of working with Unity are in the Intel RealSense SDK. See them after the installation is complete.

Figure 16. Examples from the Intel RealSense SDK
Unity 3D provides support for third-party plug-ins, as well as the Intel RealSense SDK. To connect the Intel RealSense SDK, add the SDK DLL files to the project. In the Unity window, click Assets -> Import package -> custom package .... Then select the RSUnityToolkit.unitypackage file located at C: \ Program files (x86) \ Intel \ RSSDK \ framework \ Unity. A dialog box will appear on the screen (see fig. 17). By default, all files are selected. To remove the selection, click None. Then select only the plug-in folder. When working with 64-bit systems, imported DLL files will also need to be replaced manually. They are located in the C: \ Program Files (x86) \ Intel \ RSSDK \ bin \ x64 folder .

Figure 17. Connecting the Intel RealSense SDK to Unity * using the package import feature
After connecting you can go to the implementation of the management rackets. Create another C # file. To do this, click the Create button in the project window. Name the file Paddle . For control of both rackets one common copy is enough. This is a significant point, since the Intel RealSense 3D Camera does not support connecting to multiple instances. Therefore, to connect a new file, simply drag it to the main camera object in the hierarchy window.
Then double-click the Paddles.cs file. Although it is connected to the main camera, for work we need game objects corresponding to the rackets. In Unity, the connection of several game objects is defined in their properties. In C #, you would have to define additional properties with get and set , which is not necessary in Unity. You only need to create for each racket a GameObject variable with a public access modifier, as shown in the example below. Now, to connect the objects of the game, just drag them to the properties of the created rackets.
public class Paddles : MonoBehaviour { public GameObject Paddle1; public GameObject Paddle2; .. Fragment 2. Automatically defined properties
To connect the camera in the Intel RealSense SDK implemented class PXCMSenseManager . The Start function will be called only once, so that it is best to perform all the preparatory actions. That is why we chose the Start function to initialize the PXCMSenseManager class. Gesture recognition is implemented in the QueryHand module, to which we refer to the program. A separate module is required for face and voice recognition. The declaration of the module instance (the _pxcmSenseManager variable) is outside the Start function. See program snippet below.
public class Paddles : MonoBehaviour { public GameObject Paddle1; public GameObject Paddle2; private PXCMSenseManager _pxcmSenseManager; private PXCMHandModule _pxcmHandModule; // private void Start() { _pxcmSenseManager = PXCMSenseManager.CreateInstance(); if (_pxcmSenseManager == null) { Debug.LogError("SenseManager Initialization Failed"); } else { pxcmStatus pxcmResult = _pxcmSenseManager.EnableHand(); if (pxcmResult != pxcmStatus.PXCM_STATUS_NO_ERROR) { Debug.LogError("EnableHand: " + pxcmResult); } else { _pxcmHandModule = _pxcmSenseManager.QueryHand(); _pxcmSenseManager.Init(); PXCMHandConfiguration configuration = _pxcmHandModule.CreateActiveConfiguration(); configuration.EnableAllGestures(); configuration.ApplyChanges(); configuration.Dispose(); } } } ... Code snippet 3. Connecting Intel RealSense 3D camera
Processing the queue of data from the camera is performed in the Update function (at each step of the game cycle), so that we can determine if the camera recognizes the hand or not. In our implementation, the left hand controls the left racket, right - right. The processing of actions for both hands is completely the same, so we will create a separate MoveBall function and pass it access to the data on the left or right hand as a parameter.
If a player ends the game or starts anew, you need to disable the instance associated with the camera. For this, we will use the OnDisable function, which Unity will automatically access.
// private void Update() { if (_pxcmSenseManager == null) { return; } _pxcmSenseManager.AcquireFrame(false, 0); _pxcmHandModule = _pxcmSenseManager.QueryHand(); PXCMHandData handData = _pxcmHandModule.CreateOutput(); handData.Update(); MoveBall(handData, PXCMHandData.AccessOrderType.ACCESS_ORDER_LEFT_HANDS, Paddle1); MoveBall(handData, PXCMHandData.AccessOrderType.ACCESS_ORDER_RIGHT_HANDS, Paddle2); _pxcmSenseManager.ReleaseFrame(); } private void MoveBall(PXCMHandData handData, PXCMHandData.AccessOrderType accessOrderType, GameObject gameObject) { PXCMHandData.IHand pxcmHandData; if (handData.QueryHandData(accessOrderType, 0, out pxcmHandData) == pxcmStatus.PXCM_STATUS_NO_ERROR) { PXCMHandData.JointData jointData; if (pxcmHandData.QueryTrackedJoint(PXCMHandData.JointType.JOINT_CENTER, out jointData) == pxcmStatus.PXCM_STATUS_NO_ERROR) { gameObject.GetComponent<Rigidbody>().velocity = new Vector3(-9, jointData.positionWorld.y*100f, 0); } } } private void OnDisable() { _pxcmHandModule.Dispose(); _pxcmSenseManager.Dispose(); } } Code 4 fragment. Racket control with gestures
Restart game
We created objects, wrote a program, now it is time to play. The racket will begin to move if it was possible to recognize the movement of the hand within 1–5 meters from the camera. Having hit a racket, the ball will bounce off and will move in the opposite direction. If the ball does not touch the racket and fly out of the field, it will not be possible to return it. In this case, it would be logical to start the game again.
To do this, just add a few lines of code in our file Ball.cs. Add a check for the presence of a ball on the field to the Update function. If the ball disappears from view, the Application.LoadLevel function will restart the game, as shown in the program below.
private bool _loaded; // void Update () { if (GetComponent<Renderer>().isVisible) { _loaded = true; } if (!GetComponent<Renderer>().isVisible && _loaded) { Application.LoadLevel(Application.loadedLevel); } } Code snippet 5. Ball.cs: launch of a new game when the ball disappears from view
Game publication
We have not tried in vain and created the first version of the game. Sharing it with others is easy. Click File | Build Settings (Ctrg + Shift + B). The assembly dialog box appears. It offers a huge selection of various platforms. We will use the Windows OS (x86_64 architecture). To start the compiler and create an * .exe file for Windows, just click Build . After that, to start the game, you will need an Intel RealSense 3D camera with the driver installed.
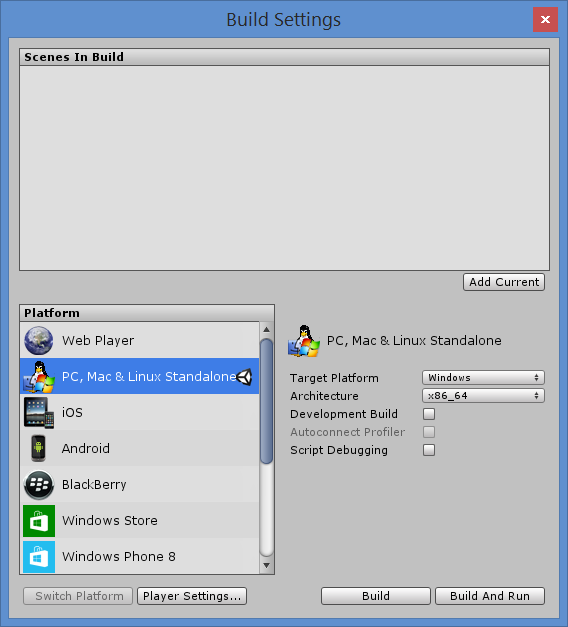
Figure 18. Compiling the game and creating an * .exe file
Now you
We have learned how to create the simplest game with Unity, but there are still so many ways to improve it! Try to modify it, add scoring, sounds and special effects. Upload videos to YouTube * and email me to show off your progress. I am sure you will have a great game. That's all, it's time to play!

Figure 19. Game

Figure 20. Game interface
Source: https://habr.com/ru/post/264577/
All Articles