Acceleration of image processing in Android
 The central processors and graphics cores of modern Android devices are capable of much. For example, their computing power can be directed to image processing.
In order to do this, you should pay attention to the technology OpenCL and RenderScript.
This material describes an example of an Android application, which shows high-performance image processing techniques using the programming languages OpenCL and RenderScript . These technologies are designed with a view to the possibility of graphics hardware designed for parallel data processing (shader units). They allow you to speed up work with significant amounts of data and solving problems involving a large number of command repetitions. Although, to speed up graphics processing in Android applications, you can use other technologies, this material discusses examples of building the application infrastructure and the implementation of graphical algorithms on OpenCL and RenderScript. It also covers the wrapper class for the OpenCL API, which allows you to simplify the creation and execution of applications that work with graphics and use OpenCL. Using source code of this class in your projects does not require licensing.
In preparing this material, it was assumed that his readers are familiar with the technologies OpenCL and RenderScript, and are proficient in programming techniques for the Android platform. Therefore, we will focus on consideration of mechanisms for accelerating processing or programmatically creating images.
')
In order to see the examples in the case, you need an Android device that is configured so that it can execute the OpenCL code. Below we will talk about how to organize a working environment for OpenCL development using Intel INDE and Android Studio.
Please note that the purpose of this article is to show the features of the OpenCL and RenderScript code, we are not talking about other technologies here. In addition, a material is planned on analyzing the performance of applications using OpenCL and RenderScript code, which is executed on video chips (GPU).
1.1 Application Interface
On the screen of the application in question, there are three switches with which you can choose between imaging subsystems using RenderScript, OpenCL or Android machine code. The menu allows you to switch between the execution of OpenCL code on a CPU (central processing unit) or on a GPU (graphic core). In addition, you can select a graphic effect from the menu. Target device selection is available only for OpenCL code. The Intel x86 platform supports running OpenCL on both the CPU and the GPU.
Below you can see the main screen of the application, which displays the effect of plasma, which is generated by means of OpenCL.
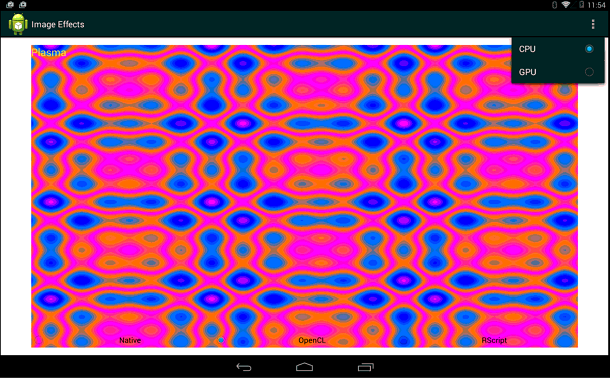
The main program window, the choice of the target device for the execution of OpenCL-code
Performance indicators are displayed in the upper right corner of the window. They are displayed for all three methods of working with graphics supported by the program.
Performance indicators include the number of frames per second (FPS), the frame rendering time (frame render) and the time it takes to calculate the effect (effect compute elapsed time).
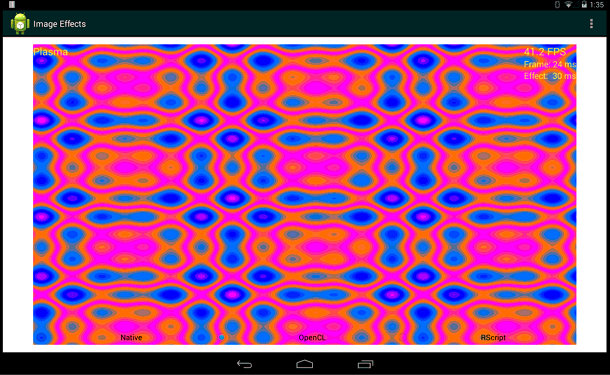
Performance indicators
Please note that this is just one example of performance. Indicators depend on the device on which the code is run.
1.2. APIs and SDKs used
In addition to the ADT (Android Development Tool, Android development tools that include the Android SDK), the sample development used the RenderScript SDK and the Intel OpenCL SDK designed to work in the Android environment.
Intel OpenCL SDK is based on the OpenCL specification and adheres to its provisions. This specification is an open, free-to-use cross-platform development standard. Details are on the Khronos website.
RenderScript appeared in ADT 2.2. (API Level 8). It is a platform for performing high-performance computing in the Android environment. RenderScript is mainly designed to perform tasks that allow parallel execution of calculations, however, it can also be used to benefit from calculations that are performed sequentially. Here you can find out more about RenderScript.
The latest version of ADT, available from Google’s open repository, includes packages that need to be imported in order to use RenderScript, JNI (Java Native Interface, Machine Code Java Interface) and a set of runtime APIs.
You can find more information about developing using RenderScript here , OpenCL materials - here .
1.3 Application Support Infrastructure Code
The infrastructure of the considered application consists of the main Activity and auxiliary functions. Here we look at these functions and the code used to configure the user interface, select a graphical effect, and for OpenCL, select the computing device that should be used.
Here are two main auxiliary functions.
The first, backgroundThread () , starts a separate thread of execution, from which a function is periodically called that performs a step-by-step application of the graphic effect. This function is taken from the application, which is discussed in the Getting Started with RenderScript , details about this example can be found here .
The second function, processStep () , is called from backgroundThread (). She , in turn, calls the commands for image processing. The function relies on the state of the switches to determine which algorithm implementation to use. In the processStep () function, depending on the state of the settings, methods are invoked for image processing using OpenCL, RenderScript or plain machine code written in C / C ++. Since this code is executed in a background thread, the user interface is not blocked, so you can switch between implementations of graphical algorithms at any time. When the user selects an effect, the application immediately switches to it.
// processStep() () . private void processStep() { try { switch (this.type.getCheckedRadioButtonId()) { case R.id.type_renderN: oclFlag = 0; // OpenCL stepRenderNative(); break; case R.id.type_renderOCL: oclFlag = 1; // OpenCL stepRenderOpenCL(); break; case R.id.type_renderRS: oclFlag = 0; // OpenCL stepRenderScript(); break; default: return; } } catch (RuntimeException ex) { // Log.wtf("Android Image Processing", "render failed", ex); } } 1.4 Definition of functions implemented in native code in Java
The application in question implements the NativeLib class, which defines the functions used to invoke machine-level commands using JNI that implement graphic effects. The appendix shows three effects: the plasma effect (plasma), toning the image in sepia (sepia) and bleaching (monochrome). Accordingly, the class defines the renderPlasma (...) , renderSepia (...) and renderMonoChrome (...) functions . These Java functions play the role of JNI entry points, by means of which either the functionality implemented in the machine code or the OpenCL version of the graphical algorithms is called.
The corresponding JNI function, when running a selected graphic effect, either executes code written in C / C ++, or sets up and executes a program on OpenCL. The described class uses the android.graphics.Bitmap and android.content.res.AssetManager packages. Bitmap objects are used to send graphic data to the processing subsystem and to get results. An application uses an object of the AssetManager class to access OpenCL files (sepia.cl, for example). These files describe OpenCL kernels (kernels), which are functions that implement graphical algorithms.
Below is the code for the NativeLib class. It can be easily expanded to add additional graphical effects, as indicated by the comment // TODO.
package com.example.imageprocessingoffload; import android.content.res.AssetManager; import android.graphics.Bitmap; public class NativeLib { // libimageeffects.so public static native void renderPlasma(Bitmap bitmapIn, int renderocl, long time_ms, String eName, int devtype, AssetManager mgr); public static native void renderMonoChrome(Bitmap bitmapIn, Bitmap bitmapOut, int renderocl, long time_ms, String eName, int simXtouch, int simYtouch, int radHi, int radLo, int devtype, AssetManager mgr); public static native void renderSepia(Bitmap bitmapIn, Bitmap bitmapOut, int renderocl, long time_ms, String eName, int simXtouch, int simYtouch, int radHi, int radLo, int devtype, AssetManager mgr); //TODO public static native <return type> render<Effectname>(…); // static { System.loadLibrary("imageeffectsoffloading"); } } Notice that the Android objects AssetManager and BitMap are passed to the machine code as input and output parameters. The AssetManager object is used by machine code to access CL files that describe OpenCL kernels. The BitMap object contains pixel data that is processed in native code. The same data type is used to return the processing result.
The deviceType user interface parameter is used to specify the target device on which the OpenCL code will be executed - CPU or GPU. To achieve this flexibility, the Android OS must be properly configured. Modern Intel Atom and Intel Core processors can execute OpenCL instructions both independently and using graphics chips embedded in the system.
The eName parameter specifies which OpenCL kernel to compile and run. In the application, each graphic effect has its own JNI function; as a result, the transfer of the kernel name may seem unnecessary. However, in one CL-file (the same applies to the JNI-function) you can encode several similar graphical algorithms. In this situation, the eName parameter could be used to indicate which particular CL program (or kernel) needs to be compiled and loaded.
The renderocl parameter plays the role of a flag indicating whether to execute OpenCL code or machine code written in C / C ++. Its value is interpreted as true if the user has activated the OpenCL switch, otherwise the flag remains unchecked.
The time_ms parameter is used to transmit the timestamp (in milliseconds), which is used to calculate performance metrics. The effect of plasma, moreover, is guided by this value in the step-by-step calculation of the image.
Other arguments reflect the features of the implementation of graphic effects, in particular, the radial expansion of the treated area. For example, the parameters simXtouch , simYTouch , radLo and radHi , together with the width and height values, are used in the effects of tinting an image into sepia and bleaching. With their use, calculation and display of how image processing begins at a certain point, after which the area expands radially until it fills the entire image.
1.5 Definitions and resources needed to run machine code (C or OpenCL)
Here we look at the definitions of machine JNI functions that implement the effects shown in the example. As already mentioned, each effect corresponds to one function. This is done in order not to complicate the narration and more clearly distinguish the functional elements used in accelerating image processing using OpenCL.
There are links to code written in C, fragments of this code are included here. This is done in terms of comparing the performance of the technologies under consideration in future versions of the example.
One JNI function corresponds to a single Java machine function. Therefore, it is very important that the JNI functions are correctly declared and defined. The Java SDK has a javah tool that helps generate correct and accurate declarations of JNI functions. This tool is recommended to use in order not to fall into difficult situations when the code is compiled correctly, but gives runtime errors.
The following shows the JNI functions corresponding to the lower level functions for accelerated image processing. Function signatures are generated using the javah tool.
// JNI-, // #ifndef _Included_com_example_imageprocessingoffload_NativeLib #define _Included_com_example_imageprocessingoffload_NativeLib #ifdef __cplusplus extern "C" { #endif /* * Class: com_example_imageprocessingoffload_NativeLib * Method: renderPlasma * Signature: (Landroid/graphics/Bitmap;IJLjava/lang/String;)Ljava/lang/String; */ JNIEXPORT void JNICALL Java_com_example_imageprocessingoffload_NativeLib_renderPlasma (JNIEnv *, jclass, jobject, jint, jlong, jstring, jint, jobject); /* * Class: com_example_imageprocessingoffload_NativeLib * Method: renderMonoChrome * Signature: (Landroid/graphics/Bitmap;Landroid/graphics/Bitmap;IJLjava/lang/String;)Ljava/lang/String; */ JNIEXPORT void JNICALL Java_com_example_imageprocessingoffload_NativeLib_renderMonoChrome (JNIEnv *, jclass, jobject, jobject, jint, jlong, jstring, jint, jint, jint, jint, jint, jobject); /* * Class: com_example_imageprocessingoffload_NativeLib * Method: renderSepia * Signature: (Landroid/graphics/Bitmap;Landroid/graphics/Bitmap;IJLjava/lang/String;)Ljava/lang/String; */ JNIEXPORT void JNICALL Java_com_example_imageprocessingoffload_NativeLib_renderSepia (JNIEnv *, jclass, jobject, jobject, jint, jlong, jstring, jint, jint, jint, jint, jint, jobject); } #endif The javah tool can generate the correct JNI function signatures. However, the class or classes that define Java machine functions should already be compiled in the Android project. If you need to generate a header file, you can use the javah command like this:
{javahLocation} -o {outputFile} -classpath {classpath} {importName}
In our example, the function signatures were created with the following command:
javah -o junk.h -classpath bin \ classes com.example.imageprocessingoffloading.NativeLib
The signatures of the JNI functions from the junk.h file were then added to the imageeffects.cpp file, which implements the preparation and launch of OpenCL or C code. Next, we allocate the resources needed when running OpenCL or machine code for plasma effects, bleaching, toning in sepia.
1.5.1 Plasma effect
The Java_com_example_imageprocessingoffload_NativeLib_renderPlasma (...) function is the entry point for the execution of OpenCL or machine code that implement the plasma effect. The functions startPlasmaOpenCL (...) , runPlasmaOpenCL (...) , and runPlasmaNative (...) are external to the code from the imagee imageeffects.cpp file, they are declared in a separate plasmaEffect.cpp file. The source code of plasmaEffect.cpp can be found here .
The renderPlasma (...) function, which is the entry point, uses an OpenCL wrapper to query Android for OpenCL support. It calls the wrapper class function :: initOpenCL (...) to initialize the OpenCL environment. As a device type, when creating an OpenCL context, it is passed to a CPU or GPU. The Android resource manager uses the ceName parameter to identify, load, and compile a CL file with the required kernel.
If you succeed in successfully setting up the OpenCL environment, the next step for the renderPlasma (...) function is to call the startPlasmaOpenCL () function, which allocates OpenCL resources and starts the execution of the kernel that implements the plasma effect. Note that gOCL is a global variable that holds an instance of the wrapper class of OpenCL. This variable is visible to all JNI functions that are entry points. Thanks to this approach, the OpenCL environment can be initialized when accessing any of the supported graphic effects.
When demonstrating the plasma effect, no ready-made images are used. Everything that is displayed on the screen is generated programmatically. The bitmapIn parameter is a BitMap object that stores graphic data generated during the operation of the algorithm. The pixels parameter passed to the startPlasma (...) function is mapped onto a raster texture and is used by machine code or OpenCL core code to read and write pixel data that is displayed on the screen. Once again, we note that the assetManager object is used to access the CL file that contains the OpenCL core that implements the plasma effect.
JNIEXPORT void Java_com_example_imageprocessingoffload_NativeLib_renderPlasma(JNIEnv * env, jclass, jobject bitmapIn, jint renderocl, jlong time_ms, jstring ename, jint devtype, jobject assetManager) { … // // BitMapIn “pixels”, OpenCL- . ret = AndroidBitmap_lockPixels(env, bitmapIn, &pixels); … // If OCL not initialized AAssetManager *amgr = AAssetManager_fromJava(env, assetManager); gOCL.initOpenCL(clDeviceType, ceName, amgr); startPlasmaOpenCL((cl_ushort *) pixels, infoIn.height, infoIn.width, (float) time_ms, ceName, cpinit); else runPlasmaOpenCL(infoIn.width, infoIn.height, (float) time_ms, (cl_ushort *) pixels); … // } The external startPlasmaOpenCL (...) function creates and fills Palette and Angles buffers, which contain the data necessary to create a plasma effect. To run the OpenCL kernel responsible for this effect, the function relies on the OpenCL command queue, context, and kernel, which are defined as data members in a wrapper class.
The runPlasmaOpenCL (...) function continuously calls the OpenCL core, which generates a plasma image. A separate function is used once, when the OpenCL kernel is launched, subsequent kernel calls need only a new timestamp value in the input data. Due to the fact that for subsequent calls to the kernel you need to pass only an argument in the form of a timestamp, there is a need for an additional function.
extern int startPlasmaOpenCL(cl_ushort* pixels, cl_int height, cl_int width, cl_float ts, const char* eName, int inittbl); extern int runPlasmaOpenCL(int width, int height, cl_float ts, cl_ushort *pixels); extern void runPlasmaNative( AndroidBitmapInfo* info, void* pixels, double t, int inittbl ); The runPlasmaNative (...) function contains the implementation of the plasma effect creation algorithm on C. The inittbl argument is used as a logical one, its value indicates whether the Palette and Angles data sets are needed for the algorithm to work. OpenCL kernel code implementing the plasma effect can be found in the plasmaEffect.cpp file.
#define FBITS 16 #define FONE (1 << FBITS) #define FFRAC(x) ((x) & ((1 << FBITS)-1)) #define FIXED_FROM_FLOAT(x) ((int)((x)*FONE)) /* , */ #define PBITS 8 #define ABITS 9 #define PSIZE (1 << PBITS) #define ANGLE_2PI (1 << ABITS) #define ANGLE_MSK (ANGLE_2PI - 1) #define YT1_INCR FIXED_FROM_FLOAT(1/100.0f) #define YT2_INCR FIXED_FROM_FLOAT(1/163.0f) #define XT1_INCR FIXED_FROM_FLOAT(1/173.0f) #define XT2_INCR FIXED_FROM_FLOAT(1/242.0f) #define ANGLE_FROM_FIXED(x) ((x) >> (FBITS - ABITS)) & ANGLE_MSK ushort pfrom_fixed(int x, __global ushort *palette) { if (x < 0) x = -x; if (x >= FONE) x = FONE-1; int idx = FFRAC(x) >> (FBITS - PBITS); return palette[idx & (PSIZE-1)]; } __kernel void plasma(__global ushort *pixels, int height, int width, float t, __global ushort *palette, __global int *angleLut) { int yt1 = FIXED_FROM_FLOAT(t/1230.0f); int yt2 = yt1; int xt10 = FIXED_FROM_FLOAT(t/3000.0f); int xt20 = xt10; int x = get_global_id(0); int y = get_global_id(1); int tid = x+y*width; yt1 += y*YT1_INCR; yt2 += y*YT2_INCR; int base = angleLut[ANGLE_FROM_FIXED(yt1)] + angleLut[ANGLE_FROM_FIXED(yt2)]; int xt1 = xt10; int xt2 = xt20; xt1 += x*XT1_INCR; xt2 += x*XT2_INCR; int ii = base + angleLut[ANGLE_FROM_FIXED(xt1)] + angleLut[ANGLE_FROM_FIXED(xt2)]; pixels[tid] = pfrom_fixed(ii/4, palette); } 1.5.2 Image discoloration
The Java_com_example_imageprocessingoffload_NativeLib_renderMonochrome (...) function is the entry point for calling image discoloration functions implemented in native code or OpenCL tools. The functions executeMonochromeOpenCL (...) and executeMonochromeNative (...) are external to the code from imageeffects.cpp , they are declared in a separate file. As in the case of the plasma effect, the function that plays the role of an entry point uses an OpenCL wrapper to perform requests for OpenCL support to the Android device management subsystem. It also calls the function :: initOpenCL (...) , which initializes the OpenCL environment.
The following pair of lines of code shows that the executeMonochromeOpenCL (...) and executeMonochromeNative (...) functions are declared with the extern keyword. This makes them visible to the NDK compiler. This is necessary because these functions are declared in a separate file.
extern int executeMonochromeOpenCL(cl_uchar4 *srcImage, cl_uchar4 *dstImage, int radiHi, int radiLo, int xt, int yt, int nWidth, int nHeight); extern int executeMonochromeNative(cl_uchar4 *srcImage, cl_uchar4 *dstImage, int radiHi, int radiLo, int xt, int yt, int nWidth, int nHeight); Unlike the plasma effect, input and output images are used here. Both bitmapIn and bitmapOut are bitmaps in the ARGB_888 format. Both of them are mapped onto cl -buffers of cl_uchar4 type vectors . Notice that the typesIn and PixOut types are cast here , this is necessary so that OpenCL can map BitMap objects to the cl_uchar4 vector buffers .
JNIEXPORT void JNICALL Java_com_example_imageprocessingoffload_NativeLib_renderMonochrome(JNIEnv * env, jclass obj, jobject bitmapIn, jobject bitmapOut, jint renderocl, jlong time_ms, jstring ename, jint xto, jint yto, jint radHi, jint radLo, jint devtype, jobject assetManager) { … // // BitMapIn “pixelsIn”, OpenCL- . ret = AndroidBitmap_lockPixels(env, bitmapIn, &pixelsIn); // BitMapOut “pixelsOut”, OpenCL- ret = AndroidBitmap_lockPixels(env, bitmapOut, &pixelsOut); … // If OpenCL If OCL not initialized AAssetManager *amgr = AAssetManager_fromJava(env, assetManager); gOCL.initOpenCL(clDeviceType, ceName, amgr); else executeMonochromeOpenCL((cl_uchar4*) pixelsIn,(cl_uchar4*) pixelsOut, radiHi, radiLo, xt, yt, infoIn.width, infoIn.height); // , , OCL else executeMonochromeNative((cl_uchar4*) pixelsIn,(cl_uchar4*) pixelsOut, radiHi, radiLo, xt, yt, infoIn.width, infoIn.height); // OpenCL … // } When the executeMonochromeOpenCL (...) function is called , pixelsIn and pixelsOut are converted to the cl_uchar4 type of buffers and transmitted. This function uses the OpenCL API to create buffers and other resources needed for operation. It sets the kernel arguments and enqueues the commands necessary for the execution of the OpenCL kernel. The input image buffer is formed as a read-only buffer (read_only); it is accessed using the pixelsIn pointer. Kernel code uses this pointer to get the image input pixel data. This data, in turn, is processed by the kernel, the input image is discolored. The output buffer is a buffer that is intended for both reading and writing (read_write), it stores the results of image processing, pixelsOut points to it . For more information about OpenCL, see the Intel Programming and Optimization Guide .
In the function executeMonochromeNative (...), the image discoloration algorithm is implemented in C. It is a very simple algorithm that uses nested loops — an external (y) and internal (x), in which pixel data is processed, and the result is stored in the dstImage variable pointed to by pixoOut . The variable srcImage , which is indicated by pixelsIn , is used to obtain the input pixel data in the formula of the algorithm, where the color image is converted to monochrome.
Here is the OpenCL kernel code that implements the bleaching effect:
constant uchar4 cWhite = {1.0f, 1.0f, 1.0f, 1.0f}; constant float3 channelWeights = {0.299f, 0.587f, 0.114f}; constant float saturationValue = 0.0f; __kernel void mono (__global uchar4 *in, __global uchar4 *out, int4 intArgs, int width) { int x = get_global_id(0); int y = get_global_id(1); int xToApply = intArgs.x; int yToApply = intArgs.y; int radiusHi = intArgs.z; int radiusLo = intArgs.w; int tid = x + y * width; uchar4 c4 = in[tid]; float4 f4 = convert_float4 (c4); int xRel = x - xToApply; int yRel = y - yToApply; int polar = xRel*xRel + yRel*yRel; if (polar > radiusHi || polar < radiusLo) { if (polar < radiusLo) { float4 outPixel = dot (f4.xyz, channelWeights); outPixel = mix ( outPixel, f4, saturationValue); outPixel.w = f4.w; out[tid] = convert_uchar4_sat_rte (outPixel); } else { out[tid] = convert_uchar4_sat_rte (f4); } } else { out[tid] = convert_uchar4_sat_rte (cWhite); } } 1.5.3 Toning in sepia
The code for toning the image in sepia is very similar to the implementation of the bleaching algorithm. The main difference is how the pixel color information is processed. Other formulas and constants are used here. Below is the declaration of functions for calling algorithm implementations implemented by means of OpenCL and on C. As you can see, functions, with the exception of names, look the same as functions for calling implementations of the bleaching algorithm.
extern int executeSepiaOpenCL(cl_uchar4 *srcImage, cl_uchar4 *dstImage, it int radiHi, int radiLo, int xt, int yt, int nWidth, int nHeight); extern int executeSepiaNative(cl_uchar4 *srcImage, cl_uchar4 *dstImage, int radiHi, int radiLo, int xt, int yt, int nWidth, int nHeight); JNIEXPORT jstring JNICALL Java_com_example_imageprocessingoffload_NativeLib_renderSepia(JNIEnv * env, jclass obj, jobject bitmapIn, jobject bitmapOut, jint renderocl, jlong time_ms, jstring ename, jint xto, jint yto, jint radHi, jint radLo, jint devtype, jobject assetManager) { … } The code in Java_com_example_imageprocessingoffload_NativeLib_renderSepia (...) is also very similar to the one we saw for the bleaching algorithm, so it is not shown here.
When the executeSepiaOpenCL (...) function is called , it converts the values passed to it to the desired type and passes pixelsIn and pixelsOut in the format of cl_uchar4 buffers. It uses the OpenCL API to create buffers and other necessary resources. It also sets the arguments for the OpenCL core, enqueues the commands for execution. The input image buffer is formed as a read-only buffer (read_only); it is accessed using the pixelsIn pointer. Kernel code uses a pointer to get image pixel data. These data, in turn, are processed by the core, the input image is stained in sepia. The output buffer is a buffer that is intended for both reading and writing (read_write), it stores the results of image processing, pixelsOut points to it .
In the function executeSepiaNative (...) is the implementation of the algorithm of rendering to sepia in C. This is a simple algorithm consisting of a pair of nested loops — external (y) and internal (x). In the loop, the data is processed, the results are stored in the dstImage variable pointed to by pixelsOut . The srcImage variable pointed to by pixelsIn is used to obtain the input pixel data in the formula of the algorithm, where the color image is colored in sepia.
Below is the OpenCL kernel code for rendering an image in sepia.
constant uchar4 cWhite = {1, 1, 1, 1}; constant float3 sepiaRed = {0.393f, 0.769f, 0.189f}; constant float3 sepiaGreen = {0.349f, 0.686f, 0.168f}; constant float3 sepiaBlue = {0.272f, 0.534f, 0.131f}; __kernel void sepia(__global uchar4 *in, __global uchar4 *out, int4 intArgs, int2 wh) { int x = get_global_id(0); int y = get_global_id(1); int width = wh.x; int height = wh.y; if(width <= x || height <= y) return; int xTouchApply = intArgs.x; int yTouchApply = intArgs.y; int radiusHi = intArgs.z; int radiusLo = intArgs.w; int tid = x + y * width; uchar4 c4 = in[tid]; float4 f4 = convert_float4(c4); int xRel = x - xTouchApply; int yRel = y - yTouchApply; int polar = xRel*xRel + yRel*yRel; uchar4 pixOut; if(polar > radiusHi || polar < radiusLo) { if(polar < radiusLo) { float4 outPixel; float tmpR = dot(f4.xyz, sepiaRed); float tmpG = dot(f4.xyz, sepiaGreen); float tmpB = dot(f4.xyz, sepiaBlue); outPixel = (float4)(tmpR, tmpG, tmpB, f4.w); pixOut = convert_uchar4_sat_rte(outPixel); } else { pixOut= c4; } } else { pixOut = cWhite; } out[tid] = pixOut; } 1.6 , RenderScript
, RenderScript- ? , – , , , . Android- , .
MainActivity.java .
private RenderScript rsContext; rsContext RenderScript, RS-. RenderScript. RenderScript.
private ScriptC_plasma plasmaScript; private ScriptC_mono monoScript; private ScriptC_sepia sepiaScript; plasmaScript , monoScript , sepiaScript – -, RS-. Eclipse IDE Android Studio Java- rs-. , plasma.rs ScriptC_plasma , mono.rs – ScriptC_mono . sepia.rs ScriptC_sepia . RenderScript- , gen . , sepia.rs ScriptC_sepia.java . Java-, rs- , RenderScript-, . - - MainActivity.java.
private Allocation allocationIn; private Allocation allocationOut; private Allocation allocationPalette; private Allocation allocationAngles; Allocation RenderScript-. , allocationIn allocationOut . , allocationIn , allocationOut , RS- , , .
RenderScript-, , Activity . , , allocationPalette allocationAngle .
, RS-, RS-. initRS(…) .
protected void initRS() { … }; RenderScript, create RenderScript . , RenderScript, . RenderScript RS-. , RenderScript MainActivity . RenderScript.create(…) « this ».
rsContext = RenderScript.create(this); , RS-, RenderScript-, . , , initRS() , RenderScript- , .
if (effectName.equals("plasma")) { plasmaScript = new ScriptC_plasma(rsContext); } else if (effectName.equals("mono")) { monoScript = new ScriptC_mono(rsContext); } else if (effectName.equals("sepia")) { sepiaScript = new ScriptC_sepia(rsContext); } // stepRenderScript(…) , RenderScript- . RenderScript- RS-. stepRenderScript(…) , .
private void stepRenderScript(…) { … // if(effectName.equals("plasma")) { plasmaScript.bind_gPalette(allocationPalette); plasmaScript.bind_gAngles(allocationAngles); plasmaScript.set_gx(inX - stepCount); plasmaScript.set_gy(inY - stepCount); plasmaScript.set_ts(System.currentTimeMillis() - mStartTime); plasmaScript.set_gScript(plasmaScript); plasmaScript.invoke_filter(plasmaScript, allocationIn, allocationOut); } else if(effectName.equals("mono")) { // , int radius = (stepApply == -1 ? -1 : 10*(stepCount - stepApply)); int radiusHi = (radius + 2)*(radius + 2); int radiusLo = (radius - 2)*(radius - 2); // . monoScript.set_radiusHi(radiusHi); monoScript.set_radiusLo(radiusLo); monoScript.set_xInput(xToApply); monoScript.set_yInput(yToApply); // . monoScript.forEach_root(allocationIn, allocationOut); if(stepCount > FX_COUNT) { stepCount = 0; stepApply = -1; } } else if(effectName.equals("sepia")) { … // , } … // }; RenderScript-, , gPalette , gAngles , gx , gy gScript . RS , . plasma.rs . , rs_allocation , bind_<var> . , bind_<gvars> , allocationPalette allocationAngles RenderScript-. , , gx , gy , ts gScript, set_<var> , . , , RenderScript- , x, y , . invoke_filter(…) RenderScript. , , filter() , , , RenderScript.
, radius radiusHi radiusLo . , xInput yInput , . , , , , forEach_root() . forEach_root(…) –, , RenderScript. , radiusHi , radiusLo , xInput yInput . set_<var> .
RenderScript , .
RenderScript :
#pragma version(1) #pragma rs java_package_name(com.example.imageprocessingoffload) rs_allocation *gPalette; rs_allocation *gAngles; rs_script gScript; float ts; int gx; int gy; static int32_t intFromFloat(float xfl) { return (int32_t)((xfl)*(1 << 16)); } const float YT1_INCR = (1/100.0f); const float YT2_INCR = (1/163.0f); const float XT1_INCR = (1/173.0f); const float XT2_INCR = (1/242.0f); static uint16_t pfrom_fixed(int32_t dx) { unsigned short *palette = (unsigned short *)gPalette; uint16_t ret; if (dx < 0) dx = -dx; if (dx >= (1 << 16)) dx = (1 << 16)-1; int idx = ((dx & ((1 << 16)-1)) >> 8); ret = palette[idx & ((1<<8)-1)]; return ret; } uint16_t __attribute__((kernel)) root(uint16_t in, uint32_t x, uint32_t y) { unsigned int *angles = (unsigned int *)gAngles; uint32_t out = in; int yt1 = intFromFloat(ts/1230.0f); int yt2 = yt1; int xt10 = intFromFloat(ts/3000.0f); int xt20 = xt10; int y1 = y*intFromFloat(YT1_INCR); int y2 = y*intFromFloat(YT2_INCR); yt1 = yt1 + y1; yt2 = yt2 + y2; int a1 = (yt1 >> 7) & ((1<<9)-1); int a2 = (yt2 >> 7) & ((1<<9)-1); int base = angles[a1] + angles[a2]; int xt1 = xt10; int xt2 = xt20; xt1 += x*intFromFloat(XT1_INCR); xt2 += x*intFromFloat(XT2_INCR); a1 = (xt1 >> (16-9)) & ((1<<9)-1); a2 = (xt2 >> (16-9)) & ((1<<9)-1); int ii = base + angles[a1] + angles[a2]; out = pfrom_fixed(ii/4); return out; } void filter(rs_script gScript, rs_allocation alloc_in, rs_allocation alloc_out) { //rsDebug("Inputs TS, X, Y:", ts, gx, gy); rsForEach(gScript, alloc_in, alloc_out); } RenderScript :
#pragma version(1) #pragma rs java_package_name(com.example.imageprocessingoffload) int radiusHi; int radiusLo; int xToApply; int yToApply; const float4 gWhite = {1.f, 1.f, 1.f, 1.f}; const float3 channelWeights = {0.299f, 0.587f, 0.114f}; float saturationValue = 0.0f; uchar4 __attribute__((kernel)) root(const uchar4 in, uint32_t x, uint32_t y) { float4 f4 = rsUnpackColor8888(in); int xRel = x - xToApply; int yRel = y - yToApply; int polar = xRel*xRel + yRel*yRel; uchar4 out; if(polar > radiusHi || polar < radiusLo) { if(polar < radiusLo) { float3 outPixel = dot(f4.rgb, channelWeights); outPixel = mix( outPixel, f4.rgb, saturationValue); out = rsPackColorTo8888(outPixel); } else { out = rsPackColorTo8888(f4); } } else { out = rsPackColorTo8888(gWhite); } return out; } RenderScript- .
#pragma version(1) #pragma rs java_package_name(com.example.imageprocessingoffload) #pragma rs_fp_relaxed int radiusHi; int radiusLo; int xTouchApply; int yTouchApply; rs_script gScript; const float4 gWhite = {1.f, 1.f, 1.f, 1.f}; const static float3 sepiaRed = {0.393f, 0.769f, 0.189f}; const static float3 sepiaGreen = {0.349f, 0.686, 0.168f}; const static float3 sepiaBlue = {0.272f, 0.534f, 0.131f}; uchar4 __attribute__((kernel)) sepia(uchar4 in, uint32_t x, uint32_t y) { uchar4 result; float4 f4 = rsUnpackColor8888(in); int xRel = x - xTouchApply; int yRel = y - yTouchApply; int polar = xRel*xRel + yRel*yRel; if(polar > radiusHi || polar < radiusLo) { if(polar < radiusLo) { float3 out; float tmpR = dot(f4.rgb, sepiaRed); float tmpG = dot(f4.rgb, sepiaGreen); float tmpB = dot(f4.rgb, sepiaBlue); out.r = tmpR; out.g = tmpG; out.b = tmpB; result = rsPackColorTo8888(out); } else { result = rsPackColorTo8888(f4); } } else { result = rsPackColorTo8888(gWhite); } return result; } 1.7
OpenCL, .
Intel INDE . IDE, . – Android Studio. , , -, IDE, ( – Android SDK NDK, ), - – OpenCL- OpenCL-. Android-, . , Root-.
, , OpenCL Android . Eclipse IDE, , Android Studio.
Android Studio . , Android Studio, . , , Android SDK, NDK , Intel OpenCL.
, Android.mk , OpenCL-. :
INTELOCLSDKROOT="C:\Intel\INDE\code_builder_5.1.0.25" local.properties Android SDK NDK.
sdk.dir=C\:\\Intel\\INDE\\IDEintegration\\android-sdk-windows ndk.dir=C\:\\Intel\\INDE\\IDEintegration\\android-ndk-r10d Android-. Intel Nexus 7 x86. Android Virtual Device Manager.
, , , OpenCL. , Run Android Studio . , Serial Number. emulator-5554 .
Windows :
C:\Intel\INDE\code_builder_5.1.0.25\android-preinstall>opencl_android_install –d emulator-5554 OpenCL- , . , , Android Studio , , OK. .

OpenCL-
, OpenCL- .
, OpenCL, RenderScript-. Android Studio Eclipse- RenderScript Android . , , RenderScript. .
OpenCL-. OpenCL .
2. - OpenCL
- OpenCL API OpenCL-. , - API, OpenCL. . . .
class openclWrapper { private: cl_device_id* mDeviceIds; // OpenCL- (CPU, GPU, ) cl_kernel mKernel; // cl_command_queue mCmdQue; // CL- cl_context mContext; // OpenCL cl_program mProgram; // OpenCL- public: openclWrapper() { mDeviceIds = NULL; mKernel = NULL; mCmdQue = NULL; mContext = NULL; mProgram = NULL; }; ~openclWrapper() { }; cl_context getContext() { return mContext; }; cl_kernel getKernel() { return mKernel; }; cl_command_queue getCmdQue() { return mCmdQue; }; int createContext(cl_device_type deviceType); bool LoadInlineSource(char* &sourceCode, const char* eName); bool LoadFileSource(char* &sourceCode, const char* eName, AAssetManager *mgr); int buildProgram(const char* eName, AAssetManager *mgr); int createCmdQueue(); int createKernel(const char *kname); // int initOpenCL(cl_device_type clDeviceType, const char* eName, AAssetManager *mgr=NULL); }; ::createContext(cl device) . , (CPU GPU), , OpenCL . , OpenCL. OpenCL. , , SUCCESS ( mContext ). , , OpenCL, FAIL.
::createCmdQue() , OpenCL-. mContext . SUCCESS ( mCmdQue ). , , createContext(…) , FAIL.
::buildProgram(effectName, AssetManager) . ( effectName ) Android JNI. OpenCL-, . - (inline) OpenCL-. NULL . , effectName , , . , OpenCL-, , . , , – OpenCL-. , OpenCL- , – , API OpenCL- .
- buildProgram(…) OpenCL API clCreateProgramWithSource(…) . API , OpenCL- . . OpenCL . , clCreateProgramWithSource(…) .
- clBuildProgram(…) , clCreateProgramWithSource(…) clCreateProgramWithBinary(…) . , , OpenCL-. - , clGetProgramBuildInfo(…) . -.
::createKernel(…) . SUCCESS. mKernel , , , .
::getContext() , ::getCmdQue() ::getKernel() , , , . JNI , OpenCL-.
Results
OpenCL-, Android-. OpenCL RenderScript. , , . OpenCL , , , . , .
Source: https://habr.com/ru/post/263843/
All Articles