Spy stuff in Wolfram Language, or how to hide anything in the picture
Translation of John McLoone's post " Doing Spy Stuff with Mathematica ".
The code given in the article can be downloaded here .
Many thanks to Kirill Guzenko KirillGuzenko for help with the translation.
I read about the problems of IT recently arrested, as stated, Russian spies. It was said that they did not use the most reliable digital steganography tools ( wikis ). And it became interesting to me - how quickly I can realize steganography through digital images in Mathematica , using a method known as least significant bit insertion .
The idea of steganography is based on hiding messages in some other information in such a way that no one will notice the fact of communication. The word itself comes from a Latin-Greek combination, meaning "secretive letter"; this term was called the process of applying a secret message to a bald head of a person, on which hair then grew and thereby hid the message. In the case of digital steganography, everything is done through mathematics.
The first thing we need to do is choose some kind of innocent-looking image to transfer it to our spy bosses, perhaps through some kind of public online forum. This picture should not cause suspicion if we place it on the discussion site about the poultry industry:

')

Surprisingly, however, it is possible to embed another, larger full-color image into this image and get it back with a dozen lines of code in Mathematica .
The key idea is to use the low-order bits in each color channel of each pixel as the place where the information is hidden. We begin by assigning the value 0 to all these bits, applying the binary word 11111110 to each byte through And .
We have to force Mathematica to use strictly 8 bits per channel, because it works by default in a much more accurate color space, that is, we will use the “Byte” service word in some places of our code.
In fairly complex images, the human eye cannot detect the loss of information. That is, the fact that a certain color channel of an individual pixel has become darker or lighter than before at 1/256 is simply impossible to detect.

Even if you subtract the truncated version from the original, in order to show only the values of the differences, you will still not see anything, unless you have a very keen eye and a very good monitor.

And only if you unscrew the contrast to the maximum, then we will see that the difference is not equal to zero.
Next, we must convert our secret message into a sequence of bits and insert them into the zeroed bits in the carrier image. It turns out a bit per channel, that is, three per pixel for an RGB image.
To encode characters into their corresponding numbers in ASCII, we will use the ToCharacterCode function:
Then we get their binary representations, while maintaining at 8 bits per number, adding zeroes at the beginning if necessary (otherwise we will not know where one byte ends and the other begins).

Then we add zeros to the list in order to align with the total number of pixel channel values in which we will hide information (width * image height * 3 RGB channels) . Now that we have the right number of bits, we will transform the data according to the image resolution and add it to the carrier image with the bits cleared.
Here are all these operations together:

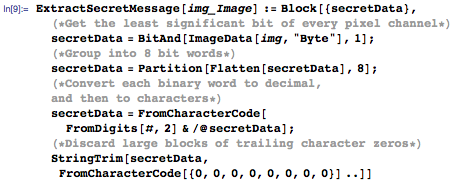
To accomplish the reverse process, we must take the low-order bits from each pixel channel and group them into words of 8 bits, and then convert them back to text.
Let's test:

And the reverse process:
The image should be exported to a lossless format, such as PNG, with the original image size. Any conversion to a lossy format, such as a JPG, or a change in scale destroys information in the low-order bits, where we store our secret message.
The image of Matilda's chicken consists of 450 * 450 pixels and has three color channels. This means that we can transfer 450 * 450 * 3/8 characters. Over 75,000. More than enough to convey the entire text of Alice's Adventures in Wonderland.
We can add no more information than we deleted. The file will still be the same size and visually exactly the same.
In fact, on average, half of the pixel channels have the same values as in the original image, about a quarter of the pixel channel values are one bit less than the original, about a quarter are one bit more, that is, our image is closer to the original than the truncated version.


We get a solution for transmitting any information that can be represented in 8-bit ASCII. Mathematica for such tasks contains a set of tools , so that in order to send a message consisting of a richer character set, we can do this:

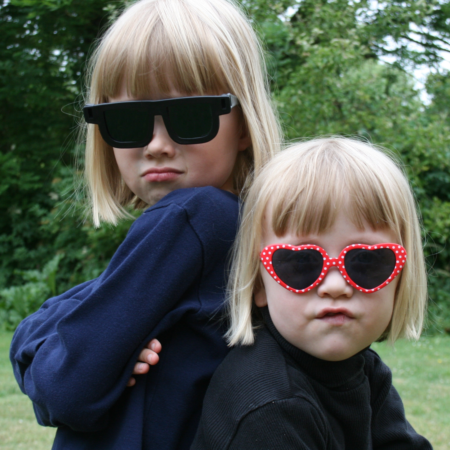
We can use ASCII conversion to insert files or data in special formats. For example, we can insert an image. Here we import the PNG file, and then re-encode it into an ASCII string of the JPG format.

This string, thanks to JPG compression, contains only 32,000 characters, a little less text about Alice - it's amazing how easy it is to hide the whole image! We can export the image to any format without loss; all that matters is that the secret image is encoded in JPG, and this should be taken into account when decoding and interpreting.

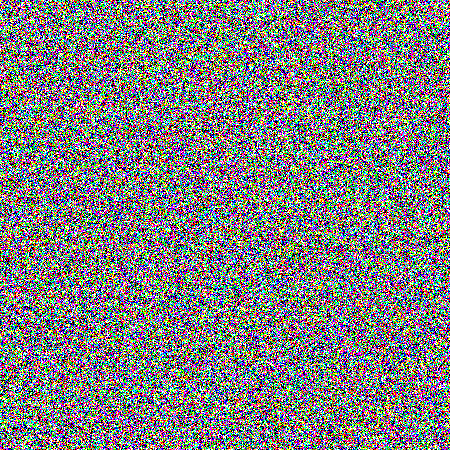
The carrier image still looks the same to us, although the secret image of Agent H and Agent B is now hidden in it:
None of the above is cryptographic safe; this is just a way to transfer information unnoticed. Cryptographic methods must be applied to the most secret message before inserting it into the carrier image. And, of course, none of this will help if you are not sure of the recipient, who may already be under surveillance, or who is “smart enough” to ask an FBI agent under cover to monitor your laptop.
Source: https://habr.com/ru/post/263783/
All Articles