Office as Platform issue 1: an introduction to how a billion Microsoft Office users become your users
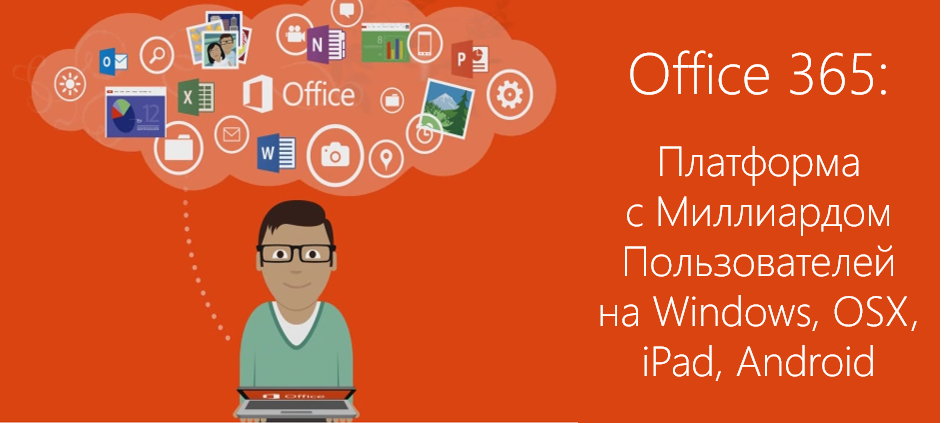
More than a billion people around the world use Microsoft Office 365 apps today. It is the largest platform that is available on a variety of devices, from large desktops to miniature smartphones. With the release of new versions of Office 365, all these users become your users as well, since the new platform features allow you to integrate developer solutions directly into the workflow of all office applications! Thanks to the cross-platform office, and its HTML5-based API, your applications can run on all platforms, including iOS, Andoird and Windows tablets. I am pleased to welcome the first post from Alexandra Bogdanova in a special column of development for Office 365. - Vladimir Yunev, technical evangelist, Microsoft Russia
Well, we already have wonderful columns about the web and ASP.NET , I decided to support this movement and start a new cycle of articles about Office 365. New office APIs, application creation, various alternative scenarios of office use - all this in the “Office as a platform. ”
In addition to a whole set of various office applications and services, Office 365 provides interesting opportunities for developers. Here is a brief description of the main innovations and features of Office 365. Today, we will learn more about the development tools for Office 365 and look at a few examples of applications for Excel and Word.
')
What can Office 365 offer for developers?
Firstly, Office 365 has an API that allows you to integrate your office into applications and thereby expand their file handling functionality. The Office 365 API provides a large number of opportunities for working with mail, sharing files, calendars and contacts. Also pleased that the API is available not only for Windows / Windows Phone, but also for Android and iOS.
Secondly, you have the opportunity to expand the standard features of office programs by writing various "add-ons". For example, you can add the ability to play video files directly into Outlook, embed Bing maps into your report, or somehow process the input files.
Well, let's start to dive into the world of office applications just by exploring the "add-ons" for applications.
How do office applications work?
The simplest office application consists of a static web page and an application manifest in XML format. HTML page can be placed on any web server or service, for example, in Microsoft Azure . The manifest file must point to the location of the web page, it must be published in the public Office Store, the internal SharePoint list, or on a network share. The manifest also defines the parameters and capabilities of the application, such as the URL of the web page on which the user interface and program logic is implemented, the name, description, identifier, version and locale of the application, the level of permissions and data access requirements for this application.

What features can we use when creating office applications?
- Provide an interactive user interface and custom logic through JavaScript.
- Use javascript platforms such as jQuery.
- Connect to REST endpoints and web services via HTTP and AJAX.
- Run server-side code or logic if the page is created using a server-side scripting language, such as ASP or PHP.
The overall structure of office applications is clear. Now let's see how we can separate applications depending on their functionality.
Types of office applications
Office applications can be divided into three types:
Note All these applications can be run both on desktop versions of Office, and on mobile in tablets Windows, iOS, Android! In addition, the Outlook extension can also work in the online versions of Oultook.com and Outlook from Office 365 in the user's browser!
Task pane applications
Task pane applications work in parallel with an Office document and provide contextual information and functionality to make it easier to view and create documents. For example, a task pane application can search and retrieve product information from a web service based on the product name or item code selected in the document.

Content Applications
Content applications allow you to create attractive data visualizations on the Internet, use the built-in multimedia capabilities (such as YouTube’s video player or image gallery), as well as other external content.

Mail applications
Mail applications can work with e-mail messages (view, create, delete letters), calendars (create and delete events and appointments). Mail applications can analyze data from the letter and work with them, for example, “isolate” the address from the letter and automatically apply it to the Bing card.

What you need to create office applications
You can create applications using both Visual Studio and the Napa application development tool. Napa Development Tools for Office 365 is a web-based environment that allows you to create projects, write code, and run applications in a browser. Additionally, you do not need to install anything - all the work on the application is done in the browser window.
If you are accustomed to creating applications in Visual Studio, then for this you can use a special template containing all the files necessary for creating and testing applications.
Of course, there is another way - to create applications in a text editor. In case you have chosen this method, you need to create 4 files:
- An HTML file that implements the user interface of the application.
- An XML manifest file that defines the metadata needed to display and launch an application in Word or Excel.
- A CSS file defining a style sheet in an application.
- The project.js file containing JavaScript programming logic that can use the JavaScript API for Office (Office.js).
We will not stop creating applications in a text editor, but get acquainted with the Napa development tool, and then create the application in Visual Studio.
Create an office application in the Napa development tool.
To create an application in the Napa development environment, you need:
- Office 365 account (subscription for developers);
- Napa Development Tools for Office 365 application.
If you have not come across Office 365 before and with development for it, then start by creating a developer site. You can read about how to do this in the detailed instructions here .
The first thing you need to do is to go to the developer’s website and click on the “create application” icon

Select the type of application you want to create — mail, content, task pane application, or SharePoint application. For example, let's create a content application.

After creating the application, a page will open on which the application files will be displayed on the left side of the screen, in the center - the application code.

Here you can add the necessary code, compile the application, change its properties and download to the office application store. By default, when you start the application (to start, click on the "play" button on the left side of the panel), an additional tab will open with Excel Online, with the ability to test the created application. You can change the application for which you are writing an add-in in Properties ( Properties) -> Run ( Run) on the left panel.
Let's begin to modify the standard example. We will create an application that will upload images from the Flickr service. Add the Images section to the Html page (under the Content section) and change the name of the get-data-from-selection button to "Search by Flickr". The full body code of the Html page you can see under the spoiler.
Hidden text
<body> <!-- Page content --> <div id="content-header"> <div class="padding"> <h1> Welcome!</h1> </div> </div> <div id="content-main"> <div class="padding"> <p><strong> Add home screen content here.</strong></p> <p>For example :</p> <button id="get-data-from-selection">Search Flickr</button> <p style="margin-top: 50px;"> <a target="_blank" href="http://go.microsoft.com/fwlink/?LinkId=276812"> Find more samples online... </a> </p> </div> <div> <div id="Images" style="height:800px; overflow:scroll"> </div> </body> Add in your project JS file a function that will display images related to the selected text.
Hidden text
function showImages(selectedText) { $('#Images').empty(); var parameters = { tags: selectedText, tagsmode: "any", format: "json" }; $.getJSON("https://secure.flickr.com/services/feeds/photos_public.gne?jsoncallback=?", parameters, function (results) { $.each(results.items, function (index, item) { $('#Images').append($("<img />").attr("src", item.media.m)); }); } ); } Do not forget to initialize it in the getDataFromSelection () function .
That's it, the application is ready. Run it in Microsoft Word and enjoy beautiful photos. I've been trained on cats)

So, I hope you got an idea of what Napa is and how to use it when creating office applications. I’m used to creating code in Visual Studio, then we’ll see how to create applications with it.
Create an office application in Visual Studio
What you need when creating office applications in Visual Studio:
- Visual Studio (since 2012) version
- Office tools for Visual Studio (for the 2013 version can be downloaded here )
Create a new project. From the list of available projects, select Visual C # or Visual Basic, then Office / SharePoint -> Applications -> Application for Office . As with creating applications with Napa, you need to choose the type of application you will create. Let me remind you that you choose from the mail, content and application task pane. Then, specify in which applications your Word should work: Word, Excel, Power Point.

Let's see how to create an application that will add data to an Excel workbook cell.
To start, open the file Home.html, which is located on the path App -> Home -> Home.html
Add a link to the jQuery library to the top of the file:
<script src="//code.jquery.com/jquery-1.11.2.min.js"></script> Inside the <body> tag, add the <div> element, write the inscription: "Our first office application." Also, do not forget to add a button, by clicking on which, the inscription will be added to the cell.
<div> </div> <button id="writeDataBtn"> </button><br /> In the Home.js file, add the function responsible for adding the label to the cell, as well as the call handler for this function.
The function of adding a label to a cell will look like this:
function writeData() { Office.context.document.setSelectedDataAsync(" ", function (asyncResult) { if (asyncResult.status === "failed") { writeToPage('Error: ' + asyncResult.error.message); } }); } When you start the application, a panel with the created application will open on the right side of the sheet. If you did everything correctly, then when you click on the button, as expected, text will be added to the selected cell.

The simplest application is ready. Let us turn to the issue of distribution created office applications.
Application Publishing
When we create a mobile application, the question of how to distribute it usually does not arise, because, as a rule, we choose a reliable and proven way to distribute applications through the appropriate application stores. For office applications, things are not so obvious. In general, there are 4 ways to distribute an office application:
Office Store. It is a convenient place for developers to download new applications designed for both consumers and companies. In fact, it is analogous to the usual application store for us.
Application Catalog for Office in SharePoint. You can customize application catalogs directly for your company by setting up your mini office application store.
Exchange directory. It is a private directory for email applications that are accessible to users of the Exchange server where they are stored. With it, you can publish and manage corporate email applications, including your own applications and applications in the Office Store, licensed for corporate use.
Application directory shared network folder. IT departments and developers can also deploy applications to a shared network folder where the manifest files are stored. Users can receive applications by specifying this shared folder as a trusted directory, or, in case this package is like a trusted directory.
You can publish in any way both the application created in Napa, and the application created in Visual Studio.
The process of publishing an application consists of three steps, which differ slightly depending on how you create the application. For applications created with Napa, you first need to package the application, then place its files on the web server, and then upload the application's XML manifest file to the Office Store.
For applications from Visual Studio, the order is as follows: configure the application's publishing page, then package and publish the application (download the application's XML manifest file to the Office Store). Read more about the publication procedures here .
Conclusion
We got acquainted with the basics of creating office applications and looked at the simplest examples - we created an application for Word in a special Napa environment and worked with cells in an Excel workbook based on a template for creating office applications in Visual Studio. Create various "add-ins", simplify work with data, integrate search engines - adjust Office 365 to the needs of you and your company. Use the Office 365 platform to access a billion new users for your solution!
Additional links for those interested
You can view the main documentation for creating office applications on the Office Development Center portal , or you can download examples of ready-made applications.
In addition, you may find the following materials useful: the Office 365 extension is a guide for architects , the new Office 365 Patterns & Practices materials, the development of native iOS applications with the Office 365 SDK, and the work with the Office 365 API for application development.
about the author

Alexandra Bogdanova, project manager, Customer and Partner Experience, Microsoft Russia. Participant of various conferences, meetings, hackathons, including Microsoft Developer Tour and Microsoft Developer Conference.
Source: https://habr.com/ru/post/262771/
All Articles