Synth synthesizing on the example of Korg Monotron

Heading is a modification that allows you to control a synthesizer using standard midi-commands transmitted from an external source. This makes it possible to connect a midi-keyboard or some other midi-controller as an input device.
Once, a real analogue synthesizer Korg monotron fell into my hands. Despite its toy shape, the device contained on board the entire minimum of settings, allowing you to dive into the world of analog synthesis. So, spending the evenings rotating the knobs and experimenting with the LFO generator and cuttoff filter, I began to catch myself thinking that something was clearly not enough. Indeed, the resistive film that plays the role of a keyboard is a very original and compact solution. But any attempts to perform some meaningful game on the instrument are doomed to failure. It turns out, and apply this synth can only as a squeaker. On the other hand, the situation could have been saved by the presence of a MIDI port and the connection of an external keyboard, but alas, it was absent.
')
As it turned out, midi synthesizer is not so difficult.
A quick surf through the Internet brought at once several pleasant surprises: firstly, the documentation for the synthesizer is publicly available, and anyone can easily find a schematic diagram. Secondly, the developers carefully brought out the points for CV / GATE management.

For those who do not know: CV / Gate (Control Voltage / Gate) is one of the most common methods for controlling analog synthesizers. The control voltage (CV) set the pitch / effect depth, and the trigger (Gate) controlled the sound output depending on whether the note was pressed. All you need is a small adapter that reads the midi-command and converts it into control voltage. What I actually realized.
Iron
Everything is quite trivial: I decided not to bother much and use the arduino that my beloved and hated by many people use to control. Under the arm turned up arduino nano, lying around idle. There was, of course, the temptation to use a miniature pro mini or even put 328 mega with a minimum body kit, but, foreseeing hemorrhoids with debugging and finishing the firmware, decided not to be greedy and stopped at nano.
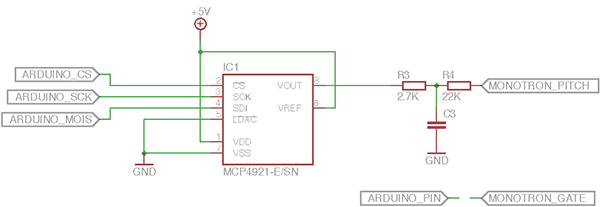
CV OUTPUT
On SPI, I connected the mcp4921 12-bit DAC that was lying around idle, which should later control the voltage that sets the pitch of the oscillator (PITCH).
MIDI INPUT
Alas, there are no revelations here. It is a typical circuit switching midi-signal.
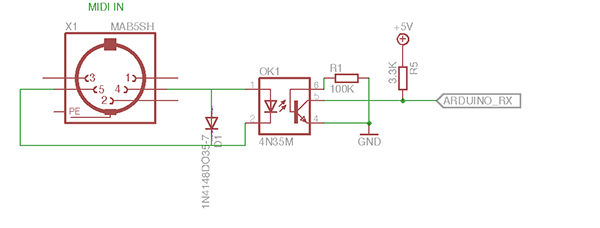
It remains to hang GATE on any free pin.
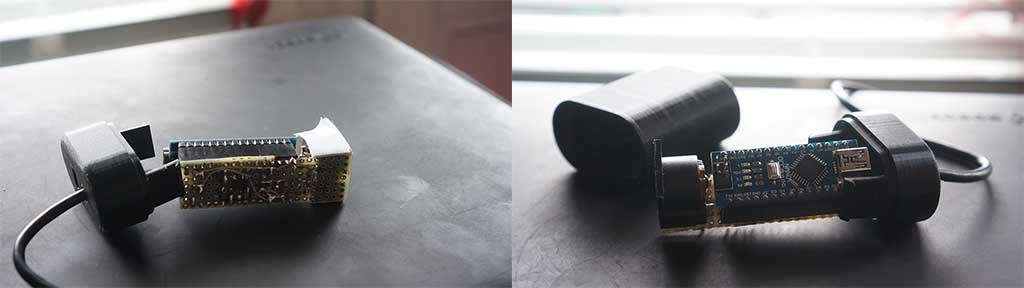
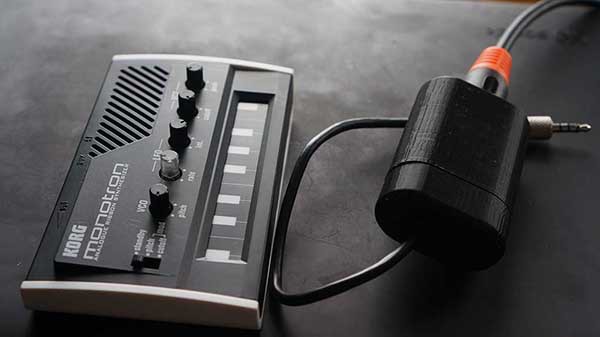
The result was such an adapter.
Now it's time to pump the synthesizer itself. In fact, you just need to display 4 pins:
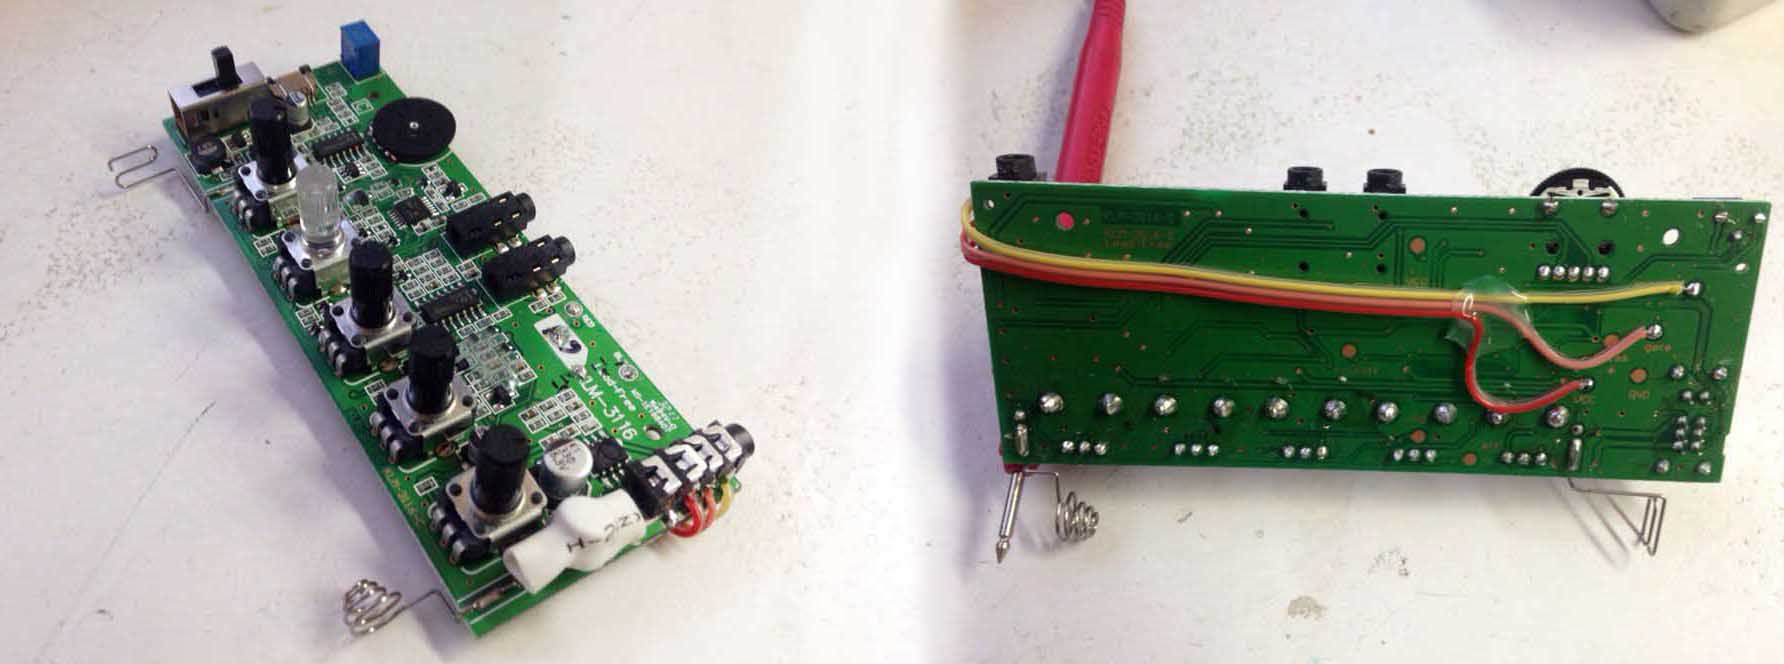
PITCH, GATE, GND and +5 for power. It is not strange, at this stage I came across the largest number of rakes. Initially, the idea was good: bring the connector under the 4-contact minijack. In fact, I learned a lot for myself. At first, the standard jack turned out to be a bit short and flatly refused to go completely into the slot. As a result, the connector had to be cut. Finding a place for a connector was also not such a simple task, but there was no going back. As I have already said, the soldering points themselves were carefully brought out by korg engineers on the reverse side of the board.
Somewhere in the code debugging stage, sympathetic people made me a 3D model of the case, which was later printed in the 3D Printing Lab . In my opinion, it turned out very well.

Firmware
I would not like to describe the whole process of writing an Arduino-sketch, and there are a lot of articles on the midi protocol as well. I will stop only at the moment of setting the output values of the DAC. So that the MIDI note sent matches the output value on the DAC. To cope with this task, I set different values on the DAC and analyzed the spectrogram received from the synthesizer in Ableton Live (there is a wonderful Spectrum instrument that displays, among other things, the note corresponding to the frequency). Perhaps there is a more convenient solution, but this was the first thing that came to mind. It is also worth noting that the dependence of the control voltage on the output frequency is linear, so the implementation of the algorithm is not difficult.
Finally, I will attach another photo of the synthesizer and MIDI2DAC converter.
Video devices in operation:
Link to github with a sketch for arduino
Source: https://habr.com/ru/post/262651/
All Articles