We give the right to choose access to the page using the Rules
When creating a new page or node on Drupal, I would like to restrict access to it. It will be about endowing such an opportunity with the help of the Rules module.
A few words about the Rules module. This is a kind of great add-on for CMS Drupal . If your project doesn’t have enough logic for different events, try this module.
On the performance side, the Rules module does not significantly slow down the work with databases. Therefore, if you have a fairly serious resource project, you will have to write a lot for yourself. In my case, it is enough to fine-tune the module and add a field in the desired type of content.
')
To immediately cut questions on similar modules, such as Content Access , I will clarify that the task is to limit access to a specific page. In the same Content Access it is possible to control access to the “content” type. That is, restrict user access to the entire contents of the site or deny certain rights (editing, deleting).
Now that we have discussed the problem and decided how to perform it we will proceed to the implementation.
First you need to put the Rules module. The installation process is standard, as for all Drupal modules, it makes no sense to describe it. All work is carried out under the version of Drupal 7 and you should download the module of the same edition. You will need to install the Entity module. We install and activate all modules. Make sure they are active:

Go to the settings of the module Config-> Process-> Rules . In the first tab, Rules (Rules), create a new rule.

Fill in the required fields - the name of the rule, the machine name. We indicate the event that will trigger our rule - Content is viewed (View content). Set the content type - Page. Save the rule and temporarily close it.
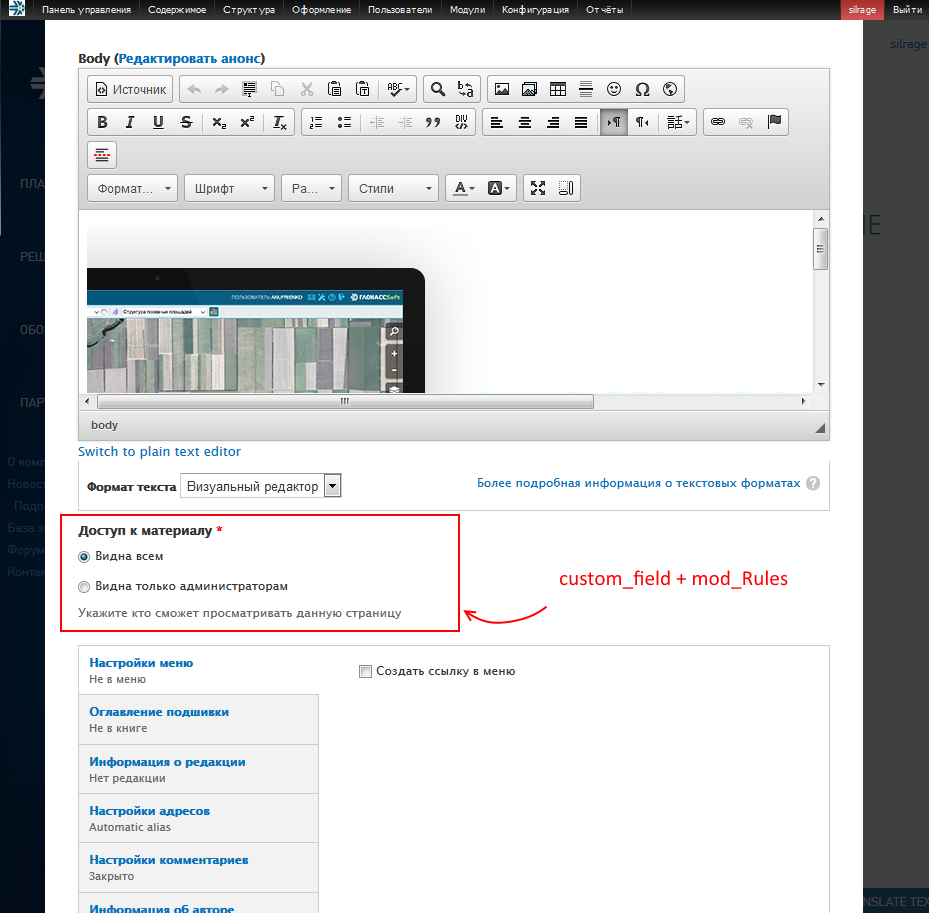
To add a field go to the section Structure -> Content type -> Page -> Manage fields . Add a new field “List (text)” (List with text), set the name “Access to the material”, the machine name “field_view_access” and specify the choice via the checkbox (checkboxes). Click save. The list field settings window will open. We can specify a hint here - reference text. Add values to the list:

It is necessary to make this field mandatory and the default value to put the first value "Visible to all." It will save you time in the future.

We save the settings of the field and they will appear when editing the "Pages" of the site, though not what logic they do not produce. To prevent this field from being displayed as text on pages, click in the same section of the editing of the type of material “Page” -> Display Control. Set a hidden display and no text from the new field will be displayed.
So, the final stage is binding our field and outputting information to the user.
Let’s go back to editing our rule (see clause 1). Add condition to the rule:

1. NOT Text comparison - Says that the contents of the field should not have the specified value. Negations can be set by the checkbox at the very bottom of the condition parameters. The field [field-view-access] is specified, and the value is 0. That is, if only administrators have access on the page, this condition will work.
2. AND - Logical operator, added by the button below, “Add and”. To make it work, you need to drag the necessary conditions to the child items.
3. NOT User has role role (s) - When a user does not have a “developer” role, this condition also works. It's simple.
Now what will happen - Actions:

1. Show a message on the site - Show a message with a class error, the text is specified in the parameters.
2. Page redirect - Simple 301-redirect, so that the user can continue to surf the site.
We keep our rule and rejoice.
Waiting for your comments.
All successful development of web space.
A few words about the Rules module. This is a kind of great add-on for CMS Drupal . If your project doesn’t have enough logic for different events, try this module.
On the performance side, the Rules module does not significantly slow down the work with databases. Therefore, if you have a fairly serious resource project, you will have to write a lot for yourself. In my case, it is enough to fine-tune the module and add a field in the desired type of content.
')
To immediately cut questions on similar modules, such as Content Access , I will clarify that the task is to limit access to a specific page. In the same Content Access it is possible to control access to the “content” type. That is, restrict user access to the entire contents of the site or deny certain rights (editing, deleting).
Now that we have discussed the problem and decided how to perform it we will proceed to the implementation.
Preparation - Module Installation
First you need to put the Rules module. The installation process is standard, as for all Drupal modules, it makes no sense to describe it. All work is carried out under the version of Drupal 7 and you should download the module of the same edition. You will need to install the Entity module. We install and activate all modules. Make sure they are active:
Setting the Rules Module
Go to the settings of the module Config-> Process-> Rules . In the first tab, Rules (Rules), create a new rule.
Fill in the required fields - the name of the rule, the machine name. We indicate the event that will trigger our rule - Content is viewed (View content). Set the content type - Page. Save the rule and temporarily close it.
Add custom field - Access to material
To add a field go to the section Structure -> Content type -> Page -> Manage fields . Add a new field “List (text)” (List with text), set the name “Access to the material”, the machine name “field_view_access” and specify the choice via the checkbox (checkboxes). Click save. The list field settings window will open. We can specify a hint here - reference text. Add values to the list:
It is necessary to make this field mandatory and the default value to put the first value "Visible to all." It will save you time in the future.
We save the settings of the field and they will appear when editing the "Pages" of the site, though not what logic they do not produce. To prevent this field from being displayed as text on pages, click in the same section of the editing of the type of material “Page” -> Display Control. Set a hidden display and no text from the new field will be displayed.
Binding custom field to the rule
So, the final stage is binding our field and outputting information to the user.
Let’s go back to editing our rule (see clause 1). Add condition to the rule:
1. NOT Text comparison - Says that the contents of the field should not have the specified value. Negations can be set by the checkbox at the very bottom of the condition parameters. The field [field-view-access] is specified, and the value is 0. That is, if only administrators have access on the page, this condition will work.
2. AND - Logical operator, added by the button below, “Add and”. To make it work, you need to drag the necessary conditions to the child items.
3. NOT User has role role (s) - When a user does not have a “developer” role, this condition also works. It's simple.
Now what will happen - Actions:
1. Show a message on the site - Show a message with a class error, the text is specified in the parameters.
2. Page redirect - Simple 301-redirect, so that the user can continue to surf the site.
We keep our rule and rejoice.
Waiting for your comments.
All successful development of web space.
Source: https://habr.com/ru/post/262607/
All Articles