Build Tesseract OCR under MinGW

In one of my projects, I needed character recognition and my choice was tesseract ocr. On Habré was already a similar article , but at the moment it is not relevant, during the installation did not work exactly repeat the instructions of the author. This article describes the process of installing Tesseract OCR under MinGW.
At the moment, Google is developing tesseract ocr, which may mean that the library will develop in the near future. I will try to describe the installation process in as much detail as possible, starting with the installation of MinGW.
Install MinGW
First we need to install MinGW, it can be downloaded from the official site of the project . During installation, you must select the following options:
- C ++ Compiler
- MSYS Basic System
Step 1. Install MinGW:
')


Do not forget to mark the options we need: C ++ Compiler and MSYS Basic System.

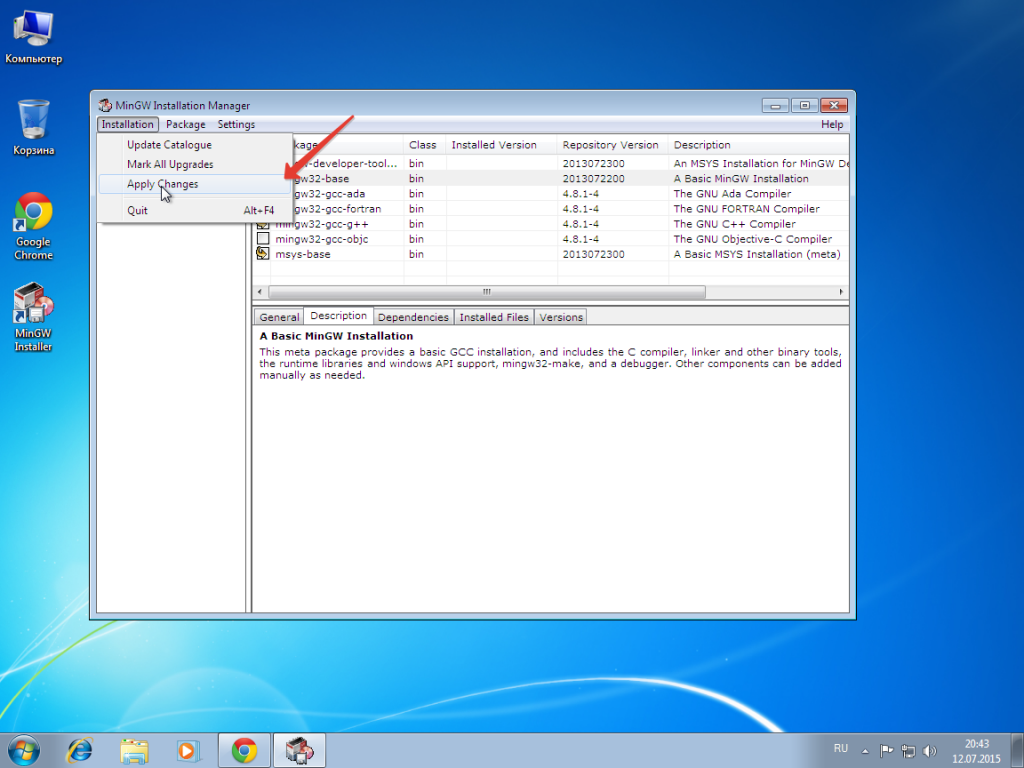
Next, go to the Installation section and select Apply Chanages .
Next, select the selected Apply package for installation.
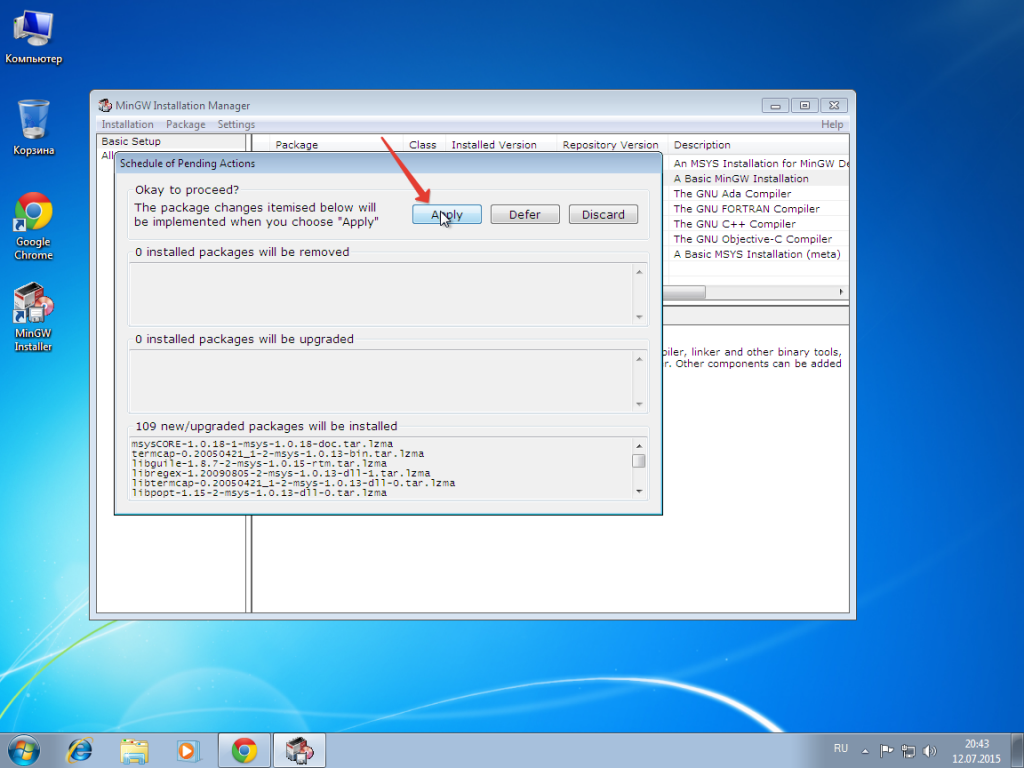
We wait until the end of the installation of the MinGW packages and click Close .

After completing these steps, the installer can be closed.
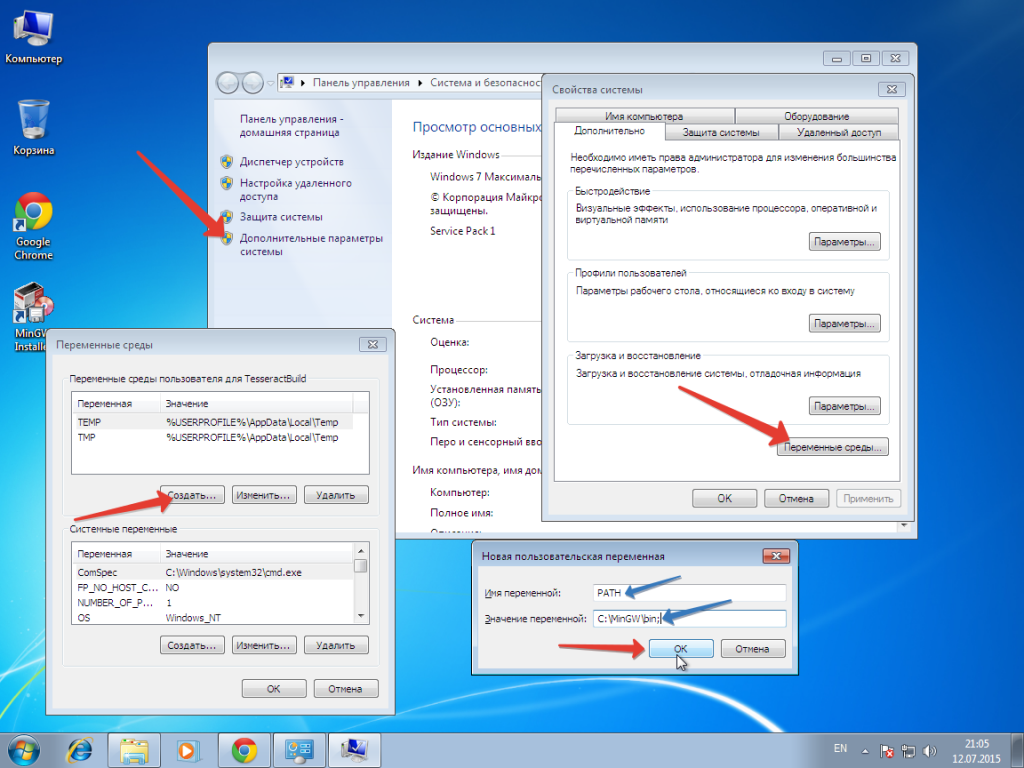
Before starting the installation of additional packages, we need to add the MinGW directory to the PATH.
To do this, go to the properties of the system.

Next, go to Advanced System Settings -> Environment Variables -> Create .
Enter PATH in the variable name. In the Value of the variable, enter the path to the folder with mingw, in our case it is C: \ MinGW \ bin .
Now we need to install several packages using the MinGW Shell , which we will need when collecting the Tesseract OCR library.
To open MinGW Shell, go to the folder C: \ MinGW \ msys \ 1.0 and run the binary file msys.bat
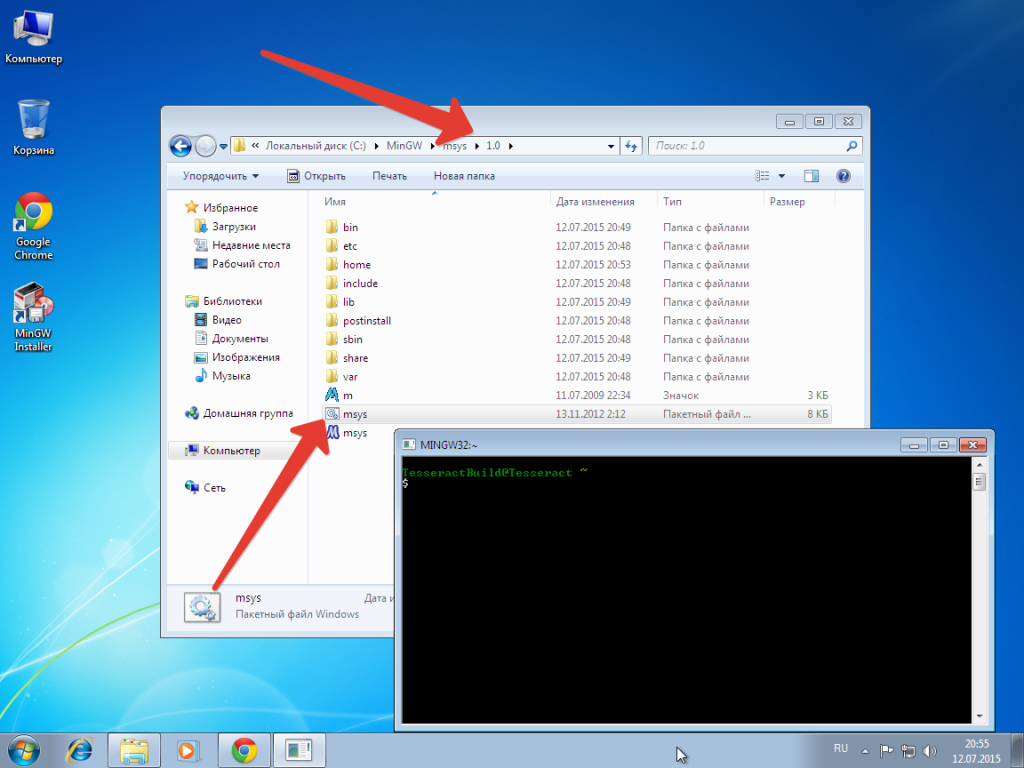
In the opened console enter the following command:
mingw-get install mingw32-automake mingw32-autoconf mingw32-autotools mingw32-libz
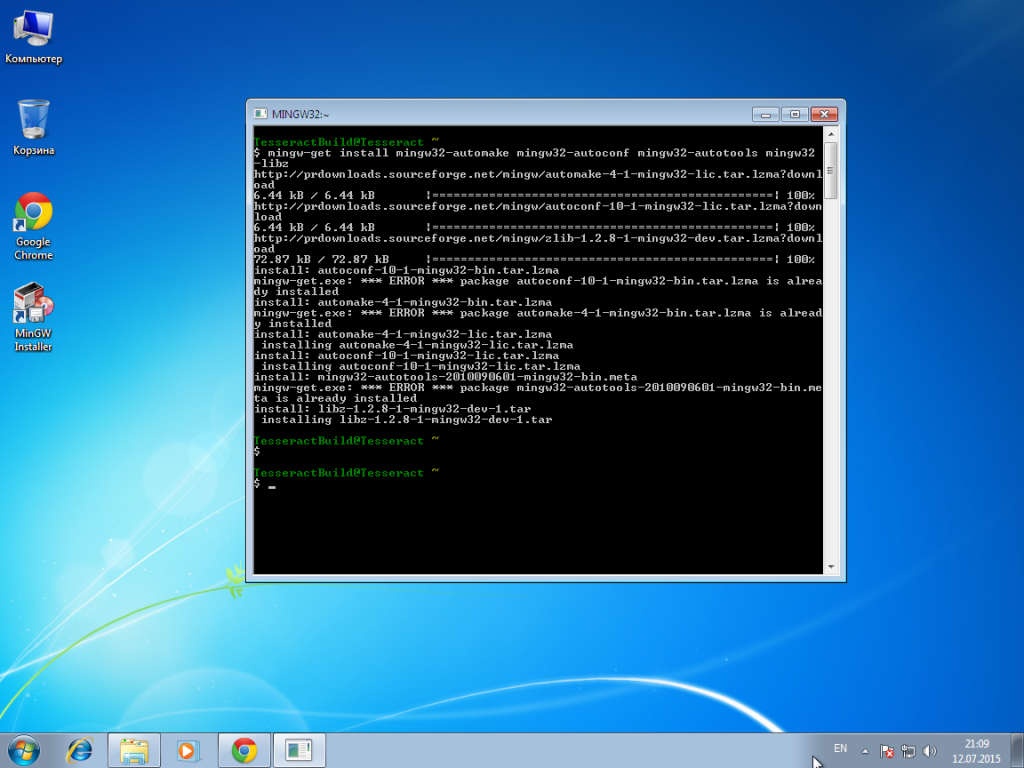
In this case, we were told that we already have these packages installed, that's okay, this is normal.
Important point ! We need to mount a folder with our MinGW in MinSYS.
To do this, follow these steps:
Create a file C: \ MinGW \ msys \ 1.0 \ etc \ fstab to mount the directory C: \ MinGW to the mount point / mingw:
  # Win32_Path Mount_Point
 c: / MinGW / mingw
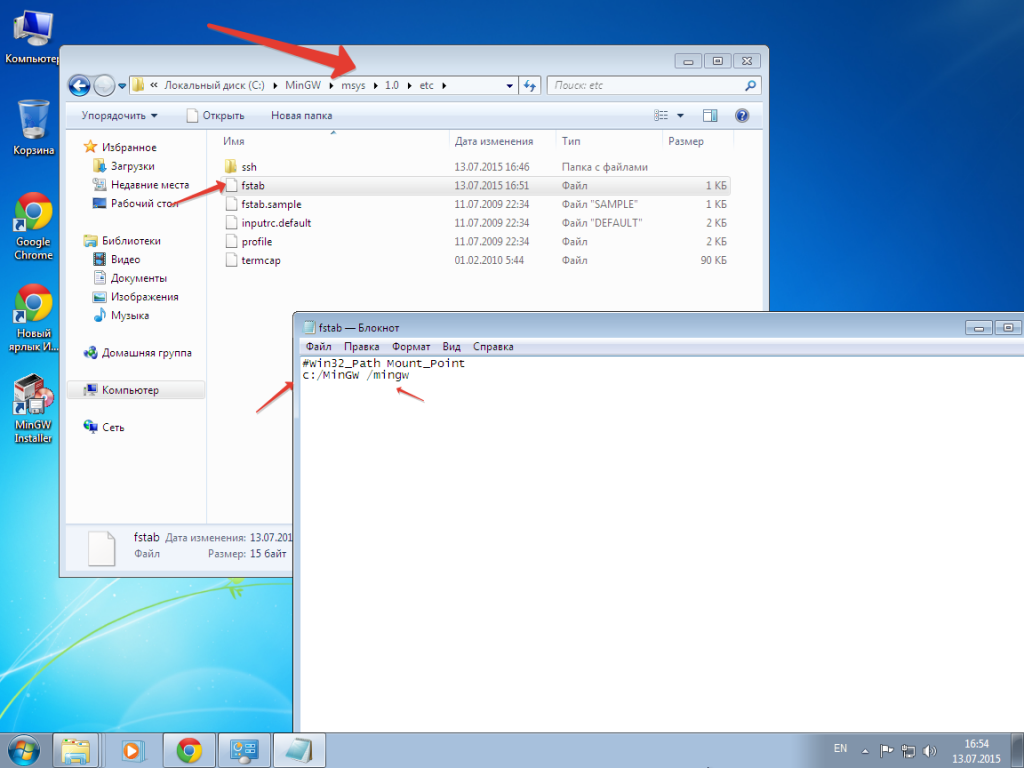
Well, after creating fstab, you need to restart MinGW Shell, just close and re-open msys.bat .
Installing the Leptonica Library
After setting up MinGW, we need to install the Leptonica library. Tesseract ocr uses the Leptonica library for working with images, but before installing it we need to install several auxiliary libraries:
- libJpeg
- libPng
- libTiff
Install LibJpeg
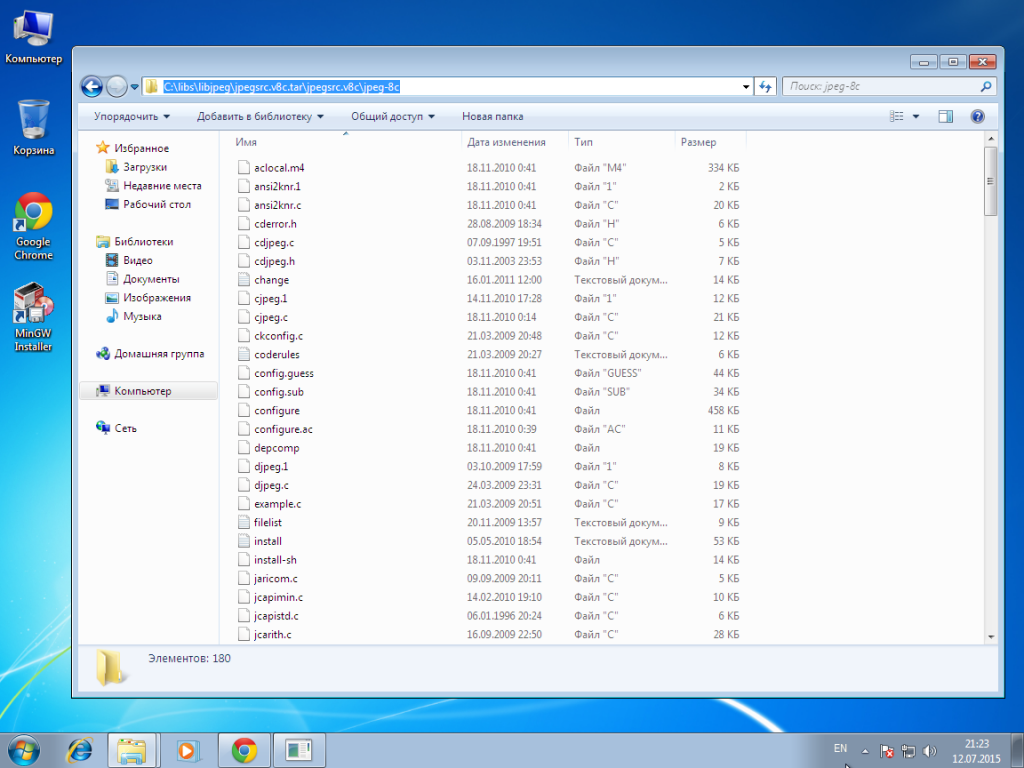
First, create a directory in which we will store our libraries, for example C: \ libs \ . In this directory, create a sub-folder libjpeg to store the library. Now that we have prepared our workplace, you can download LibJpeg from the official site and unpack it in our folder C: \ libs \ libjpeg .
After unpacking, I got the following path to the libjpeg folder: C: \ libs \ libjpeg \ jpegsrc.v8c.tar \ jpegsrc.v8c \ jpeg-8c.
Now we need to build and install the library, to do this, go to the MinGW Shell and enter the following commands:
  cd /C/libs/libjpeg/jpegsrc.v8c.tar/jpegsrc.v8c/jpeg-8c/
 ./configure CFLAGS = '- O2' CXXFLAGS = '- O2' --prefix = / mingw
 make
 make install
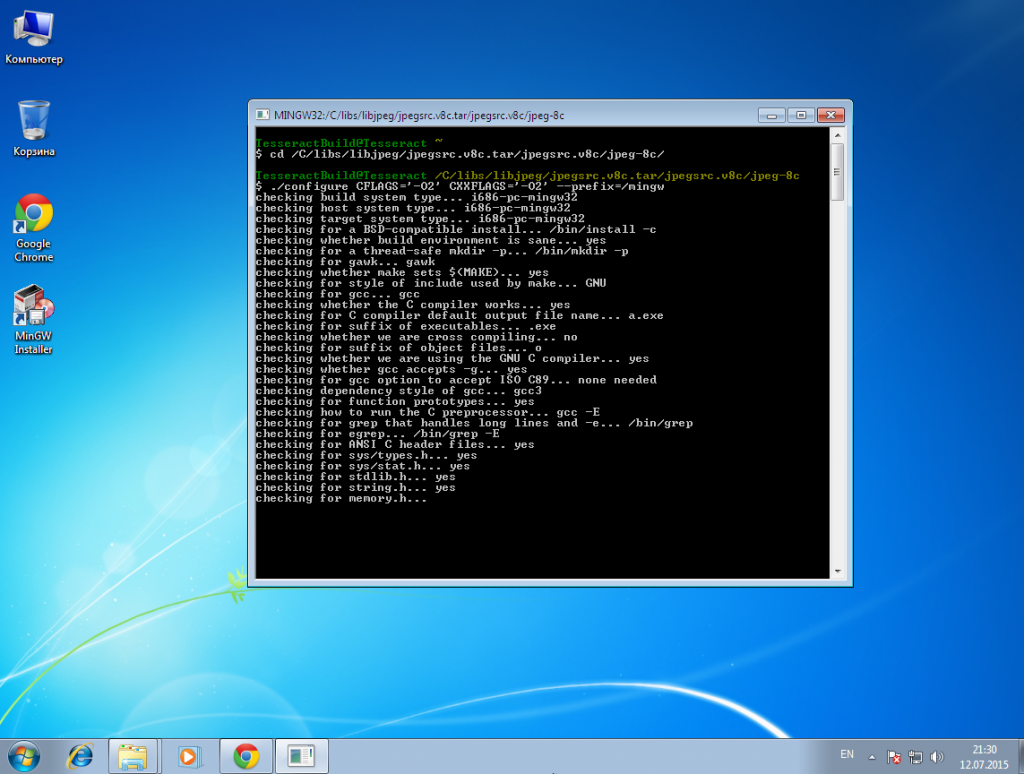
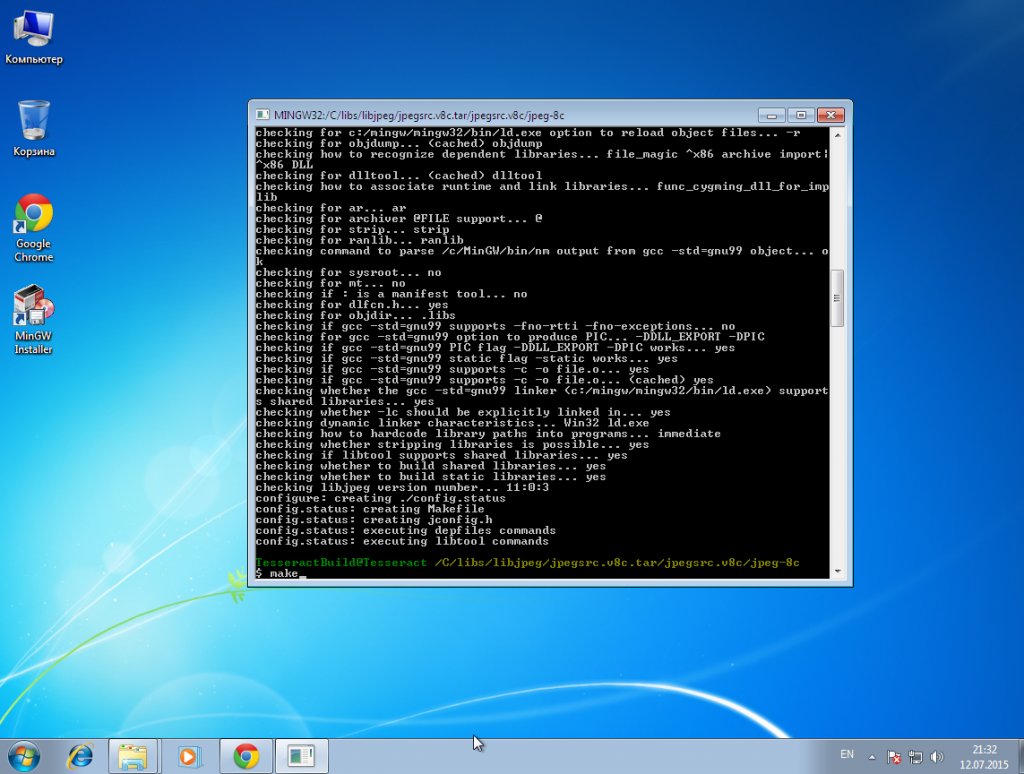
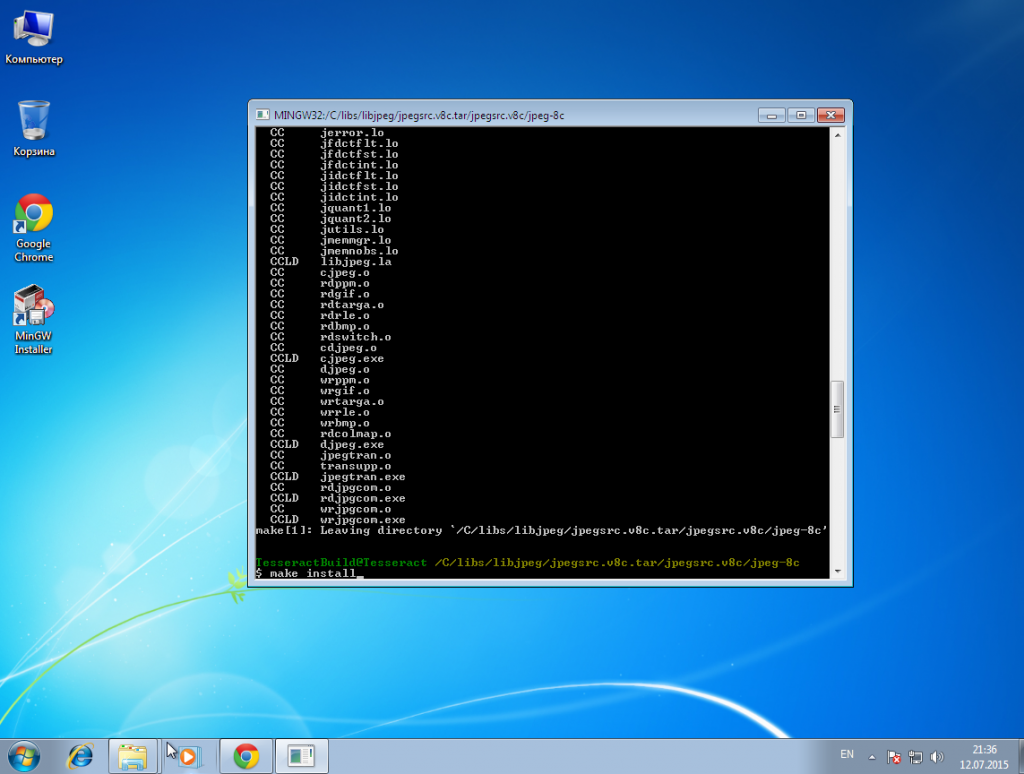
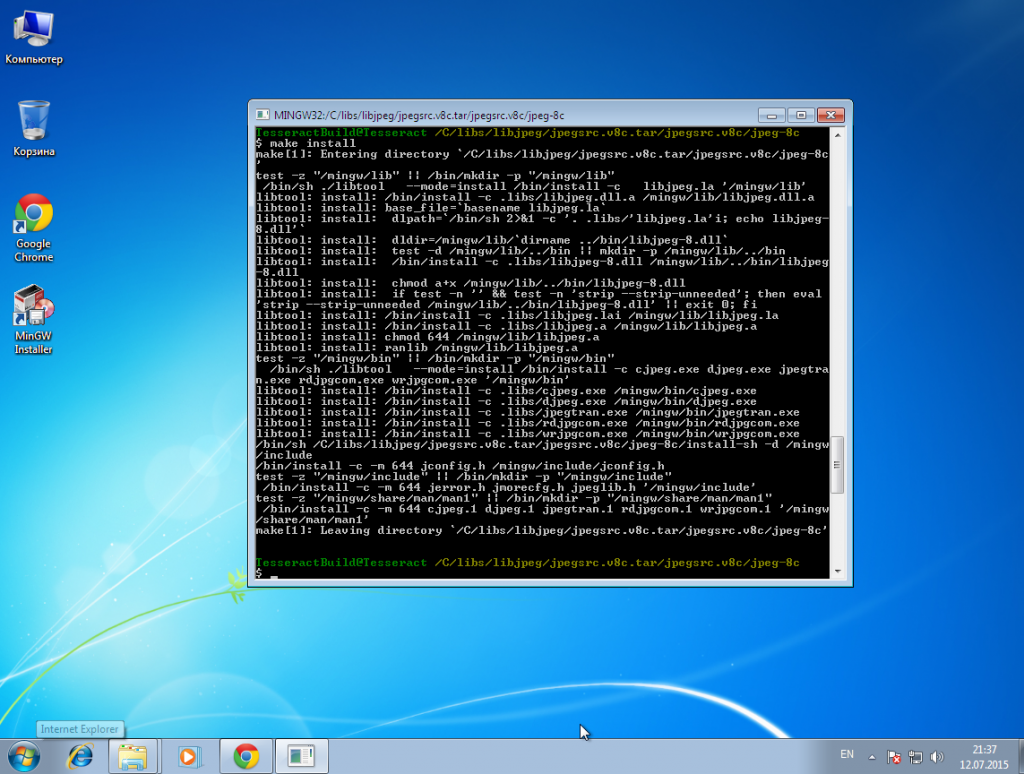
Excellent at this stage the installation of libJpeg is complete.
Install libPng
Download the archive with source codes from the official site of the project and unpack it in the C : \ libs \ libpng directory. We return to MinGW Shell, the installation procedure for this library will be identical to the libJpeg installation. After unpacking, I got the following directory: C: \ libs \ libpng \ libpng-1.5.4.tar \ libpng-1.5.4
  cd /C/libs/libpng/libpng-1.5.4.tar/libpng-1.5.4/
 ./configure CFLAGS = '- O2' CXXFLAGS = '- O2' --prefix = / mingw
 make
 make install
LibTiff build
The source code archive can be downloaded from the project's ftp server . Unpack the archive in C : \ libs \ libtiff . Building this library is similar to building the previous two libraries.
After unpacking, we got the following path: C: \ libs \ libtiff \ tiff-3.9.5.tar \ tiff-3.9.5 .
  cd /C/libs/libtiff/tiff-3.9.5.tar/tiff-3.9.5/
 ./configure CFLAGS = '- O2' CXXFLAGS = '- O2' --prefix = / mingw
 make
 make install
Build Leptonica
After installing all the additional libraries, we proceed to collecting Leptonica. First we need to download Leptonica 1.71 , this is important, we need version 1.71 . As tests have shown, if you take a version higher or lower, the tesseract ocr itself will not be assembled. But in this version there is one bug that we have to fix. First, download the archive with source files from the official site . Extract the downloaded archive into the folder C: / libs / leptonica / . After unpacking, I got the following path: C: \ libs \ leptonica \ leptonica-1.71.tar \ leptonica-1.71 .
The next step is to build the library, it is no different from the assembly of previous libraries:
  cd /C/libs/leptonica/leptonica-1.71.tar/leptonica-1.71/
 ./configure CFLAGS = '- O2' CXXFLAGS = '- O2' --prefix = / mingw
 make
 make install
Fine. We proceed to build Tesseract OCR.
Tesseract OCR Build
After successfully assembling Leptonica, you can begin to build Tesseract OCR. Download the archive with the source code from the official site . Extract the downloaded archive with the Tesseract OCR source code to the C: \ libs \ tesseract folder . After unpacking, I got the following path: C: \ libs \ tesseract \ tesseract-ocr-3.02.02.tar \ tesseract-ocr-3.02.02 \ tesseract-ocr .
Putting our Tesseracr OCR.
  cd /C/libs/tesseract/tesseract-ocr-3.02.02.tar/tesseract-ocr-3.02.02/tesseract-ocr
 ./configure CFLAGS = '- D__MSW32__ -O2' CXXFLAGS = '- D__MSW32 __- O2' LIBS = '- lws2_32' LIBLEPT_HEADERSDIR = '/ mingw / include' --prefix = / mingw
 make
 make install
Tesseracrt build process takes a lot of time while you can go for tea.
The tesseract ocr header files will be in C: \ MinGW \ include \ tesseract , the Leptonica header files in C: \ MinGW \ include \ leptonica , all the libraries in C: \ mingw \ lib .
For the success of future programs, you should download and install the Tesseract ocr SDK from the official site .
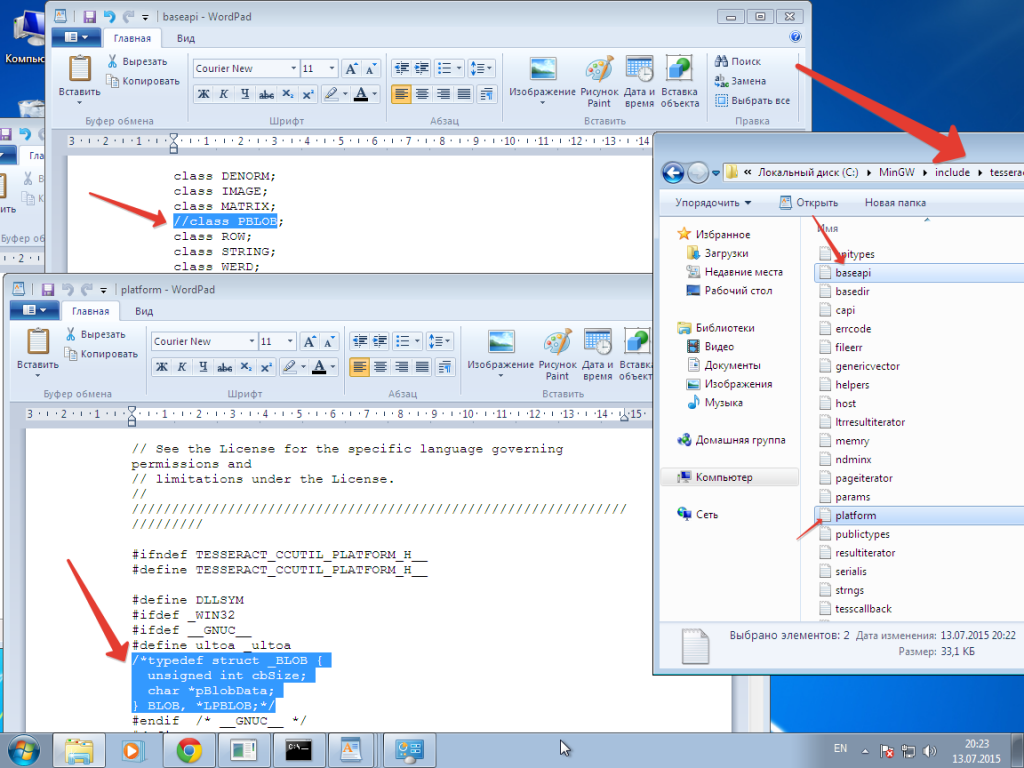
It remains to fix the small bugs that appear after installing Tesseract OCR.
To do this, go to the folder with the Tesseract OCR C: \ MinGW \ include \ tesseract header files .
We comment in the file platform.h the repeated declaration of the BLOB type . You should get something like this:
  / * typedef struct _BLOB {
 unsigned int cbSize;
 char * pBlobData;
 } BLOB, * LPBLOB; * /
Commenting on the PBLOB class declaration in baseapi.h .
Tesseract OCR Testing App
After installing the tesseract, you can test it, write a simple C ++ application.
#include <tesseract / baseapi.h>
#include <leptonica / allheaders.h>
#include <string>
#include <iostream>
int main (int argc, char * argv [])
{
tesseract :: TessBaseAPI ocr;
ocr.Init (NULL, "eng");
if (argc> 1)
{
PIX * pix = pixRead (argv [1]);
ocr.SetImage (pix);
std :: string result = ocr.GetUTF8Text ();
std :: cout << "Recognition text:" << result << std :: endl;
}
else
std :: cout << "drag and drop image" << std :: endl;
return 0;
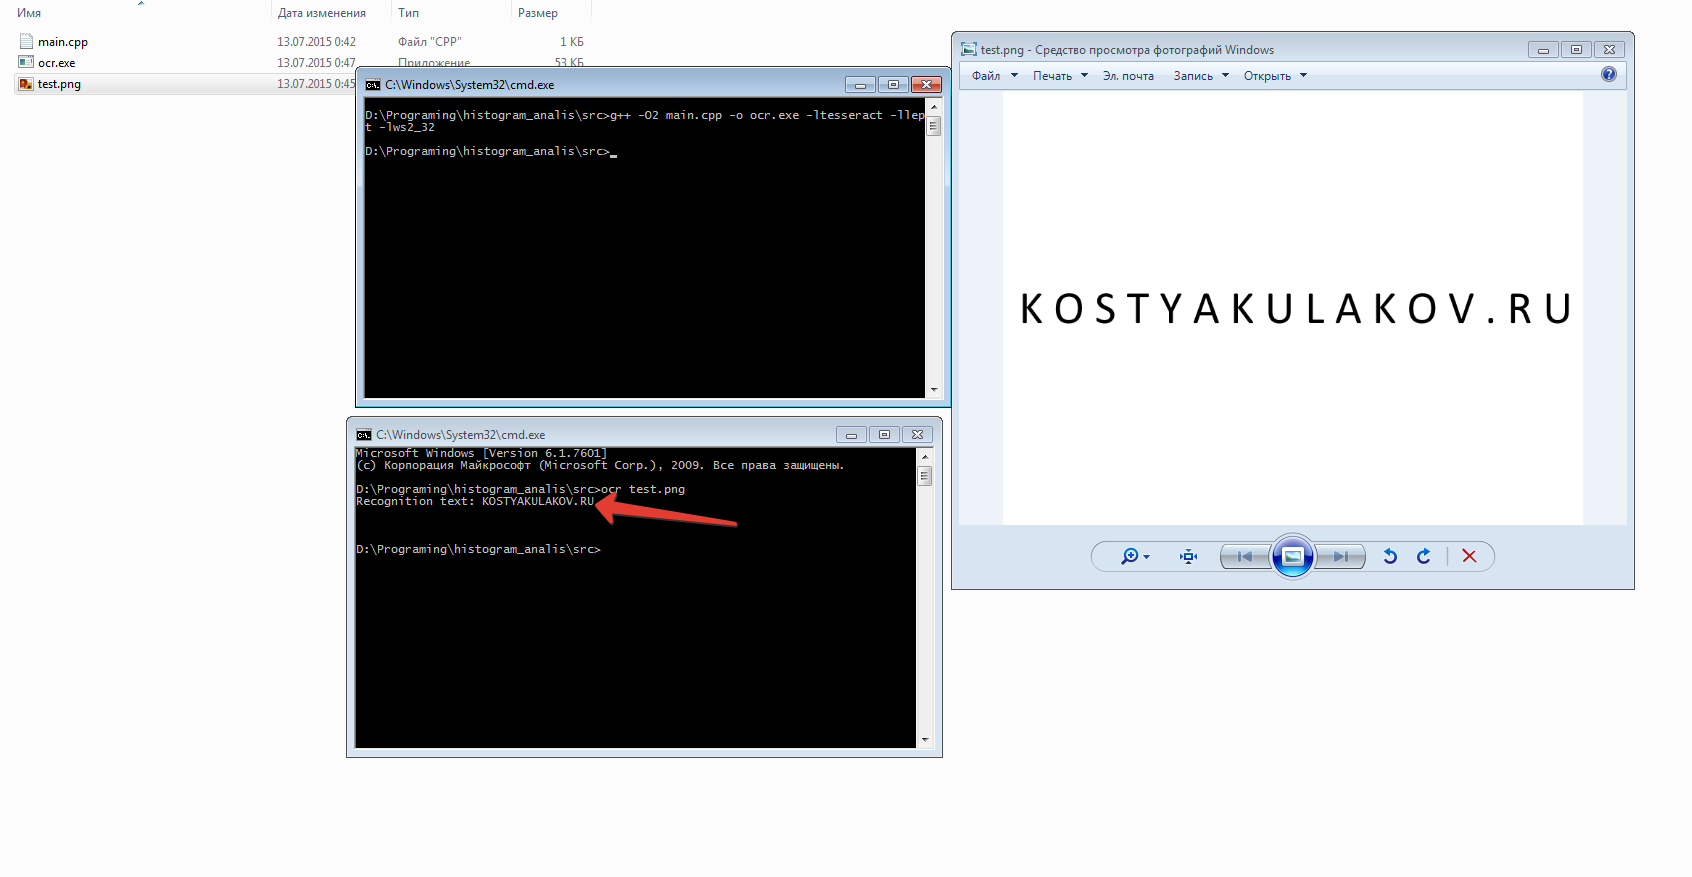
} You can build the application from the command line:
g ++ -O2 main.cpp -o ocr.exe -ltesseract -llept -lws2_32
Source: https://habr.com/ru/post/262483/
All Articles