Teach Hyper-V Server with Veeam B & R to backup yourself
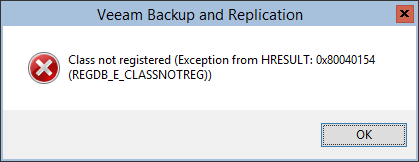
Veeam's slogan is “It Just Works!”. And it is. But not quite: when using Backup & Replication on the Hyper-V Server (the one that is free), you can only work on-host / off-host. When you start the management console, the system swears at the absence of registered classes.
On the Veeam forum, every 10 posts about launching on Hyper-V Server, the answer is always the same - use as an off-host, i.e. Connect to the server from another full machine.
')
It haunted me for several months. Why keep another VM or load an existing VM with unnecessary services? And if I don't have a VM on Windows, what then?
Those who share my thoughts, please under the cat. There, I’ll tell you how to get Hyper-V to back up your VMs yourself using a PowerShell script.
The entire configuration process is divided into 3 stages:
1) Installing Veeam B & R v8 FREE and the current patch on Hyper-V Server, adding host
2) Register Snap (Snapin)
3) Editing the backup script for yourself and working with the Windows scheduler
The Veeam B & R installation is standard, without any special moments. Download , run, mark all components for installation. After that we put the services of integration and transport. By default, they are located in c: \ Program Files \ Veeam \ Backup and Replication \ Backup \ Packages \ .
Next - the current patch (at the time of writing - 2b). And here are 2 pitfalls. Firstly, the patch is just not put, swears on active tasks, etc. And secondly, after its installation, it is MANDATORY to start the console, from which Component Updater will start, which will continue the update. If you just install the patch, when you run the script, you will be prompted to update the integration components and terminate the task.
So, the sequence of actions when updating:
1) Connect to the Hyper-V Server “Services” from another machine with the corresponding rights, set all Veeam services to the “Disabled” launch type. Of course, you can stop the service and other methods, use the one that is closer to you.
2) Reboot the server.
3) Download the patch to the server, open the command line and install the patch in Unattended mode ( here you can read more ):
Unpacking the patch and installing.
In my case, the command looks like this:
General view of the commands:
I do not advise using the silent key, it will save you from a long reading of the logs.
The components will be automatically updated the next time you start the Veeam Backup Service.
4) In "Services", we set the launch type "Automatic" to all Veeam services and DO NOT START.
5) Reboot the server.
6) Make the addition of the host machine, i.e. myself.
The arguments are intuitive.
7) We check that the addition has passed normally.
In response, we get a list of VMs on this server.
Done, go further.
As luck would have it, a snap-in to manage from PowerShell is not registered in the system itself, it needs to be done manually:
1) We check, suddenly I'm wrong and the tooling works.
Note dated 12/09/2015: when installing Update 3, snap-ins are registered automatically.
2) No, it does not work. Begin the registration process.
Connect the installutil cmdlet:
Registering a snap:
In this example, the path to the default snap-in. Please note that the snap-in is 64-bit, therefore Framework64 .
3) Check the registration.
All is well, now you can go to the script.
The script already flashed in the previous topic about Veeam , though in the comments and without a description.
Here you can read who wrote it and how to use it, as well as download .
Edit the script for yourself and configure the Windows scheduler. The task is trivial and does not require a description.
I note only that the script is extremely convenient, the message in the mail falls very informative.
The task of VM backup using Hyper-V server has been solved. Perhaps, this approach may seem meaningless to someone, but for me personally it was a matter of principle. For this, allow me to bow out.
On the Veeam forum, every 10 posts about launching on Hyper-V Server, the answer is always the same - use as an off-host, i.e. Connect to the server from another full machine.
')
It haunted me for several months. Why keep another VM or load an existing VM with unnecessary services? And if I don't have a VM on Windows, what then?
Those who share my thoughts, please under the cat. There, I’ll tell you how to get Hyper-V to back up your VMs yourself using a PowerShell script.
The entire configuration process is divided into 3 stages:
1) Installing Veeam B & R v8 FREE and the current patch on Hyper-V Server, adding host
2) Register Snap (Snapin)
3) Editing the backup script for yourself and working with the Windows scheduler
Correct installation
The Veeam B & R installation is standard, without any special moments. Download , run, mark all components for installation. After that we put the services of integration and transport. By default, they are located in c: \ Program Files \ Veeam \ Backup and Replication \ Backup \ Packages \ .
Next - the current patch (at the time of writing - 2b). And here are 2 pitfalls. Firstly, the patch is just not put, swears on active tasks, etc. And secondly, after its installation, it is MANDATORY to start the console, from which Component Updater will start, which will continue the update. If you just install the patch, when you run the script, you will be prompted to update the integration components and terminate the task.
So, the sequence of actions when updating:
1) Connect to the Hyper-V Server “Services” from another machine with the corresponding rights, set all Veeam services to the “Disabled” launch type. Of course, you can stop the service and other methods, use the one that is closer to you.
2) Reboot the server.
3) Download the patch to the server, open the command line and install the patch in Unattended mode ( here you can read more ):
Unpacking the patch and installing.
In my case, the command looks like this:
C:\2b.exe /q /c /t:C:\Temp C:\Temp\HotFixRunner.exe noreboot log C:\Logs\veeam.log VBR_AUTO_UPGRADE=1 General view of the commands:
%PatchFullPath% /q /c /t:%TempFolderPath% %PathToHotFixRunner.exe% silent noreboot log %PathToLogFile% VBR_AUTO_UPGRADE=1 I do not advise using the silent key, it will save you from a long reading of the logs.
The components will be automatically updated the next time you start the Veeam Backup Service.
4) In "Services", we set the launch type "Automatic" to all Veeam services and DO NOT START.
5) Reboot the server.
6) Make the addition of the host machine, i.e. myself.
add-vbrhvhost -name "*server_name*" -user *DOMAIN\account* -password *password* The arguments are intuitive.
7) We check that the addition has passed normally.
find-vbrhventity -server "*server_name*" In response, we get a list of VMs on this server.
Done, go further.
Registering a Veeam PSSnapin snap-in
As luck would have it, a snap-in to manage from PowerShell is not registered in the system itself, it needs to be done manually:
1) We check, suddenly I'm wrong and the tooling works.
Get-pssnapin –registered Note dated 12/09/2015: when installing Update 3, snap-ins are registered automatically.
2) No, it does not work. Begin the registration process.
Connect the installutil cmdlet:
set-alias installutil $env:windir\Microsoft.NET\Framework64\v4.0.30319\installutil.exe Registering a snap:
installutil "c:\Program Files\Veeam\Backup and Replication\Backup\Veeam.Backup.PowerShell.dll" In this example, the path to the default snap-in. Please note that the snap-in is 64-bit, therefore Framework64 .
3) Check the registration.
Get-pssnapin –registered All is well, now you can go to the script.
Script and Scheduler
The script already flashed in the previous topic about Veeam , though in the comments and without a description.
Here you can read who wrote it and how to use it, as well as download .
Edit the script for yourself and configure the Windows scheduler. The task is trivial and does not require a description.
I note only that the script is extremely convenient, the message in the mail falls very informative.
The task of VM backup using Hyper-V server has been solved. Perhaps, this approach may seem meaningless to someone, but for me personally it was a matter of principle. For this, allow me to bow out.
Source: https://habr.com/ru/post/262191/
All Articles