DevStack as a tool
Hello, dear habrakrady!
In my previous posts I mentioned products such as OpenStack, DevStack and Chef.
In this article, I'll start with DevStack.
Now very often you can hear / read such popular words as “cloud” and “virtualization”. And in fact, it is very convenient when you have somewhere in the corner “puffing” a whole pile (stack, English - stack, pile, pile) of “servers” in the face of 1-2 servers.
Of course, the market is now saturated with various virtualization platforms, but in 2010 OpenStack came out from the depths of Rackspace.
It briefly and in detail tells what OpenStack is. DevStack is just a set of scripts for quickly deploying the OpenStack environment.
Using OpenStack can sometimes make life easier for both an IT professional in a small company and much larger ones. This is a very handy tool when you need to deploy dozens of virtual machines, while describing the entire creation process in scripts. This, of course, can be done with the help of other products, but OpenStack turned out to be closer to me.
')
Set up an environment for software testing, with the ability to place N virtual machines with different operating systems on a minimum number of "real" devices.
The IP address of our booth will be 192.168.0.250. Accordingly, our external network will be 192.168.0.0/24.
What should happen?
As a result, we get an OpenStack environment with basic services for deploying virtual machines with some internal network and a set of external addresses. We do not install Neutron simply because it is not needed in this configuration.
Let's start small:
Next we need a user, from which the whole of this "system" will work. Let's call it plain stack
Do not forget to remove the password request in / etc / sudoers :
Now we are connecting from the stack user and all further actions will be performed from this particular user.
Install git and clone the repository we need:
In general, by and large, we can already run ./stack.sh and there is some chance that everything will be established. But most often it is not. Therefore, let's create some local.conf config:
There is no default directory / var / log / openstack / , so we create it:
LIBVIRT_TYPE = kvm means that we will use kvm, but you must first include support:
Something might go wrong. For example, if our equipment does not know how! But almost all modern systems have the necessary "skill".
For some unknown reason, I did not pick up the GIT_BASE parameter from the config , so I recommend (but not necessarily) change it in stackrc :
Actually now we do
and go to drink coffee / tea / lemonade. Depending on the Internet channel and the power of the system unit, the installation process will take about half an hour to an hour. The scripts themselves install RabbitMQ, MySQL, nova packages, cinder, etc.
As a result, we will see a joyful message:
Actually, you can go to 192.168.0.250 and build your virtual data centers.
Sooner or later, we will have to shut down / reboot this system unit, or simply turn off the lights for a long time.
In order for cinder to rise normally, you should find to which loop device our file is mounted and add this action to autoload:
In my case it was. The last line should be added to /etc/rc.local before " exit 0 ".
Everything! Now you can safely reboot and on returning from the user stack, run:
Exit from SCREEN using the keyboard shortcut Ctrl + A + D
Ubuntu 14.04 x64
CentOS 7
Windows Server 2012 R2 (must agree to the terms of the license)
In the following articles, I will explain how to deploy OpenStack in the Keystone, Nova, Glance, Cinder, Neutron configuration with “hands” on 2 servers, then how to pull all this to Chef (although under the spoiler there is already a link that can help)
I hope this material will help someone save time and nerves.
In my previous posts I mentioned products such as OpenStack, DevStack and Chef.
In this article, I'll start with DevStack.
What is it?
Now very often you can hear / read such popular words as “cloud” and “virtualization”. And in fact, it is very convenient when you have somewhere in the corner “puffing” a whole pile (stack, English - stack, pile, pile) of “servers” in the face of 1-2 servers.
Of course, the market is now saturated with various virtualization platforms, but in 2010 OpenStack came out from the depths of Rackspace.
It briefly and in detail tells what OpenStack is. DevStack is just a set of scripts for quickly deploying the OpenStack environment.
Using OpenStack can sometimes make life easier for both an IT professional in a small company and much larger ones. This is a very handy tool when you need to deploy dozens of virtual machines, while describing the entire creation process in scripts. This, of course, can be done with the help of other products, but OpenStack turned out to be closer to me.
')
Task.
Set up an environment for software testing, with the ability to place N virtual machines with different operating systems on a minimum number of "real" devices.
Instruments.
- 1 system unit with pre-installed OS (Ubuntu, CentOS) with 4 or more cores, 24 GB of RAM and two 500GB HDD. This is quite enough for 19-25 virtual machines. I will give an example on Ubuntu 14.04.
- DevStack version of Kilo (you can and Juno)
- Good internet channel (many will need to download)
The IP address of our booth will be 192.168.0.250. Accordingly, our external network will be 192.168.0.0/24.
What should happen?
As a result, we get an OpenStack environment with basic services for deploying virtual machines with some internal network and a set of external addresses. We do not install Neutron simply because it is not needed in this configuration.
The process.
Training
Let's start small:
apt-get update && apt-get upgrade -y Next we need a user, from which the whole of this "system" will work. Let's call it plain stack
useradd -G sudo -m -U -s /bin/bash stack passwd stack Do not forget to remove the password request in / etc / sudoers :
... stack ALL=(ALL:ALL) NOPASSWD: ALL ... Now we are connecting from the stack user and all further actions will be performed from this particular user.
Installation
Install git and clone the repository we need:
sudo apt-get install git -y git clone https://github.com/openstack-dev/devstack.git -b stable/kilo cd devstack In general, by and large, we can already run ./stack.sh and there is some chance that everything will be established. But most often it is not. Therefore, let's create some local.conf config:
[[local|localrc]] HOST_IP=192.168.0.250 # IP FLAT_INTERFACE=p2p1 # FIXED_RANGE=10.10.128.0/24 # () FIXED_NETWORK_SIZE=254 # FLOATING_RANGE=192.168.0.0/24 # LOGFILE=/var/log/openstack/stack.sh.log # LOGDAYS=3 # ADMIN_PASSWORD=admin MYSQL_PASSWORD=SuperPuperSekret RABBIT_PASSWORD=SuperPuperSekret SERVICE_PASSWORD=SuperPuperSekret SERVICE_TOKEN=AAAAB3NzaC1yc2EAAAADAQABAAABAQCyYjfgyPazTvGpd8OaAvtU2utL8W6gWC4JdRS1J95G REGION_NAME=OfficeMiniCloudOne # LIBVIRT_TYPE=kvm # KVM VOLUME_BACKING_FILE_SIZE=200G # . , . There is no default directory / var / log / openstack / , so we create it:
sudo mkdir /var/log/openstack sudo chown stack:stack /var/log/openstack LIBVIRT_TYPE = kvm means that we will use kvm, but you must first include support:
sudo rmmod kvm-intel sudo sh -c "echo 'options kvm-intel nested=y' >> /etc/modprobe.d/dist.conf" sudo modprobe kvm-intel cat /sys/module/kvm_intel/parameters/nested modinfo kvm_intel | grep nested Something might go wrong. For example, if our equipment does not know how! But almost all modern systems have the necessary "skill".
For some unknown reason, I did not pick up the GIT_BASE parameter from the config , so I recommend (but not necessarily) change it in stackrc :
GIT_BASE=${GIT_BASE:-https://www.github.com} Actually now we do
./stack.sh and go to drink coffee / tea / lemonade. Depending on the Internet channel and the power of the system unit, the installation process will take about half an hour to an hour. The scripts themselves install RabbitMQ, MySQL, nova packages, cinder, etc.
As a result, we will see a joyful message:
Horizon is now available at http://192.168.0.250/ Keystone is serving at http://192.168.0.250:5000/v2.0/ Examples on using novaclient command line is in exercise.sh The default users are: admin and demo The password: admin This is your host ip: 192.168.0.250 Actually, you can go to 192.168.0.250 and build your virtual data centers.
What else?
Sooner or later, we will have to shut down / reboot this system unit, or simply turn off the lights for a long time.
In order for cinder to rise normally, you should find to which loop device our file is mounted and add this action to autoload:
sudo losetup -a losetup /dev/loop0 /opt/stack/data/stack-volumes-lvmdriver-1-backing-file In my case it was. The last line should be added to /etc/rc.local before " exit 0 ".
Everything! Now you can safely reboot and on returning from the user stack, run:
cd /home/stack/devstack ./rejoin-stack.sh Exit from SCREEN using the keyboard shortcut Ctrl + A + D
Links to images for OpenStack
Ubuntu 14.04 x64
CentOS 7
Windows Server 2012 R2 (must agree to the terms of the license)
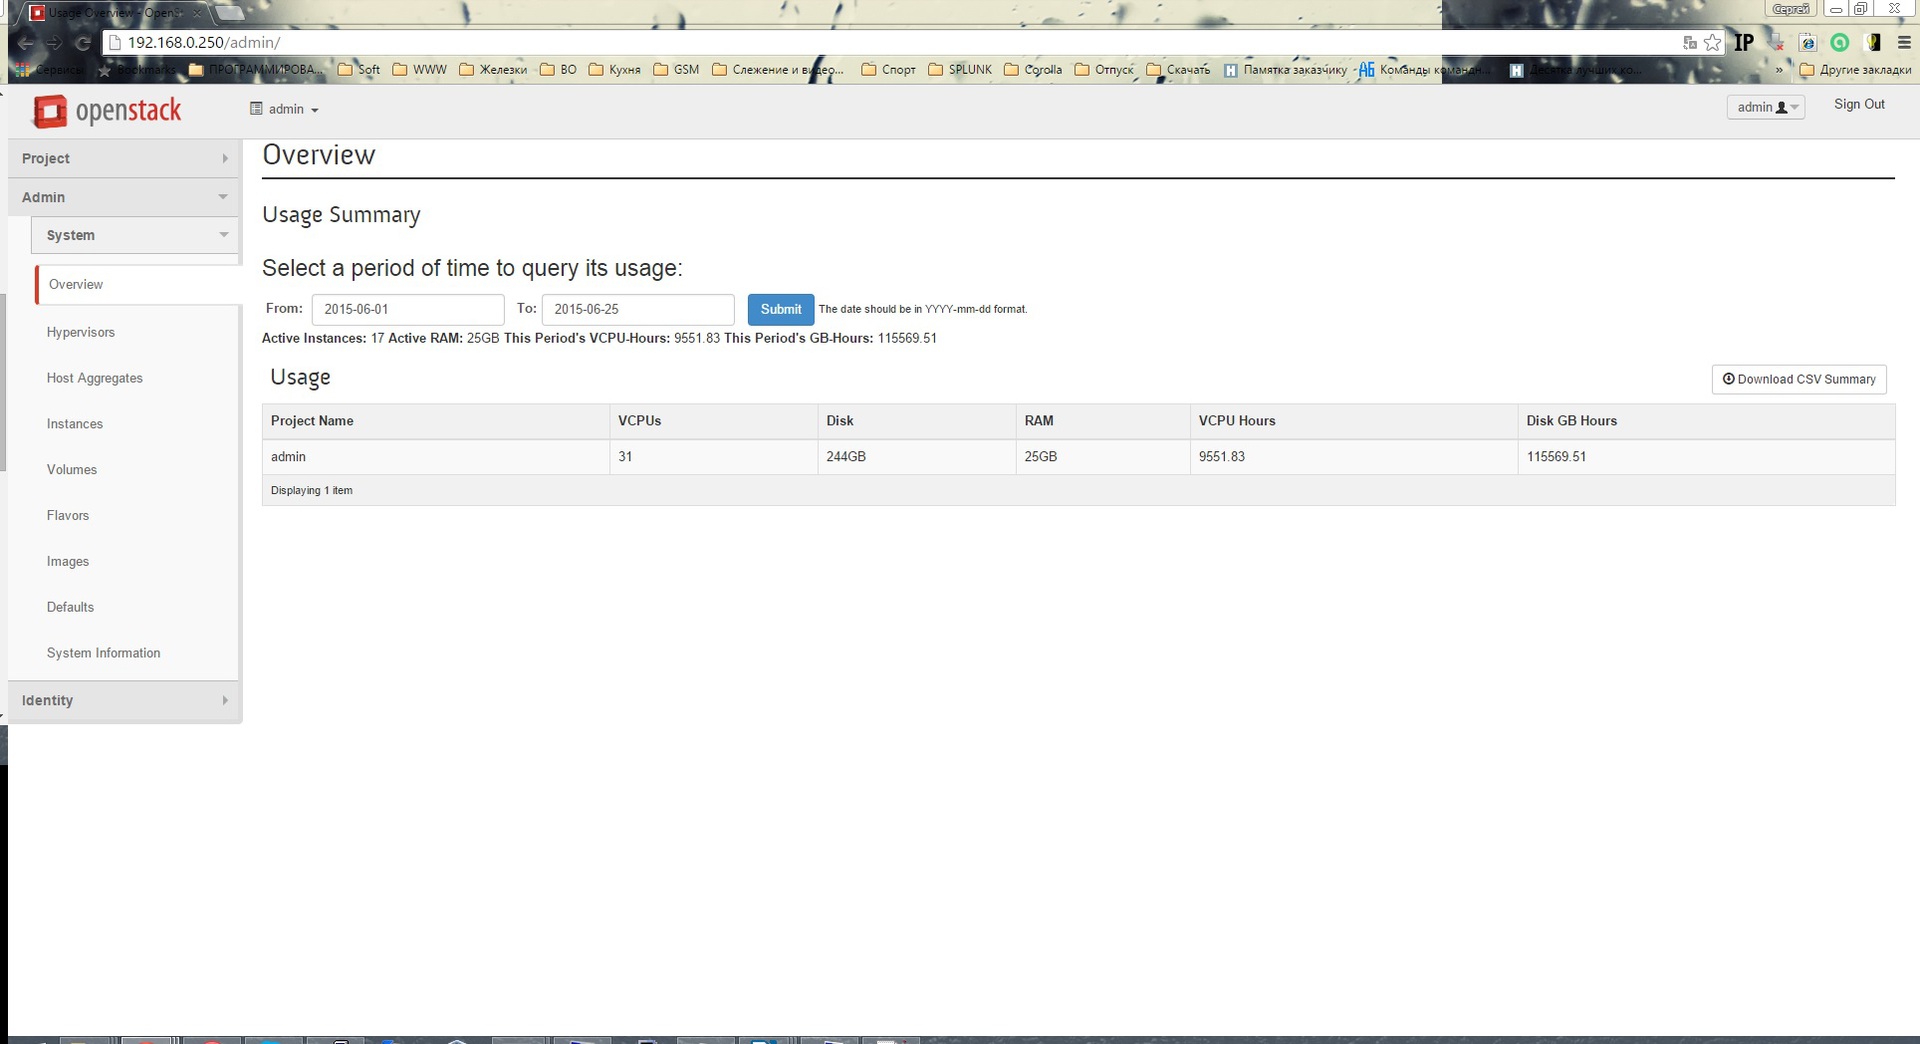
A couple of screenshots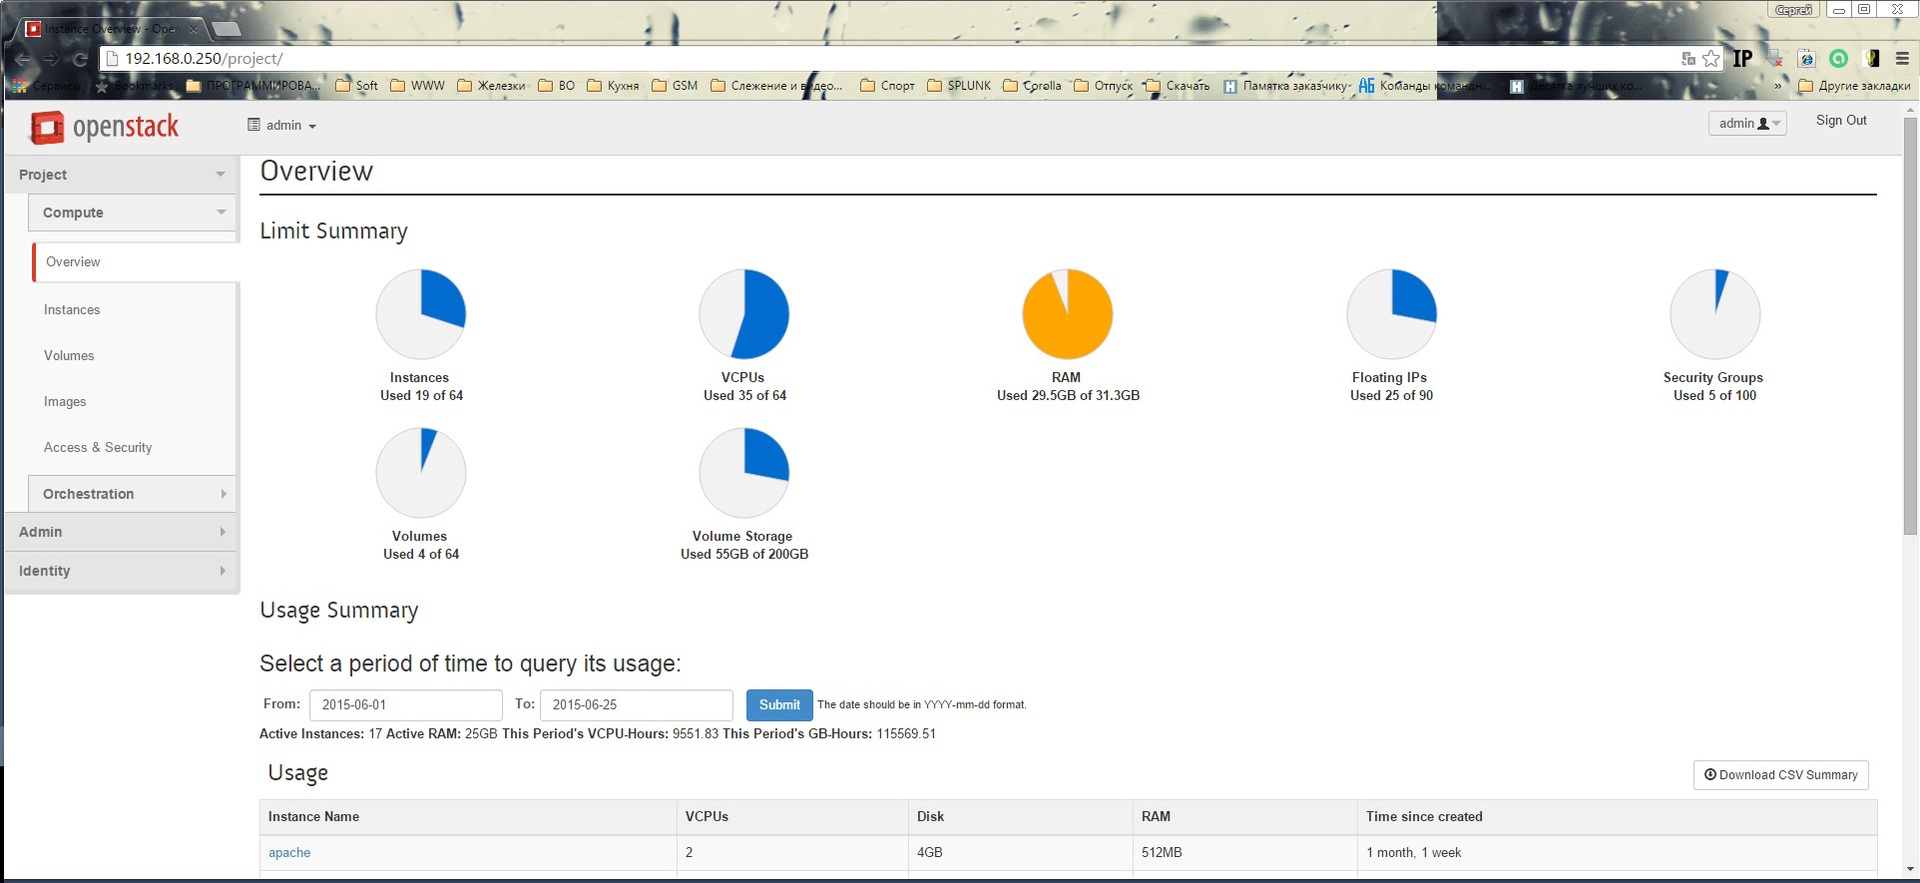
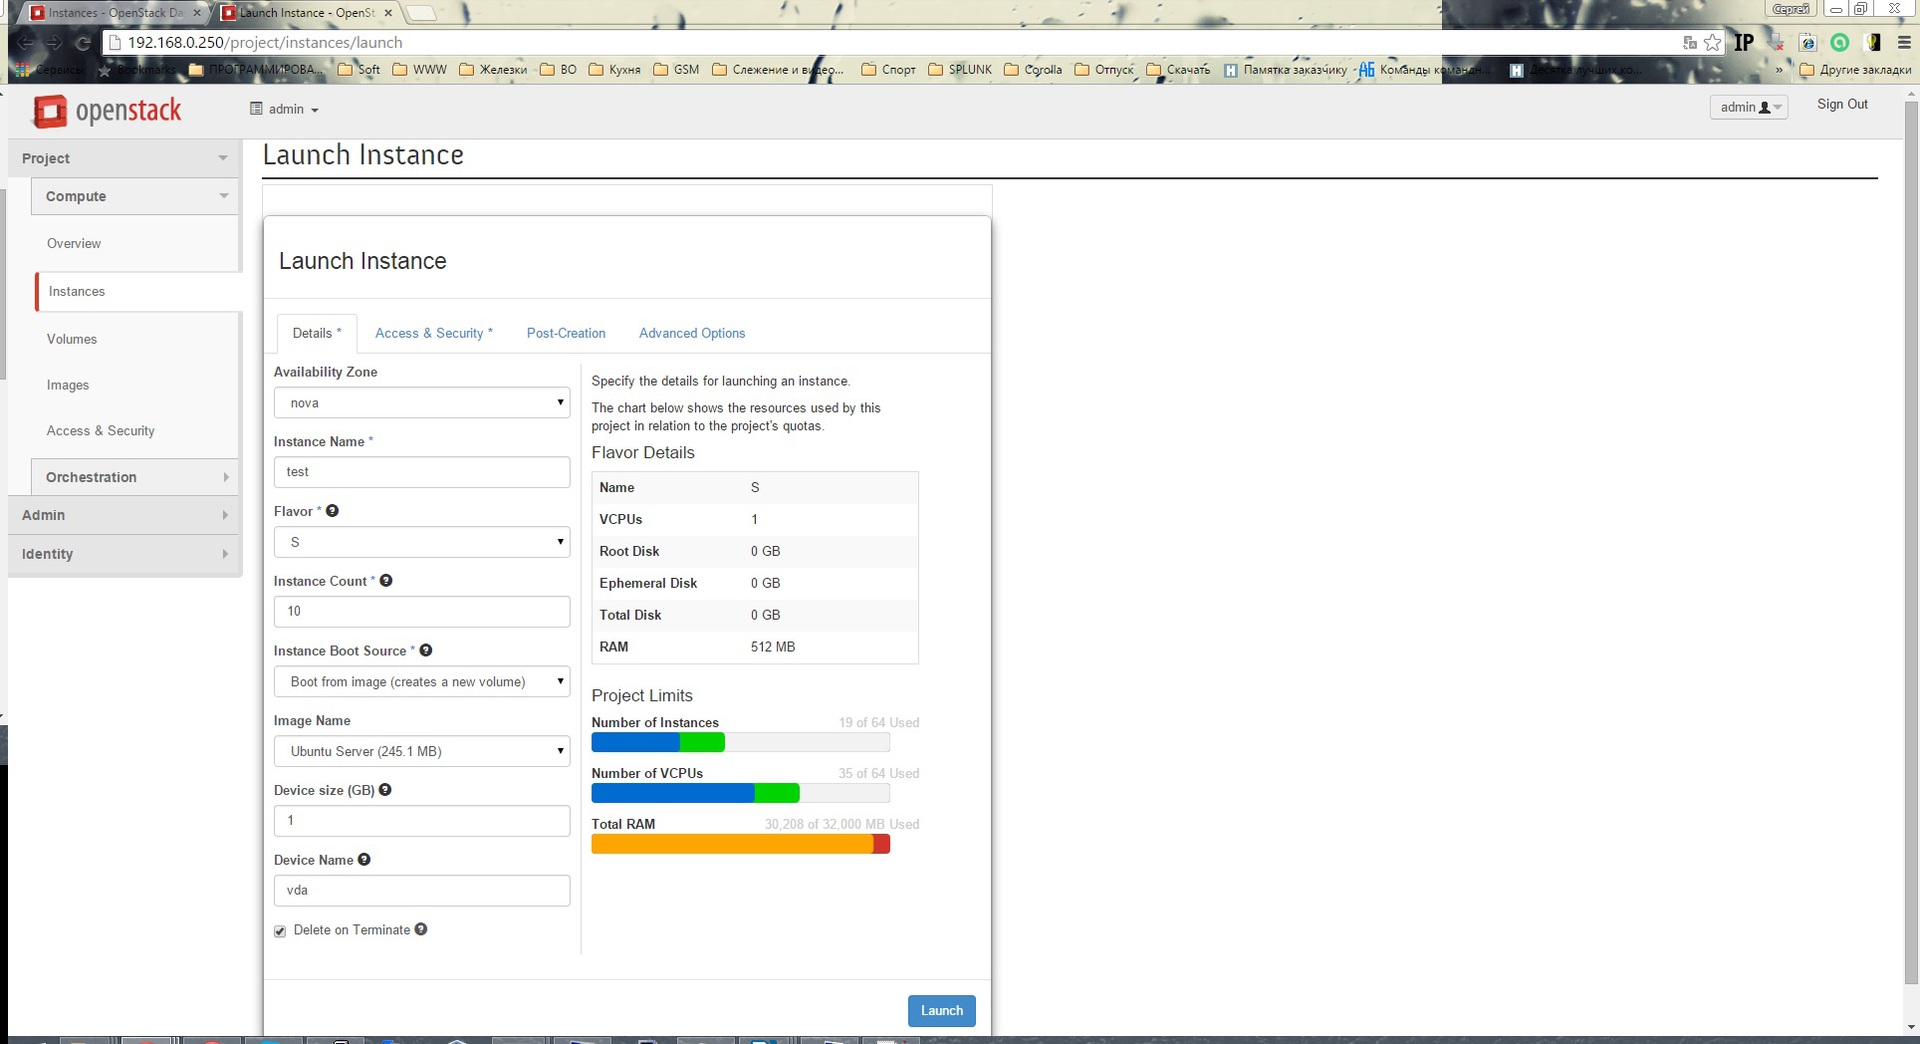
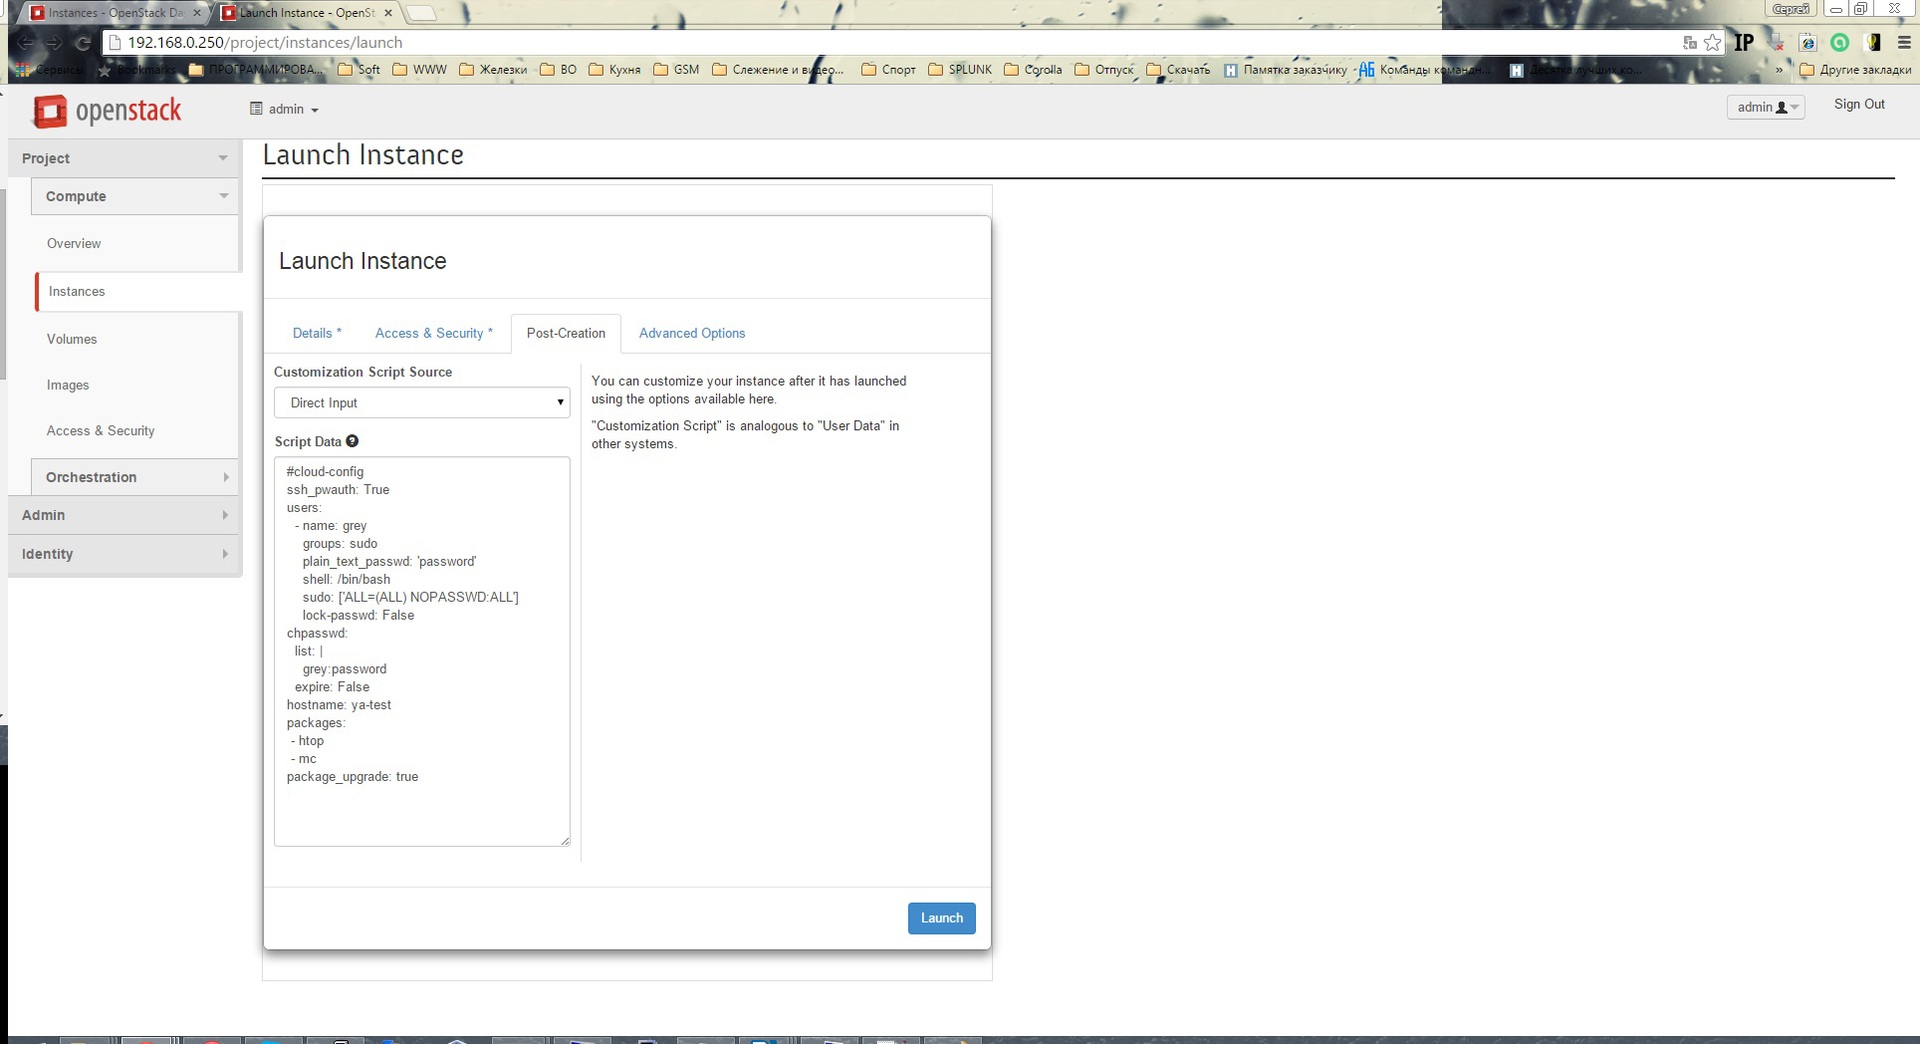
On the last two screens, we create 10 instances, add the user gray to them, set the password, set the hostname , install the htop and mc packages and do apt-get update && apt-get upgrade -y
You can read more about cloud-init syntax here.
On the last two screens, we create 10 instances, add the user gray to them, set the password, set the hostname , install the htop and mc packages and do apt-get update && apt-get upgrade -y
You can read more about cloud-init syntax here.
In the following articles, I will explain how to deploy OpenStack in the Keystone, Nova, Glance, Cinder, Neutron configuration with “hands” on 2 servers, then how to pull all this to Chef (although under the spoiler there is already a link that can help)
I hope this material will help someone save time and nerves.
Source: https://habr.com/ru/post/261715/
All Articles