We send and visualize data from the Intel Galileo / Edison board in the Azure cloud
Hello!
On Monday, we wrote about how we see the Internet of Things - with a cloud that can be used to process various kinds of data, as well as our new Windows 10 operating system, which can be installed on Raspberry Pi 2 or Intel Minnowboard. On Wednesday, a colleague from the Microsoft technology center spoke about how they are doing a smart office. Yesterday @shwars wrote a column about how to connect the Arduino to the Raspberry Pi2. Today I will talk a little about the process of connecting Intel Galileo & Edison to Microsoft Azure, sending simple data and visualizing it using Azure services. Next week - experience installing Windows 10 IoT on Minnowboard MAX.
Let's start with Galileo. About Galileo wrote a lot on Intel's blog ( one , two ), many times our colleagues ( for example, Sergey Baydachny ) wrote, so I’ll focus only on the practical part, which we tested on ours and Intel hackathons.
In order to connect Galileo to a computer, there are several options - Ethernet, USB and a 6-pin debug cable. The simplest and most affordable is an Ethernet connection.
The problem is that the default network on Galileo is not configurable, and you will not be able to see it even after connecting with a cable.
There are two solutions to this problem:
After receiving the IP address, you can connect to the board via SSH. If you have Edison, then everything is easier - just call ./configure
')
On Galileo, the default image is Yocto Linux, which has its own specifics, but you can put the necessary software on it. You can also install Windows 8 . Windows 10 for Galileo & Edison is not.
To do this, you need to connect via SSH.
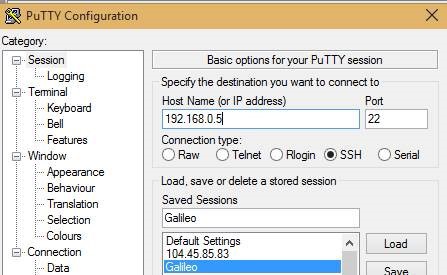
We will use Putty .
The login is root, there is no default password.
We start to customize the ecosystem. We will use Python and install the Azure SDK for Python, but you can install any other available SDK or write the necessary code yourself.
Download the Azure SDK for Python:
Set the current date:
(must be performed to avoid getting
Install and update the necessary software:
Install the PIP package manager - you’ll need it to easily manage your Python modules.
The installation process may be quite long (about 5-10 minutes), while it may not be visible. Do not interrupt it.
Create a file for our example. This queue is intended for testing.
If you want to create a new queue, you need to create a new Microsoft Azure account and Service Bus Queue. In the namespace, you can create other queues, etc.
Go to the created queue page.
Click "Connection Details".
In order to interact with the queue, we need to create an access rule. Click on "Click here to configure".
Enter the fullaccess rule name in the lower block, then select the “Manage” access level - full access to the queue. Click “Save”.

Click on “Connection Details” again and copy the name and access key.
Now you can replace the test values in the code with new values from your own queue.
In order to run the example, you need to install the module:
Now you can run an example:
An example will send simple messages to the queue.
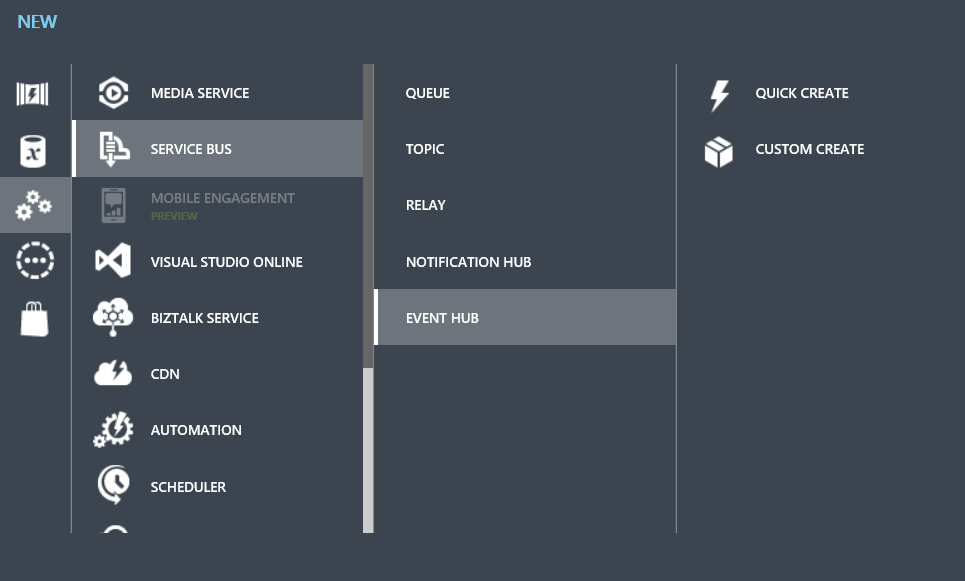
Similarly, the creation of the Event Hub (much more suitable for small messages mechanism for collecting messages).
To control and access the Event Hubs use its own security mechanism.
An example for sending messages to the Python Event Hub is on Github .
You can get them from the application using the API, from Service Bus Explorer or Stream Analytics - a convenient service for stream data processing. Ie, instead of independently implementing a mechanism for collecting data in (near) real time from a source (in this case, a queue), simply processing it (for example, aggregating or averaging over a period) and further transmission, you can connect Stream Analytics as a ready service.
Stream Analytics can be created using the instructions .
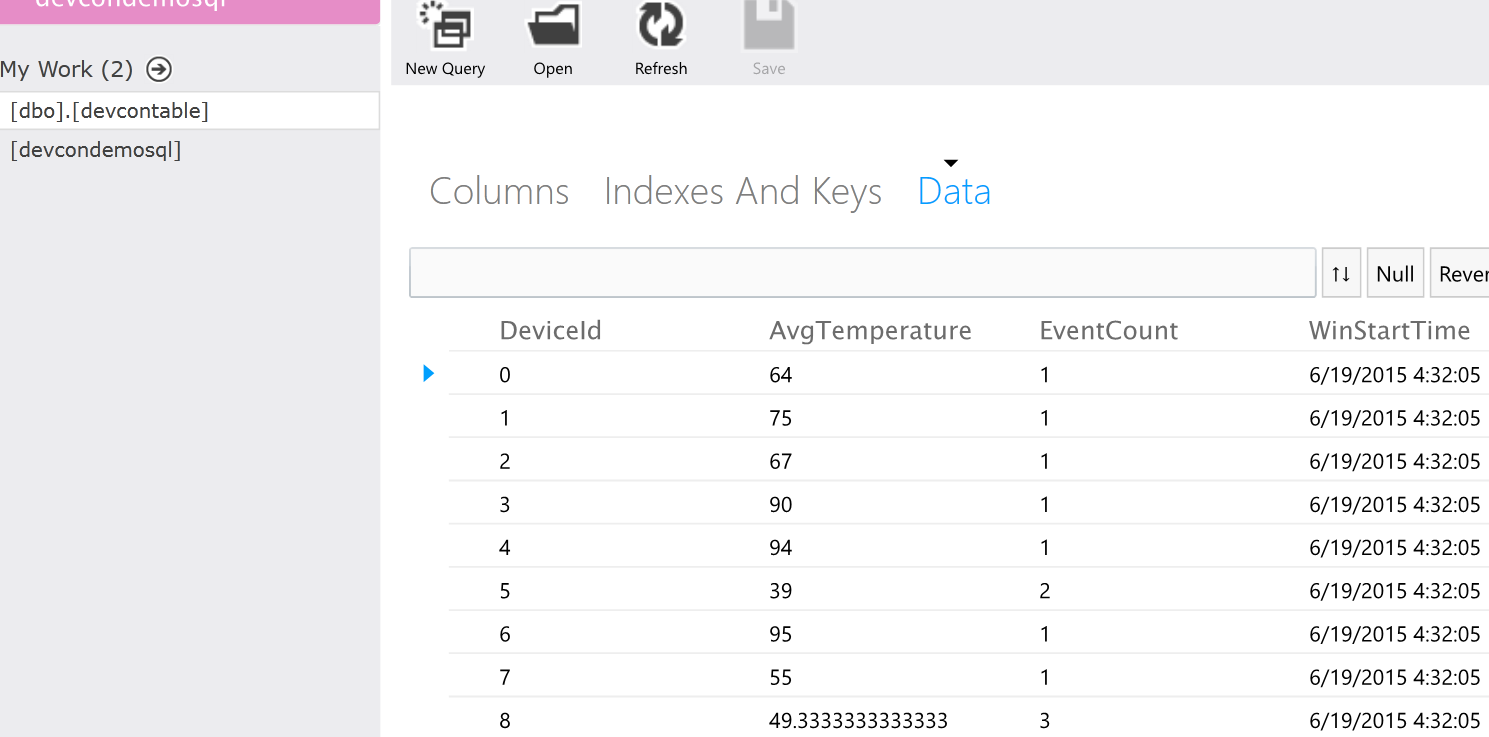
An SQL script that will average the temperature values, inside Stream Analytics, below. It consists of two scripts - one of them takes the stream and sends it to SQL Server (configured as an Output with the appropriate name) for the story and to the PowerBI for visualization.
Substituting your data for the Event Hub instead of the available data, you can redirect the incoming data stream from the device to where you need - to another Event Hub queue, to the storage (for example, in the form of JSON), etc.
From there you can get this data and process it using any means - for example, HDInsight, or visualize it using Excel or PowerBI.
For example, PowerBI:

Or Azure SQL:
Or even Excel:

On Monday, we wrote about how we see the Internet of Things - with a cloud that can be used to process various kinds of data, as well as our new Windows 10 operating system, which can be installed on Raspberry Pi 2 or Intel Minnowboard. On Wednesday, a colleague from the Microsoft technology center spoke about how they are doing a smart office. Yesterday @shwars wrote a column about how to connect the Arduino to the Raspberry Pi2. Today I will talk a little about the process of connecting Intel Galileo & Edison to Microsoft Azure, sending simple data and visualizing it using Azure services. Next week - experience installing Windows 10 IoT on Minnowboard MAX.
Let's start with Galileo. About Galileo wrote a lot on Intel's blog ( one , two ), many times our colleagues ( for example, Sergey Baydachny ) wrote, so I’ll focus only on the practical part, which we tested on ours and Intel hackathons.
In order to connect Galileo to a computer, there are several options - Ethernet, USB and a 6-pin debug cable. The simplest and most affordable is an Ethernet connection.
The problem is that the default network on Galileo is not configurable, and you will not be able to see it even after connecting with a cable.
There are two solutions to this problem:
- Connect Galileo to a router that will distribute its IP address (via Ethernet or Wi-Fi). This is the most convenient and functional way - the board will be able to go online.
- Connect the board to the computer and distribute the IP address to it using its own DHCP server. You can use OpenDHCPServer . To configure it, you must configure the interface to which Galileo will connect to a static address (for example, 192.168.0.1) and add this address for wiretapping to the OpenDHCPServer configuration, and then run it as a service or standalone. In this case, in order for the board to see the Internet, you need to perform additional settings.
After receiving the IP address, you can connect to the board via SSH. If you have Edison, then everything is easier - just call ./configure
')
On Galileo, the default image is Yocto Linux, which has its own specifics, but you can put the necessary software on it. You can also install Windows 8 . Windows 10 for Galileo & Edison is not.
To do this, you need to connect via SSH.
We will use Putty .
- The first step is to determine the IP address of the machine. If you have connected to the router, you can see on the administrator panel of the router which IP address was distributed by DHCP. If OpenDHCPServer, then in the console you will see that the IP is distributed.
- Enter the required data.
The login is root, there is no default password.
We start to customize the ecosystem. We will use Python and install the Azure SDK for Python, but you can install any other available SDK or write the necessary code yourself.
Download the Azure SDK for Python:
git clone https://github.com/Azure/azure-sdk-for-python.git cd azure-sdk-for-python/ python setup.py install Set the current date:
rdate -s time.nist.gov (must be performed to avoid getting
401 ExpiredToken errors: when sending a message to the Azure queue)Install and update the necessary software:
opkg update opkg install openssl opkg install curl Install the PIP package manager - you’ll need it to easily manage your Python modules.
The installation process may be quite long (about 5-10 minutes), while it may not be visible. Do not interrupt it.
curl https://bootstrap.pypa.io/get-pip.py -k | python Create a file for our example. This queue is intended for testing.
from azure.servicebus import ServiceBusService,Message, Queue import base64 service_namespace = 'demostand-ns' key_name = 'AuthRead' key_value = 'ax2UKT7ppf0ti8uslO8p+HSF4qfprqLKTdY893Io+to=' queue_name = 'galileo' message = Message(base64.b64encode('Hello World')) sbs = ServiceBusService(service_namespace, shared_access_key_name=key_name, shared_access_key_value=key_value) sbs.send_queue_message(queue_name,message) If you want to create a new queue, you need to create a new Microsoft Azure account and Service Bus Queue. In the namespace, you can create other queues, etc.
Go to the created queue page.
Click "Connection Details".
In order to interact with the queue, we need to create an access rule. Click on "Click here to configure".
Enter the fullaccess rule name in the lower block, then select the “Manage” access level - full access to the queue. Click “Save”.
Click on “Connection Details” again and copy the name and access key.
Now you can replace the test values in the code with new values from your own queue.
In order to run the example, you need to install the module:
pip install python-dateutil Now you can run an example:
python 1.py An example will send simple messages to the queue.
Similarly, the creation of the Event Hub (much more suitable for small messages mechanism for collecting messages).
To control and access the Event Hubs use its own security mechanism.
An example for sending messages to the Python Event Hub is on Github .
You can get them from the application using the API, from Service Bus Explorer or Stream Analytics - a convenient service for stream data processing. Ie, instead of independently implementing a mechanism for collecting data in (near) real time from a source (in this case, a queue), simply processing it (for example, aggregating or averaging over a period) and further transmission, you can connect Stream Analytics as a ready service.
Stream Analytics can be created using the instructions .
An SQL script that will average the temperature values, inside Stream Analytics, below. It consists of two scripts - one of them takes the stream and sends it to SQL Server (configured as an Output with the appropriate name) for the story and to the PowerBI for visualization.
SELECT DateAdd(second,-5,System.TimeStamp) as WinStartTime, system.TimeStamp as WinEndTime, DeviceId, Avg(Temperature) as AvgTemperature, Count(*) as EventCount INTO outputbi FROM input GROUP BY TumblingWindow(second, 5), DeviceId SELECT DateAdd(second,-5,System.TimeStamp) as WinStartTime, system.TimeStamp as WinEndTime, DeviceId, Temperature as Temperature, Count(*) as EventCount INTO outputsql FROM input GROUP BY TumblingWindow(second, 5), DeviceId Substituting your data for the Event Hub instead of the available data, you can redirect the incoming data stream from the device to where you need - to another Event Hub queue, to the storage (for example, in the form of JSON), etc.
From there you can get this data and process it using any means - for example, HDInsight, or visualize it using Excel or PowerBI.
For example, PowerBI:
Or Azure SQL:
Or even Excel:
Source: https://habr.com/ru/post/261671/
All Articles