We continue to expand the functionality of the browser Vivaldi
Already half a year has passed since the birth of the very first version of the browser Vivaldi.
During this period, the development team managed to do and add a lot, delighting users with weekly builds. Progress is visible. And Technical Preview 4 will be pulled up very soon.
But many users still lack some features. And while the browser developers are busy with a completely different, we will try to implement something ourselves.
')
This article is a kind of collection of some functions that extend the capabilities of the UI. Something has been peeped on the official Vivaldi forum, something has been changed, but something has been written personally. In the article we will try to implement features from other browsers and return a couple of the usual things that some people lack.
And under the cut, we start with the most delicious.
This is the name of the tick in the settings of the Opera Presto tabs. She allowed by repeated clicking on the active tab to open the previous one. For some it was a very useful thing, which over time, unfortunately, disappeared.
So now let us return it to Vivaldi.
Here is how she looked in the Opera:
As in the previous article , we also work according to the old scheme - we are only creating not css, but a js file with some name, for example, “last-tab.js”. And paste the code there:
And in browser.html after
insert the line:
Now, when you click on the active tab again, the previous one will open.
Yandex has its own alternative view on how to click on the active tab.
During these six months, I have often heard in the comments and forums user requests to make this feature. I myself have never used Yandex.Browser, but according to the description everything is, in principle, crystal clear what is required.
In browser.html respectively:
We start, we check. It seems to work.
Since these two functions are mutually exclusive, it is not recommended to combine them.
In Maxthon, there is a rather convenient function to follow a link from the clipboard.
After I tried it, I really missed it in all other browsers, and other users also ask developers to do this.
Fortunately, we can not wait for them and try to repeat this function in Vivaldi ourselves.
Create a "click-and-go.js" and paste the code:
Accordingly, in browser.html add:
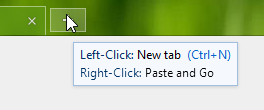
The function is made according to the following principle: clicking the right mouse button on the plus sign creates a new tab, and a link from the clipboard is clicked, if there is no link there, then an automatic search is performed on the search engine string.
But the solution has a couple of minuses.
First, a regular expression that looks for a link in a string without a protocol can be wrong. That is, for example, “test.test” will be perceived as a link exactly like “ya.ru”. But in general, in practice, this should not interfere.
And secondly, a given search engine is not associated with a search engine, which is set up in the browser as the main one. In this case, the search will occur through Google. But I specifically added more lines for DuckDuckGo and Yandex, if someone does not like Google. For other search engines it is also quite simple to write the necessary link.
It was possible to remove the status bar in the settings from the very first version. But the problem is that the links are displayed there when you hover over them. And those who do not need the status bar, either had to get on with it, or didn’t see any links when hovering. Now we will try to fix it using css.
Respectively after
insert the line
The principle here is simple: we simply remove the display of the status bar and draw a rectangle for status_info in the corner.
But this solution has some drawbacks: the link is always displayed in the corner on top of all elements of the user interface. Therefore, for users with tabs below this solution will not work, and it will be necessary to raise the block through the bottom .
This design solution may seem interesting for users whose tabs are not located on top, but on the sides or bottom. Because it is precisely with this arrangement of the tabs that the top of the window appears, which eats up the extra space vertically, which can be critical for some.
This will look like a window with a combination:
This is an option for those who use the Vivaldi-button.
But there are users who use the menu in its classic presentation. In this case, the address bar will have to shrink and give way to the menu buttons. And for different languages the width of the menu will be different.
Probably many have already forgotten, but Opera Presto was able to display tabs in several lines. Now this is except that in FF can be found. The time has come and teach Vivaldi.
The result will look like this:
When you open a new tab, the top panel will increase in height, respectively.
If you want to use some functions at the same time, then you can quite easily copy several files into one any custom.js file, so as not to produce unnecessary files.
The same with css.
I would also like to share a single user Vivaldi githab from the forum, which did quite good things and even implemented its own tab scrolling through PKM + scrolling with previews. Although this is more irrelevant, since the browser already has such a function, albeit in its most rudimentary form.
And this is probably all. I hope some of this was useful for you. Of course, these solutions are not ideal, and may require individual refinement, because Some of the things I created for myself.
If you have thoughts about a more concise solution in js-functions or suggestions on what else to do, then I will be glad to listen.
Do not forget that with each update all such changes will fly. After the upgrade, the files you create will be in the folder of the previous version. All you need is to copy the necessary two or three files into the new version.
A couple of ready-made options from me:
last-tab + status-bar + click & go + hideplus + tab-lines
(Tabs must be moved in advance from the header) tab-top + status-bar + click & go + hideplus + header
Vivaldi Forum
Github
During this period, the development team managed to do and add a lot, delighting users with weekly builds. Progress is visible. And Technical Preview 4 will be pulled up very soon.
But many users still lack some features. And while the browser developers are busy with a completely different, we will try to implement something ourselves.
')
This article is a kind of collection of some functions that extend the capabilities of the UI. Something has been peeped on the official Vivaldi forum, something has been changed, but something has been written personally. In the article we will try to implement features from other browsers and return a couple of the usual things that some people lack.
And under the cut, we start with the most delicious.
Minimize by clicking the tab
This is the name of the tick in the settings of the Opera Presto tabs. She allowed by repeated clicking on the active tab to open the previous one. For some it was a very useful thing, which over time, unfortunately, disappeared.
So now let us return it to Vivaldi.
Here is how she looked in the Opera:
Illustration:
As in the previous article , we also work according to the old scheme - we are only creating not css, but a js file with some name, for example, “last-tab.js”. And paste the code there:
last-tab.js
var browser = document.body.querySelector('#browser'); var list = []; function listTabs() { var tabs = browser.querySelectorAll('#tabs>.tab'); list=[]; for(var i = 0;i < tabs.length;i++){ list.push(tabs[i]); } list.sort(function(a,b) { return recent(b) - recent(a); }); } function recent(tab){ var page = document.querySelector('.webpageview webview[tab_id="'+tab.dataset.tabId+'"]'); if(page) { page = page.parentNode.parentNode.parentNode.parentNode; return parseInt(page.style.zIndex); } return 0; }; var dispatchMouseEvent = function(target, var_args) { var e = document.createEvent("MouseEvents"); e.initEvent.apply(e, Array.prototype.slice.call(arguments, 1)); target.dispatchEvent(e); }; browser.addEventListener('mousedown', function(e){ for (var i = 0; i < e.path.length; i++) { if (e.path[i].className.indexOf('active') > -1) { var active = browser.querySelector('.tab.active'); listTabs(); dispatchMouseEvent(list[1], 'mousedown', true, true); break; } } }); And in browser.html after
<script src="bundle.js"></script> insert the line:
<script src="last-tab.js"></script> Now, when you click on the active tab again, the previous one will open.
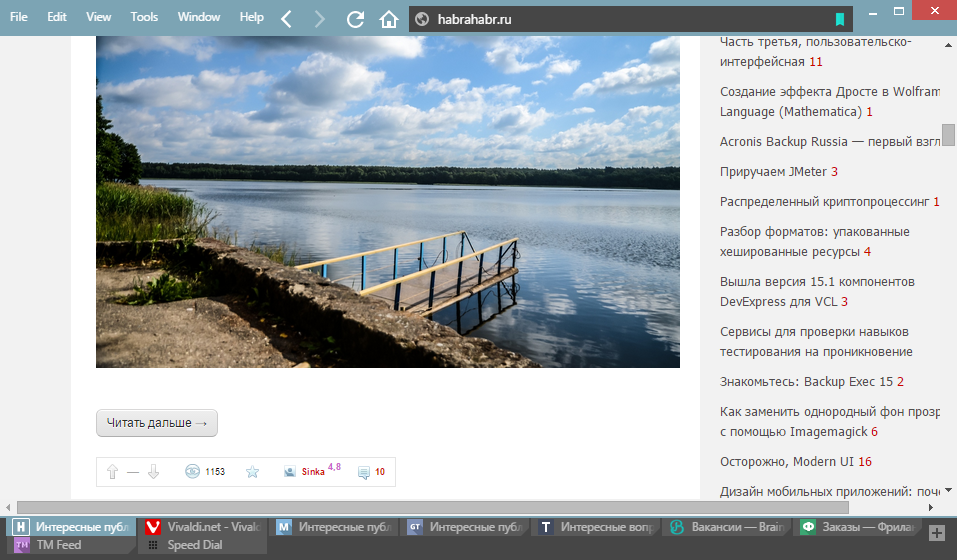
Go to the top of the page by clicking the tab
Yandex has its own alternative view on how to click on the active tab.
During these six months, I have often heard in the comments and forums user requests to make this feature. I myself have never used Yandex.Browser, but according to the description everything is, in principle, crystal clear what is required.
tab-to-top.js
// Click on active tab to scroll top var browser=document.body.querySelector('#browser'); browser.addEventListener('click', function(e){ for (var i = 0; i < e.path.length; i++) { if (e.path[i].className.indexOf('active') > -1) { var active = browser.querySelector('.tab.active'); var webview = document.querySelector('#webview-container webview[tab_id="'+active.dataset.tabId+'"]'); webview.executeScript({ code: "document.body.scrollTop=0" }); return; } } }); In browser.html respectively:
<script src="tab-to-top.js"></script> We start, we check. It seems to work.
Illustration (1 Mb):
Since these two functions are mutually exclusive, it is not recommended to combine them.
Paste and click through
In Maxthon, there is a rather convenient function to follow a link from the clipboard.
After I tried it, I really missed it in all other browsers, and other users also ask developers to do this.
Fortunately, we can not wait for them and try to repeat this function in Vivaldi ourselves.
Create a "click-and-go.js" and paste the code:
click-and-go.js
// Right click on plus-button to paste and go var browser=document.body.querySelector('#browser'); var isItMouse = false; // Exclude responses from keyboard //Tweak for paste in this input-field var hiddenInput = document.createElement("input"); hiddenInput.type = "text"; browser.appendChild(hiddenInput); hiddenInput.style.width = "0px"; hiddenInput.style.height = "0px"; hiddenInput.style.display = "none"; var dispatchMouseEvent = function(target, var_args) { var e = document.createEvent("MouseEvents"); e.initEvent.apply(e, Array.prototype.slice.call(arguments, 1)); target.dispatchEvent(e); }; browser.addEventListener('contextmenu', function(e) { //Area near square if (e.target.className.toString().indexOf('newtab') > -1) { isItMouse = true; document.execCommand('paste'); return; } //Plus-symbol if (e.target.parentNode.className.indexOf('newtab') > -1) { initPaste(); return; } //Square if (e.target.getTotalLength() > 0) { // 104 — length of new tab Button SVG initPaste(); return; } }); function initPaste() { isItMouse = true; hiddenInput.style.display = "block"; hiddenInput.focus(); document.execCommand('paste'); } document.addEventListener('paste',function(e) { if (isItMouse) { isItMouse = false; var url = e.clipboardData.getData('text/plain'); hiddenInput.style.display = "none"; //hide input-field for pasting var re = new RegExp('\\r\\n', 'g'); // Delete newline characters url = url.replace(re, ''); // Search engines var searchEngine = 'https://google.com/webhp?hl=ru#hl=ru&q='; // var searchEngine = 'http://yandex.ru/search/?text='; // var searchEngine = 'https://duckduckgo.com/?q='; var active = browser.querySelector('.tab.active'); var webview = document.querySelector('#webview-container webview[tab_id="'+active.dataset.tabId+'"]'); if (url.length > 0) { if (checkUrl(url)) { webview.executeScript({ code: "window.open('"+url+"','_blank')" }); } else if (checkUrlWithoutProtocol(url)) { webview.executeScript({ code: "window.open('http://"+url+"','_blank')" }); } else { webview.executeScript({ code: "window.open('"+searchEngine+url+"','_blank')" }); } } console.log(url)} } ); //Check url var patternUrl = /^(?:(?:https?|ftp):\/\/)(?:\S+(?::\S*)?@)?(?:(?!(?:10|127)(?:\.\d{1,3}){3})(?!(?:169\.254|192\.168)(?:\.\d{1,3}){2})(?!172\.(?:1[6-9]|2\d|3[0-1])(?:\.\d{1,3}){2})(?:[1-9]\d?|1\d\d|2[01]\d|22[0-3])(?:\.(?:1?\d{1,2}|2[0-4]\d|25[0-5])){2}(?:\.(?:[1-9]\d?|1\d\d|2[0-4]\d|25[0-4]))|(?:(?:[az\u00a1-\uffff0-9]-*)*[az\u00a1-\uffff0-9]+)(?:\.(?:[az\u00a1-\uffff0-9]-*)*[az\u00a1-\uffff0-9]+)*(?:\.(?:[az\u00a1-\uffff]{2,})).?)(?::\d{2,5})?(?:[/?/#]\S*)?$/i; var patternUrlWithout = /^(?:\S+(?::\S*)?@)?(?:(?!(?:10|127)(?:\.\d{1,3}){3})(?!(?:169\.254|192\.168)(?:\.\d{1,3}){2})(?!172\.(?:1[6-9]|2\d|3[0-1])(?:\.\d{1,3}){2})(?:[1-9]\d?|1\d\d|2[01]\d|22[0-3])(?:\.(?:1?\d{1,2}|2[0-4]\d|25[0-5])){2}(?:\.(?:[1-9]\d?|1\d\d|2[0-4]\d|25[0-4]))|(?:(?:[az\u00a1-\uffff0-9]-*)*[az\u00a1-\uffff0-9]+)(?:\.(?:[az\u00a1-\uffff0-9]-*)*[az\u00a1-\uffff0-9]+)*(?:\.(?:[az\u00a1-\uffff]{2,3})).?)(?::\d{2,5})?(?:[/?/#]\S*)?$/i; function checkUrl(str) { return patternUrl.test(str); } //url without protocol function checkUrlWithoutProtocol(str) { return patternUrlWithout.test(str); } Accordingly, in browser.html add:
<script src="click-and-go.js"></script> The function is made according to the following principle: clicking the right mouse button on the plus sign creates a new tab, and a link from the clipboard is clicked, if there is no link there, then an automatic search is performed on the search engine string.
But the solution has a couple of minuses.
First, a regular expression that looks for a link in a string without a protocol can be wrong. That is, for example, “test.test” will be perceived as a link exactly like “ya.ru”. But in general, in practice, this should not interfere.
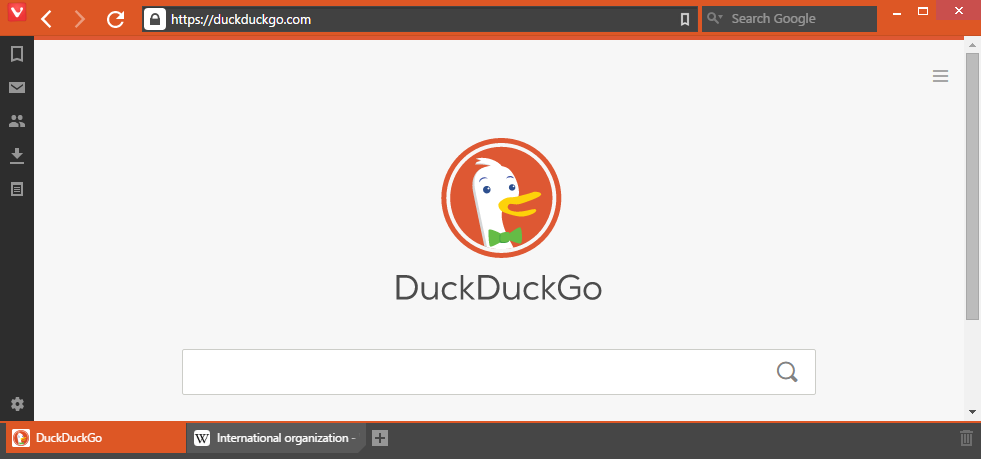
And secondly, a given search engine is not associated with a search engine, which is set up in the browser as the main one. In this case, the search will occur through Google. But I specifically added more lines for DuckDuckGo and Yandex, if someone does not like Google. For other search engines it is also quite simple to write the necessary link.
Illustration (1 Mb):
Getting rid of the status bar
It was possible to remove the status bar in the settings from the very first version. But the problem is that the links are displayed there when you hover over them. And those who do not need the status bar, either had to get on with it, or didn’t see any links when hovering. Now we will try to fix it using css.
status-bar.css
/** status bar **/ #footer.disabled{ display:block !important; position:static !important; padding:0 !important; height:0 !important; width:0 !important; } #footer.disabled > *{ display:none !important; } #footer.disabled #status_info{ display:block !important; } #footer.disabled #status_info span{ position:fixed !important; bottom:0 !important; left:0 !important; margin:0 !important; color:#333 !important; background-color:#FEFEFE !important; padding:2px 5px !important; border:#9E9E9E solid 0 !important; border-width:1px 1px 0 0 !important; max-width:75% !important; overflow: hidden !important; white-space: nowrap !important; text-overflow: ellipsis !important; z-index:50 !important; } #footer.disabled #status_info span:empty{ display:none !important; } /******/ Respectively after
<link rel="stylesheet" href="style/common.css" /> insert the line
<link rel="stylesheet" href="status-bar.css" /> The principle here is simple: we simply remove the display of the status bar and draw a rectangle for status_info in the corner.
But this solution has some drawbacks: the link is always displayed in the corner on top of all elements of the user interface. Therefore, for users with tabs below this solution will not work, and it will be necessary to raise the block through the bottom .
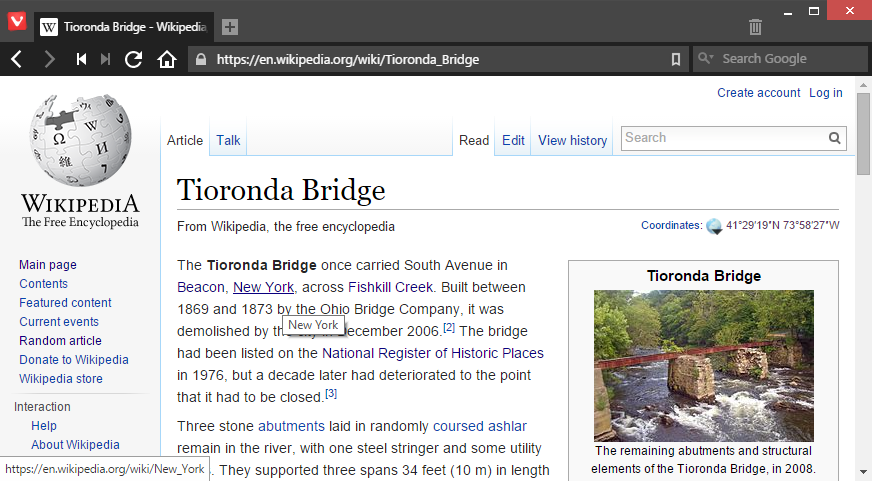
We remove the address bar in the window title
This design solution may seem interesting for users whose tabs are not located on top, but on the sides or bottom. Because it is precisely with this arrangement of the tabs that the top of the window appears, which eats up the extra space vertically, which can be critical for some.
This will look like a window with a combination:
header.css
/** **/ #header { min-height: 2px !important; height: 2px !important; z-index: auto !important; } .win .vivaldi { color: #fff; position: absolute; top: 5px; left: 98px; } .vivaldi+#tabs-container.top { border-bottom: 1px solid; position: absolute; top: 62px; width: 100%; z-index: 1 !important; } #tabs-container.bottom #tabs, #tabs-container.top #tabs { max-height: 30px !important; } .toolbar.toolbar-addressbar { padding-right: 100px; } .addressfield { margin-left: 40px !important; } .button-toolbar { position: relative !important; left: 30px !important; } .bookmark-bar { margin-bottom: 37px; } .vivaldi { z-index: 3; } .window-buttongroup { z-index: 2; } .home,.rewind,.next,#pagetitle{display:none} /********************/ This is an option for those who use the Vivaldi-button.
But there are users who use the menu in its classic presentation. In this case, the address bar will have to shrink and give way to the menu buttons. And for different languages the width of the menu will be different.
Options for English and Russian
 |  |
| |
Several rows of tabs
Probably many have already forgotten, but Opera Presto was able to display tabs in several lines. Now this is except that in FF can be found. The time has come and teach Vivaldi.
tab-lines.css
#tabs-container.top #tabs, #tabs-container.bottom #tabs { height: auto !important; display: block !important; } #tabs-container.bottom #tabs .tab, #tabs-container.top #tabs .tab { max-width: 150px !important; min-width: 150px; display: inline-block !important; float: left; } #tabs .tab .tab-thumb { display: none; } #tabs .newtab { margin-top: -9px; } #tabs .trash { margin-top: -10px; display: inline-block !important; float: right; } The result will look like this:
When you open a new tab, the top panel will increase in height, respectively.
And lastly a couple of little things:
- Disabling the display of the button with a plus in the Express Panel (it may soon become irrelevant):
.dial.add {display: none !important;} - Disable display of the cross with tabs:
#tabs .tab .tab-header .close {display: none !important;}
If you want to use some functions at the same time, then you can quite easily copy several files into one any custom.js file, so as not to produce unnecessary files.
The same with css.
I would also like to share a single user Vivaldi githab from the forum, which did quite good things and even implemented its own tab scrolling through PKM + scrolling with previews. Although this is more irrelevant, since the browser already has such a function, albeit in its most rudimentary form.
And this is probably all. I hope some of this was useful for you. Of course, these solutions are not ideal, and may require individual refinement, because Some of the things I created for myself.
If you have thoughts about a more concise solution in js-functions or suggestions on what else to do, then I will be glad to listen.
Do not forget that with each update all such changes will fly. After the upgrade, the files you create will be in the folder of the previous version. All you need is to copy the necessary two or three files into the new version.
A couple of ready-made options from me:
last-tab + status-bar + click & go + hideplus + tab-lines
(Tabs must be moved in advance from the header) tab-top + status-bar + click & go + hideplus + header
Vivaldi Forum
Github
Source: https://habr.com/ru/post/261543/
All Articles