CIFS in Android, or how I got files from a broken phone
It so happened that I broke the screen with my beloved Nexus 4. The first thought was “Damn! Now I will be like one of these rogues, with a broken screen! ” But, apparently, the creators of Nexus 4 were ardent opponents of poverty, because together with the broken screen, the touch screen completely failed. In general, do not worry, take the phone for repair and all. However, there were files on the phone that I needed right now, and not in a couple of weeks. But it seemed possible to get them only when the screen was unlocked, the phone required entering a “super secret” gesture and categorically did not want to work as an external drive.

Having rummaged a little with adb I spat on attempts to unlock the screen via the console. All the tips on hacking the lock screen required the presence of a root, and my phone is not one of these. It was decided to act from within. The choice fell on the JCIFS library, as I had previously worked with it and there were no problems with its use.
It was necessary to write an application that would independently copy the files from the phone to a folder shared via Wi-Fi. Mandatory conditions for such a trick: enabled debugging via USB and the computer to which the phone has already granted permission for debugging, as well as the availability of a Wi-Fi network to which the phone will connect as soon as it sees it (I have a home Wi-Fi).
')
Let's create the project with one Activity. Although she does not see the white light because of the lock screen, but to start the service, which will do the main work, it will be needed.
Copying files will be handled by a separate service. Since the Activity is not visible, it’s not worth counting on its viability, but the service running in Foreground will perfectly cope with this task.
Before moving on, we add a dependency, the build.gradle file, which will add the JCIFS library to the project.
You also need to add some permissions to the manifest and do not forget to write about our service there. Ultimately, AndroidManifest.xml I looked like this.
So, all the preparations are complete. Now, if you start the application, the service messages will appear in the notification list (starting with Android 5, you can configure the display of messages on the lock screen. If the Android version is smaller, you will not see this message), which means the application works as expected and you can proceed to the most delicious - transfer files.
In order not to perform network operations in the main thread, let's take the whole thing in AsyncTask.
SmbFile is a file for working with network files. Surprisingly, in JCIFS it is very easy to work with files. You will feel almost no difference between SmbFile and regular File. The only thing that catches your eye is the presence of managed exceptions in almost all methods of the class. And to create an SmbFile object, you need the authentication data that we created earlier.
Files can be many ... No, not so. They can be VERY MUCH! Therefore, showing progress is a vital function. The recursive getFilesSize method calculates the total amount of files that will be needed to calculate the total progress.
As I said earlier, working with SmbFile is no different from working with a regular file, therefore, the process of transferring data from the phone to the computer is not original. I even hide this code under the spoiler, so as not to litter the article with even more obvious code.
Almost done. Now run this task in the onCreate service.
Run the application. There was a message from the launched service. While the total files are being calculated, an uncertain state of progress is shown. But the indicator shows 0%, after which the strip gradually, in small, slightly noticeable steps, begins to move to 100%.
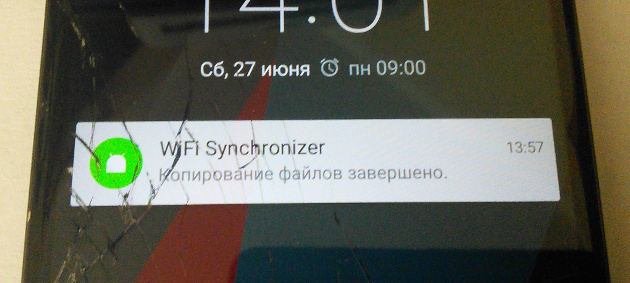
When the work was completed, a message was displayed on the screen about a successful result, and I had all the necessary files on my computer, which were previously sharpened on a broken phone.
What was needed I received. It's time to make a seagull, fall apart on the couch and turn on some serials. But wait! Despite the fact that the phone was mine and access to files on it is not contrary to Russian law, I got them without using a password! At the same time, Root was not on the phone. This means that with debugging mode on only, it is not difficult to access the contents of the “SD card” without even knowing the password. The only thing that saves is that the only thick point in protection against hacking is the need to use a computer that already has debugging rights.
Introduced, not long ago, the new version of Android, perhaps, will close this hole , because to access the necessary permissions, you will need to confirm the user, which is impossible when the screen is locked. In the meantime, Android developer, be on the guard, if you do not want someone else to see your nude photos. And remember, by allowing any computer to debug via USB, you create another loophole for hacking your own phone.
Thanks for attention. I would be glad to see your thoughts in the comments.
Source code can be found at the following link: github.com/KamiSempai/WiFiFolderSynchronizer
UPD: As I expected, there is a simpler solution to my problem. Namely, use the adb pull command. Unfortunately, the rare use of adb and the narrow look at the problem prevented me from coming to it. I tried to unlock the screen, not download files.
Thanks EvgenT for a good note.
Having rummaged a little with adb I spat on attempts to unlock the screen via the console. All the tips on hacking the lock screen required the presence of a root, and my phone is not one of these. It was decided to act from within. The choice fell on the JCIFS library, as I had previously worked with it and there were no problems with its use.
It was necessary to write an application that would independently copy the files from the phone to a folder shared via Wi-Fi. Mandatory conditions for such a trick: enabled debugging via USB and the computer to which the phone has already granted permission for debugging, as well as the availability of a Wi-Fi network to which the phone will connect as soon as it sees it (I have a home Wi-Fi).
')
Preparatory work
Let's create the project with one Activity. Although she does not see the white light because of the lock screen, but to start the service, which will do the main work, it will be needed.
MainActivity.java
public class MainActivity extends Activity { @Override protected void onCreate(Bundle savedInstanceState) { super.onCreate(savedInstanceState); startService(new Intent(this, SynchronizeService.class)); } } Copying files will be handled by a separate service. Since the Activity is not visible, it’s not worth counting on its viability, but the service running in Foreground will perfectly cope with this task.
SynchronizeService.java
public class SynchronizeService extends Service { private static final int FOREGROUND_NOTIFY_ID = 1; @Override public void onCreate() { super.onCreate(); final NotificationCompat.Builder builder = new NotificationCompat.Builder(this) .setSmallIcon(R.mipmap.ic_launcher) .setContentTitle(getString(R.string.app_name)) .setContentText(getString(R.string.synchronize_service_message)) .setContentIntent(getDummyContentIntent()) .setColor(Color.BLUE) .setProgress(1000, 0, true); startForeground(FOREGROUND_NOTIFY_ID, builder.build()); // CPU PowerManager powerManager = (PowerManager) getSystemService(POWER_SERVICE); final WakeLock wakeLock = powerManager.newWakeLock(PowerManager.PARTIAL_WAKE_LOCK, "SynchronizeWakelockTag"); wakeLock.acquire(); } @Override public int onStartCommand(Intent intent, int flags, int startId) { return START_NOT_STICKY; } @Override public IBinder onBind(Intent intent) { return null; } } Before moving on, we add a dependency, the build.gradle file, which will add the JCIFS library to the project.
dependencies { ... compile 'jcifs:jcifs:1.3.17' } You also need to add some permissions to the manifest and do not forget to write about our service there. Ultimately, AndroidManifest.xml I looked like this.
AndroidManifest.xml
<manifest xmlns:android="http://schemas.android.com/apk/res/android" package="ru.kamisempai.wifisynchronizer"> // . <uses-permission android:name="android.permission.WAKE_LOCK"/> // . <uses-permission android:name="android.permission.INTERNET"/> // SD . <uses-permission android:name="android.permission.READ_EXTERNAL_STORAGE"/> <application android:label="@string/app_name" android:icon="@mipmap/ic_launcher"> <activity android:name=".activities.MainActivity"> <intent-filter> <action android:name="android.intent.action.MAIN" /> <category android:name="android.intent.category.LAUNCHER" /> </intent-filter> </activity> <service android:name=".services.SynchronizeService"/> </application> </manifest> Copying files
So, all the preparations are complete. Now, if you start the application, the service messages will appear in the notification list (starting with Android 5, you can configure the display of messages on the lock screen. If the Android version is smaller, you will not see this message), which means the application works as expected and you can proceed to the most delicious - transfer files.
In order not to perform network operations in the main thread, let's take the whole thing in AsyncTask.
public class CopyFilesToSharedFolderTask extends AsyncTask<Void, Double, String> { private final File mFolderToCopy; private final String mSharedFolderUrl; private final NtlmPasswordAuthentication mAuth; private FileFilter mFileFilter; public CopyFilesToSharedFolderTask(File folderToCopy, String sharedFolderUrl, String user, String password, FileFilter fileFilter) { super(); mFolderToCopy = folderToCopy; // , . mSharedFolderUrl = sharedFolderUrl; // Url , . mAuth = (user != null && password != null) ? new NtlmPasswordAuthentication(user + ":" + password) : NtlmPasswordAuthentication.ANONYMOUS; mFileFilter = fileFilter; } } Special attention should be paid to the user and password parameters. This is the login and password for the network folder that will be used to create NtlmPasswordAuthentication. If you do not need a password to access the folder, NtlmPasswordAuthentication.ANONYMOUS should be used as the authentication. It looks simple, however, authentication is the biggest problem you may encounter when working with network folders. Usually, most problems lurk in improperly setting security policies on a computer. The best way to verify the settings is to try to open the network folder on your phone, through any other file manager that supports networking.SmbFile is a file for working with network files. Surprisingly, in JCIFS it is very easy to work with files. You will feel almost no difference between SmbFile and regular File. The only thing that catches your eye is the presence of managed exceptions in almost all methods of the class. And to create an SmbFile object, you need the authentication data that we created earlier.
private double mMaxProgress; private double mProgress; ... @Override protected String doInBackground(Void... voids) { mMaxProgress = getFilesSize(mFolderToCopy); mProgress = 0; publishProgress(0d); try { SmbFile sharedFolder = new SmbFile(mSharedFolderUrl, mAuth); if (sharedFolder.exists() && sharedFolder.isDirectory()) { copyFiles(mFolderToCopy, sharedFolder); } } catch (MalformedURLException e) { return "Invalid URL."; } catch (IOException e) { e.printStackTrace(); return e.getMessage(); } return null; } The doInBackground method returns an error message. If null is returned, then everything went smoothly and without errors.Files can be many ... No, not so. They can be VERY MUCH! Therefore, showing progress is a vital function. The recursive getFilesSize method calculates the total amount of files that will be needed to calculate the total progress.
private double getFilesSize(File file) { if (!checkFilter(file)) return 0; if (file.isDirectory()) { int size = 0; File[] filesList = file.listFiles(); for (File innerFile : filesList) size += getFilesSize(innerFile); return size; } return (double) file.length(); } private boolean checkFilter(File file) { return mFileFilter == null || mFileFilter.accept(file); } The filter passed to the designer helps to eliminate unnecessary files and folders. For example, you can exclude all folders starting with a dot or add the Android folder to the blacklist.As I said earlier, working with SmbFile is no different from working with a regular file, therefore, the process of transferring data from the phone to the computer is not original. I even hide this code under the spoiler, so as not to litter the article with even more obvious code.
CopyFiles and copySingleFile methods
The code is obvious, but there is one, not at all obvious, point - adding the character "/" to the end of the folder name when creating a new SmbFile. The fact is that JCIFS treats all files that do not end with the "/" character only as a file, not as a directory. Therefore, if the network folder's Url looks like this: “file: // MY-PC / shared / some_foldel”, incidents will arise when creating a new folder in the “some_foldel” folder. Namely, “some_foldel” will be dropped, and the new folder will have the URL: “file: // MY-PC / shared / new_folder”, instead of the expected “file: // MY-PC / shared / some_foldel / new_folder”. However, for such folders, the isDirectory, mkdir or listFiles methods will work correctly. private static final String LOG_TAG = "WiFiSynchronizer"; private void copyFiles(File fileToCopy, SmbFile sharedFolder) throws IOException { if (!checkFilter(fileToCopy)) return; // , . if (fileToCopy.exists()) { if (fileToCopy.isDirectory()) { File[] filesList = fileToCopy.listFiles(); // "/". SmbFile newSharedFolder = new SmbFile(sharedFolder, fileToCopy.getName() + "/"); if (!newSharedFolder.exists()) { newSharedFolder.mkdir(); Log.d(LOG_TAG, "Folder created:" + newSharedFolder.getPath()); } else Log.d(LOG_TAG, "Folder already exist:" + newSharedFolder.getPath()); for (File file : filesList) copyFiles(file, newSharedFolder); // } else { SmbFile newSharedFile = new SmbFile(sharedFolder, fileToCopy.getName()); // , . // , , , . if (!newSharedFile.exists()) { copySingleFile(fileToCopy, newSharedFile); Log.d(LOG_TAG, "File copied:" + newSharedFile.getPath()); } else Log.d(LOG_TAG, "File already exist:" + newSharedFile.getPath()); // . mProgress += (double) fileToCopy.length(); publishProgress(mProgress / mMaxProgress * 100d); } } } // . private void copySingleFile(File file, SmbFile sharedFile) throws IOException { IOException exception = null; InputStream inputStream = null; OutputStream outputStream = null; try { outputStream = new SmbFileOutputStream(sharedFile); inputStream = new FileInputStream(file); byte[] bytesBuffer = new byte[1024]; int bytesRead; while ((bytesRead = inputStream.read(bytesBuffer)) > 0) { outputStream.write(bytesBuffer, 0, bytesRead); } } catch (IOException e) { exception = e; } finally { if (inputStream != null) try { inputStream.close(); } catch (IOException e) { e.printStackTrace(); } if (outputStream != null) try { outputStream.close(); } catch (IOException e) { e.printStackTrace(); } } if (exception != null) throw exception; } Almost done. Now run this task in the onCreate service.
private static final int FOREGROUND_NOTIFY_ID = 1; private static final int MESSAGE_NOTIFY_ID = 2; private static final String SHARED_FOLDER_URL = "file://192.168.0.5/shared/"; ... final File folderToCopy = getFolderToCopy(); CopyFilesToSharedFolderTask task = new CopyFilesToSharedFolderTask(folderToCopy, SHARED_FOLDER_URL, null, null, null) { @Override protected void onProgressUpdate(Double... values) { builder.setProgress(100, values[0].intValue(), false) .setContentText(String.format("%s %.3f", getString(R.string.synchronize_service_progress), values[0]) + "%"); mNotifyManager.notify(FOREGROUND_NOTIFY_ID, builder.build()); } @Override protected void onPostExecute(String errorMessage) { stopForeground(true); if (errorMessage == null) showNotification(getString(R.string.synchronize_service_success), Color.GREEN); else showNotification(errorMessage, Color.RED); stopSelf(); wakeLock.release(); // wakeLock } @Override protected void onCancelled(String errorMessage) { // . , - . // . stopSelf(); wakeLock.release(); } }; task.execute(); In my case, the username and password are not required, I did not specify a filter either. The onProgressUpdate method is overridden to show the progress status, and onPostExecute shows a message about the end of the download, or about the occurrence of an error, and then terminates the service.Run the application. There was a message from the launched service. While the total files are being calculated, an uncertain state of progress is shown. But the indicator shows 0%, after which the strip gradually, in small, slightly noticeable steps, begins to move to 100%.
When the work was completed, a message was displayed on the screen about a successful result, and I had all the necessary files on my computer, which were previously sharpened on a broken phone.
Unexpected conclusions
What was needed I received. It's time to make a seagull, fall apart on the couch and turn on some serials. But wait! Despite the fact that the phone was mine and access to files on it is not contrary to Russian law, I got them without using a password! At the same time, Root was not on the phone. This means that with debugging mode on only, it is not difficult to access the contents of the “SD card” without even knowing the password. The only thing that saves is that the only thick point in protection against hacking is the need to use a computer that already has debugging rights.
Introduced, not long ago, the new version of Android, perhaps, will close this hole , because to access the necessary permissions, you will need to confirm the user, which is impossible when the screen is locked. In the meantime, Android developer, be on the guard, if you do not want someone else to see your nude photos. And remember, by allowing any computer to debug via USB, you create another loophole for hacking your own phone.
Thanks for attention. I would be glad to see your thoughts in the comments.
Source code can be found at the following link: github.com/KamiSempai/WiFiFolderSynchronizer
UPD: As I expected, there is a simpler solution to my problem. Namely, use the adb pull command. Unfortunately, the rare use of adb and the narrow look at the problem prevented me from coming to it. I tried to unlock the screen, not download files.
Thanks EvgenT for a good note.
Source: https://habr.com/ru/post/261419/
All Articles