Your cloud hosting in 5 minutes. Part 1: Ansible, Docker, Docker Swarm

Hi Habr! The last 1.5 years I have been working on my project, which required reliable cloud hosting. Up to this point, I have been engaged in web programming for more than 10 years and when I decided to build my hosting, I had relatively superficial knowledge in this area, and now I am not a system administrator. All that I will be telling can be done by an ordinary programmer within 5 minutes, simply by running a set of scripts for Ansible, which I prepared specially for you and uploaded to GitHub .
My goal is to give you a list of tools and a general understanding that you would know what to build on if you need your own cloud hosting. When choosing the tools I used, I was guided by simplicity, quality of documentation and stability. Before you use all this in your production, you should definitely consult with your system administrator ( I use some components that are in BETA status (June 2015) ).
Content
- Part 0: Virtualization
- Part 1: Ansible, Docker, Docker Swarm
- Part 2: Service Discovery
- Part 3: Consul, Registrator, Consul-Template
- ...
Why your hosting?
The main reason - I wanted to get the necessary experience. I am increasingly moving away from programming and dealing with administrative issues. A good entrepreneur has to go all the way himself and work, if possible, in all positions, to understand how everything works, how to manage it, from which people and what to demand, how to evaluate their work and themselves.
')
The second reason is the specifics of my project, it is related to the privacy of personal data. I have no reason for someone to just trust their data, and my users more. I am very concerned about this issue, and I am concerned that so little attention is paid to it.
The last reason in the goals and orientations of a startup in Russian realities. Here, the main goal is to start making money and get a plus. No profit - no startup, there is an unprofitable hobby. Therefore, the third reason is the cost. I now have ~ 9Tb of traffic and ~ 5Tb of data that I regularly process, costing me all this ~ $ 100 / month ( you can calculate how much it will cost on AWS) . I know that next month I will have the same value, and I build a project with my own money.
Training
The first thing to do is to get 3 servers in one data center ( they should be located as close as possible to each other, so that the ping between them is minimal ). It does not matter whether they are virtual dedicated servers ( at the time of testing ) or real ones and from which provider you rent them. I ordered from DigitalOcean, chose a Debian 8.1 x64 installation and indicated to add my SSH key:
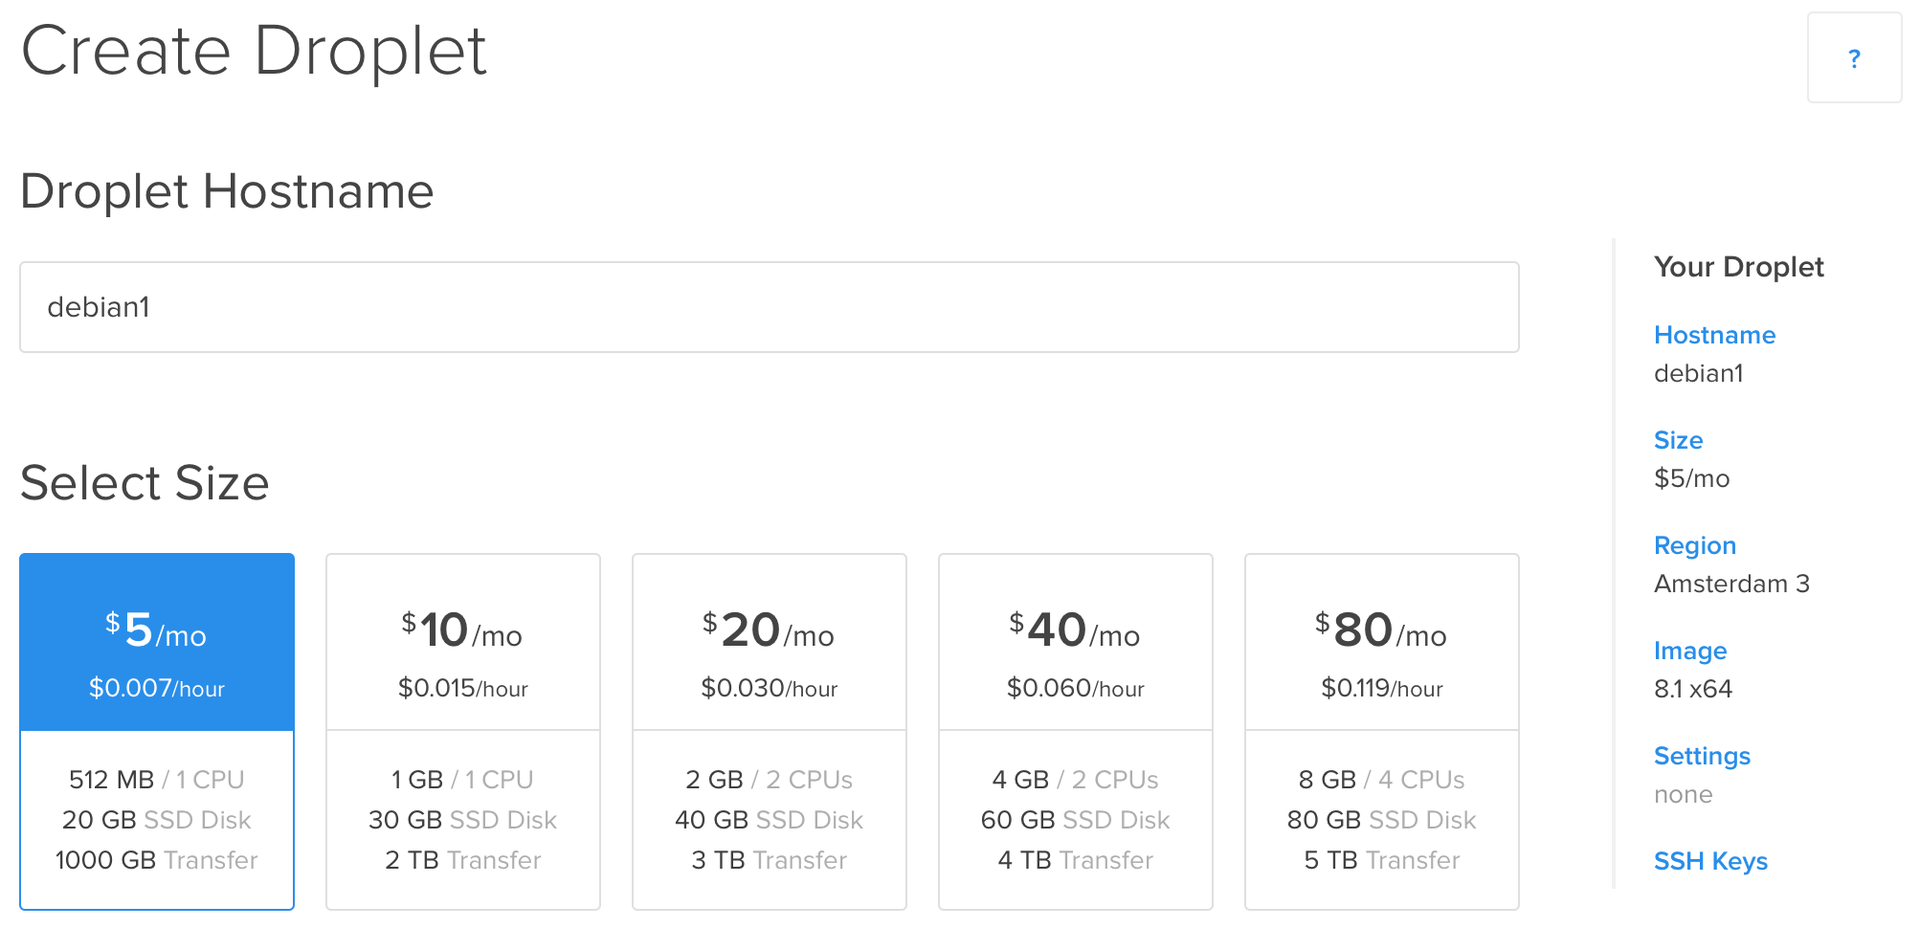
The installation is complete and we have at our disposal 3 “bare” servers:

Ansible
As you already understood, we will use Ansible to configure our servers. If you do not know what it is and how to use it, then on Habré there are answers to these questions:
No one has canceled the official documentation ( if you have no problems reading the documentation in English, then I would recommend this source of information ).
Ansible is not the only configuration management system (there is Puppet , Chef , Salt , etc. ), so why exactly is it?
As I wrote above, one of the priorities when choosing tools is simplicity. There is no need to install clients on managed machines ( everything works via SSH ), the scripting language is extremely simple, the project has fresh and detailed documentation, and the module code is written in Python ( which is an advantage for us because Python is the main language in a startup ).
Thoughts of simplicity
In general, for me, simplicity is a sign of a deep understanding of the subject. If one person ( familiar with the subject ) cannot explain to another person ( with a subject not familiar ) how he works, then he himself does not fully understand this subject.
This is well revealed in Steve Wozniak's book “Steve Jobs and Me,” where his father begins to tell the principles of electrical engineering to Steve when he has not yet reached four years (the book will be of interest to all engineers, even if you are not interested in the story of Apple ).
This is well revealed in Steve Wozniak's book “Steve Jobs and Me,” where his father begins to tell the principles of electrical engineering to Steve when he has not yet reached four years (the book will be of interest to all engineers, even if you are not interested in the story of Apple ).
At this stage, Ansible should be installed on your client machine ( instruction ). I, on OS X 10.9, for this I needed to execute only 2 commands:
» sudo easy_install pip # PIP » sudo pip install ansible Check that everything is OK:
» ansible --version ansible 1.9 configured module search path = None Docker

This is without a doubt one of the best tools I have met in the last few years. That Docker will be the heart of our cloud hosting, giving it a truly great potential.
"Out of the box" we get access to a huge number of ready-made images that we can instantly perform in our cloud. We have the opportunity to independently run the necessary services of different versions at the same time, to test compatibility or meet the dependencies of our web applications.
We can launch 20 containers with the 1st version of our web application, 2 containers with the 2nd version and distribute the load between them, show the new version only ~ 10% of visitors, assessing the stability of work and user reviews.
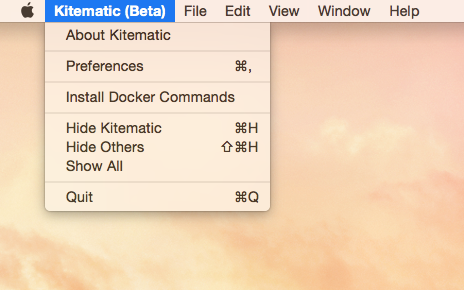
Now you need to install Docker on the client machine, we will need it to manage the future Docker cluster. The easiest way to do this is to download the Kitematic GUI client ( available for Mac OS X 10.9+ and Windows 7+ 64-bit) , go to the main menu and select Install Docker Commands to install Docker console commands.
Alternative installation options can be found in the official documentation ( it is well written and updated in a timely manner ). To make sure that everything is in order, you can as follows:
» docker version Client version: 1.6.2 Client API version: 1.18 Go version (client): go1.4.2 Git commit (client): 7c8fca2 OS/Arch (client): darwin/amd64 Docker swarm

Finally, we have reached the most interesting, to the point that will give our hosting "cloudiness". Strange, but I did not find any information about Docker Swarm on Habré.
Docker Swarm is used to combine multiple Docker hosts into one virtual host and does it elegantly. Docker Swarm provides a Docker API compatible REST API . Thus, all tools that work with the Docker'a API (Docker'a client, Dokku, Compose, Krane, Flynn, Deis, DockerUI, Shipyard, Drone, Jenkins, etc. ) can work with Docker Swarm, not suspecting that a Docker cluster is behind him, not just one machine.
Let's build our cloud and, in practice, take a look at what Docker Swarm is capable of.
Getting started
At this point, Ansible and Docker should be installed on your client machine. There should be 3 servers with authorization by key and Debian 8.1 x64 on board ( you can use any other distribution kit, making minor changes to the script ). I have prepared a set of scripts for Ansible that will do all the work for you, so you will not need much time.
Download a set of scripts or clone the repository:
» git clone https://github.com/vkozlovski/ansible-cloud-hosting » git checkout v1.x » cd ansible-cloud-hosting We open the stage file and replace the IP addresses with the IP of our servers in it:
[cloud] 188.166.16.70 debian_release=testing hostname=debian1 188.166.99.31 debian_release=testing hostname=debian2 128.199.59.102 debian_release=testing hostname=debian3 In order for Docker Swarm to connect to Docker nodes, they must be accessible from the outside ( by default on port 2375 for HTTP and on 2376 for HTTPS ). We also need to make the Docker Swarm Manager available outside, so that we can manage the cluster. HTTP is not suitable for us for these purposes ( we are building a cloud for ourselves, not for any Internet user ), HTTPS remains, or rather TLS ( for more information, see the official documentation ).
The principle of operation is the following: we create our own certificate authority ( hereinafter referred to as the CA ), sign certificates for the Docker server and client. After that, the “demon” of the docker accepts connections from clients whose certificate is signed by the same CA as the certificate of the “demon”. The Docker client performs the same verification and connects only to those Docker servers whose certificate is signed by the same CA. Docker Swarm Manager uses the same scheme. This ensures authentication and security of our mini-clouds.
The only thing you need to do is generate keys for your CA ( everything else will be executed in automatic mode ). Just execute the following commands from the project root directory (the password you specify, you need to remember, we will need it ) and fill in the answers to the questions ( there are no specific requirements, you can specify any domain ):
» openssl genrsa -aes256 -out certs/ca/ca-key.pem 4096 » openssl req -new -x509 -days 365 -key certs/ca/ca-key.pem -sha256 -out certs/ca/ca.pem It remains to fill in the values of some variables in the file:
group_vars / all.yml
certs: ca: password: "YOUR PASSWORD HERE" docker_swarm: # docker run --rm swarm create token: "YOUR DOCKER SWARM TOKEN HERE" manager: "YOU DOCKER SWARM MANAGER IP HERE" ssh: users: # user for ansible - user: "support" shell: "/bin/zsh" # for oh-my-zsh groups: "sudo" # mkpasswd --method=SHA-512 password: "YOUR PASSWORD HERE" # cat ~/.ssh/id_rsa.pub key: "YOUR PUBLIC KEY HERE" The variable certs.ca.password should contain the password that we specified when we generated the private key for our certificate authority.
The variable docker_swarm.token should contain the identifier of our future cluster, which can be generated by the following command:
» docker run --rm swarm create 6856663cdefdec325839a4b7e1de38e8 The variable docker_swarm.manager should contain the IP address of the host where Docker Swarm Manager will be running ( specify the IP address of any of your servers ).
The Ansible scripts indicate that you need to create a support user, add him to the sudo group and disable root 's SSH authorization. The value of the variable ssh.users []. Password must be a password hash for the user specified above. In order to get it, you need to run the following command on any Linux machine ( you can go to one of your servers via SSH and execute it ):
» mkpasswd --method=SHA-512 Password: $6$n0lQGWy2s5437ns1$nczULrrTw5r.TmhEI/xBz5xYEHWyMbtbQhAJoWshv0rFjSoRxLYZh0zDoMwVM.ZFnChx7ym.4.r182EOIn9Ec/ The ssh.users []. Key value should be your public key, which by default is here ~ / .ssh / id_rsa.pub :
~ / .ssh / id_rsa.pub
ssh-rsa AAAAB3NzaC1yc2EAAAADAQABAAACAQDDakR6/NJuIxJGpWZiV5QODuRacuh4VoIdzeOUlH+MC1xxFf/U74gfumoQ1k62d4S0qPqnlpJVqRNg7mQo0CCguujVRuOP+FbRMjdQbbAEfDAjxkSuKXRWnChg6Ds4MX0RO9WUB9pQLrCmbPpI8A0l0zaNi6mp6TaXWCoMPrgk1OfuTYDBTgQya/MtKjjPnWFEdgwTvB3hVusCU83854Gju9OX4I5ucejy/f8/IWGUIFt8miLisrYnDcdFvY/ThzX7E2h4lzsc8JK6ltywyoHVScl3Vdgf1/WbScEnQYWJZk/h2zWDqdFlte/elov7l3yfJDN0axF+dC6BqJGfZMFQsN6xPWHoG8OCPaH2HmTY3XNpQNRLJR5GFWwVriIBDe+GyVjtjzb1/BLdu0WJatv6/PYMsEfArYBgnQ/bHYgfFLF0GPq6nBGJbngytv7C5crBljZAvnC86HQN5sGPbZWfkKdvoG5MbbJYwqFvaD2BEjlXMurbCX4ERrRUHC9875XufaCvdpCiSWaU4S5PM8nr2QCF3co0EtL0bkiciyv95eU0HoQ3cYhPNGwUMxntPp/3z0KRqeSBHPnvV5pmXOwP/xUHxEIvDbqCXtTc3y96iDKZ1T8+jPH1aif6ooVUwmogTHDd1DcW+APtMkqRHdZ7r33wKAYJfNopd+0P8rYF2w== An example of a completed configuration file can be found below:
group_vars / all.yml
certs: ca: password: "12345" docker_swarm: # docker run --rm swarm create token: "6856663cdefdec325839a4b7e1de38e8" manager: "188.166.16.70" ssh: users: # user for ansible - user: "support" shell: "/bin/zsh" # for oh-my-zsh groups: "sudo" # mkpasswd --method=SHA-512 password: "$6$n0lQGWy2s5437ns1$nczULrrTw5r.TmhEI/xBz5xYEHWyMbtbQhAJoWshv0rFjSoRxLYZh0zDoMwVM.ZFnChx7ym.4.r182EOIn9Ec/" # cat ~/.ssh/id_rsa.pub key: "ssh-rsa AAAAB3NzaC1yc2EAAAADAQABAAACAQDDakR6/NJuIxJGpWZiV5QODuRacuh4VoIdzeOUlH+MC1xxFf/U74gfumoQ1k62d4S0qPqnlpJVqRNg7mQo0CCguujVRuOP+FbRMjdQbbAEfDAjxkSuKXRWnChg6Ds4MX0RO9WUB9pQLrCmbPpI8A0l0zaNi6mp6TaXWCoMPrgk1OfuTYDBTgQya/MtKjjPnWFEdgwTvB3hVusCU83854Gju9OX4I5ucejy/f8/IWGUIFt8miLisrYnDcdFvY/ThzX7E2h4lzsc8JK6ltywyoHVScl3Vdgf1/WbScEnQYWJZk/h2zWDqdFlte/elov7l3yfJDN0axF+dC6BqJGfZMFQsN6xPWHoG8OCPaH2HmTY3XNpQNRLJR5GFWwVriIBDe+GyVjtjzb1/BLdu0WJatv6/PYMsEfArYBgnQ/bHYgfFLF0GPq6nBGJbngytv7C5crBljZAvnC86HQN5sGPbZWfkKdvoG5MbbJYwqFvaD2BEjlXMurbCX4ERrRUHC9875XufaCvdpCiSWaU4S5PM8nr2QCF3co0EtL0bkiciyv95eU0HoQ3cYhPNGwUMxntPp/3z0KRqeSBHPnvV5pmXOwP/xUHxEIvDbqCXtTc3y96iDKZ1T8+jPH1aif6ooVUwmogTHDd1DcW+APtMkqRHdZ7r33wKAYJfNopd+0P8rYF2w==" Now we are ready to start building a long-awaited cloud:
» ansible-playbook -i stage site.yml -u root Due to the fact that we have disabled the root authorization feature, as well as added support user ( this is written in the Ansible scripts ), all subsequent launches should be performed with the -s ( sudo ) and -K flags ( to request a password for sudo ):
» ansible-playbook -i stage site.yml -u support -s -K Check and use
We are ready to test our new cloud:
» docker -H tcp://188.166.16.70:8000 --tlsverify=true --tlscacert=certs/ca/ca.pem --tlscert=certs/docker/cert.pem --tlskey=certs/docker/key.pem info Containers: 4 Images: 3 Storage Driver: Role: primary Strategy: spread Filters: affinity, health, constraint, port, dependency Nodes: 3 debian1: 188.166.16.70:2376 └ Containers: 2 └ Reserved CPUs: 0 / 1 └ Reserved Memory: 0 B / 519.2 MiB └ Labels: executiondriver=native-0.2, kernelversion=3.16.0-4-amd64, operatingsystem=Debian GNU/Linux stretch/sid, storagedriver=aufs debian2: 188.166.99.31:2376 └ Containers: 1 └ Reserved CPUs: 0 / 1 └ Reserved Memory: 0 B / 519.2 MiB └ Labels: executiondriver=native-0.2, kernelversion=3.16.0-4-amd64, operatingsystem=Debian GNU/Linux stretch/sid, storagedriver=aufs debian3: 128.199.59.102:2376 └ Containers: 1 └ Reserved CPUs: 0 / 1 └ Reserved Memory: 0 B / 519.2 MiB └ Labels: executiondriver=native-0.2, kernelversion=3.16.0-4-amd64, operatingsystem=Debian GNU/Linux stretch/sid, storagedriver=aufs Execution Driver: Kernel Version: Operating System: CPUs: 3 Total Memory: 1.521 GiB Name: ID: Http Proxy: Https Proxy: No Proxy: Hooray! I’ve almost finished this great article, and you’ve successfully finished building your cloud.
If you need, you can connect to any of the Docker hosts separately:
Example
» docker -H tcp://128.199.59.102:2376 --tlsverify=true --tlscacert=certs/ca/ca.pem --tlscert=certs/docker/cert.pem --tlskey=certs/docker/key.pem info Containers: 2 Images: 7 Storage Driver: aufs Root Dir: /var/lib/docker/aufs Backing Filesystem: extfs Dirs: 11 Dirperm1 Supported: true Execution Driver: native-0.2 Kernel Version: 3.16.0-4-amd64 Operating System: Debian GNU/Linux stretch/sid CPUs: 1 Total Memory: 494.5 MiB Name: debian1 ID: 5XPE:2VWX:QCSA:J3PJ:WMN7:EDXX:3TSS:7K7K:XU4R:Z3AX:TRVX:VTUQ WARNING: No memory limit support WARNING: No swap limit support But we did not go all this way for this, right? Let's try to run several instances of Nginx in our cloud:
» docker -H tcp://188.166.16.70:8000 --tlsverify=true --tlscacert=certs/ca/ca.pem --tlscert=certs/docker/cert.pem --tlskey=certs/docker/key.pem run -d -p 80:80 --name nginx1 nginx bb49018b697fca975d10a5ec31ad2fed65ed12b3ad8fbd61e64474187d8bc6ed » docker -H tcp://188.166.16.70:8000 --tlsverify=true --tlscacert=certs/ca/ca.pem --tlscert=certs/docker/cert.pem --tlskey=certs/docker/key.pem run -d -p 80:80 --name nginx2 nginx 2bd86ff97c35d431e9db7f0571d65e17893aefd1d18b1b52194c100a22a49937 Checking:
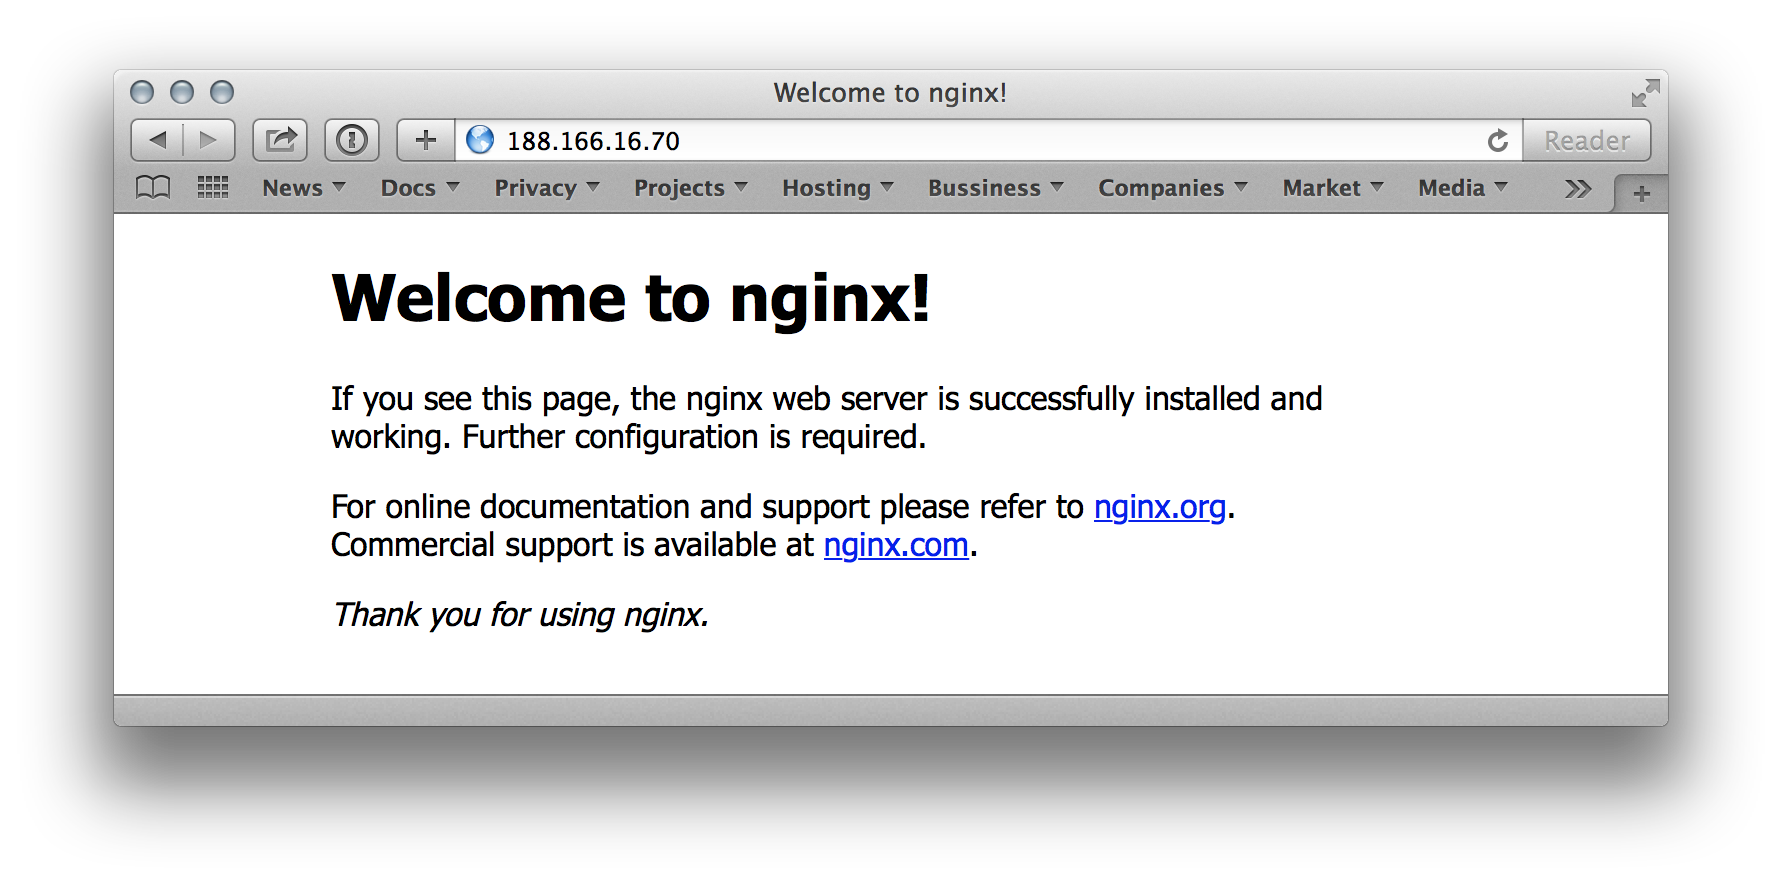
Let's try to launch 2 more instances of Nginx:
» docker -H tcp://188.166.16.70:8000 --tlsverify=true --tlscacert=certs/ca/ca.pem --tlscert=certs/docker/cert.pem --tlskey=certs/docker/key.pem run -d -p 80:80 --name nginx3 nginx 622b4e199c700cae663bf2e2f326918f94a0cd016c27dc9ff39f4ec4abf7bdb1 » docker -H tcp://188.166.16.70:8000 --tlsverify=true --tlscacert=certs/ca/ca.pem --tlscert=certs/docker/cert.pem --tlskey=certs/docker/key.pem run -d -p 80:80 --name nginx4 nginx FATA[0001] Error response from daemon: unable to find a node with port 80 available As we can see, the 3rd instance started, but the 4th one is not: FATA [0001] Error response from daemon: unable to find a node with port 80 available . Docker Swarm Scheduler sees that there are no hosts with a free 80th port.
We can see which containers are currently running in our cluster and make sure that each copy of Nginx was running on a different machine:
» docker -H tcp://188.166.16.70:8000 --tlsverify=true --tlscacert=certs/ca/ca.pem --tlscert=certs/docker/cert.pem --tlskey=certs/docker/key.pem ps 1 ↵ CONTAINER ID IMAGE COMMAND CREATED STATUS PORTS NAMES 622b4e199c70 nginx:latest "nginx -g 'daemon of 5 minutes ago Up 5 minutes 128.199.59.102:80->80/tcp, 443/tcp debian3/nginx3 2bd86ff97c35 nginx:latest "nginx -g 'daemon of 16 minutes ago Up 16 minutes 188.166.16.70:80->80/tcp, 443/tcp debian1/nginx2 bb49018b697f nginx:latest "nginx -g 'daemon of 17 minutes ago Up 17 minutes 188.166.99.31:80->80/tcp, 443/tcp debian2/nginx1 148eef0bbe02 library/swarm:latest "/swarm manage --tls 2 hours ago Up 2 hours 188.166.16.70:8000->2375/tcp debian1/docker-swarm-manager 3545322d27b7 library/swarm:latest "/swarm join --addr= 2 hours ago Up 2 hours 2375/tcp debian2/docker-swarm faaa78cbedba library/swarm:latest "/swarm join --addr= 2 hours ago Up 2 hours 2375/tcp debian3/docker-swarm 0fee12f6a473 library/swarm:latest "/swarm join --addr= 2 hours ago Up 2 hours 2375/tcp debian1/docker-swarm The possibilities of Docker Swarm do not end there, but are just beginning ( you can read about it here and here ).
As I wrote at the beginning of the article, my goal is to give you a list of tools and a general understanding that you would know what to build on and I hope that it has been achieved.
In the next part, I will tell you what Service Discovery is, how to distribute the load in our cloud and what tools are available for this.
That's all. Thank you all for your attention. Stable clouds and good luck to you!
Follow me on Twitter , I talk about working in a startup, my mistakes and the right decisions, about python and everything related to web development.
PS I'm looking for developers to the company, the details in my profile .
Source: https://habr.com/ru/post/261415/
All Articles