Eat filed, sit down, please connect
Today, Intel Edison with a set of sensors and actuators will help us do the following: play the song “A grasshopper in the grass”, determine whether water flows well, whether fire is burning, pump water, check if there is a couple of spirits in the air, dusty room, as the kettle boils, determine your coordinates, find a magnet. And something else.
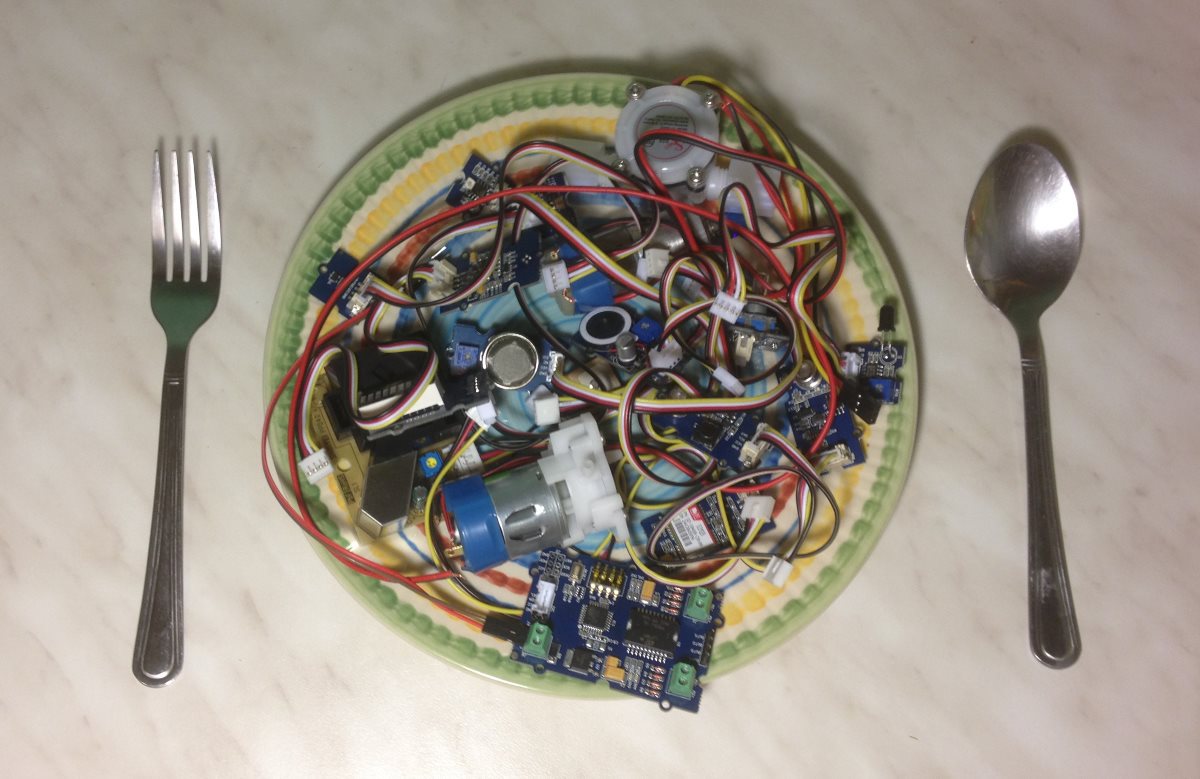
We will look at the following sensors and actuators, and how to use them with Intel Edison.
Examples of the sensors can be viewed in the video:
')
If you have not worked with sensors and Intel Edison before this point, see the previous article .
Before we begin, a small note. If during the example startup process, you will have an error when working with UPM functions, for example, the following message will appear:
So you need to update the installed packages, including UPM. This is done very simply with the command:
It is advisable to update the firmware of the board itself.

Grove - Hall Sensor . SKU: SEN14034P
Application: Determining the presence of a magnetic field. Determination of rotational speed.
To determine the rotational speed, for example, the wheel, you can mount the magnet on the wheel and place the sensor near the place where the magnet will pass, while rotating. Then at the time of their approach there will be a signal.
The Hall sensor is connected to any digital input D2-D8. Gives out 0 - in the presence of a magnetic field, 1 - in its absence. On the sensor board is an LED that turns on when a magnetic field appears.
An example of a program in which the LED on the Intel Edison board lights up when there is no magnetic field. And in the presence of it turns off.
The sensor is connected to the D2.
The program sends to the built-in LED (D13), the value read from the Hall sensor. We use the library MRAA.

Grove - Speaker . SKU: COM05051P
Connects to a digital output. The signal that is fed to this output is set on the speaker. Therefore, if you quickly change the signal with a certain frequency, you can play the sound. The volume can be changed trimmer.
The UPM library has functions for working with a speaker.
An example of playing one note.
Function:
The first parameter, the note 'a', 'b', 'c', 'd', 'e', 'f', or 'g' (A, B, C, D, M, F, Sal).
The second parameter is whether to use Sharp for this note.
The third parameter, the octave, can be “low”, “med”, or “high”.
The duration can not be set, but each note sounds about 0.1 seconds.
It seems that the sound is played by software, because the speaker can be connected to any digital output. And because of this, the sound is not very clear, he wheezes.
Therefore, it is convenient to use PWM for working with sound, since it allows hardware to generate a signal. (About working with PWM, you can read in the previous article ).
The speaker is connected to the D3, as it supports PWM. (Contacts that support PWM are indicated on the board with a tilde "~", these are D3, D5, D6).
For example, you can play the note A in this way for one second.
Now let's move on to hardcore and manually program the melody “A grasshopper sat in the grass”, which will sound clean and beautiful.
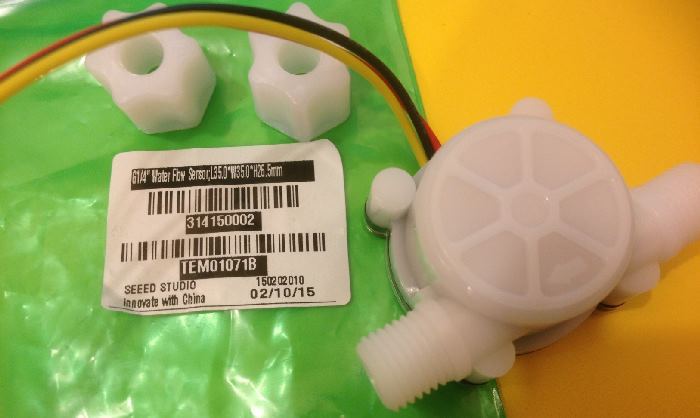
G1 / 4 "Water Flow Sensor . SKU: TEM01071B
The sensor allows you to determine the amount of water passing through it. Range from 0.3 to 6 liters per minute. The arrow on the cover shows the direction of water movement.
Inside the sensor is a Hall sensor, triggered by the rotation of the inner impeller. The frequency of its operation is proportional to the volume of flowing water. At the sensor output, signal 0 and 1 changes. We will monitor the value of the signal at the sensor output and take into account its change from 0 to 1.
We calculate the number of pulses per second, that is, the frequency of their movement. The formula for converting frequency to stream is as follows:
L = Q / 73 ,
where Q is the pulse frequency (Hz).
L - flow (l / minute)
There are some minor problems with connecting the sensor. It does not have standard connectors. Installed three-contact, and need four. But it is easy to decide if you have three wires Male-Male. They fit well into the connectors.
Connect the sensor to D2.
The program works as follows. Let's make two timers. The first will trigger once a millisecond and check the status of the sensor. If the value from 0 has passed to 1, increase the pulse counter.
The second timer will fire once per second. It reads the value of the counted pulses.
Since we take 1 second for accumulation, the minimum value of the flow will be 1/73 = 0.013 l / min.
It should be noted that the algorithm without interruptions works less accurately, because if the pulses arrive too often, we will not notice them. On my tests, about 230 pulses per second normally worked, this is about 3 liters per minute. If you increase the speed, the calculated value starts to decrease. The value is displayed on the LCD screen. To connect to the water sensor, I bought a 4 mm diameter hose in the store.

Grove - Flame Sensor . SKU: SEN05082P
The sensor responds to the presence of fire, or rather to radiation from a wavelength of 760nm - 1100nm. It is possible to adjust the sensitivity using a trimmer resistor. In my test, the sensor did not respond to the green LED placed next to it. Reacting to a white LED flashlight, only when the center of its beam was directed to the sensor. When you turn on the gas lighter, the sensor worked at a distance of about 50 centimeters. At about the same distance, it worked from a lit match. The sensor is triggered from the remote control. Most likely, the same photodiode is used as in household appliances. Reacts to sunlight. But since the sensitivity is adjustable, it can be adjusted so that there are no false positives.
The manual says that the distance of operation is 0-1 m.
An example in which the sensor is connected to D2 and its value is shown on the on-board LED.

Grove - Infrared Temperature Sensor . SKU: SEN01041P
Non-contact infrared temperature sensor. The working distance is 9 cm. It is recommended to select the distance experimentally, adjusting by melting and boiling water.
Must use UPM. The sensor produces two temperatures. One environment, another measured object. Inside the sensor is used TP-538U.
Sample program. The sensor is connected to A0 (pins A0 and A1 will be used). Data is displayed on the console and LCD screen.

Grove - UV Sensor . SKU: SEN00700P
The sensor is connected to the analog input. You can simply read the value, or you can use the UPM to convert to voltage. At the same time, the library itself averages the value by performing a series of measurements. Because of this, receiving data from the sensor can slow down.
In a room with good solar diffused lighting, but with the windows closed, the value is 0.283203. If you bring it to the window on the direct rays from the sun, but behind a triple glazed window, the value rises to 0.473633. If you open the window, you get a maximum of 4.980469

Grove - LED Bar . SKU: LED05031P
The progress bar consists of 10 LEDs. All of them are green except for two extreme ones, yellow and red. For work it is better to use the UPM library. It allows you to specify the side where the initial value and the number of indicators to be lit will be. Both conductors (data and clock pulses) are used for control. When connected to D2, it will be pin-2 and pin-3.
In the following example, the value of the indicator increases sequentially, changing the direction each time.

Grove - Encoder . SKU: COM01112P
Encoder, turn sensor. It can turn a full turn in any direction.
For work, it is desirable to use the UPM library. When turning the value will increase, when turning in the other direction, decrease. The value may become less than zero. Two control signals are used.
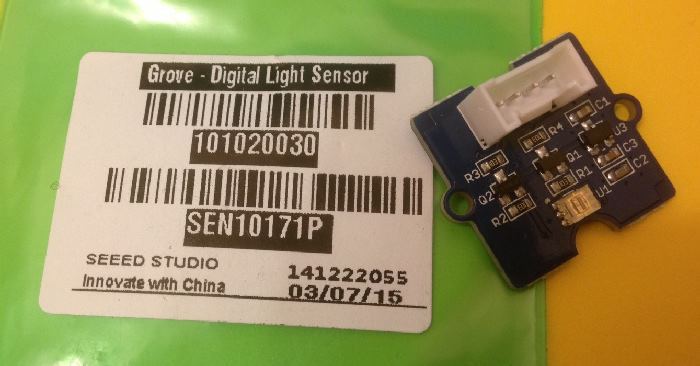
Grove - Digital Light Sensor . SKU: SEN10171P
Light sensor. It connects to the I2C bus. Displays the value in suites. According to the documentation, the values are in the range of 0-40000.
On tests, it turned out that in a bright room, the value is about 500. In the sun, through a window with blinds, it reaches 20000-40000. If you take out the direct sun, it rolls over and the value drops to 4000. We must bear this in mind.
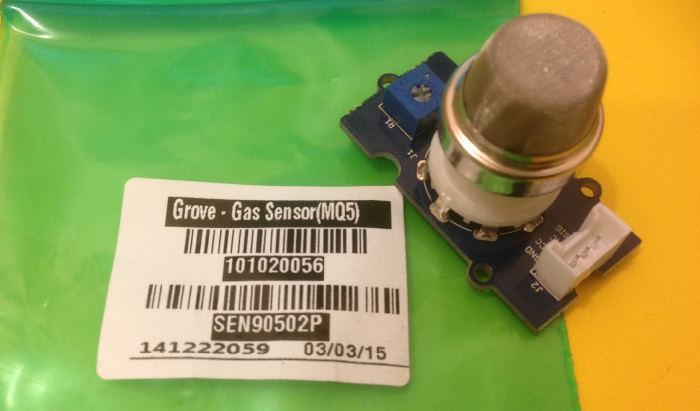
Grove - Gas Sensor (MQ5) . SKU: SEN90502P
Gas sensor. Reacts to liquid solvents, natural gas. Sensitivity can be adjusted with a potentiometer.
Gives an analog value. You can simply take it, but you can use the UPM library. The library calculates the average value by performing a series of measurements, but because of this, the function call suspends the program.
The special feature of the sensor is that it significantly heats up during operation. This is a feature of most such detectors. Before starting, the sensor should warm up. The manual says that the best preheating time is 24 hours, although this is somehow strange.
In the following example, we connect the sensor to A0 and use UPM.

Grove - Dust Sensor . SKU: SEN12291P
Dust sensor. It produces pulses depending on the dustiness of the air. Reacts to dust particles of 1 micron and larger. It is advisable to use the UPM library.
The feature that the getData function receives data within 30 seconds.
Here is an example of his work. This is a normal condition:
And I shook it next to the sensor with a dusty rag:

Grove - Air quality sensor . SKU: SEN01111P
Air quality sensor. Designed for indoor use. Reacts to carbon monoxide, hydrogen, alcohol, acetone, solvents, formaldehyde and other toxic gases.
I checked his work with alcohol and gas from a lighter. He defined them.
Connects to analog input. In the example for A0. Just read the value.
Grove - Alcohol Sensor . SKU: SEN21723P
Alcohol sensor. Gives value to analog pin. But he also needs a digital pin to heat the sensor itself. If we use the usual shield for the sensors, then on connector A0 there will be pins A0 and A1. Pin A1 is actually a digital pin D15.
Before starting the sensor, it is desirable to warm up for 2 minutes.
Grove - GPS . SKU: SEN10752P
Module for receiving data from GPS. This module provides data on the serial port. Therefore, we connect it to a connector that can work as a serial port. This is a connector labeled UART.
Data is transmitted in text form in NMEA 0183 format. A description of the fields can be found here .
Here is a sample output from the module:
We are interested in the last line with $ GPRMC
183227 - time 18:32:27 in UTC.
5619.7971, N - latitude
04400.5751, E - longitude
This data can be used, for example, in yandex maps, indicating them in the search bar in the following format:
If the satellites are not detected, the output will be something like this:
This program uses the serialport library to work, so it must be specified in dependencies in the package.json file:
The following example simply displays to the console the data received from the GPS module.
The following example is more complicated, since it analyzes the data received in order to extract geographic coordinates from them and display them on an LCD screen.

Grove - I2C Motor Driver . SKU: ROB72212P
The motor driver allows you to connect either two conventional motors or one four-wire two-phase stepper motor. Management is done on the I2C bus. The current can be up to 2A per channel. With such a high current, the chips can heat up. There is a button on the board that allows you to stop the engines.
There are switches on the board that set the address of the I2C device on the bus. By default, it is set to 1111, which is 15.
The board has a power connector. The motors are powered from a separate power source. Therefore, these can be motors for voltages other than 5 V. In our examples, we will apply voltage to it from the Intel Edison board itself, it's easier.
When working with the UPM library, the parameters for the engines are set immediately by a pair.
First you need to set the direction for each engine.
After this command, the first engine will rotate counterclockwise, and the second clockwise.
Then you can set the rotation speed 0-255. With a value of 255, full voltage will be applied to the motor.
The first engine will rotate at full speed, the second one at half speed.
In the following example, turn on the second motor counterclockwise at half voltage.

Planet Geared Motor F280 . SKU: 316070006
Engine with integrated gear. Working voltage is 3-24 V. Frequency of rotation is 80-800 rpm. We will supply 5V to it, since we do not use an external power source. When operating from the motor driver and set to 255, its rotational speed is about 120 rpm.
The motor does not have a connector for connection, only contacts, so you need to solder the wires.
The following example uses a rotation sensor (encoder) to control the speed and direction of rotation of the engine. The LCD screen displays the value supplied to the motor.
The rotation sensor is connected to the D4. LCD screen to I2C. Motor driver for I2C.
6V mini water pump . SKU: 114990073
Water pump. Contains a motor that can be controlled through a motor driver.
To connect the water, you can use 4 mm tube.
The motor does not have a connector for connection, only contacts, so you need to solder the wires.
The supply voltage is 6 V, so you can use the voltage of 5 V from the board.
It is not recommended to turn on the pump without water, as the plastic petals inside can deteriorate. When you connect the power must observe polarity. Positive contact is marked with a red dot. With this connection, water is taken through the bottom hole, and out through the side. Whether it is possible to include in the opposite direction, the documentation does not say.
The following example is similar to the previous one with a motor. It also uses a rotation sensor and an LCD screen. The difference is that the engine does not change the direction of rotation.
Here you have the sensors, as they say, for all occasions. Experiment on health!
We will look at the following sensors and actuators, and how to use them with Intel Edison.
- Grove - Hall Sensor - Hall sensor.
- Grove - Speaker - speaker.
- Grove - Flame Sensor - fire sensor.
- Grove - LED Bar - LED progress indicator.
- Grove - Encoder - turn sensor.
- Grove - Gas Sensor (MQ5) - gas sensor.
- Grove - Air quality sensor - air quality sensor.
- Grove - Infrared Temperature Sensor - IR temperature meter.
- G1 / 4 "Water Flow Sensor - water flow sensor.
- Grove - I2C Motor Driver - motor driver.
- 6V mini water pump - water pump.
- Grove - Digital Light Sensor - light sensor.
- Grove - Alcohol Sensor - alcohol sensor.
- Grove - Dust Sensor - dust sensor.
- Planet Geared Motor F280 - motor.
- Grove - GPS - GPS module.
Examples of the sensors can be viewed in the video:
')
If you have not worked with sensors and Intel Edison before this point, see the previous article .
Before we begin, a small note. If during the example startup process, you will have an error when working with UPM functions, for example, the following message will appear:
Cannot find module 'jsupm_rotaryencoder' So you need to update the installed packages, including UPM. This is done very simply with the command:
opkg upgrade It is advisable to update the firmware of the board itself.
Hall Sensor
Grove - Hall Sensor . SKU: SEN14034P
Application: Determining the presence of a magnetic field. Determination of rotational speed.
To determine the rotational speed, for example, the wheel, you can mount the magnet on the wheel and place the sensor near the place where the magnet will pass, while rotating. Then at the time of their approach there will be a signal.
The Hall sensor is connected to any digital input D2-D8. Gives out 0 - in the presence of a magnetic field, 1 - in its absence. On the sensor board is an LED that turns on when a magnetic field appears.
An example of a program in which the LED on the Intel Edison board lights up when there is no magnetic field. And in the presence of it turns off.
The sensor is connected to the D2.
The program sends to the built-in LED (D13), the value read from the Hall sensor. We use the library MRAA.
Source code main.js
var mraa = require('mraa'); var hallSensor = new mraa.Gpio(2); hallSensor.dir(mraa.DIR_IN); var myOnboardLed = new mraa.Gpio(13); myOnboardLed.dir(mraa.DIR_OUT); periodicActivity(); function periodicActivity() { var value = hallSensor.read(); myOnboardLed.write(value); setTimeout(periodicActivity,20); } Speaker
Grove - Speaker . SKU: COM05051P
Connects to a digital output. The signal that is fed to this output is set on the speaker. Therefore, if you quickly change the signal with a certain frequency, you can play the sound. The volume can be changed trimmer.
The UPM library has functions for working with a speaker.
An example of playing one note.
var groveSpeaker = require('jsupm_grovespeaker'); var mySpeaker = new groveSpeaker.GroveSpeaker(2); // D2 mySpeaker.playSound('a', true, "med");// Function:
playSound('a', false, "med"); The first parameter, the note 'a', 'b', 'c', 'd', 'e', 'f', or 'g' (A, B, C, D, M, F, Sal).
The second parameter is whether to use Sharp for this note.
The third parameter, the octave, can be “low”, “med”, or “high”.
The duration can not be set, but each note sounds about 0.1 seconds.
It seems that the sound is played by software, because the speaker can be connected to any digital output. And because of this, the sound is not very clear, he wheezes.
Therefore, it is convenient to use PWM for working with sound, since it allows hardware to generate a signal. (About working with PWM, you can read in the previous article ).
The speaker is connected to the D3, as it supports PWM. (Contacts that support PWM are indicated on the board with a tilde "~", these are D3, D5, D6).
For example, you can play the note A in this way for one second.
Source code main.js
var mraa = require("mraa"); var pwm3 = new mraa.Pwm(3); freq = 440; // var period = 1000000 / freq; pwm3.period_us(period); pwm3.pulsewidth_us(period/2); pwm3.enable(true); setTimeout( function(){pwm3.enable(false);}, 1000); Now let's move on to hardcore and manually program the melody “A grasshopper sat in the grass”, which will sound clean and beautiful.
Source code main.js
var mraa = require("mraa"); var pwm3 = new mraa.Pwm(3); // // , -, , -, , , -, , -, , -, var freq = [261.63, 277.18, 293.66, 311.13, 329.63, 349.23, 369.99, 392.00, 415.30, 440.00, 466.16, 493.88 ]; // // . N,V // N- (-1-), 1/V var notes = [ 9,4, 4,4, 9,4, 4,4, 9,4, 8,4, 8,2, 8,4, 4,4, 8,4, 4,4, 8,4, 9,4, 9,2, 9,4, 4,4, 9,4, 4,4, 9,4, 8,4, 8,2, 8,4, 4,4, 8,4, 4,4, 8,4, 9, 1.33]; var currNote = 0; var baseValue = 1000;// nextNote(); function nextNote() { pwm3.enable(false); if( currNote >= notes.length / 2 ) { return; } var note = notes[currNote*2]; var value = notes[currNote*2+1]; // : // 0.25 - // 0.5 - // 1 - // 2 - // 4 - // 8 - // 16 - var octaveScale = 2;// , console.log('note='+note+' value='+value); if( note >= 0 ) { var frequency = freq[ note ] * octaveScale; var period = 1000000 / frequency; console.log('frequency='+frequency+ ' Hz'); pwm3.period_us(period); pwm3.pulsewidth_us(period/2); pwm3.enable(true); } currNote++; setTimeout( nextNote, baseValue/value); } Water flow sensor
G1 / 4 "Water Flow Sensor . SKU: TEM01071B
The sensor allows you to determine the amount of water passing through it. Range from 0.3 to 6 liters per minute. The arrow on the cover shows the direction of water movement.
Inside the sensor is a Hall sensor, triggered by the rotation of the inner impeller. The frequency of its operation is proportional to the volume of flowing water. At the sensor output, signal 0 and 1 changes. We will monitor the value of the signal at the sensor output and take into account its change from 0 to 1.
We calculate the number of pulses per second, that is, the frequency of their movement. The formula for converting frequency to stream is as follows:
L = Q / 73 ,
where Q is the pulse frequency (Hz).
L - flow (l / minute)
There are some minor problems with connecting the sensor. It does not have standard connectors. Installed three-contact, and need four. But it is easy to decide if you have three wires Male-Male. They fit well into the connectors.
Connect the sensor to D2.
The program works as follows. Let's make two timers. The first will trigger once a millisecond and check the status of the sensor. If the value from 0 has passed to 1, increase the pulse counter.
The second timer will fire once per second. It reads the value of the counted pulses.
Since we take 1 second for accumulation, the minimum value of the flow will be 1/73 = 0.013 l / min.
It should be noted that the algorithm without interruptions works less accurately, because if the pulses arrive too often, we will not notice them. On my tests, about 230 pulses per second normally worked, this is about 3 liters per minute. If you increase the speed, the calculated value starts to decrease. The value is displayed on the LCD screen. To connect to the water sensor, I bought a 4 mm diameter hose in the store.
Source code main.js
var mraa = require('mraa'); var jsUpmI2cLcd = require ('jsupm_i2clcd'); var lcd = new jsUpmI2cLcd.Jhd1313m1(0, 0x3E, 0x62); lcd.setColor(10,10,10); var waterFlowSensor = new mraa.Gpio(2); waterFlowSensor.dir(mraa.DIR_IN); var prev = waterFlowSensor.read(); var count = 0; setInterval( checkSensor, 1 ); setInterval( countProc, 1000 ); function checkSensor() { var curr = waterFlowSensor.read(); // 1 if( prev === 0 && curr === 1 ) { count++; } prev = curr; } function countProc() { var litres = count / 73; var currCount = count; count = 0; console.log('count='+currCount+ ' water=' + litres + ' Litres/hour, water=' + (litres/60) + 'L/min'); lcd.setCursor(0,0); lcd.write("Count=" + currCount + ' '); lcd.setCursor(1,0); lcd.write("Flow=" + parseFloat(litres).toFixed(2)+ ' L/min '); } Fire sensor
Grove - Flame Sensor . SKU: SEN05082P
The sensor responds to the presence of fire, or rather to radiation from a wavelength of 760nm - 1100nm. It is possible to adjust the sensitivity using a trimmer resistor. In my test, the sensor did not respond to the green LED placed next to it. Reacting to a white LED flashlight, only when the center of its beam was directed to the sensor. When you turn on the gas lighter, the sensor worked at a distance of about 50 centimeters. At about the same distance, it worked from a lit match. The sensor is triggered from the remote control. Most likely, the same photodiode is used as in household appliances. Reacts to sunlight. But since the sensitivity is adjustable, it can be adjusted so that there are no false positives.
The manual says that the distance of operation is 0-1 m.
An example in which the sensor is connected to D2 and its value is shown on the on-board LED.
Source code main.js
var mraa = require('mraa'); var flameSensor = new mraa.Gpio(2); flameSensor.dir(mraa.DIR_IN); var myOnboardLed = new mraa.Gpio(13); myOnboardLed.dir(mraa.DIR_OUT); periodicActivity(); function periodicActivity() { var value = flameSensor.read(); myOnboardLed.write(1-value); setTimeout(periodicActivity,20); } Non-contact IR temperature sensor
Grove - Infrared Temperature Sensor . SKU: SEN01041P
Non-contact infrared temperature sensor. The working distance is 9 cm. It is recommended to select the distance experimentally, adjusting by melting and boiling water.
Must use UPM. The sensor produces two temperatures. One environment, another measured object. Inside the sensor is used TP-538U.
Sample program. The sensor is connected to A0 (pins A0 and A1 will be used). Data is displayed on the console and LCD screen.
Source code main.js
var OTP538U_AREF = 5.0;// var tempIRSensor_lib = require('jsupm_otp538u'); // - var jsUpmI2cLcd = require ('jsupm_i2clcd'); var lcd = new jsUpmI2cLcd.Jhd1313m1(0, 0x3E, 0x62); // A0 ( A0 A1) // A0 - // A1 - var tempIRSensor_obj = new tempIRSensor_lib.OTP538U(0, 1, OTP538U_AREF); function checkTemp() { var tempAmb = tempIRSensor_obj.ambientTemperature(); var tempObj = tempIRSensor_obj.objectTemperature(); var tempAmbStr = parseFloat(tempAmb).toFixed(2); var tempObjStr = parseFloat(tempObj).toFixed(2); var outputStr = "Ambient temp: " + tempAmbStr + " C, " +"Object temp: " + tempObjStr + " C"; lcd.setCursor(0,0); lcd.write('amb='+tempAmbStr+' '); lcd.setCursor(1,0); lcd.write('obj='+tempObjStr+' '); console.log(outputStr); } setInterval(checkTemp, 1000); UV light sensor
Grove - UV Sensor . SKU: SEN00700P
The sensor is connected to the analog input. You can simply read the value, or you can use the UPM to convert to voltage. At the same time, the library itself averages the value by performing a series of measurements. Because of this, receiving data from the sensor can slow down.
Source code main.js
var UVSensor = require('jsupm_guvas12d'); // A0 var myUVSensor = new UVSensor.GUVAS12D(0); var g_GUVAS12D_AREF = 5.0;// var g_SAMPLES_PER_QUERY = 1024; setInterval(function() { var val = myUVSensor.value(g_GUVAS12D_AREF, g_SAMPLES_PER_QUERY); var valStr = parseFloat(val).toFixed(6); var outputStr = "AREF: " + g_GUVAS12D_AREF + ", Voltage value (higher means more UV): " + valStr; console.log(outputStr); }, 1000); In a room with good solar diffused lighting, but with the windows closed, the value is 0.283203. If you bring it to the window on the direct rays from the sun, but behind a triple glazed window, the value rises to 0.473633. If you open the window, you get a maximum of 4.980469
Progress Bar
Grove - LED Bar . SKU: LED05031P
The progress bar consists of 10 LEDs. All of them are green except for two extreme ones, yellow and red. For work it is better to use the UPM library. It allows you to specify the side where the initial value and the number of indicators to be lit will be. Both conductors (data and clock pulses) are used for control. When connected to D2, it will be pin-2 and pin-3.
In the following example, the value of the indicator increases sequentially, changing the direction each time.
Source code main.js
var LEDBar = require("jsupm_my9221"); var myLEDBar = new LEDBar.MY9221(2, 3);// D2 (pin-D2,pin-D3) var directionBool = true; setInterval(function() { show_LED(1, directionBool); }, 1500 ); function show_LED(level, direction) { if (level <= 10) { myLEDBar.setBarLevel(level, directionBool); setTimeout(show_LED, 50, ++level, directionBool); } else { directionBool = !directionBool; } } 360 degree rotation sensor. Encoder
Grove - Encoder . SKU: COM01112P
Encoder, turn sensor. It can turn a full turn in any direction.
For work, it is desirable to use the UPM library. When turning the value will increase, when turning in the other direction, decrease. The value may become less than zero. Two control signals are used.
Source code main.js
var rotaryEncoder = require("jsupm_rotaryencoder"); // D2 ( D2, D3) var myRotaryEncoder = new rotaryEncoder.RotaryEncoder(2, 3); getValue(); function getValue() { var v = myRotaryEncoder.position(); console.log("Position: " + v); setTimeout(getValue,100); } I2C Lighting Sensor
Grove - Digital Light Sensor . SKU: SEN10171P
Light sensor. It connects to the I2C bus. Displays the value in suites. According to the documentation, the values are in the range of 0-40000.
On tests, it turned out that in a bright room, the value is about 500. In the sun, through a window with blinds, it reaches 20000-40000. If you take out the direct sun, it rolls over and the value drops to 4000. We must bear this in mind.
Source code main.js
var digitalLightSensor = require('jsupm_tsl2561'); // TSL2561 on I2C var myDigitalLightSensor = new digitalLightSensor.TSL2561(); setInterval(function() { console.log("Light value is " + myDigitalLightSensor.getLux() + ' Lux'); }, 1000); MQ5 gas sensor
Grove - Gas Sensor (MQ5) . SKU: SEN90502P
Gas sensor. Reacts to liquid solvents, natural gas. Sensitivity can be adjusted with a potentiometer.
Gives an analog value. You can simply take it, but you can use the UPM library. The library calculates the average value by performing a series of measurements, but because of this, the function call suspends the program.
The special feature of the sensor is that it significantly heats up during operation. This is a feature of most such detectors. Before starting, the sensor should warm up. The manual says that the best preheating time is 24 hours, although this is somehow strange.
In the following example, we connect the sensor to A0 and use UPM.
Source code main.js
var upmMQ5 = require("jsupm_gas"); // A0 var myMQ5 = new upmMQ5.MQ5(0); var threshContext = new upmMQ5.thresholdContext; threshContext.averageReading = 0; threshContext.runningAverage = 0; threshContext.averagedOver = 2; while(1) { var buffer = new upmMQ5.uint16Array(128); var len = myMQ5.getSampledWindow(2, 128, buffer); if (len) { var thresh = myMQ5.findThreshold(threshContext, 30, buffer, len); myMQ5.printGraph(threshContext, 5); } } Dust sensor
Grove - Dust Sensor . SKU: SEN12291P
Dust sensor. It produces pulses depending on the dustiness of the air. Reacts to dust particles of 1 micron and larger. It is advisable to use the UPM library.
The feature that the getData function receives data within 30 seconds.
Here is an example of his work. This is a normal condition:
Low pulse occupancy: 1829533 Ratio: 6.0984462 Concentration: 3279.9744018259016 And I shook it next to the sensor with a dusty rag:
Low pulse occupancy: 5541164 Ratio: 18.470549560000002 Concentration: 15240.471566321306 Source code main.js
var dustSensor = require('jsupm_ppd42ns'); // D2 var myDustSensor = new dustSensor.PPD42NS(2); var data; var notice = "This program will give readings "; notice += "every 30 seconds until you stop it" console.log(notice); while(1) { data = myDustSensor.getData(); console.log("Low pulse occupancy: " + data.lowPulseOccupancy); console.log("Ratio: " + data.ratio); console.log("Concentration: " + data.concentration); } Air quality sensor
Grove - Air quality sensor . SKU: SEN01111P
Air quality sensor. Designed for indoor use. Reacts to carbon monoxide, hydrogen, alcohol, acetone, solvents, formaldehyde and other toxic gases.
I checked his work with alcohol and gas from a lighter. He defined them.
Connects to analog input. In the example for A0. Just read the value.
Source code main.js
var mraa = require('mraa'); var gas = new mraa.Aio(0); getGas(); function getGas() { var g = gas.read(); console.log(gas='+g); setTimeout(getGas,500); } Alcohol sensor
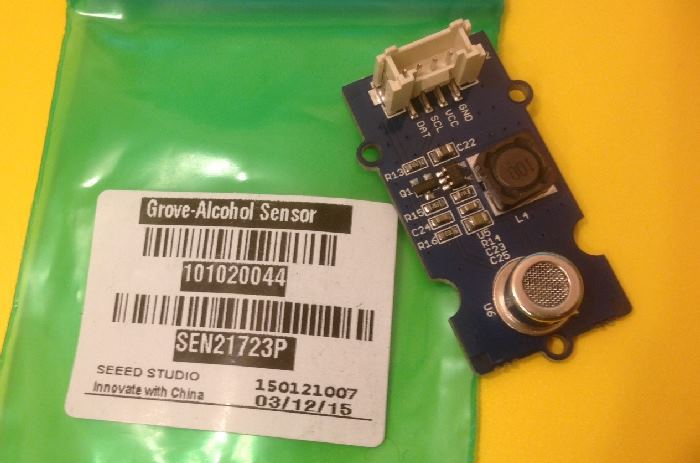
Grove - Alcohol Sensor . SKU: SEN21723P
Alcohol sensor. Gives value to analog pin. But he also needs a digital pin to heat the sensor itself. If we use the usual shield for the sensors, then on connector A0 there will be pins A0 and A1. Pin A1 is actually a digital pin D15.
Before starting the sensor, it is desirable to warm up for 2 minutes.
Source code main.js
// MQ303A var mq303a = require('jsupm_mq303a'); // mq303a // A0 – // A1, D15 var myAlcoholObj = new mq303a.MQ303A(0, 15); console.log("Enabling heater and waiting 2 minutes for warmup."); // 30 statusMessage(1); statusMessage(2); statusMessage(3); function statusMessage(amt) { setTimeout(function() { console.log((amt * 30) + " seconds have passed"); }, 30000 * amt); } // 2 setTimeout(runAlcoholSensor, 120000); function runAlcoholSensor() { var notice = "This sensor may need to warm " + "until the value drops below about 450." console.log(notice); setInterval(function() { var val = myAlcoholObj.value(); var msg = "Alcohol detected "; msg += "(higher means stronger alcohol): "; console.log(msg + val); }, 1000); } GPS module
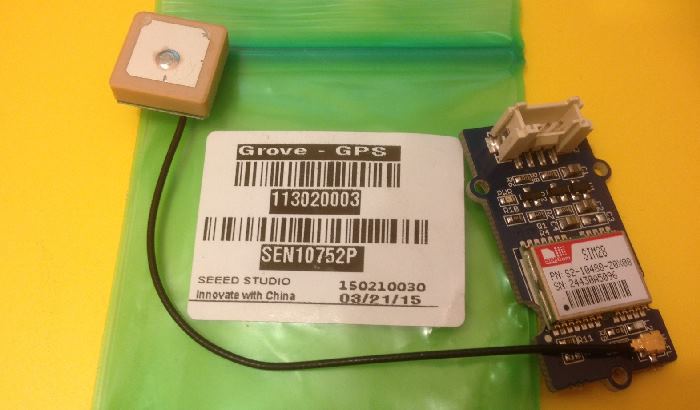
Grove - GPS . SKU: SEN10752P
Module for receiving data from GPS. This module provides data on the serial port. Therefore, we connect it to a connector that can work as a serial port. This is a connector labeled UART.
Data is transmitted in text form in NMEA 0183 format. A description of the fields can be found here .
Here is a sample output from the module:
$GPGGA,183227.000,5619.7971,N,04400.5751,E,2,4,3.28,36.7,M,9.4,M,0000,0000*59 $GPGSA,A,3,16,27,19,22,,,,,,,,,3.43,3.28,0.99*05 $GPGSV,3,1,12,18,73,111,,27,61,264,22,22,56,212,26,21,41,107,*70 $GPGSV,3,2,12,19,38,302,22,15,30,054,,16,16,234,25,20,12,062,*78 $GPGSV,3,3,12,13,11,026,,14,06,169,,30,03,340,,04,03,281,*7A $GPRMC,183227.000,A,5619.7971,N,04400.5751,E,0.00,87.99,230615,,,D*53 We are interested in the last line with $ GPRMC
183227 - time 18:32:27 in UTC.
5619.7971, N - latitude
04400.5751, E - longitude
This data can be used, for example, in yandex maps, indicating them in the search bar in the following format:
N56 19.7971 E44 00.5751 If the satellites are not detected, the output will be something like this:
$GPGGA,235958.800,,,,,0,0,,,M,,M,,*40 $GPGSA,A,1,,,,,,,,,,,,,,,*1E $GPGSV,1,1,00*79 $GPRMC,235958.800,V,,,,,0.00,0.00,050180,,,N*49 This program uses the serialport library to work, so it must be specified in dependencies in the package.json file:
Source package.json
{ "name": "OnboardLEDBlink", "description": "", "version": "0.0.0", "main": "main.js", "engines": { "node": ">=0.10.0" }, "dependencies": { "serialport" : "1.7.4" } } The following example simply displays to the console the data received from the GPS module.
Source code main.js
var mraa = require('mraa'); //require mraa var uartdev = new mraa.Uart(0); var com = require('serialport'); // UART var portName = uartdev.getDevicePath();// '/dev/ttyMFD1'; var serialPort = new com.SerialPort(portName, { baudrate: 9600, dataBits: 8, parity: 'none', stopBits: 1, flowControl: false }); serialPort.on('open',function(){ console.log('Port open'); serialPort.write('\n'); }); serialPort.on('data', function(data){ console.log(data.toString()); console.log('---'); }); serialPort.on('close', function() { console.log('close'); }); serialPort.on('close', function(error) { console.log('error='+error); }); The following example is more complicated, since it analyzes the data received in order to extract geographic coordinates from them and display them on an LCD screen.
Source code main.js
var jsUpmI2cLcd = require ('jsupm_i2clcd'); var lcd = new jsUpmI2cLcd.Jhd1313m1(0, 0x3E, 0x62); lcd.setColor(0,0,0); var mraa = require('mraa'); //require mraa var uartdev = new mraa.Uart(0); var com = require('serialport'); var portName = uartdev.getDevicePath();// '/dev/ttyMFD1'; var serialPort = new com.SerialPort(portName, { baudrate: 9600, // default for serial communication dataBits: 8, parity: 'none', stopBits: 1, flowControl: false, parser: com.parsers.readline('\r\n') }); serialPort.on('open',function() { console.log('Port open'); serialPort.write('\n'); }); serialPort.on('data', function(data) { console.log(data.toString()); console.log('---'); var str = data.toString(); var vals = str.split(','); if( vals[0] === '$GPRMC' ) { var tm = vals[1].split('.')[0]; var lat = parseFloat(parseFloat(vals[3])).toFixed(1); var latS = vals[4]; var lon = parseFloat(parseFloat(vals[5])).toFixed(1); var lonS = vals[6]; //var time= Math.floor(tm); var time = [tm.substring(0,2), tm.substring(2,4), tm.substring(4,6)].join(':'); var str1 = 'time='+time; var str21 = latS+lat.substr(0,2) +' ' + lat.substr(2); var str22 = lonS+lon.substr(0,2) +' ' + lon.substr(2); var str2 = str21 + ' ' + str22; lcd.setCursor(0,0); lcd.write(str1); lcd.setCursor(1,0); lcd.write(str2); console.log('time=' + time + ' lat=' + lat + latS + ' lon=' + lon + lonS); console.log(str1); console.log(str2); } }); serialPort.on('close', function() { console.log('close'); }); serialPort.on('close', function(error) { console.log('error='+error); }); Motor driver
Grove - I2C Motor Driver . SKU: ROB72212P
The motor driver allows you to connect either two conventional motors or one four-wire two-phase stepper motor. Management is done on the I2C bus. The current can be up to 2A per channel. With such a high current, the chips can heat up. There is a button on the board that allows you to stop the engines.
There are switches on the board that set the address of the I2C device on the bus. By default, it is set to 1111, which is 15.
The board has a power connector. The motors are powered from a separate power source. Therefore, these can be motors for voltages other than 5 V. In our examples, we will apply voltage to it from the Intel Edison board itself, it's easier.
When working with the UPM library, the parameters for the engines are set immediately by a pair.
First you need to set the direction for each engine.
my_MotorDriver_obj1.setMotorDirections( groveMotorDriver_lib.GroveMD.DIR_CCW, groveMotorDriver_lib.GroveMD.DIR_CW); After this command, the first engine will rotate counterclockwise, and the second clockwise.
Then you can set the rotation speed 0-255. With a value of 255, full voltage will be applied to the motor.
my_MotorDriver_obj1.setMotorSpeeds(255, 127); The first engine will rotate at full speed, the second one at half speed.
In the following example, turn on the second motor counterclockwise at half voltage.
Source code main.js
var groveMotorDriver_lib = require('jsupm_grovemd'); var i2c_addr1 = 15; var my_MotorDriver_obj1 = new groveMotorDriver_lib.GroveMD( groveMotorDriver_lib.GROVEMD_I2C_BUS, i2c_addr1 ); my_MotorDriver_obj1.setMotorDirections( groveMotorDriver_lib.GroveMD.DIR_CCW, groveMotorDriver_lib.GroveMD.DIR_CCW); my_MotorDriver_obj1.setMotorSpeeds(0, 127); Engine
Planet Geared Motor F280 . SKU: 316070006
Engine with integrated gear. Working voltage is 3-24 V. Frequency of rotation is 80-800 rpm. We will supply 5V to it, since we do not use an external power source. When operating from the motor driver and set to 255, its rotational speed is about 120 rpm.
The motor does not have a connector for connection, only contacts, so you need to solder the wires.
The following example uses a rotation sensor (encoder) to control the speed and direction of rotation of the engine. The LCD screen displays the value supplied to the motor.
The rotation sensor is connected to the D4. LCD screen to I2C. Motor driver for I2C.
Source code main.js
var groveMotorDriver_lib = require('jsupm_grovemd'); var rotaryEncoder = require("jsupm_rotaryencoder"); var myRotaryEncoder = new rotaryEncoder.RotaryEncoder(4, 5); var jsUpmI2cLcd = require ('jsupm_i2clcd'); var lcd = new jsUpmI2cLcd.Jhd1313m1(0, 0x3E, 0x62); lcd.setColor(0,0,0); var i2c_addr1 = 15; var my_MotorDriver_obj1 = new groveMotorDriver_lib.GroveMD( groveMotorDriver_lib.GROVEMD_I2C_BUS, i2c_addr1 ); my_MotorDriver_obj1.setMotorDirections( groveMotorDriver_lib.GroveMD.DIR_CCW, groveMotorDriver_lib.GroveMD.DIR_CCW); my_MotorDriver_obj1.setMotorSpeeds(0, 0); checkButton(); function checkButton() { var v = myRotaryEncoder.position(); var speed = v*10; if( speed < -255 ) { speed = -255; } if( speed > 255) { speed = 255; } var dir; if( speed > 0) { dir = groveMotorDriver_lib.GroveMD.DIR_CCW; } else { speed = -speed; dir = groveMotorDriver_lib.GroveMD.DIR_CW; } my_MotorDriver_obj1.setMotorDirections( 0, dir); my_MotorDriver_obj1.setMotorSpeeds(0, speed); lcd.setCursor(0,0); lcd.write('v='+v+' '); lcd.setCursor(1,0); lcd.write('speed='+speed+' '); setTimeout(checkButton,100); } Mini pump
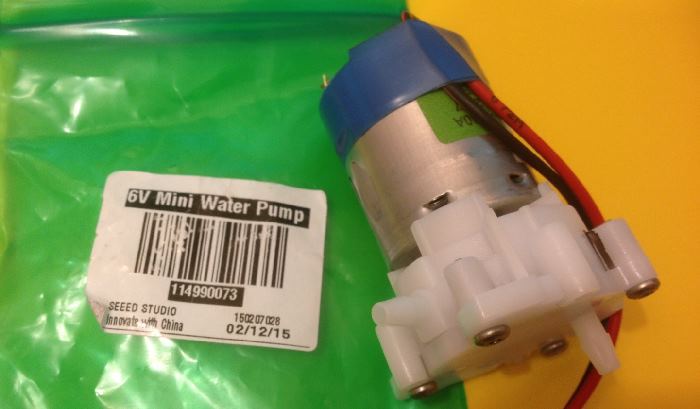
6V mini water pump . SKU: 114990073
Water pump. Contains a motor that can be controlled through a motor driver.
To connect the water, you can use 4 mm tube.
The motor does not have a connector for connection, only contacts, so you need to solder the wires.
The supply voltage is 6 V, so you can use the voltage of 5 V from the board.
It is not recommended to turn on the pump without water, as the plastic petals inside can deteriorate. When you connect the power must observe polarity. Positive contact is marked with a red dot. With this connection, water is taken through the bottom hole, and out through the side. Whether it is possible to include in the opposite direction, the documentation does not say.
The following example is similar to the previous one with a motor. It also uses a rotation sensor and an LCD screen. The difference is that the engine does not change the direction of rotation.
Source code main.js
var groveMotorDriver_lib = require('jsupm_grovemd'); var rotaryEncoder = require("jsupm_rotaryencoder"); var myRotaryEncoder = new rotaryEncoder.RotaryEncoder(4, 5); var jsUpmI2cLcd = require ('jsupm_i2clcd'); var lcd = new jsUpmI2cLcd.Jhd1313m1(0, 0x3E, 0x62); lcd.setColor(0,0,0); var i2c_addr1 = 15; var my_MotorDriver_obj1 = new groveMotorDriver_lib.GroveMD( groveMotorDriver_lib.GROVEMD_I2C_BUS, i2c_addr1 ); my_MotorDriver_obj1.setMotorDirections( groveMotorDriver_lib.GroveMD.DIR_CCW, groveMotorDriver_lib.GroveMD.DIR_CCW); checkButton(); // 255 - 2 //my_MotorDriver_obj1.setMotorSpeeds(0, 127); //set the speeds of the motors on board 1 function checkButton() { var v = 10 * myRotaryEncoder.position(); if( v < 0 ) { v = 0; } if( v > 255) { v = 255; } my_MotorDriver_obj1.setMotorSpeeds(0, v); lcd.setCursor(0,0); lcd.write('Speed='+v+' '); setTimeout(checkButton,100); } Here you have the sensors, as they say, for all occasions. Experiment on health!
Source: https://habr.com/ru/post/261123/
All Articles