When 3D Printers Were Big: Chronicle of Master Keith Lab
In May 2015, a new 3D-printer MC2 was tested in Master Keith's lab.
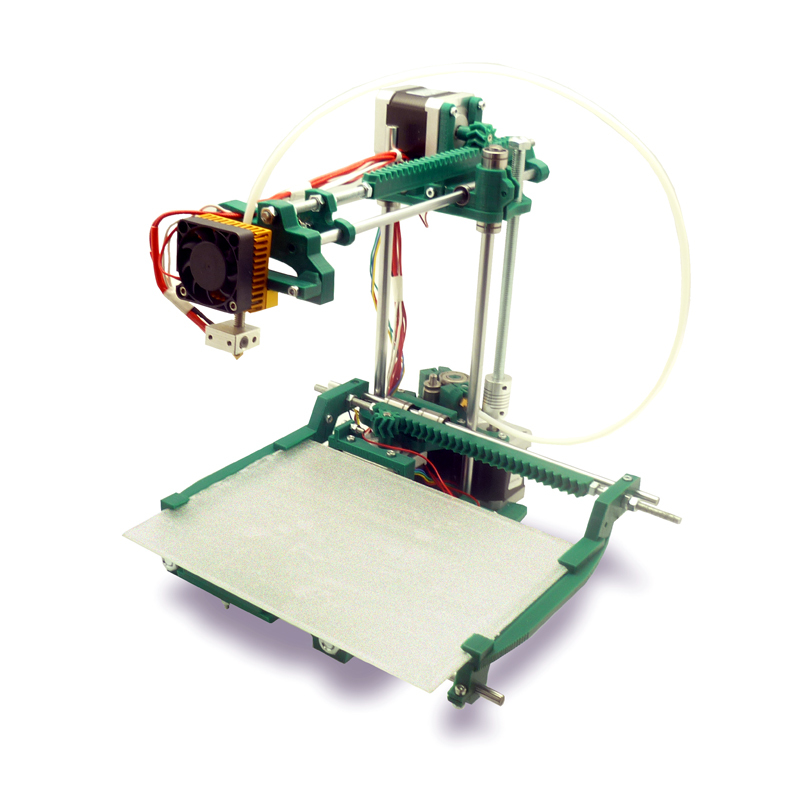
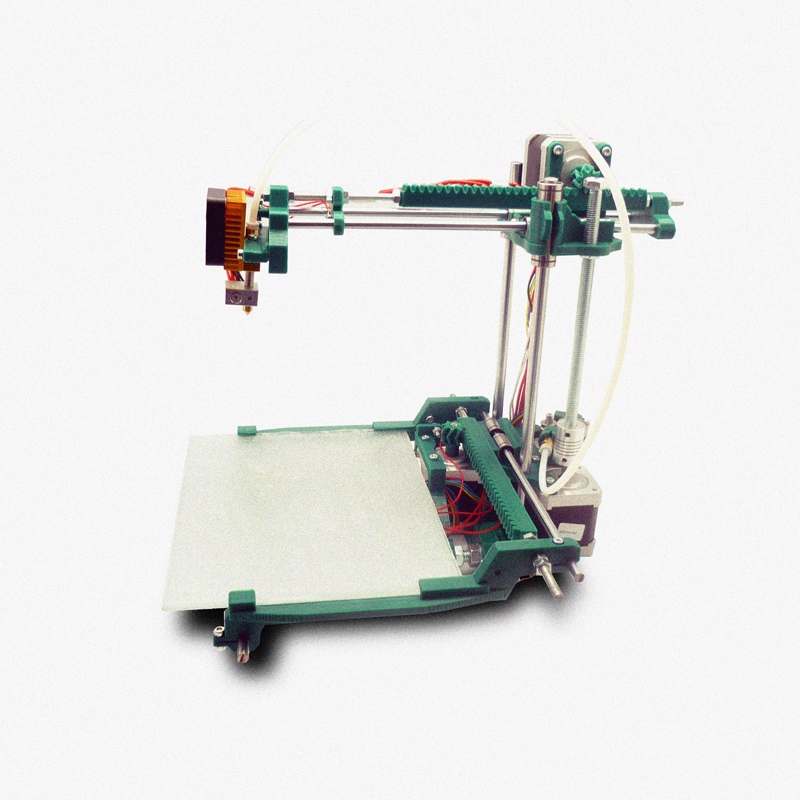
By this time, we had already released and closed the MC3, the trace of which remained on the most popular 3D printing resource Thingiverse .
')
The design of the MC3 worked for three months. 5 versions have been made. Changed the location of the guides: vertical then horizontal again. The thread pulling mechanism moved to the printhead, then returned to the bottom. In one version, Teflon bearings were even installed. They turned out to be too precise, requiring a greater initial moment. The printing area was selected, the height varied. In short, the experience was not enough, time spent a lot.

The MC3 was followed by the MC5 , our plywood version of the printer. We decided that we should have one.
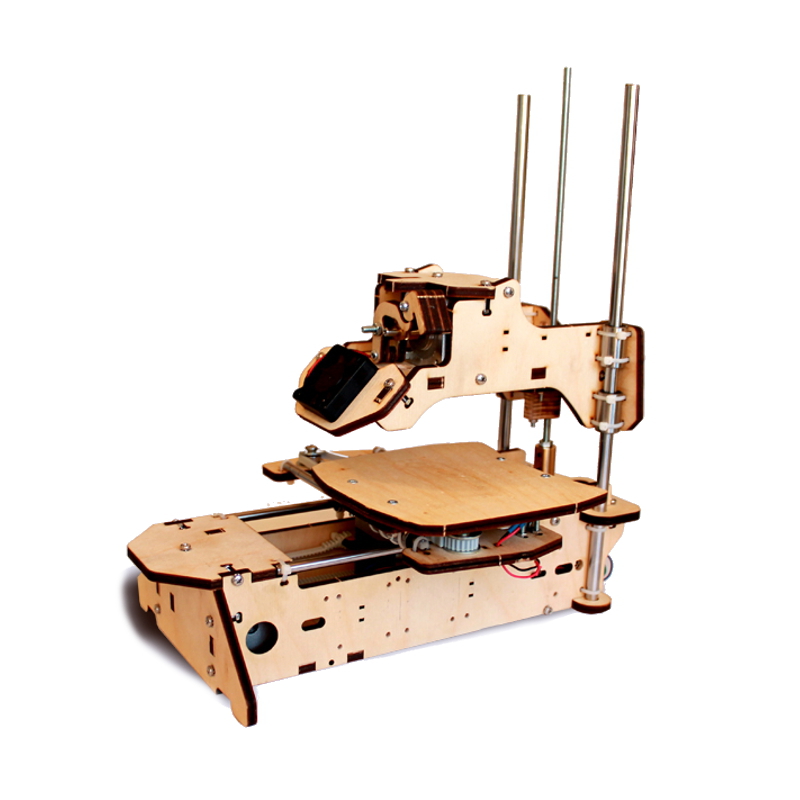
After assembly, some parts are printed directly on the printer itself.

Because of the plywood frame, the name DROVA very quickly stuck to it. And it can be painted to your liking.
This MC5 was a very fast and fun printer. It has become popular with sophisticated users who have climbed every corner of the Internet in search of the design and price of a 3D printer they need. And not once stumbled upon an American printrbot .
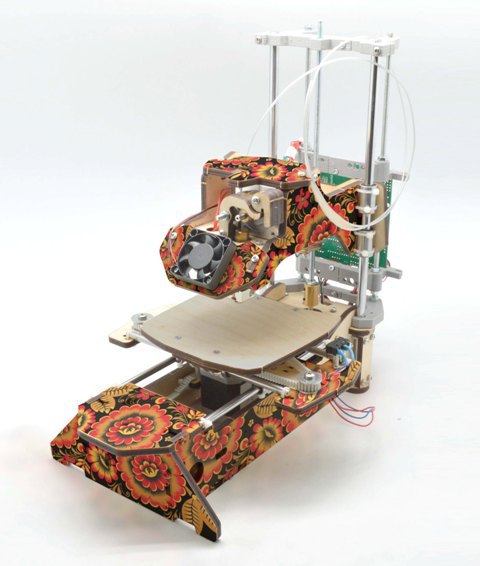
Then, at the request of users, a MC3 remake was made, called the MC3 Stealth . In the design were major changes. Drives made on the belts. Replaced extruder. The design of plastic parts has become more attractive and brutal. Real Stealth among printers. All body parts are also printed on a 3D printer.


For users who are afraid of the combination of letters DIY, a step-by-step instruction “for dummies” was prepared. Together with this instruction, MC3 Stealth was put in a plastic case, each box with cogs was signed and the result was “ MC3 Master ”.


And now the printer designer MC2 . What is it?
Almost a year passed in a joint experiment with our users. MC3, MC5, MC3 Stealth. We were not afraid and twisted the kinematics - the mechanical parts became even larger. Experiments with electronics forced our users to pull connecting loops all over the basement of MC3 type printers. And in the first versions, buyers generally made the cables themselves (full DIY). Of course, among our clients there are many original craftsmen who experience some special pleasure from laying cables, soldering or crimping the connectors with the help of household pliers. This is geeks! We love them, but they are few. We are also few, but we want everyone to know us. Therefore, it was decided: to make a truly popular printer, without stopping the production of models for geeks. We did it!
These were the tasks:
1. Minimum plastic parts.
2. At least expensive kinematics.
3. All electronics on one board.
4. No loops and interboard connectors.
5. Ready-to-use assembled extruder.
6. Maximum assembly speed.
7. Automatic calibration.
8. The minimum area occupied by the table.
9. Weight not more than 3 kg.
10. Upgradeability: display, SD card, heated table.
11. Attractive appearance.
Reports on items:
1. A total of 18 plastic parts.
2. The belts are replaced with printed racks. Respectively and plastic gears.
3. One Mastertronics replaced 6 boards from MC3 *
4. Left one board. Loops and connectors are not needed.
5. Extruder is prepared in our production. Completely ready to work.
6. 45 minutes for kinematics and 1 hour for electronics and tuning.
7. Done At three points on a rigidly fixed table. There are no springs.
8. On the table it takes the place of 350 x 250 mm. those. 1.4 sheets of A4. **
9. 2.5 kg without power supply.
10. Again, Mastertronics. Allows you to enable all these features.
11. Handsome.
* - They came up with this: on each of the axes in the 3D printer there should be travel stops that indicate a zero point. This is usually a microswitch. But since the task was to minimize the electronics, they replaced these mikriki with two screws that hit each other at the end points and close them. The rattle does not bother us, because it sets the zero point only once at the start. And therefore it does not matter if this zero is a couple of microns to the left or to the right)
** - I had to tinker here. It fits not only with the area, but also with the volume. I wanted to make it as compact as possible, with a low-set table. Mastertronics installed in the basement under the table. Three times the basement was redrawn. Lower it lower and lower. And the glass went down behind him. It turned out very attractive, flat as a laptop printing area. So also the height of the print was increased.


All details

Playlist about MC2 3D printer:
www.youtube.com/playlist?list=PLBWssaGimxpOo0lUkc4E7btTWls1jp4MF
By this time, we had already released and closed the MC3, the trace of which remained on the most popular 3D printing resource Thingiverse .
')
The design of the MC3 worked for three months. 5 versions have been made. Changed the location of the guides: vertical then horizontal again. The thread pulling mechanism moved to the printhead, then returned to the bottom. In one version, Teflon bearings were even installed. They turned out to be too precise, requiring a greater initial moment. The printing area was selected, the height varied. In short, the experience was not enough, time spent a lot.
The MC3 was followed by the MC5 , our plywood version of the printer. We decided that we should have one.
After assembly, some parts are printed directly on the printer itself.
Because of the plywood frame, the name DROVA very quickly stuck to it. And it can be painted to your liking.
This MC5 was a very fast and fun printer. It has become popular with sophisticated users who have climbed every corner of the Internet in search of the design and price of a 3D printer they need. And not once stumbled upon an American printrbot .
Then, at the request of users, a MC3 remake was made, called the MC3 Stealth . In the design were major changes. Drives made on the belts. Replaced extruder. The design of plastic parts has become more attractive and brutal. Real Stealth among printers. All body parts are also printed on a 3D printer.
For users who are afraid of the combination of letters DIY, a step-by-step instruction “for dummies” was prepared. Together with this instruction, MC3 Stealth was put in a plastic case, each box with cogs was signed and the result was “ MC3 Master ”.
And now the printer designer MC2 . What is it?
Almost a year passed in a joint experiment with our users. MC3, MC5, MC3 Stealth. We were not afraid and twisted the kinematics - the mechanical parts became even larger. Experiments with electronics forced our users to pull connecting loops all over the basement of MC3 type printers. And in the first versions, buyers generally made the cables themselves (full DIY). Of course, among our clients there are many original craftsmen who experience some special pleasure from laying cables, soldering or crimping the connectors with the help of household pliers. This is geeks! We love them, but they are few. We are also few, but we want everyone to know us. Therefore, it was decided: to make a truly popular printer, without stopping the production of models for geeks. We did it!
These were the tasks:
1. Minimum plastic parts.
2. At least expensive kinematics.
3. All electronics on one board.
4. No loops and interboard connectors.
5. Ready-to-use assembled extruder.
6. Maximum assembly speed.
7. Automatic calibration.
8. The minimum area occupied by the table.
9. Weight not more than 3 kg.
10. Upgradeability: display, SD card, heated table.
11. Attractive appearance.
Reports on items:
1. A total of 18 plastic parts.
2. The belts are replaced with printed racks. Respectively and plastic gears.
3. One Mastertronics replaced 6 boards from MC3 *
4. Left one board. Loops and connectors are not needed.
5. Extruder is prepared in our production. Completely ready to work.
6. 45 minutes for kinematics and 1 hour for electronics and tuning.
7. Done At three points on a rigidly fixed table. There are no springs.
8. On the table it takes the place of 350 x 250 mm. those. 1.4 sheets of A4. **
9. 2.5 kg without power supply.
10. Again, Mastertronics. Allows you to enable all these features.
11. Handsome.
* - They came up with this: on each of the axes in the 3D printer there should be travel stops that indicate a zero point. This is usually a microswitch. But since the task was to minimize the electronics, they replaced these mikriki with two screws that hit each other at the end points and close them. The rattle does not bother us, because it sets the zero point only once at the start. And therefore it does not matter if this zero is a couple of microns to the left or to the right)
** - I had to tinker here. It fits not only with the area, but also with the volume. I wanted to make it as compact as possible, with a low-set table. Mastertronics installed in the basement under the table. Three times the basement was redrawn. Lower it lower and lower. And the glass went down behind him. It turned out very attractive, flat as a laptop printing area. So also the height of the print was increased.
All details
Playlist about MC2 3D printer:
www.youtube.com/playlist?list=PLBWssaGimxpOo0lUkc4E7btTWls1jp4MF
Source: https://habr.com/ru/post/260583/
All Articles