Kolab Groupware (Part 2 - Installation)
If you still do not know what Kolab is, then you probably want to read the first article , where I did a detailed review of this rather functional and completely free mail server with a beautiful web-muzzle.
This time we will install it.
Kolab Groupware (Part 1 - Overview)
Kolab Groupware (Part 2 - Installation)
If you do not want to bother with all that is described in this article or just want to try Kolab, you can use a ready docker image .
')
Package installation
Packages exist for all popular distributions: Red Hat Enterprise Linux , CentOS , Fedora , Debian , there are also experimental packages for OpenSUSE and Ubuntu , and in ArchLinux Kolab you can build from AUR .
I will install it on Centos 7, but it is not necessary to be guided by me at all, the installation will differ little from other distributions.
So let's start
Install repositories
yum -y update yum -y install wget epel-release cd /etc/yum.repos.d wget http://obs.kolabsys.com/repositories/Kolab:/3.4/CentOS_7/Kolab:3.4.repo wget http://obs.kolabsys.com/repositories/Kolab:/3.4:/Updates/CentOS_7/Kolab:3.4:Updates.repo Install the keys
gpg --keyserver pgp.mit.edu --recv-key 0x446D5A45 gpg --export --armor devel@lists.kolab.org > devel.asc rpm --import devel.asc rm devel.asc Now the packages themselves
yum -y install kolab Kolab installation
First of all, the host name must be set to the full FQDN, for example:
echo "mail.example.org" > /etc/hostname In addition, the installation of dirsrv requires that the name of your machine be resolved to its IP address, so do not forget to add the corresponding entry to the DNS and / or to the / etc / hosts file.
Now it's time to find out that if you want to install Kolab and use some Active Directory instead of the standard 389 Directory Server (hereinafter referred to as dirsrv), then you need to edit the /etc/kolab/kolab.conf file and fix the parameters responsible for LDAP.
In this case, the installation will need to run with the parameter - with-ad
Also in the centos-systems, before installation, you should create a user dirsrv, when installing packages, it is not created for some reason, in debian this is all right.
adduser dirsrv Ok, now everything is ready, we start the installation:
setup-kolab The entire installation boils down to answering questions that an interactive script asks you
Listing
Please supply a password for the LDAP administrator user 'admin', used to login to the graphical console of 389 Directory server. Administrator password [sQnPqqaKInB2ObB]: Please supply a password for the LDAP Directory Manager user, which is the administrator user you will be using to at least initially log in to the Web Admin, and that Kolab uses to perform administrative tasks. Directory Manager password [ohLY9kxxinHGOGE]: Please choose the system user and group the service should use to run under. These should be existing, unprivileged, local system POSIX accounts with no shell. User [dirsrv]: Group [dirsrv]: This setup procedure plans to set up Kolab Groupware for the following domain name space. This domain name is obtained from the reverse DNS entry on your network interface. Please confirm this is the appropriate domain name space. example.org [Y/n]: y The standard root dn we composed for you follows. Please confirm this is the root dn you wish to use. dc=example,dc=org [Y/n]: y Setup is now going to set up the 389 Directory Server. This may take a little while (during which period there is no output and no progress indication). Shutting down dirsrv: mail... [ OK ] Starting dirsrv: mail... [ OK ] Please supply a Cyrus Administrator password. This password is used by Kolab to execute administrative tasks in Cyrus IMAP. You may also need the password yourself to troubleshoot Cyrus IMAP and/or perform other administrative tasks against Cyrus IMAP directly. Cyrus Administrator password [0DIMW-CLUKmsNEU]: Please supply a Kolab Service account password. This account is used by various services such as Postfix, and Roundcube, as anonymous binds to the LDAP server will not be allowed. Kolab Service password [dDGgUZAue2Y-LTW]: Shutting down postfix: [FAILED] Starting postfix: [ OK ] Shutting down amavisd: The amavisd daemon is apparently not running, no PID file /var/run/amavisd/amavisd.pid [FAILED] Starting amavisd: [ OK ] Stopping clamd.amavisd: [FAILED] Starting clamd.amavisd: LibClamAV Warning: ************************************************** LibClamAV Warning: *** The virus database is older than 7 days! *** LibClamAV Warning: *** Please update it as soon as possible. *** LibClamAV Warning: ************************************************** [ OK ] Stopping wallaced: [FAILED] Starting wallaced: [ OK ] Stopping mysqld: [ OK ] Initializing MySQL database: Installing MySQL system tables... OK Filling help tables... OK To start mysqld at boot time you have to copy support-files/mysql.server to the right place for your system PLEASE REMEMBER TO SET A PASSWORD FOR THE MySQL root USER ! To do so, start the server, then issue the following commands: /usr/bin/mysqladmin -u root password 'new-password' /usr/bin/mysqladmin -u root -h mail.example.org password 'new-password' Alternatively you can run: /usr/bin/mysql_secure_installation which will also give you the option of removing the test databases and anonymous user created by default. This is strongly recommended for production servers. See the manual for more instructions. You can start the MySQL daemon with: cd /usr ; /usr/bin/mysqld_safe & You can test the MySQL daemon with mysql-test-run.pl cd /usr/mysql-test ; perl mysql-test-run.pl Please report any problems with the /usr/bin/mysqlbug script! [ OK ] Starting mysqld: [ OK ] What MySQL server are we setting up? - 1: Existing MySQL server (with root password already set). - 2: New MySQL server (needs to be initialized). Choice: 2 Please supply a root password for MySQL. This password will be the administrative user for this MySQL server, and it should be kept a secret. After this setup process has completed, Kolab is going to discard and forget about this password, but you will need it for administrative tasks in MySQL. MySQL root password [lhBkALCvQpocaiT]: Please supply a password for the MySQL user 'kolab'. This password will be used by Kolab services, such as the Web Administration Panel. MySQL kolab password [47rxdTc-vIk3WJ8]: Please supply the timezone PHP should be using. You have to use a Continent or Country / City locality name like 'Europe/Berlin', but not just 'CEST'. Timezone ID [UTC]: Europe/Moscow Please supply a password for the MySQL user 'roundcube'. This password will be used by the Roundcube webmail interface. MySQL roundcube password [o_yUViK4oRy7SX2]: Stopping httpd: [FAILED] Starting httpd: [ OK ] Stopping httpd: [ OK ] Starting httpd: [ OK ] Stopping kolab-saslauthd: [FAILED] Starting kolab-saslauthd: [ OK ] Shutting down cyrus-imapd: [FAILED] Starting cyrus-imapd: [ OK ] Stopping kolabd: [FAILED] Starting kolabd: [ OK ] After installation, you already have a completely working installation of Kolab, for a test run, this is quite enough, but for production release you will have to work a little more with a file :)
Editing config
The config is here /etc/kolab/kolab.conf
Here, there is something to twist, here are some useful options:
Locale
The default locale for Russian is en_RU
default_locale = en_US Generating uid and box names
Here is the rule that generates the primary mailbox.
primary_mail = %(surname)s@%(domain)s And these are the rules by which additional mailboxes are generated, as you can see, they can be more flexible than for the main
secondary_mail = { 0: { "{0}.{1}@{2}": "format('%(givenname)s'[0:1].capitalize(), '%(surname)s', '%(domain)s')" }, 1: { "{0}@{1}": "format('%(uid)s', '%(domain)s')" }, 2: { "{0}@{1}": "format('%(givenname)s.%(surname)s', '%(domain)s')" } } By default in Kolab it is forbidden to change through the admin email primary email and uid, i.e. they must always be generated by themselves based on these rules.
I personally do not like this scheme, I prefer to specify the username and mail-addresses manually, well, or at least that it could be edited. I'll tell you how to do it:
Disable mailbox name checking
daemon_rcpt_policy = False Go to the Kolab admin panel, go to Settings, and for the Kolab User type uid and mail attribute, change the value from “Generated (read-only)” to “Generated”.
Now we can edit uids and mail addresses for our users manually.
Mail storage
We continue to parse the config, here it is indicated which folders should be created by default for the new user
autocreate_folders = { 'Archive': { 'quota': 0, }, 'Calendar': { 'annotations': { '/private/vendor/kolab/folder-type': "event.default", '/shared/vendor/kolab/folder-type': "event", }, ... If you wish, you can move different folders to different storages, for example, so that all folders are on fast storage, and the archive folder is slow.
To do this, in the cyrus config you should specify where to look for these storages.
echo "partition-default: /var/spool/imap" >> /etc/imapd.conf echo "partition-archive: /var/spool/imap-archive" >> /etc/imapd.conf And add the partition parameter to the Archive folder, like this:
... 'Archive': { 'quota': 0, 'partition': 'archive' }, ... Multidomain configuration
Kolab out of the box does not quite support multiple domains. Or rather, there is everything in the admin panel, but all other services, such as postfix, cyrus-imap, amavis, roundcube, are all configured by default to support only one domain.
If you still need to set up multiple domains, the official wiki has a very detailed guide on how to set up this whole zoo to work with multiple domains.
It should be noted that after the described actions, your logins will be changed from a simple username to username@example.org
If you do not need this function, simply skip this item.
SSL setup
We secure our server, get a certificate for your domain, if you have not already done so.
You will also need a certificate from a certification authority (in the case of StartSSL, sub.class1.server.ca.pem )
Install mod_ssl for apache
yum -y install mod_ssl Now we copy our keys in the following ways:
/etc/pki/tls/private/mail.example.org.key
/etc/pki/tls/certs/mail.example.org.crt
/etc/pki/tls/certs/sub.class1.server.ca.pem
# C cat /etc/pki/tls/certs/mail.example.org.crt /etc/pki/tls/private/mail.example.org.key /etc/pki/tls/certs/sub.class1.server.ca.pem > /etc/pki/tls/private/mail.example.org.bundle.pem cat /etc/pki/tls/certs/mail.example.org.crt /etc/pki/tls/certs/sub.class1.server.ca.pem > /etc/pki/tls/certs/mail.example.org.bundle.pem cat /etc/pki/tls/certs/sub.class1.server.ca.pem > /etc/pki/tls/certs/mail.example.org.ca-chain.pem # chown -R root:mail /etc/pki/tls/private chmod 600 /etc/pki/tls/private/mail.example.org.key chmod 750 /etc/pki/tls/private chmod 640 /etc/pki/tls/private/* # cat /etc/pki/tls/certs/sub.class1.server.ca.pem >> /etc/pki/tls/certs/ca-bundle.crt # apache sed -i -e '/SSLCertificateFile \/etc\/pki/c\SSLCertificateFile /etc/pki/tls/certs/mail.example.org.crt' /etc/httpd/conf.d/ssl.conf sed -i -e '/SSLCertificateKeyFile \/etc\/pki/c\SSLCertificateKeyFile /etc/pki/tls/private/mail.example.org.key' /etc/httpd/conf.d/ssl.conf sed -i -e '/SSLCertificateChainFile \/etc\/pki/c\SSLCertificateChainFile /etc/pki/tls/certs/mail.example.org.ca-chain.pem' /etc/httpd/conf.d/ssl.conf # HTTPS cat >> /etc/httpd/conf/httpd.conf << EOF <VirtualHost _default_:80> RewriteEngine On RewriteRule ^(.*)$ https://%{HTTP_HOST}\$1 [R=301,L] </VirtualHost> EOF # cyrus-imap sed -r -i \ -e 's|^tls_server_cert:.*|tls_server_cert: /etc/pki/tls/certs/mail.example.org.crt|g' \ -e 's|^tls_server_key:.*|tls_server_key: /etc/pki/tls/private/mail.example.org.key|g' \ -e 's|^tls_server_ca_file:.*|tls_server_ca_file: /etc/pki/tls/certs/mail.example.org.ca-chain.pem|g' \ /etc/imapd.conf # Postfix postconf -e smtpd_tls_key_file=/etc/pki/tls/private/mail.example.org.key postconf -e smtpd_tls_cert_file=/etc/pki/tls/certs/mail.example.org.crt postconf -e smtpd_tls_CAfile=/etc/pki/tls/certs/mail.example.org.ca-chain.pem # kolab-cli api sed -r -i \ -e '/api_url/d' \ -e "s#\[kolab_wap\]#[kolab_wap]\napi_url = https://$(hostname -f)/kolab-webadmin/api#g" \ /etc/kolab/kolab.conf # Roundcube sed -i -e 's/http:/https:/' /etc/roundcubemail/libkolab.inc.php sed -i -e 's/http:/https:/' /etc/roundcubemail/kolab_files.inc.php sed -i -e '/^?>/d' /etc/roundcubemail/config.inc.php # iRony DAV- cat >> /etc/roundcubemail/config.inc.php << EOF # caldav/webdav \$config['calendar_caldav_url'] = "https://%h/iRony/calendars/%u/%i"; \$config['kolab_addressbook_carddav_url'] = 'https://%h/iRony/addressbooks/%u/%i'; EOF # Rouncdcube HTTPS cat >> /etc/roundcubemail/config.inc.php << EOF # Force https redirect for http requests \$config['force_https'] = true; EOF On this setting SSL can be considered complete.
DKIM and SPF
In order for Gmail and other mail servers not to spam our emails, it is recommended to set up SPF and DKIM records on our server.
As a server part for DKIM, I suggest using OpenDKIM, for setting up which on Habré there was already a wonderful article
Configure spam delivery
By default, amavis simply removes all spam. Personally, I think that it is not entirely correct and that spam should be delivered to users' personal spam folders.
Actually there are two options for how this can be done:
Option with a separator
Cyrus-imap allows you to deliver mail immediately to the desired folder using a special separator in the email address.
Set up amavis
# ***spam*** sed -i '/^[^#]*$sa_spam_subject_tag/s/^/#/' /etc/amavisd/amavisd.conf # spam+ sed -i '/^# $recipient_delimiter/s/^# //' /etc/amavisd/amavisd.conf # sed -i 's/^\($final_spam_destiny.*= \).*/\1D_PASS;/' /etc/amavisd/amavisd.conf One more thing, so that mail could be delivered immediately to the spam folder, for this folder, the anyone user must have p permission (that is, put letters into this folder), otherwise everything will be dumped into INBOX.
By the way, this concerns Shared Folders, if you want to receive letters to them, you should set similar permissions for them.
Unfortunately, I didn’t find in cyrus-imap a regular way to determine secret rights for anyone.
But I have this solution, we add this line to the crontab, and every 4 hours kolab will pull cyrus-imap so that each user in your domain will have “anyone p” for the spam folder.
0 4 * * * kolab sam user/%/Spam@example.org anyone p Option with global sieve script
Set up amavis
# ***spam*** sed -i '/^[^#]*$sa_spam_subject_tag/s/^/#/' /etc/amavisd/amavisd.conf # sed -i 's/^\($final_spam_destiny.*= \).*/\1D_PASS;/' /etc/amavisd/amavisd.conf Create a global cyrus script:
mkdir -p /var/lib/imap/sieve/global/ cat > /var/lib/imap/sieve/global/default.script << EOF require "fileinto"; if header :contains "X-Spam-Flag" "YES" { fileinto "Spam"; } EOF Compile it:
/usr/lib/cyrus-imapd/sievec /var/lib/imap/sieve/global/default.script /var/lib/imap/sieve/global/default.bc Now we will make a script that will connect it to all new users:
/bin/set_spam_sieve.sh
#!/bin/bash imap_stor=/var/spool/imap/ sieve_stor=/var/lib/imap/sieve/ user_sieve_folders=($(find $imap_stor -name Spam -type d -print | sed 's|'$imap_stor'|'$sieve_stor'|' | sed 's|/user||' | sed 's|/Spam|/|')) for folder in ${user_sieve_folders[@]} ; do if [ -f $folder'USER.script' ] ; then cd $folder if [ "$(grep -c 'require.*include' 'USER.script')" -eq 0 ]; then echo 'Inject require "include"; '$folder'USER.script' sed -i '1i require "include";' 'USER.script' /usr/lib/cyrus-imapd/sievec 'USER.script' 'USER.bc' chown -R cyrus:mail $folder fi if [ "$(grep -c "include.*:global.*default" 'USER.script')" -eq 0 ]; then echo 'Inject include :global "default"; '$folder'USER.script' echo 'include :global "default";' >> $folder'USER.script' /usr/lib/cyrus-imapd/sievec 'USER.script' 'USER.bc' chown -R cyrus:mail $folder fi echo -e $folder'USER.script' else echo Creating new $folder'USER.script' mkdir -p $folder cd $folder echo -e 'require ["include"];\ninclude :global "default";' > 'USER.script' /usr/lib/cyrus-imapd/sievec 'USER.script' 'USER.bc' ln -s 'USER.bc' 'defaultbc' chown -R cyrus:mail $folder fi done Do not forget to make it executable:
chmod +x /bin/set_spam_sieve.sh Now add a task to cron that will run the set_spam_sieve.sh script every 4 hours:
0 4 * * * /bin/set_spam_sieve.sh Protection against brute force with Fail2ban
Fail2ban is a service that monitors the logs of other services for repeating incorrect login attempts too often.
For example, if you try too often to log in with the wrong password from the same IP, then this IP gets banned for a few minutes.
Install Fail2ban from official repositories
yum -y install fail2ban Create filters for Fail2ban
cat > /etc/fail2ban/filter.d/kolab-cyrus.conf << EOF [Definition] failregex = (imaps|pop3s)\[[0-9]*\]: badlogin: \[<HOST>\] (plain|PLAIN|login|plaintext) .* ignoreregex = EOF cat > /etc/fail2ban/filter.d/kolab-postfix.conf << EOF [Definition] failregex = postfix\/submission\/smtpd\[[0-9]*\]: warning: unknown\[<HOST>\]: SASL (PLAIN|LOGIN) authentication failed: authentication failure ignoreregex = EOF cat > /etc/fail2ban/filter.d/kolab-roundcube.conf << EOF [Definition] failregex = <.*> Failed login for .* from <HOST> in session .* ignoreregex = EOF cat > /etc/fail2ban/filter.d/kolab-irony.conf << EOF [Definition] failregex = <.*> Failed login for .* from <HOST> in session .* ignoreregex = EOF cat > /etc/fail2ban/filter.d/kolab-chwala.conf << EOF [Definition] failregex = <.*> Failed login for .* from <HOST> in session .* ignoreregex = EOF cat > /etc/fail2ban/filter.d/kolab-syncroton.conf << EOF [Definition] failregex = <.*> Failed login for .* from <HOST> in session .* ignoreregex = EOF Now let's set Fail2ban on them
cat >> /etc/fail2ban/jail.conf << EOF [kolab-cyrus] enabled = true filter = kolab-cyrus action = iptables-multiport[name=cyrus-imap,port="143,993,110,995,4190"] logpath = /var/log/maillog maxretry = 5 [kolab-postfix] enabled = true filter = kolab-postfix action = iptables-multiport[name=kolab-postfix,port="25,587"] logpath = /var/log/maillog maxretry = 5 [kolab-roundcube] enabled = true filter = kolab-roundcube action = iptables-multiport[name=kolab-roundcube, port="http,https"] logpath = /var/log/roundcubemail/userlogins maxretry = 5 [kolab-irony] enabled = true filter = kolab-irony action = iptables-multiport[name=kolab-irony,port="http,https"] logpath = /var/log/iRony/userlogins maxretry = 5 [kolab-chwala] enabled = true filter = kolab-chwala action = iptables-multiport[name=kolab-chwala,port="http,https"] logpath = /var/log/chwala/userlogins maxretry = 5 [kolab-syncroton] enabled = true filter = kolab-syncroton action = iptables-multiport[name=kolab-syncroton,port="http,https"] logpath = /var/log/kolab-syncroton/userlogins maxretry = 5 EOF Configure Roundcube
Default theme
As I wrote in the previous article , if you don’t like the default theme of Chameleon, you can easily replace it with Larry
sed -i "s/\$config\['skin'\] = '.*';/\$config\['skin'\] = 'larry';/g" /etc/roundcubemail/config.inc.php Zipdownload plugin
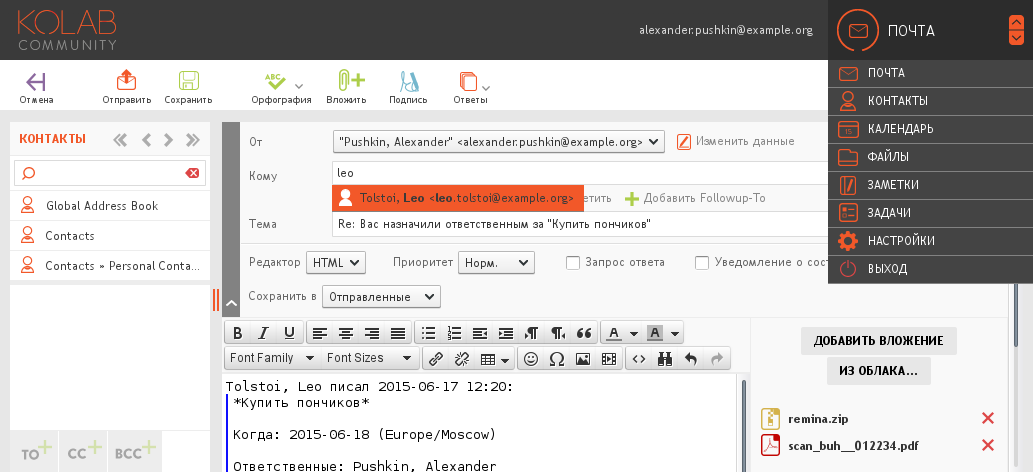
Some users complain that there is no such opportunity to download all attachments to the letter immediately.
So, this feature is in the zipdownload plugin for Roundcube
Download the roundcube repository, and copy the plugin to the folder with our Roundcube plugins
git clone https://github.com/roundcube/roundcubemail/ --depth 1 /tmp/roundcube mv /tmp/roundcube/plugins/zipdownload/ /usr/share/roundcubemail/plugins/ rm -rf /tmp/roundcube/ Now it only remains to activate it by adding it to the $ config ['plugins'] array in the /etc/roundcubemail/config.inc.php file.
sed -i "/'contextmenu',/a \ 'zipdownload'," /etc/roundcubemail/config.inc.php Another point: in the php_zlib module, in the versions supplied with distributions there is a bug, as a result of which, if the letter contains files with Cyrillic names, then when packed into a zip-file, their names turn into a cracked.
To solve this, collect a new php_zlib:
yum -y install php-devel zlib-devel pcre-devel gcc pecl install zip Kolab ActiveSync Server
A couple more words about synchronization: the kolab-synroton service ( z-push fork) by default has 2 modes of operation: folder-mode and flat-mode.
In the case of folder-mode, all folders that you mark in the sync settings in Roundcube are transferred as is.
In the case of flat-mode, all the same folders are combined into one for mail, one for contacts, one for the calendar ...
Apple and Windows technology works by default in folder-mode, but for Android, due to poor support for folder-mode (as developers say), flat-mode is enabled by default.
If you wish, you can try and if your device still supports folder-mode, you can add its name to the $ ext_devices array in the /usr/share/kolab-syncroton/lib/kolab_sync_data.php file
Conclusion
At this point, the installation can be considered complete, once again we restart all the services and check whether they start automatically when the system starts.
The mail client is available at the link: mail.example.org/webmail
Admin: mail.example.org/kolab-webadmin
You can also set up an automatic redirect from mail.example.org to mail.example.org/webmail
sed -i -e 's/<Directory \/>/<Directory \/>\n RedirectMatch \^\/$ \/webmail\//g' /etc/httpd/conf/httpd.conf UPD: Recently, sattellite addressed me with the problem that the sieve-rules do not work if the folder to which the letter should be delivered has a Cyrillic name.
The solution turned out to be quite simple:
echo 'sieve_utf8fileinto: 1' >> /opt/kolab-crosslab.ru/etc/imapd.conf thank!Docker image
As a bonus, I attach my image of Kolab to Docker to the article, where everything described above and nginx in addition is automatically configured: GitHub , DockerHub
Official site of the project: kolab.org
Source: https://habr.com/ru/post/260527/
All Articles