Creating multiplatform games using Cocos2d-x version 3.0 and higher
In this guide, you will learn how to create a simple game using Cocos2d-x 3.0 or later in the Windows development environment and how to compile it for running on Windows and Android.

Cocos2d-x is a cross-platform framework for games (and other graphical applications, such as interactive books), based on cocos2d for iOS, but using C ++, JavaScript or Lua instead of Objective-C.
One of the advantages of this framework is the ability to create games for different platforms (Android, iOS, Win32, Windows Phone, Mac, Linux and others). At the same time, the basis of the program remains the same - only a slight adaptation is required for a specific platform.
')
The cocos2d-console appeared in version 3.0. This command line provides the same functions as the project management tools in Cocos2d-x or Cocos2d-JS - creating, executing, building, debugging, etc.
1. Download the latest version of the framework and unpack the archive. In this tutorial, version 3.3rc0 was used , and the framework archive was unpacked to the desktop (C: \ Users \ intel-user \ Desktop \ cocos2d-x-3.3rc0).
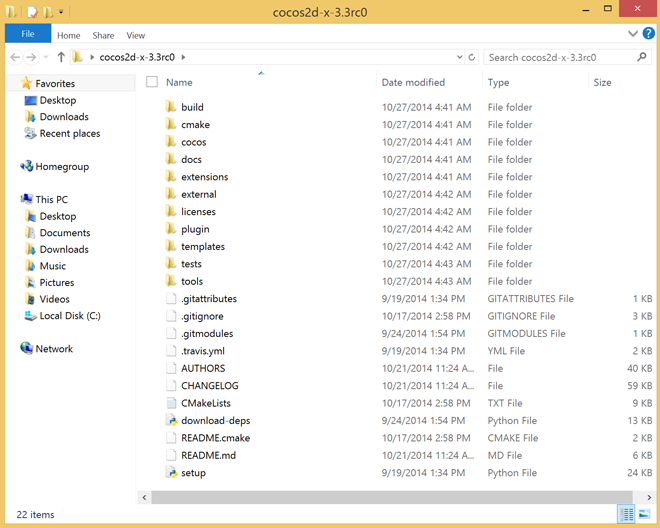
Directory structure of Cocos2d-x version 3.3 RC0
2. To create a new project in cocos2d-x, use setup.py (Python script), which is located in the framework folder. It will allow you to configure all variable environments for Win32 and Android platforms. Before you run setup.py, you will need to download, install, and configure the following items:
If you have not installed Python Runtime, download version 2.7.6 from here: www.python.org/download

Location setup.py
3. Open a command prompt (cmd.exe) and run the following commands:
- Go to the script folder (framework folder):
- Run the setup.py script:
Note: To run the Python command from the command line, add the folder where Python is installed to the path environment variable . The script will require installation paths for the Android SDK, Android NDK and ANT.
- Android NDK folder:
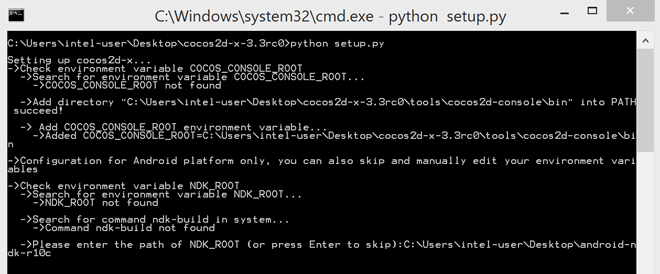
Cocos2d-console requires the path to the NDK folder
- Path to the Android SDK folder:

Cocos2d-console requires SDK folder path
- Path to the Apache ANT folder:

Cocos2d-console requires ANT folder path
After specifying all paths, re-open the command prompt (cmd.exe). This action is required to use the cocos2d-console commands .
4. Type cmd.exe to exit to the command line (you can enter cocos2d-console commands only here) and open the framework folder again:
In the next step, we will create a new Cocos2d-x project:

Creating a Cocos2d-x project
A brief explanation of the parameters:
If everything is fine, then the project is created in the Project folder - in the directory where the framework was unpacked.

MyGame directory structure
The created project contains the base code of the game (classes), resources (images, audio, etc.) and one project for each platform supported by the framework.
Requirements:
Note: Cocos2d-console uses the javac command to create Android applications, so you need to add the JAVA_HOME environment variable (path for the JDK).
1. We will compile the game program for several architectures, and the framework does not compile by default for x86 and armeabi-v7a. Edit the Application.mk file in C: \ Users \ intel-user \ Desktop \ cocos2d-x-3.3rc0 \ Project \ MyGame \ proj.android \ jni

Location of the Application.mk file
2. Add the following line to this file:
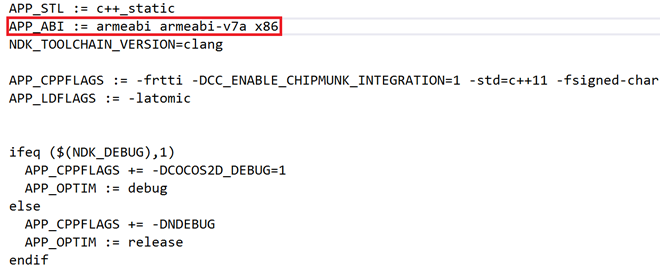
Application.mk after adding the line APP_ABI
Now, after adding target architectures, let's compile our game!
3. Using the command line prompt, go to the framework folder:
4. Run the command shown below and run the game for Android:

Running a command to compile and execute an Android game
Note: if only compilation is required, enter:
If everything works correctly, the cocos2d-console command will use adb (if this is set in the environment variables) to install the APK file on the connected device or initialized emulator. If they are not available, the command will wait for the availability of the device or emulator, as shown below:
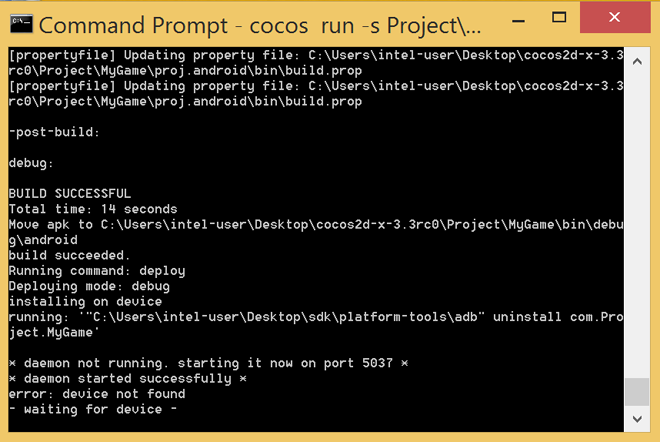
Command expects device or initialized emulator
If there is a connected device or an initialized emulator, the following screen will appear:
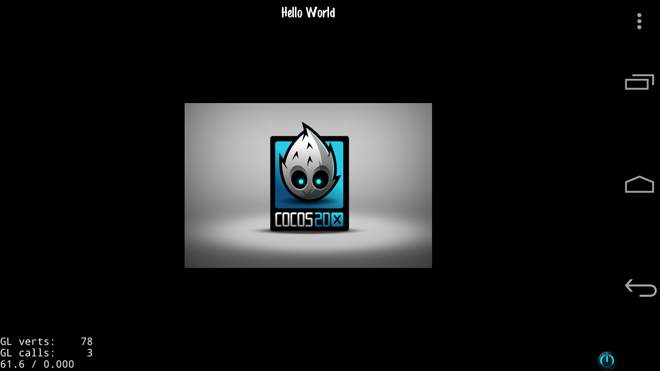
Game screen on the Android platform
We will need Visual Studio 2012 or later.
1. Using the command line prompt (cmd.exe), go to the folder where the framework was unpacked:
2. To compile and run the game for execution in a Windows environment, enter the following command:

Running the command to compile and run the game in Windows
Briefly about the parameters:
Note: if only compilation is required, use “compile” instead of “run”, as in the following example:
If everything works correctly, then after executing the run command you will see the following screen:
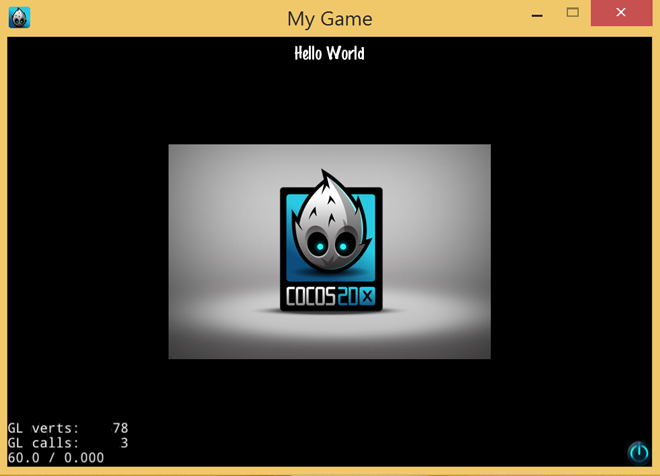
Game screen on the Windows platform
To compile and run a game project, you can use Visual Studio:
1. In the Project directory, open the Visual Studio MyGame.sln file in the “proj.win32” folder.
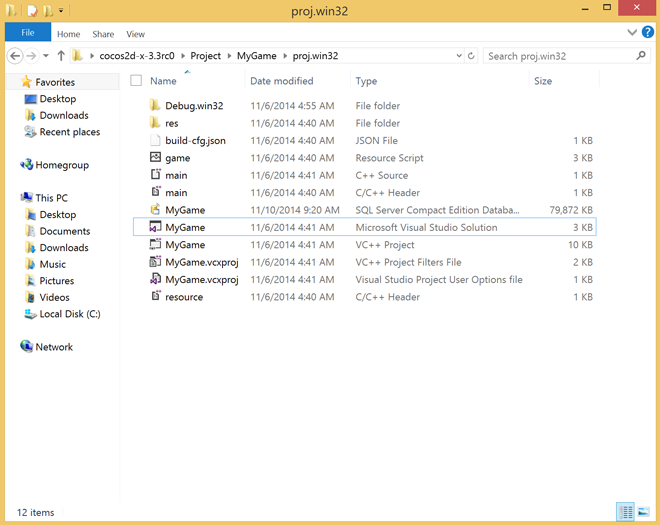
Win32 project directory structure
2. To compile the project, press F6 (or use the Build -> Build Solution menu) and F5 to start it (or the Debug menu -> Start Debugging). After building and running, you should see the same screen as after performing the steps for the console.

Win32 project opened in Visual Studio
So, now you know how to create and compile a game for Android (x86 and ARM), Windows 7 and Windows 8 (in desktop mode), bravo :)
Currently, Cocos2d-x 3.3 has a problem — the toolkit does not allow you to create projects (see details here ). This problem is fixed in the latest preliminary edition, but still remains in the latest release of Cocos2d-x.
For details on compiling optimization, see our optimization notes .
The source code of the Cocos2d-x framework is licensed under the MIT License , and you can download it here .
» Cocos2d-x and documentation
» Cocos2d-console console

What is Cocos2d-x?
Cocos2d-x is a cross-platform framework for games (and other graphical applications, such as interactive books), based on cocos2d for iOS, but using C ++, JavaScript or Lua instead of Objective-C.
One of the advantages of this framework is the ability to create games for different platforms (Android, iOS, Win32, Windows Phone, Mac, Linux and others). At the same time, the basis of the program remains the same - only a slight adaptation is required for a specific platform.
')
Cocos2d-x console
The cocos2d-console appeared in version 3.0. This command line provides the same functions as the project management tools in Cocos2d-x or Cocos2d-JS - creating, executing, building, debugging, etc.
Create your first game
1. Download the latest version of the framework and unpack the archive. In this tutorial, version 3.3rc0 was used , and the framework archive was unpacked to the desktop (C: \ Users \ intel-user \ Desktop \ cocos2d-x-3.3rc0).

Directory structure of Cocos2d-x version 3.3 RC0
2. To create a new project in cocos2d-x, use setup.py (Python script), which is located in the framework folder. It will allow you to configure all variable environments for Win32 and Android platforms. Before you run setup.py, you will need to download, install, and configure the following items:
If you have not installed Python Runtime, download version 2.7.6 from here: www.python.org/download

Location setup.py
3. Open a command prompt (cmd.exe) and run the following commands:
- Go to the script folder (framework folder):
cd C:\Users\intel-user\Desktop\cocos2d-x-3.3rc0 - Run the setup.py script:
python setup.py (or setup.py only) Note: To run the Python command from the command line, add the folder where Python is installed to the path environment variable . The script will require installation paths for the Android SDK, Android NDK and ANT.
- Android NDK folder:

Cocos2d-console requires the path to the NDK folder
- Path to the Android SDK folder:

Cocos2d-console requires SDK folder path
- Path to the Apache ANT folder:

Cocos2d-console requires ANT folder path
After specifying all paths, re-open the command prompt (cmd.exe). This action is required to use the cocos2d-console commands .
4. Type cmd.exe to exit to the command line (you can enter cocos2d-console commands only here) and open the framework folder again:
cd C:\Users\intel-user\Desktop\cocos2d-x-3.3rc0 In the next step, we will create a new Cocos2d-x project:
cocos new MyGame –p com.Project.MyGame –l cpp –d Project 
Creating a Cocos2d-x project
A brief explanation of the parameters:
- new: creates a new project; it should be followed by the name of the project (in this example, MyGame);
- -p: sets the name of the package;
- -l: selects the programming language; value can be cpp or lua;
- -d: directory in which the framework creates the project structure.
If everything is fine, then the project is created in the Project folder - in the directory where the framework was unpacked.

MyGame directory structure
The created project contains the base code of the game (classes), resources (images, audio, etc.) and one project for each platform supported by the framework.
Create an Android application
Requirements:
- To create gaming applications for Android, you need to configure all environment variables (Android SDK, Android NDK and ANT). If you haven’t completed this step yet, see the “Creating Your First Game” section above.
- Installed Java Development Kit (JDK)
Note: Cocos2d-console uses the javac command to create Android applications, so you need to add the JAVA_HOME environment variable (path for the JDK).
1. We will compile the game program for several architectures, and the framework does not compile by default for x86 and armeabi-v7a. Edit the Application.mk file in C: \ Users \ intel-user \ Desktop \ cocos2d-x-3.3rc0 \ Project \ MyGame \ proj.android \ jni

Location of the Application.mk file
2. Add the following line to this file:
APP_ABI := armeabi armeabi-v7a x86 
Application.mk after adding the line APP_ABI
Now, after adding target architectures, let's compile our game!
3. Using the command line prompt, go to the framework folder:
cd C:\Users\intel-user\Desktop\cocos2d-x-3.3rc0 4. Run the command shown below and run the game for Android:
cocos run –s Project\MyGame –p android 
Running a command to compile and execute an Android game
- run: compiles and runs the project;
- -s: path to the project folder;
- -p: selected platform.
Note: if only compilation is required, enter:
cocos compile –s Project\MyGame –p android If everything works correctly, the cocos2d-console command will use adb (if this is set in the environment variables) to install the APK file on the connected device or initialized emulator. If they are not available, the command will wait for the availability of the device or emulator, as shown below:

Command expects device or initialized emulator
If there is a connected device or an initialized emulator, the following screen will appear:

Game screen on the Android platform
Creating Win32 Applications (for PCs running Windows 7 or Windows 8)
We will need Visual Studio 2012 or later.
1. Using the command line prompt (cmd.exe), go to the folder where the framework was unpacked:
cd C:\Users\intel-user\Desktop\cocos2d-x-3.3rc0 2. To compile and run the game for execution in a Windows environment, enter the following command:
cocos run –s Project\MyGame –p win32 
Running the command to compile and run the game in Windows
Briefly about the parameters:
- run: compiling and running the selected project
- -s: path to the project folder
- -p: platform selected
Note: if only compilation is required, use “compile” instead of “run”, as in the following example:
cocos compile –s Project\MyGame –p win32 If everything works correctly, then after executing the run command you will see the following screen:

Game screen on the Windows platform
To compile and run a game project, you can use Visual Studio:
1. In the Project directory, open the Visual Studio MyGame.sln file in the “proj.win32” folder.

Win32 project directory structure
2. To compile the project, press F6 (or use the Build -> Build Solution menu) and F5 to start it (or the Debug menu -> Start Debugging). After building and running, you should see the same screen as after performing the steps for the console.

Win32 project opened in Visual Studio
So, now you know how to create and compile a game for Android (x86 and ARM), Windows 7 and Windows 8 (in desktop mode), bravo :)
Almost forgotten
Currently, Cocos2d-x 3.3 has a problem — the toolkit does not allow you to create projects (see details here ). This problem is fixed in the latest preliminary edition, but still remains in the latest release of Cocos2d-x.
For details on compiling optimization, see our optimization notes .
Mistress note
The source code of the Cocos2d-x framework is licensed under the MIT License , and you can download it here .
» Cocos2d-x and documentation
» Cocos2d-console console
Source: https://habr.com/ru/post/260267/
All Articles