Emulation of 1-wire slave devices on MSP430

Once I bought a dimmer on eBay for an LED strip with an IR remote control. Besides the fact that after a couple of hours of use, the output MOSFET died and had to be changed, over time, the following problems appeared:
- PWM frequency too low. At low brightness, blinking was visible to the naked eye. This is probably due to the operating parameters of the output transistor - if, for example, the on / off time is too long, then the PWM frequency cannot be increased.
- The lack of any opportunities for communication, except for the IR remote. There were many different additional connectors on the board (+ 5V power, PWM output and some more), but no other control interface. Which, however, is logical.
Sometimes these flaws can be eliminated by reworking the firmware, but the marking was erased on the microcontroller, and I did not find anything like this in Digikey / Mouser. It was decided to implement a similar scheme, devoid of these shortcomings. From the control interfaces, 1-wire turned out to be nearby. This is how a library for emulating 1-wire compatible slave devices appeared.
Work protocol
1-wire - bidirectional communication bus. The devices use an open-collector output to change the state of the data line, which is pulled to + 5V. Information coding is carried out using the time for which the device pulls the data line to 0. More information about the bus can be found here .
Implementation based on the MSP430G2553 microcontroller
The main problem is that the microcontroller is powered by a voltage of 3.3V maximum, the GPIO ports are calculated for the same voltage. In order to connect to the data line, you can use two pins: one as an input (with connection via a resistive divider), the second as an output (using a transistor to connect the line with the ground). The approximate scheme is shown in the figure below.
')

A linear stabilizer is needed if you plan to power the MC from a 1-wire line.
Code
The created library consists of two parts:
- The code that handles the transmission of individual bits (timeslots), bytes, a reset signal and works with the SEARCH and MATCH commands.
- Code responsible for any particular device. This part handles access to the register space.
Why is this done? First, in order to be able to easily switch from one device to another. Secondly, the library has the ability to emulate several devices with different addresses on one microcontroller. This is possible thanks to the bus device search algorithm: the microcontroller is responsible for several addresses at once. Each such virtual device is responsible for its own part of the microcontroller's periphery.
To ensure that the resulting device was compatible with existing solutions, code was written to emulate a chip that is partially compatible with DS2408, which for some reason was not released. This allows the device to be used with owserver and owhttpd. In the case of a dimmer byte, responsible for the state of the outputs of the chip, sets the duty cycle of the PWM output.
You can pretty easily initialize the library:
#include <msp430.h> #include <stdint.h> #include "one-slave.h" #include "one-2408.h" // static one_device devices[] = { { // (ROM-) | (Family code) .rom = 0x0011223344556600 | ONE_2408_FC, // .init = &one_2408_init, // : , // PORT1 .device = &(one_2408) { .port_base = &P1IN } }, { .rom = 0x00AA000000000100 | ONE_2408_PWM_FC, .init = &one_2408_pwm_init, // PWM-: P2.1 .device = &(one_2408_pwm) { .out_bit = BIT1, .port_base = &P2IN } } }; void main(void) { WDTCTL = WDTPW | WDTHOLD; one_init( (one_device *) &devices, ARRAY_SIZE(devices) ); _EINT(); while (1) { one_process_state(); } } Iron
Instead of the existing board, another one was created:

In reality, the board looks worse, because there were several flaws that needed to be fixed. Unfortunately, it didn’t work out using a variable resistor for manual adjustment - there were not enough timers, two of which were busy. It is impossible to create a lot of “software” on the basis of the hardware timer in this case, since everything happens quite fast on the line (for MC) and the timer interrupt processing code can spoil some 30-second time slot.
In the new board, the PWM frequency is 15 kHz, the blink of the eyes and the camera did not work.
Connect to Openhab
Connecting to Openhab is quite simple - using HTTP binding. To change the brightness, just send a request to owhttpd of the following form:
http://owhttpd:2121/29.0100000000AA/PIO.BYTE/?PIO.BYTE=VALUE VALUE is a value from 0 to 255.
On the phone, it looks like this:
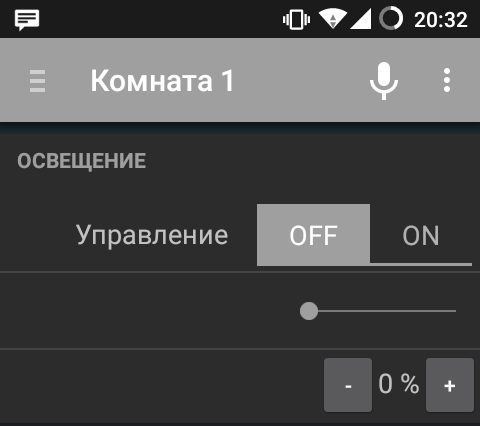
The control panel also did not stop working, it now works through LIRC, which transmits key codes to Openhab. Thanks to Openhab, when you press the buttons on the remote, the state of the controls on the phone immediately changes.
Conclusion
In conclusion, I will list again the main features of the library:
- Work on interruptions, in the intervals between transactions. The microcontroller is in low-power mode.
- The ability to emulate multiple devices on one microcontroller
- The work was tested on MSP430G2553; theoretically, it will also work on other controllers in this series.
Sources can be found here: github.com/resetnow/one-slave
Source: https://habr.com/ru/post/260187/
All Articles