IoT for a penny, or What can DeviceHive
In the modern world, the “Internet of Things” (IoT) is rapidly gaining popularity. In the future, it will help humanity to automate many aspects of life, simplify routine operations, and just make life more comfortable and more pleasant. Modern element base only contributes to this. A few years ago, the task of controlling a device from a network necessitated the use of high-performance processors, which increased the cost of the final actuator by several times. Now it is possible to build simple and effective IoT solutions for a penny.
You can make your home truly “smart” without using the trendy Raspberry Pi or Arduino. Most IoT tasks come down to connecting typical sensors and actuators with standard interfaces: I2C, SPI, UART. And sometimes even with an elementary analog output, from which it is necessary to consider the presence of voltage, or apply it, or simply close it.
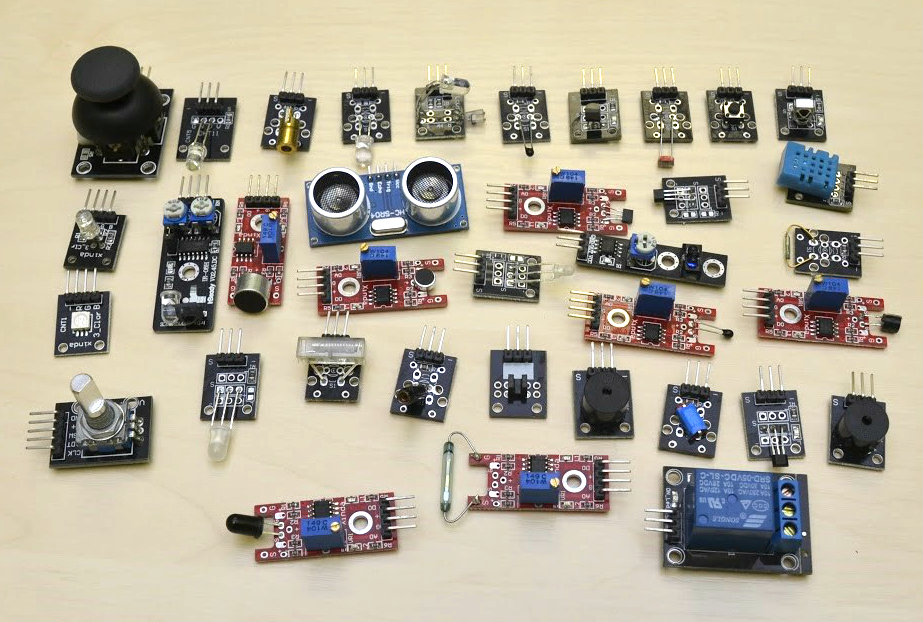
Here is a scattering of sensors - about $ 20 for everything. Sold on a pile of online sites (Aliexpress, Ebay, etc.).
')
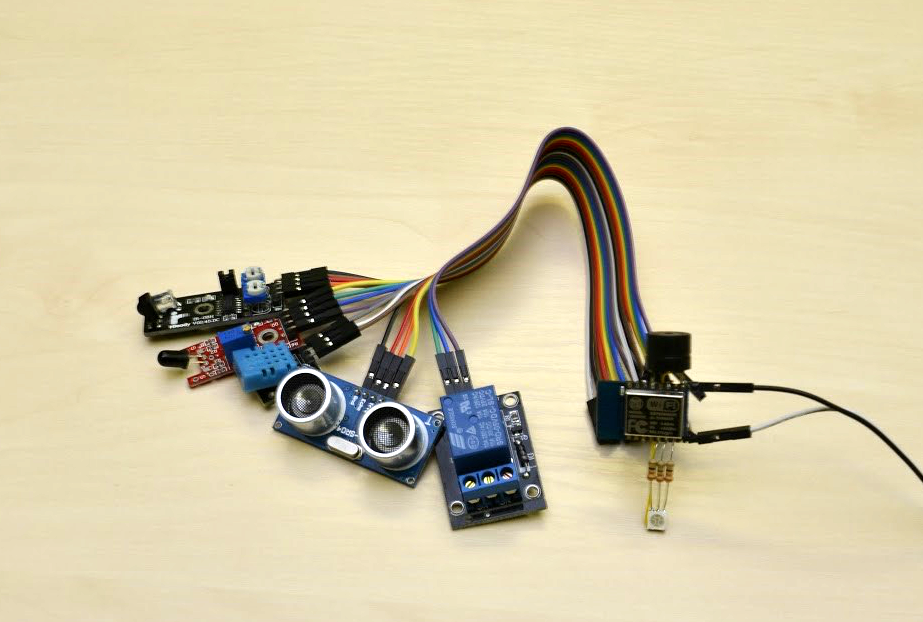
Most of these sensors, of course, can be purchased in the form of simple microcircuits or parts that are not unsoldered on the board in the radio parts store. This is easier, but in most cases it is more convenient to take such a board and connect it to the microcontroller board with a wire:
Using cheap analog sensors, it is already possible to implement a lot of simple, but useful solutions: automatic switching on of light depending on the illumination, turning on the heater to maintain the temperature, control of door opening and closing.
The cost of such sensors is negligible. And the actuators, even if they do not have interfaces for programming, can be activated by banal relays. For example, you want, when you open the front door, coming from work, the coffee machine starts making coffee. But at the same time it should not be activated when you close the door, leaving in the morning. Or you want to turn on the coffee machine from the office by clicking in the browser.
In most cases, to solve the problem, you will have to slightly modify the coffee machine - put a mechanism that will push the button, or add a relay inside that will close the contacts, simulating a button press.
Most developers will prefer to use the widely raspberry Pi or Arduino, which is like shooting a gun at sparrows. Developers are attracted by the simplicity of writing an application for these platforms and a large community. At the same time, such tasks can be solved using chips worth two dollars ($ 2.5 as a module on most Chinese marketplaces, including delivery) and at the same time get all the advantages and development flexibility in your favorite language. The result will be a full-fledged IoT device, which is part of the network, allowing you to easily scale and change the system. It will connect to the network using ordinary Wi-Fi, which most often already exists.
At such a cost, in many cases it will be cheaper to install such a module than to lay a cable (cost of copper + gaskets). If all manufacturers agreed to install such interfaces in home appliances (for example, in the above-described coffee maker), the production cost of most devices would increase by a penny, but the “smart home” would be really smart and inexpensive.
Based on the above, it looks very profitable microcontroller ESP8266 with built-in Wi-Fi-module. However, its programming may require remarkable efforts and skills - it’s not for nothing that it is often connected to other platforms to receive Wi-Fi connections via UART, using standard firmware from the manufacturer. Yes, and reinventing the wheel - somehow strange ...
We propose to use our open source DeviceHive platform and the ESP8266 chip with our firmware implementing the DeviceHive protocol on this SoC. You just need to connect the device to the module and communicate with DeviceHive servers via HTTP or via WebSocket in the environment in which you are used to.
We provide our code under the MIT license - the server part and all client software. The server can be easily deployed both in the cloud service and in the local network. To just play and try DeviceHive in action, you can use the free playground .
Communicating with ESP8266 firmware comes down to three simple steps:
Consider how to send a command via HTTP, using the example of JavaScript:
Then it is enough to call this function, for example, send ('gpio / write', 1, 0, 0), specifying the command and parameters. In this case, the “gpio / set” command will set a logical unit on the GPIO12 pin and a logical zero on the GPIO13 and GPIO14 pins, after which the connected device will do something. Simple, isn't it?
Writing an HTTP request, a problem solved for any programming language, i.e. a developer can implement his client application in any development environment, on any platform, and at the same time manage this IoT device.
Plans to implement:
While there is only a demo, but in the near future there will be an open source version, available to all for download. Keep for updates. With the first release we will prepare another article with a detailed video telling how to get a DeviceHive playground, how to flash and run a module from ESP8266 by connecting the simplest discrete devices. And we will write a simple web page to manage them.
Author: Nikolai Khabarov, Senior Embedded Developer
You can make your home truly “smart” without using the trendy Raspberry Pi or Arduino. Most IoT tasks come down to connecting typical sensors and actuators with standard interfaces: I2C, SPI, UART. And sometimes even with an elementary analog output, from which it is necessary to consider the presence of voltage, or apply it, or simply close it.
Here is a scattering of sensors - about $ 20 for everything. Sold on a pile of online sites (Aliexpress, Ebay, etc.).
')
Most of these sensors, of course, can be purchased in the form of simple microcircuits or parts that are not unsoldered on the board in the radio parts store. This is easier, but in most cases it is more convenient to take such a board and connect it to the microcontroller board with a wire:
Using cheap analog sensors, it is already possible to implement a lot of simple, but useful solutions: automatic switching on of light depending on the illumination, turning on the heater to maintain the temperature, control of door opening and closing.
The cost of such sensors is negligible. And the actuators, even if they do not have interfaces for programming, can be activated by banal relays. For example, you want, when you open the front door, coming from work, the coffee machine starts making coffee. But at the same time it should not be activated when you close the door, leaving in the morning. Or you want to turn on the coffee machine from the office by clicking in the browser.
In most cases, to solve the problem, you will have to slightly modify the coffee machine - put a mechanism that will push the button, or add a relay inside that will close the contacts, simulating a button press.
Most developers will prefer to use the widely raspberry Pi or Arduino, which is like shooting a gun at sparrows. Developers are attracted by the simplicity of writing an application for these platforms and a large community. At the same time, such tasks can be solved using chips worth two dollars ($ 2.5 as a module on most Chinese marketplaces, including delivery) and at the same time get all the advantages and development flexibility in your favorite language. The result will be a full-fledged IoT device, which is part of the network, allowing you to easily scale and change the system. It will connect to the network using ordinary Wi-Fi, which most often already exists.
At such a cost, in many cases it will be cheaper to install such a module than to lay a cable (cost of copper + gaskets). If all manufacturers agreed to install such interfaces in home appliances (for example, in the above-described coffee maker), the production cost of most devices would increase by a penny, but the “smart home” would be really smart and inexpensive.
Based on the above, it looks very profitable microcontroller ESP8266 with built-in Wi-Fi-module. However, its programming may require remarkable efforts and skills - it’s not for nothing that it is often connected to other platforms to receive Wi-Fi connections via UART, using standard firmware from the manufacturer. Yes, and reinventing the wheel - somehow strange ...
DeviceHive
We propose to use our open source DeviceHive platform and the ESP8266 chip with our firmware implementing the DeviceHive protocol on this SoC. You just need to connect the device to the module and communicate with DeviceHive servers via HTTP or via WebSocket in the environment in which you are used to.
We provide our code under the MIT license - the server part and all client software. The server can be easily deployed both in the cloud service and in the local network. To just play and try DeviceHive in action, you can use the free playground .
Communicating with ESP8266 firmware comes down to three simple steps:
- send a command to the device to perform any action (activating the pins of the chip, writing data to the interface, turning on the “pull-ups” for the input pins of the chip, querying the status of the pins, notifying the server about the level changes on the pins);
- ask the server about the result of the command;
- start “pouring” notifications that you subscribed to using commands.
Consider how to send a command via HTTP, using the example of JavaScript:
function send(command, r, g, b) { var xmlhttp = new XMLHttpRequest(); xmlhttp.open('POST', 'http://server.example.com/api/device/device-uuid/command', true); xmlhttp.setRequestHeader("Authorization", "Basic " + btoa("user:password")); xmlhttp.setRequestHeader("Content-type", "application/json;charset=UTF-8"); var myjson = {}; myjson["command"] = command; myjson["parameters"] = {}; myjson["parameters"][12] = r; myjson["parameters"][13] = b; myjson["parameters"][14] = g; xmlhttp.send(JSON.stringify(myjson)); } Then it is enough to call this function, for example, send ('gpio / write', 1, 0, 0), specifying the command and parameters. In this case, the “gpio / set” command will set a logical unit on the GPIO12 pin and a logical zero on the GPIO13 and GPIO14 pins, after which the connected device will do something. Simple, isn't it?
Writing an HTTP request, a problem solved for any programming language, i.e. a developer can implement his client application in any development environment, on any platform, and at the same time manage this IoT device.
Plans to implement:
- SPI;
- I2C;
- UART;
- ADC (analog input);
- 1-wire interface for DS18B20 and DHT11;
- PWM (PWM, pulse width modulation).
While there is only a demo, but in the near future there will be an open source version, available to all for download. Keep for updates. With the first release we will prepare another article with a detailed video telling how to get a DeviceHive playground, how to flash and run a module from ESP8266 by connecting the simplest discrete devices. And we will write a simple web page to manage them.
Author: Nikolai Khabarov, Senior Embedded Developer
Source: https://habr.com/ru/post/260115/
All Articles