Material Design and Search by the example of a reference application
Introduction
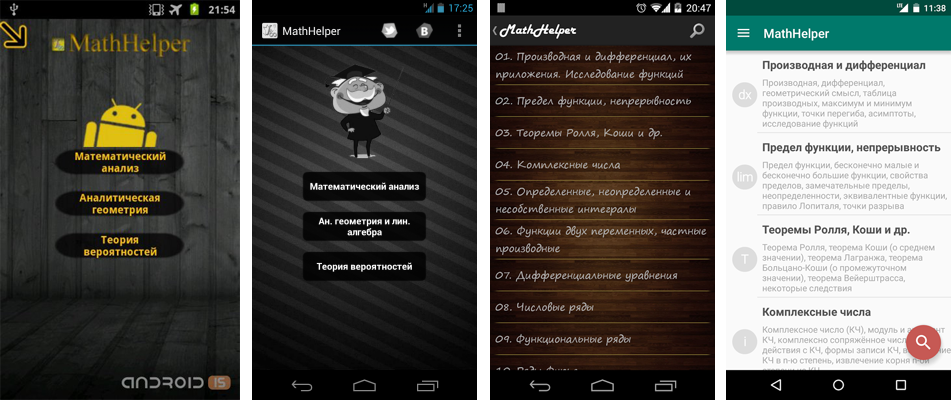
A few years ago I wrote an article on Habr about a math reference application for Android, which was my first development experience for GooglePlay. Today, looking back at my past habrapost and past version of the application, I get scared (to shudder just look at the first screenshot below). Over the past few years, much has changed: AndroidMarket has become GooglePlay with new rules and other things, new OS versions have been released, a certain general google-concept for the design of material-design applications has appeared, new development environments have appeared, and Habr has changed.
In this post we will talk about how to make your application material, add search to it, as well as some thoughts about what kind of advertising to use.

In general, the application has undergone several
')
Material design
Of course material design. Where are without it now in the development of android? I had to get rid of many graphic resources, which at one time were so carefully drawn, but nothing could be done, they did not fit into the concept of material design - they were too non-minimalist. For example, sidebar icons:

With asset icons for different screens, asset studio helps in working with resources, in which, among other things, there are also quite good long shadow and dog-ear effects. In general, asset studio is a great designer that will save a lot of time when working with resources. Also with the help of asset studio new material-icons were made for the purchase of beer and social interaction:


If beer is purchased, then sold out will appear in the lower right corner:

The application icon has also undergone some changes, here I had to open Photoshop and draw:

The most difficult thing is over, we will not talk about graphic resources anymore.
Now we will create several themes for our application and add a FloatingActionButton. In the values / project folder in the themes.xml file, we will describe two themes for our Light and Dark application:
themes.xml
<?xml version="1.0" encoding="utf-8"?> <resources> <style name="LightTheme" parent="Theme.AppCompat.Light.DarkActionBar"> <item name="colorPrimary">@color/greenPrimary1</item> <item name="colorPrimaryDark">@color/greenPrmrDark1</item> <item name="android:windowBackground">@color/mn_bck1</item> <item name="colorAccent">@color/fabBckgrnd1</item> </style> <style name="DarkTheme" parent="ThemeOverlay.AppCompat.Dark.ActionBar"> <item name="colorPrimary">@color/greyPrimary1</item> <item name="colorPrimaryDark">@color/greyPrmrDark1</item> <item name="android:windowBackground">@color/mn_bck2</item> <item name="colorAccent">@color/fabBckgrnd2</item> </style> </resources> About what colorPrimary, colorPrimaryDark, colorAccent is well written here and here . But what these topics look like in the application:
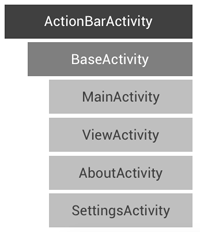
I’ll tell you how to apply the theme to all the activities of your application at once. To do this, you need to make the BaseActivity inherited from ActionBarActivity (it does not need to be declared in the manifest and create an xml markup file for it). In the onCreate () method of this activity, we call setTheme () depending on the user's choice in the application settings:
BaseActivity.java
public class BaseActivity extends ActionBarActivity { public static final String NAME_PREFERENCES = "mysetting"; public static final String THEME_SWITCHER = "thmswtch"; public static final int THM_SWTCHR_DFLT = 0; @Override protected void onCreate(Bundle savedInstanceState) { super.onCreate(savedInstanceState); SharedPreferences mSet = getSharedPreferences(NAME_PREFERENCES, Context.MODE_PRIVATE); /** , ( LightTheme) */ if(mSet.getInt(THEME_SWITCHER, THM_SWTCHR_DFLT) == 1){ /** c LOLLIPOP - - */ if (Build.VERSION.SDK_INT >= Build.VERSION_CODES.LOLLIPOP) { getWindow().addFlags(WindowManager.LayoutParams.FLAG_DRAWS_SYSTEM_BAR_BACKGROUNDS); getWindow().setStatusBarColor(getResources().getColor(R.color.greyPrmrDark1)); } setTheme(R.style.DarkTheme); } } } Well, all the other activities of our application, we will inherit from BaseActivity:
When selecting color combinations for a theme in the material style, the materialpalette.com resource can be a great help, offering a full color palette for the theme in two main shades of your choice.
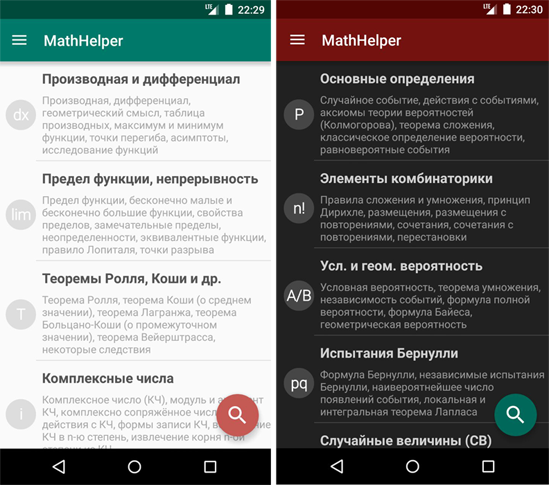
TextDrawable library is great for adding circular icons with text in each list item , which is easy to use and allows you to create not only circular icons of the same type (as in the screenshots), but also icons of different shapes, colors, fonts and even add animation for them.
An example of using TextDrawable in the application's main list adapter
TextDrawable drawable = null; if(position==0) drawable = TextDrawable.builder().beginConfig().bold().endConfig().buildRound("dx", context.getResources().getColor((curr_theme==1) ? R.color.mn_dvdr_dark : R.color.mn_dvdr_lght)); if(position==1) drawable = TextDrawable.builder().beginConfig().bold().endConfig().buildRound("lim",context.getResources().getColor((curr_theme==1) ? R.color.mn_dvdr_dark : R.color.mn_dvdr_lght)); Floating Action Button (further we will call it fab) should bear in itself the main function of the application. In the reference application, this is of course a search. So clicking on the button will drop SearchView. In order for the fab to scroll down / up beautifully disappear / appear in the list, I recommend using the FloatingActionButton library.
FloatingActionButton usage example
FloatingActionButton fab; ListView MainListView; LinearLayout searchLayout; SearchView searchView; ... searchLayout = (LinearLayout) findViewById(R.id.search_view); searchView = (SearchView) findViewById(R.id.search); MainListView = (ListView) findViewById(android.R.id.list); fab = (FloatingActionButton) findViewById(R.id.fab); // fab MainListView. // fab , - fab.attachToListView(MainListView); fab.setShadow(true); fab.setOnClickListener(new View.OnClickListener() { @Override public void onClick(View v) { Animation openSearch = AnimationUtils.loadAnimation(context, R.anim.search_down); searchLayout.startAnimation(openSearch); searchLayout.setVisibility(View.VISIBLE); Animation hideFab = AnimationUtils.loadAnimation(context, R.anim.s_down); fab.startAnimation(hideFab); fab.setVisibility(View.GONE); // searchView searchView.requestFocus(); openKeyboard(); } }); ... This work on the materialization of application interfaces ends.
Search
Since the contents of the directory are stored in different html-files, in order to make a quick search on them you need:
- Work with the html files themselves - add anchors to each place where the user will go when entering this or that request.
- Use the virtual FTS table (what is it you can read here (English) and here (in Russian) . In short, the FTS allows users to perform full-text searches on multiple documents).
The table contains two columns. The first column (KEY_INPUT) is a list of all section titles and terms contained in the directory, in other words, this is a list of possible user requests. The second column (KEY_ANKER) is a list of html files with anchors (ie, files and positions in these files) corresponding to these requests. As with all other SQLite tables, both virtual and normal, data from FTS tables is obtained using SELECT queries:
String query = "SELECT docid as _id," + KEY_INPUT + "," + KEY_ANKER + " FROM " + FTS_VIRTUAL_TABLE + " WHERE " + KEY_INPUT + " MATCH '" + inputText + "';"; When you enter a text query, the FTS table is searched and options are provided to the user in the drop-down list. When you select a transition to the desired section on the corresponding anchor. The principle is shown in the figure below:

SearchDbAdapter.java
public class SearchDbAdapter { private static final String DATABASE_NAME = "mhdb"; private static final String FTS_VIRTUAL_TABLE = "srcht"; private static final int DATABASE_VERSION = 1; public static final String KEY_INPUT = "rqst"; public static final String KEY_ANKER = "ankr"; private static final String DATABASE_CREATE = "CREATE VIRTUAL TABLE " + FTS_VIRTUAL_TABLE + " USING fts3(" + KEY_INPUT + "," + KEY_ANKER + ");"; private final Context mCtx; // ( , ) public static final String search_arr[] = {"data1 request 1","data1 request 2","data2 request 3","data2 request 4"}; // html- ( assets ) public static final String ankers_arr[] = {"file1.html#an1","file2.html#an2","file1.html#an3","file1.html#an4"}; private static class DatabaseHelper extends SQLiteOpenHelper { DatabaseHelper(Context context) { super(context, DATABASE_NAME, null, DATABASE_VERSION); } @Override public void onCreate(SQLiteDatabase db) { db.execSQL(DATABASE_CREATE); int LNGTH = search_arr.length; ContentValues initValues = new ContentValues(); for(int i=0; i<LNGTH; i++){ initValues.put(KEY_INPUT, search_arr[i]); initValues.put(KEY_ANKER, ankers_arr[i]); db.insert(FTS_VIRTUAL_TABLE, null, initValues); initValues.clear(); } } @Override public void onUpgrade(SQLiteDatabase db, int oldVersion, int newVersion) { db.execSQL("DROP TABLE IF EXISTS " + FTS_VIRTUAL_TABLE); onCreate(db); } } public SearchDbAdapter(Context ctx) { this.mCtx = ctx; } public SearchDbAdapter open() throws SQLException { mDbHelper = new DatabaseHelper(mCtx); mDb = mDbHelper.getWritableDatabase(); return this; } public void close() { if (mDbHelper != null) { mDbHelper.close(); } } public Cursor searchAnker(String inputText) throws SQLException { inputText = inputText.toLowerCase(); String query = "SELECT docid as _id," + KEY_INPUT + "," + KEY_ANKER + " FROM " + FTS_VIRTUAL_TABLE + " WHERE " + KEY_INPUT + " MATCH '" + inputText + "';"; Cursor mCursor = mDb.rawQuery(query,null); if (mCursor != null) { mCursor.moveToFirst(); } return mCursor; } } 1 . The user enters the search query "data2" in SearchView. The SearchViewer calls the searchAnker () method of the SearchDbAdapter class, which returns a cursor (mCursor) containing queries similar to the entered text and the corresponding html files with anchors:
data2 request 3 - file1.html # an3
data2 request 4 - file2.html # an4
2 Similar requests contained in mCursor are displayed in the drop-down list: data2 request 3, data2 request 4.
3 When clicking on the elements of the drop-down list, the ViewActivity is launched, to which the corresponding html-file name with the anchor from mCursor is transmitted with an intent: file1.html # an3
Advertising and hidden features of the application
Do you need it, advertising? It spoils the interface, and so much time and effort is spent to make it beautiful. Now you can earn something from advertising either with millions of active users, or from aggressive banner advertising that works like this:
- the user downloads an update into which the advertising library is integrated;
- stage of waiting, so that the user, at the moment of the beginning of the most interesting, does not immediately understand why this happens;
- The most interesting thing is that the user has, on top of all interfaces in other applications, huge advertising banners pop up on the full screen, not clicking on which is a difficult task.
Of course, such an advertisement, to put it mildly, very few people like it. I have long ago refused any advertising in the directory, and more, perhaps, of interest, I added the usual donat - buying beer in the app.

Buying beer is easily realized using In-app Billing . To simplify the implementation of billing, there are libraries about which more than once was written on Habré here and here .
In order to somehow revive our Activity with a donate, a small Easter egg has been added. When you click on any area of the screen in the lower right corner Android will appear, reflecting on the beer.

Here is the creativity.
Source: https://habr.com/ru/post/260045/
All Articles