Start using GTKD
Good day, Habr!
Today I want to tell you how to write applications using GTK + and programming language D.
')
I’m not going to talk about GTK . Get down to business immediately.
Create a new project, that is, just a folder =)
Add there dub.json with the following content:
The dub build system looks for sources in the source folder by default.
Create it and add the main.d file there:
Run the build and then the application.
And voila!
We will not stop here and create an extremely simple ui in the glade program, and then load it into our program.
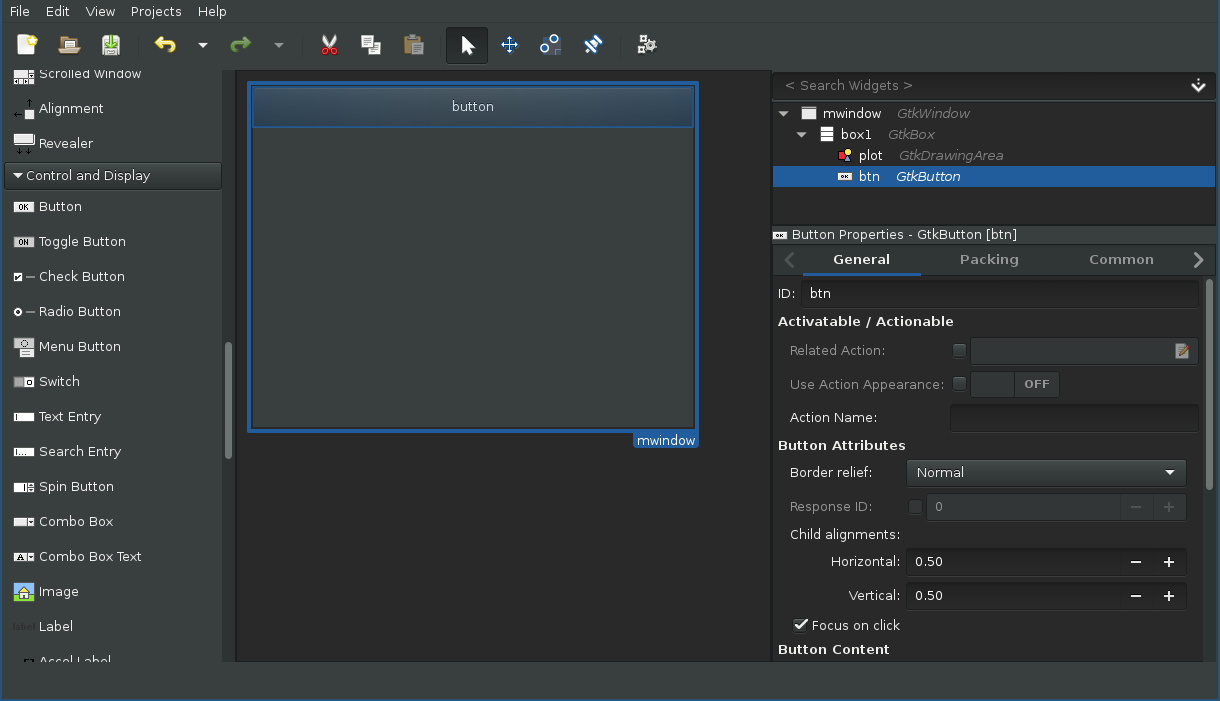
Pay attention to the tree of added components (top right), for the main window, shortcut and drawing fields assigned identifiers different from those given by default (mwindow, btn, plot, respectively), we will use them for convenient retrieval from the builder.
Save the file in the project folder under the name ui.glade and edit main.d:
I think everyone guessed why the GtkDrawingArea element was added - we will draw.
Add the actions performed when the button is pressed:
Let's prepare an empty class for drawing while, create a file draw.d in the source folder:
We tie the figure:
Now when you start the application, you will see in the console something like this output:
You may notice that the re-drawing is caused not only by pressing the button, but also in other events: moving and resizing the window, animating the color of the button, and so on.
For details on redrawing widgets, see the GTK + documentation.
I put the redraw call at the touch of a button in order to show how it is done.
In fact, it simply coincided that pressing the button in itself leads to redrawing (due to a change in the background color of the button), but there may be other events that are not related to changing the GUI, then such a call is necessary.
Add some drawing code:
And make the button do at least something that is not done automatically =)
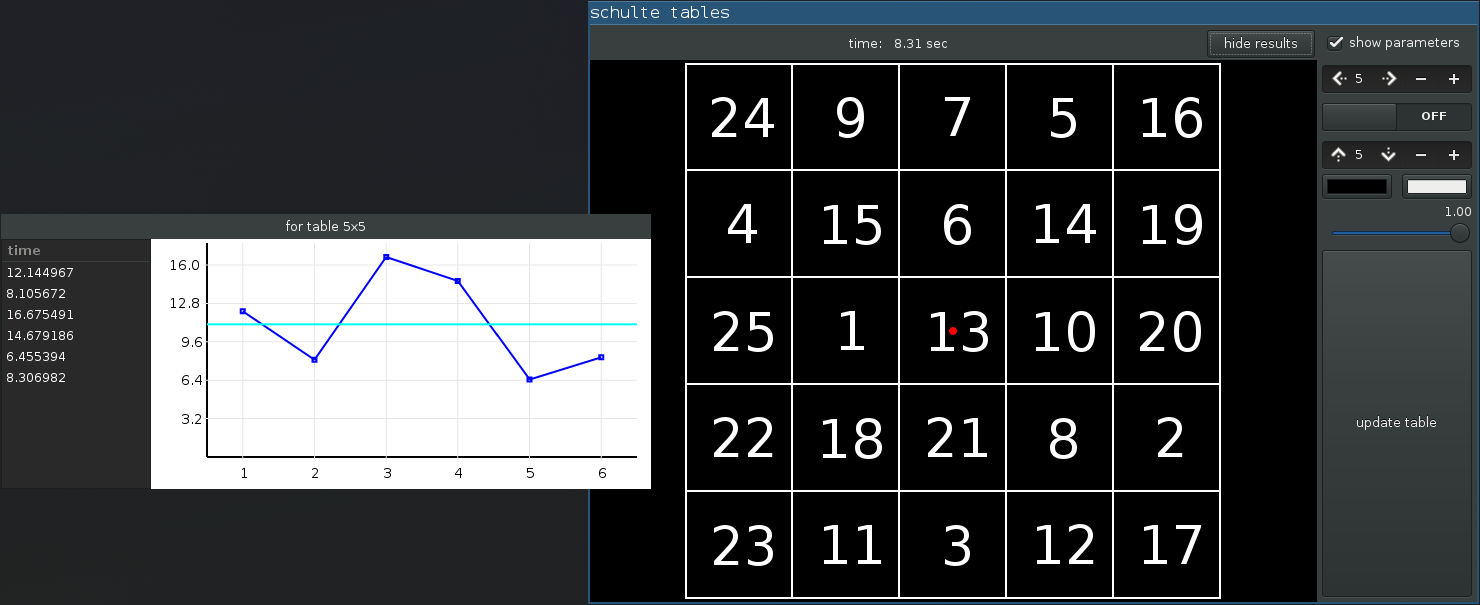
That's all. The program for training with the tables of Schulte (the first picture) is here . In it you can find more examples of using gtkd and drawing via cairo (although not the best in terms of code quality).
Also in the gtk-d package there are wrappers for:
The project documentation is here .
Many more examples are here .
Today I want to tell you how to write applications using GTK + and programming language D.
')
I’m not going to talk about GTK . Get down to business immediately.
Create a new project, that is, just a folder =)
Add there dub.json with the following content:
{ "name": "hellogtkd", "targetPath": "bin", "targetType": "executable", "dependencies": { "gtk-d": "~>3.1.3" } } The dub build system looks for sources in the source folder by default.
Create it and add the main.d file there:
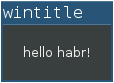
import gtk.Main; import gtk.MainWindow; import gtk.Label; class HelloWorld : MainWindow { this() { super( "wintitle" ); setBorderWidth(20); // add( new Label( "hello habr!" ) ); showAll(); } } void main( string[] args ) { Main.init( args ); new HelloWorld(); Main.run(); } Run the build and then the application.
dub build && bin/hellogtkd And voila!
We will not stop here and create an extremely simple ui in the glade program, and then load it into our program.
Pay attention to the tree of added components (top right), for the main window, shortcut and drawing fields assigned identifiers different from those given by default (mwindow, btn, plot, respectively), we will use them for convenient retrieval from the builder.
Save the file in the project folder under the name ui.glade and edit main.d:
new main.d
import std.string : format; import gtk.Main; import gtk.Builder; import gtk.Window; import gtk.Widget; import std.format; final class UI { string glade_file; Builder builder; // this( string file ) { builder = new Builder; if( !builder.addFromFile( file ) ) except( "could no load glade object from file '%s'", file ); glade_file = file; prepare(); } void prepare() { prepareMainWindow(); } void prepareMainWindow() { auto w = obj!Window( "mwindow" ); // Window w.setTitle( "glade ui" ); w.addOnHide( (Widget aux){ Main.quit(); } ); // w.showAll(); // } // auto obj(T)( string name ) { // getObject ObjectG, auto ret = cast(T)builder.getObject( name ); // if( ret is null ) except( "no '%s' element in file '%s'", name, glade_file ); return ret; } void except( string file=__FILE__, size_t line=__LINE__, Args...)( Args args ) { throw new Exception( format( args ), file, line ); } } void main( string[] args ) { Main.init( args ); new UI( "ui.glade" ); // , , Main.run(); } I think everyone guessed why the GtkDrawingArea element was added - we will draw.
Add the actions performed when the button is pressed:
... void prepare() { prepareMainWindow(); prepareButtonAction(); } ... void prepareButtonAction() { // , Clicked obj!Button( "btn" ).addOnClicked( (Button aux) { obj!DrawingArea( "plot" ).queueDraw(); // plot }); } Let's prepare an empty class for drawing while, create a file draw.d in the source folder:
module draw; import std.stdio; import std.datetime : Clock; import gtk.Widget; import cairo.Context; class Figure { bool draw( Scoped!Context cr, Widget aux ) { writefln( "draw figure %012d", Clock.currAppTick().length ); // true, // , false, // // , bool delegate(...) return false; } } We tie the figure:
... void prepare() { prepareMainWindow(); prepareButtonAction(); prepareDrawing(); } ... Figure fig; void prepareDrawing() { fig = new Figure; // , obj!DrawingArea( "plot" ).addOnDraw( &fig.draw ); } Now when you start the application, you will see in the console something like this output:
... draw figure 014855276247 draw figure 014872180248 draw figure 014889286316 ... You may notice that the re-drawing is caused not only by pressing the button, but also in other events: moving and resizing the window, animating the color of the button, and so on.
For details on redrawing widgets, see the GTK + documentation.
I put the redraw call at the touch of a button in order to show how it is done.
In fact, it simply coincided that pressing the button in itself leads to redrawing (due to a change in the background color of the button), but there may be other events that are not related to changing the GUI, then such a call is necessary.
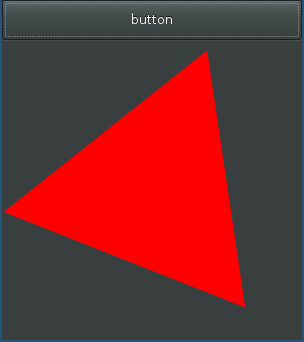
Add some drawing code:
... float angle = 0; bool draw( Scoped!Context cr, Widget aux ) { writefln( "draw figure %012d", Clock.currAppTick().length ); import std.math; auto w = aux.getAllocatedWidth(); auto h = aux.getAllocatedHeight(); auto xc = w / 2.0; auto yc = h / 2.0; auto radius = fmin(w,h) / 2.0; auto x1 = cos( angle ) * radius + xc; auto y1 = sin( angle ) * radius + yc; auto x2 = cos( angle + PI / 3 * 2 ) * radius + xc; auto y2 = sin( angle + PI / 3 * 2 ) * radius + yc; auto x3 = cos( angle + PI / 3 * 4 ) * radius + xc; auto y3 = sin( angle + PI / 3 * 4 ) * radius + yc; cr.setSourceRgb( 1.0, 0.0, 0.0 ); cr.moveTo( x1, y1 ); cr.lineTo( x2, y2 ); cr.lineTo( x3, y3 ); cr.closePath(); cr.fill(); // true, // , false, // // , bool delegate(...) return false; } ... And make the button do at least something that is not done automatically =)
... void prepareButtonAction() { obj!Button( "btn" ).addOnClicked( (Button aux) { fig.angle += 0.1; // obj!DrawingArea( "plot" ).queueDraw(); }); } ... That's all. The program for training with the tables of Schulte (the first picture) is here . In it you can find more examples of using gtkd and drawing via cairo (although not the best in terms of code quality).
Also in the gtk-d package there are wrappers for:
- gtkgl - using OpenGL in GTK + applications
- sv - SourceView - GTK + extension for editing text with different buns like syntax highlighting, undo / redo, etc.
- vte - terminal widget
- gstreamer - multimedia framework (surprised and pleased that the binding was created and included in gtkd)
The project documentation is here .
Many more examples are here .
Source: https://habr.com/ru/post/259717/
All Articles