Simple Web Service with Jetty Embedded

The development of information technology is increasingly involving the use of the Internet infrastructure. Distributed and mobile applications are increasingly using HTTP communications. At the same time, the Client-Server architecture remains the most common and easiest to master, build and operate. The principle of the Client-Server architecture is simple - the server provides the resource, and the client uses this resource.
This article is an attempt to provide a clear description of creating a simple web service. A simple, practical and detailed example often brings more value to the study of technology than a diligent reading of literature. The article discusses creating a simple calculator based web service based on REST, JSON using Eclipse and the built-in Jetty server.
Task
Consider creating a calculator as a web service that implements simple arithmetic with two numbers. A web service can be treated in the same way as a remote function that accepts input parameters and produces a result. Therefore, its functionality can be described as follows:
')
Input parameters:
- a is the first argument;
- b is the second argument;
- op is an arithmetic operator expressed by one of the signs +, -, /, *.
Output Parameters:
- error - the first argument;
- result is the second argument;
Sample request / response - amount
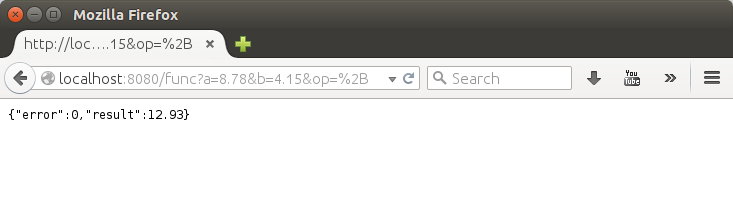
Request: http: // localhost: 8080 / func? A = 8.78 & b = 4.15 & op = +
Answer:
{ “error”:0, “result”:12.93 } Sample request / response - the difference
Request: http: // localhost: 8080 / func? A = 8.78 & b = 4.15 & op = -
Answer:
{ “error”:0, “result”:4.63 } Sample request / response - product
Request: http: // localhost: 8080 / func? A = 8.78 & b = 4.15 & op = *
Answer:
{ “error”:0, “result”:36.437 } Sample request / response - private
Request: http: // localhost: 8080 / func? A = 8.78 & b = 4.15 & op = /
Answer:
{ “error”:0, “result”:2.1156626506 } Sample request / response - error "division by 0"
Request: http: // localhost: 8080 / func? A = 8.78 & b = 0 & op = /
Answer:
{ “error”:1 } Sample request / response - error "invalid number format"
Request: http: // localhost: 8080 / func? A = 8.78 & b = 4.15m & op = /
Answer:
{ “error”:1 } Installing Jetty Libraries
Jetty is very convenient for creating web applications. Using it as an embedded server frees the developer from deploying a web application to an external server each time it is launched. It also does not require the installation of an external application server.
For most cases, it is enough to load the server libraries, register them in Eclipse as a user library, and then use the link to this library. This approach is simple for novice Java programmers because it does not require the presence and skills of assembly automation tools, such as Maven or Gradle.
You can install the necessary Jetty libraries in Eclipse as follows:
1. Download the compressed file at http://download.eclipse.org/jetty/ and unpack it;
2. In the root project folder (usually Workspace), create a jars folder, and in it the jetty folder;
3. Copy the contents of the lib folder from the previously unpacked file into the created jetty folder;
4. In the Window / Preferences menu, select the Java / Build Path / User Libraries section.

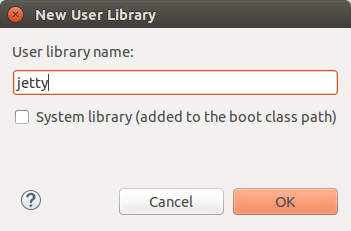
5. Click the New ... button, enter the name of the jetty library and click the OK button.
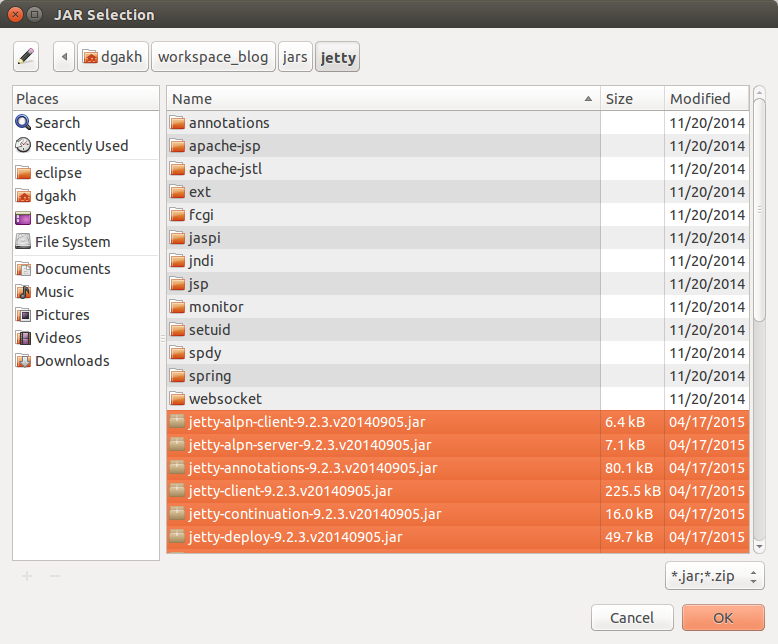
6. Next, with the jetty library just selected in the Preferences window, click the Add External JARs ... button. In the JAR Selection window, select all the JAR files from the previously created jars / jetty folder.
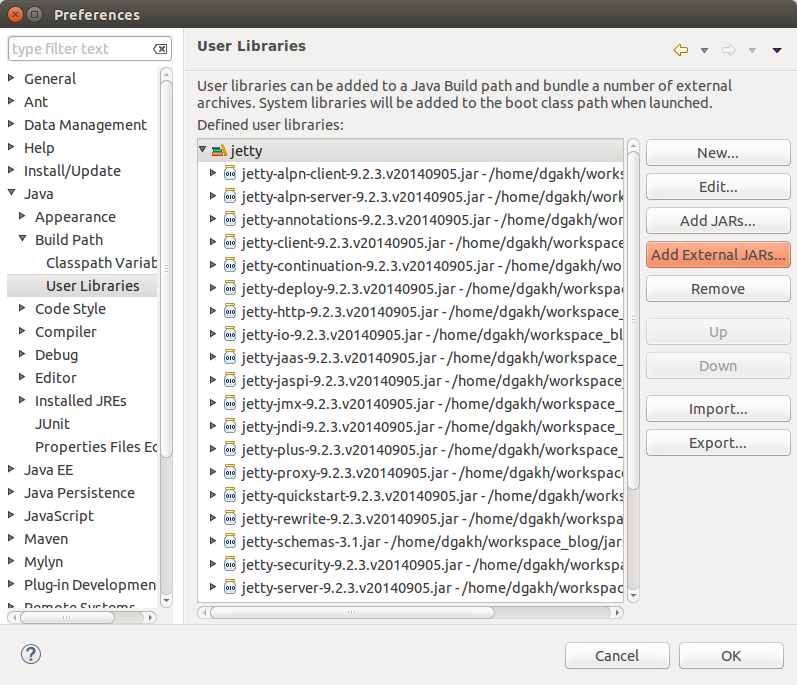
7. As a result, the JAR files will be loaded into the custom jetty library. Although files in sub-folders will not be uploaded, for most cases they are not necessary.
Creating a web server project
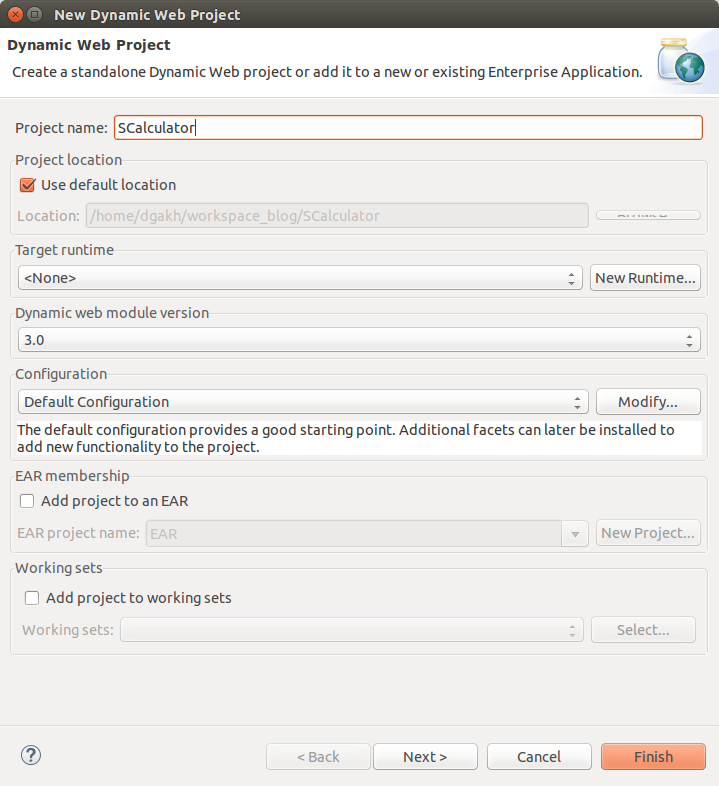
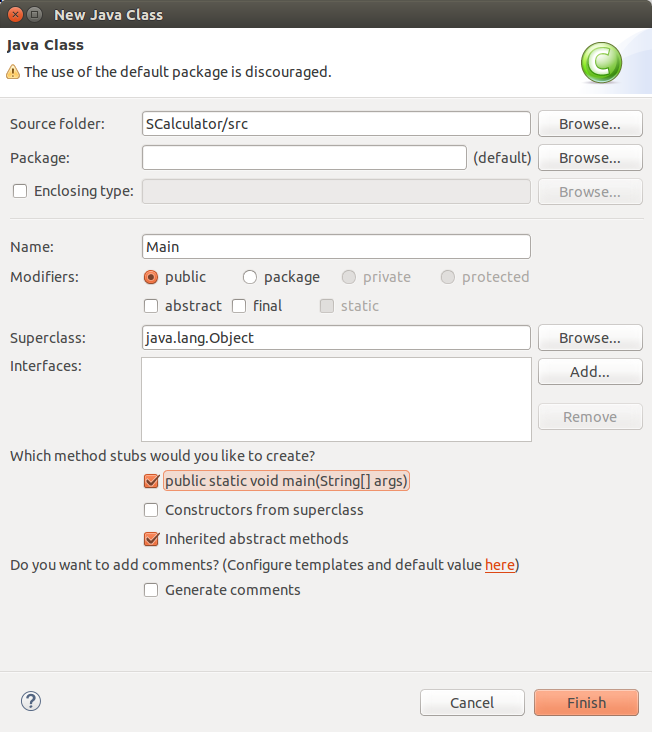
In the File / New menu, select Dynamic Web Project . In the Project name field , enter the SCalculator. Click the Finish button.

Adding a link to the jetty library
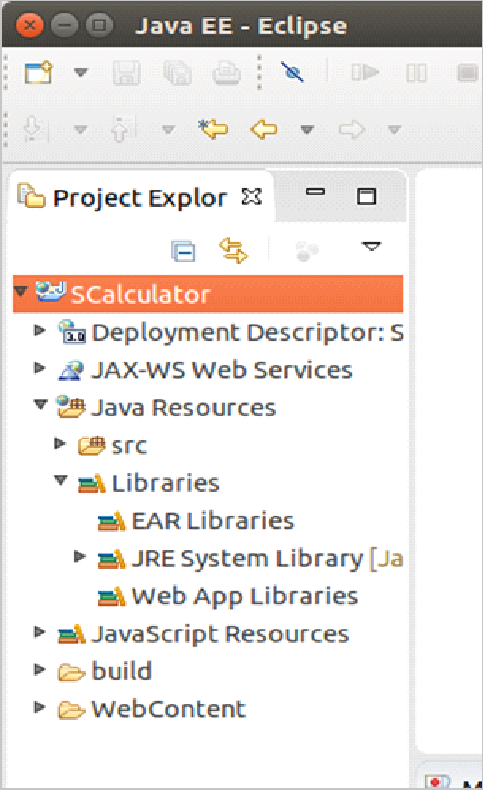
Immediately after creating the project does not contain a link to the jetty library. Connected libraries can be viewed in the Project Explorer in the Java Resources tab, in the Libraries sub-tab.
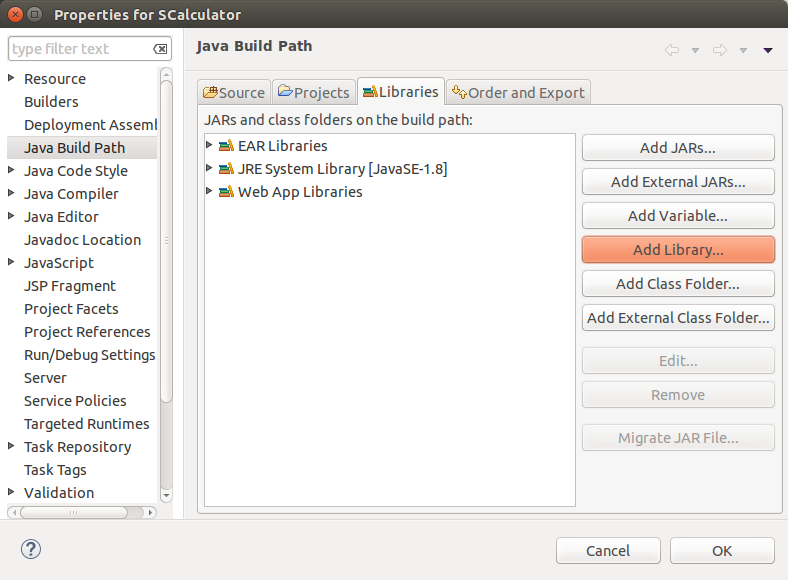
Right-click on the project label and select Build Path in the context menu and then Configure Build Path .... In the Java Build Path tab of the Libraries page, click the Add Library ... button.
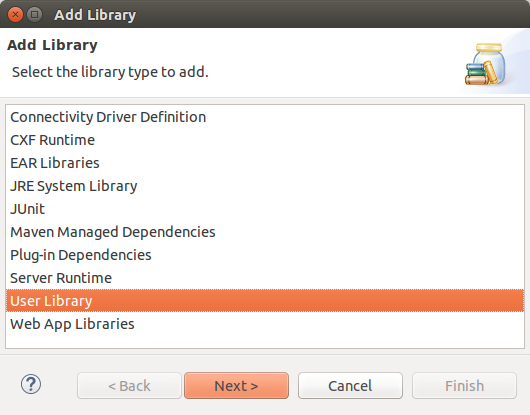
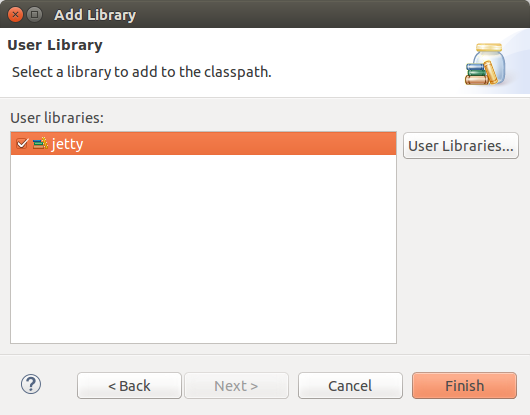
Select User Library and click Next . Select jetty and click Finish .
As a result, after confirming the inclusion of the custom jetty library, the presence of a link to it can be seen in the Project Explorer .

Creating a calculator servlet
Creating a servlet file
The calculator servlet will contain all the code for decoding input data, calculating, and generating a response. To create a servlet, right-click on the project name in the Project Explorer panel, select New in the context menu, and then Servlet . In the class name we enter SrvltCalculator and click the Finish button.

In the Project Explorer panel you can see the generated file SrvltCalculator.java. Its contents automatically open in the editor.
Removing excess code
To simplify further editing of files, remove the unused servlet constructor SrvltCalculator and the doPost method.
Add imported modules
The code to be added to the servlet file will require the addition of the following lines of code for the inclusion of modules. Add these lines.
import java.io.IOException; import java.io.UnsupportedEncodingException; import javax.servlet.ServletException; import javax.servlet.annotation.WebServlet; import javax.servlet.http.HttpServlet; import javax.servlet.http.HttpServletRequest; import javax.servlet.http.HttpServletResponse; Adding code to the doGet method
The doGet method contains the code for processing GET requests. In this method, add the following code snippets sequentially.
Reception of parameters in the corresponding string variables.
String str_a = request.getParameter("a"); String str_b = request.getParameter("b"); String str_op = request.getParameter("op"); Declaring variables for accepting numeric parameters a and b decoded from string variables.
double value_a = 0; double value_b = 0; Declare a noError error control variable.
boolean noError = true; An attempt to decode the numeric parameters a and b from the corresponding string variables. If a decoding error occurs, the noError variable is set to false.
try { value_a = Double.parseDouble(str_a); value_b = Double.parseDouble(str_b); } catch ( Exception ex ) { noError = false; } Opening of the code section for the case if the error did not occur during decoding of numeric parameters.
if ( noError ) { Declaring a numeric result variable to store the result.
double result = 0; Open the try section to enable the calculation code and error control. The section is necessary, since during arithmetic operations a floating-point error may occur.
try { For the case of the operation of addition, we call the function functionSum, which we will describe later.
if (str_op.equals("+")) result = functionSum( value_a, value_b ); else For the case of the subtraction operation, we call the functionDif function, which we will describe later.
if (str_op.equals("-")) result = functionDif( value_a, value_b ); else For the case of multiplication, we call the functionMul function, which we will describe later.
if (str_op.equals("*")) result = functionMul( value_a, value_b ); else For the case of a division operation, we call the functionDiv function, which we will describe later. As for the double type, the error of dividing by zero on modern platforms does not occur, the situation in which the divisor is zero is controlled manually.
if (str_op.equals("/") && (value_b!=0)) result = functionDiv( value_a, value_b ); else After checking all four operations, set the check box for no error to false. This is done to identify that the arithmetic operation is not identified.
noError = false; We close the try block with the setting of the check box if there is no error in “false” in case of an exceptional situation.
} catch ( Exception ex ) { noError = false; } If there is no error, send the result using the doSetResult method, which we describe below. Since the work of the doGet method ends here, we return as the return operator.
if ( noError ) { doSetResult( response, result ); return; } Close the section started by the “if (noError) {” operator:
} Since an error somewhere occurred while processing the request and the doGet function did not return control with a successful calculation, we return an error message using the doSetError method, which we describe below.
doSetError( response ); Cross Domain Requests
Cross-domain requests (also such requests are called cross-domain / cross domain) occur when you request from web pages located outside the network domain of the service server. Answers to such requests are usually blocked to counter inter-domain attacks. To disable blocking in server responses, you can set the Access-Control-Allow-Origin header: *.
DoSetResult method
The doSetResult method formats the response and sets the HTTP response parameters. The value of the method lines is as follows:
- The first line forms the JSON response. Since the response structure is simple, the specialized JSON library is not used;
- In the second line, the JSON response is encoded into the HTTP response body in binary form using UTF-8 encoding;
- The third line indicates the content type of the HTTP response body;
- The fourth line sets the permission for cross-domain requests;
- The fifth line sets the OK HTTP response flag.
protected void doSetResult( HttpServletResponse response, double result ) throws UnsupportedEncodingException, IOException { String reply = "{\"error\":0,\"result\":" + Double.toString(result) + "}"; response.getOutputStream().write( reply.getBytes("UTF-8") ); response.setContentType("application/json; charset=UTF-8"); response.setHeader("Access-Control-Allow-Origin", "*"); response.setStatus( HttpServletResponse.SC_OK ); } DoSetError method
The doSetError method formats the response of the error message and the necessary setting of the HTTP response parameters. The value of the method lines is as follows:
- The first line forms the JSON response. Since the response structure is simple, the specialized JSON library is not used;
- In the second line, the JSON response is encoded into the HTTP response body in binary form using UTF-8 encoding;
- The third line indicates the content type of the HTTP response body;
- The fourth line sets the permission for cross-domain requests;
- The fifth line sets the OK HTTP response flag. Note that the message contains an error associated with arithmetic calculations. Since this error is not related to the HTTP protocol, the status flag is set to OK.
protected void doSetError( HttpServletResponse response ) throws UnsupportedEncodingException, IOException { String reply = "{\"error\":1}"; response.getOutputStream().write( reply.getBytes("UTF-8") ); response.setContentType("application/json; charset=UTF-8"); response.setHeader("Access-Control-Allow-Origin", "*"); response.setStatus( HttpServletResponse.SC_OK ); } Methods for implementing arithmetic operations
The architecture of this simple example involves the separation of code into functional parts. Because of this, arithmetic operations are implemented as separate functions, and are not included in the body of the doGet method. Since the functions are simple, we will not comment on their code.
protected double functionSum( double a, double b ) { return a + b; } protected double functionDif( double a, double b ) { return a - b; } protected double functionMul( double a, double b ) { return a * b; } protected double functionDiv( double a, double b ) { return a / b; } The source code of the program can be found in the GitHub repository .
Creating a base class
The main class of the application will contain the function main - the so-called entry point, from which the program starts. The main function will enable the initialization, configuration, and launch of the embedded Jetty server.
To create the main class of the application, right-click on the name of the project in the Project Explorer panel, select New in the context menu and then Class . In the class name we enter Main. Check the box to create a static main function and click the Finish button.
Just as in the case of a servlet, the corresponding file is created and opened in a text editor.
Add imported modules
Code that will be added to the main application class file will require the addition of the following lines of module inclusion code. We introduce these lines.
import org.eclipse.jetty.server.Handler; import org.eclipse.jetty.server.Server; import org.eclipse.jetty.server.handler.HandlerList; import org.eclipse.jetty.servlet.ServletContextHandler; import org.eclipse.jetty.servlet.ServletHolder; Adding code to the main method
The main method code begins by declaring the port variable and assigning it the port number that the server will listen to. This approach allows you to quickly and easily change the port if necessary in case of further growth of the program.
int port = 8080; Create a server class.
Server server = new Server(port); Specify the parameters that will associate the path of the query string with the servlet created above.
ServletContextHandler context = new ServletContextHandler( ServletContextHandler.SESSIONS ); context.setContextPath( "/" ); // http://localhost:8080/func context.addServlet(new ServletHolder( new SrvltCalculator( ) ),"/func"); We specify the request handler to the server.
HandlerList handlers = new HandlerList( ); handlers.setHandlers( new Handler[] { context } ); server.setHandler( handlers ); We try to start the server. To ensure that the program does not stop, we wait for the main process to terminate the server process by calling server.join (). If an error occurs, a corresponding message is printed.
try { server.start(); System.out.println("Listening port : " + port ); server.join(); } catch (Exception e) { System.out.println("Error."); e.printStackTrace(); } The source code of the program can be found in the GitHub repository .
Access to the service from the browser
Server startup
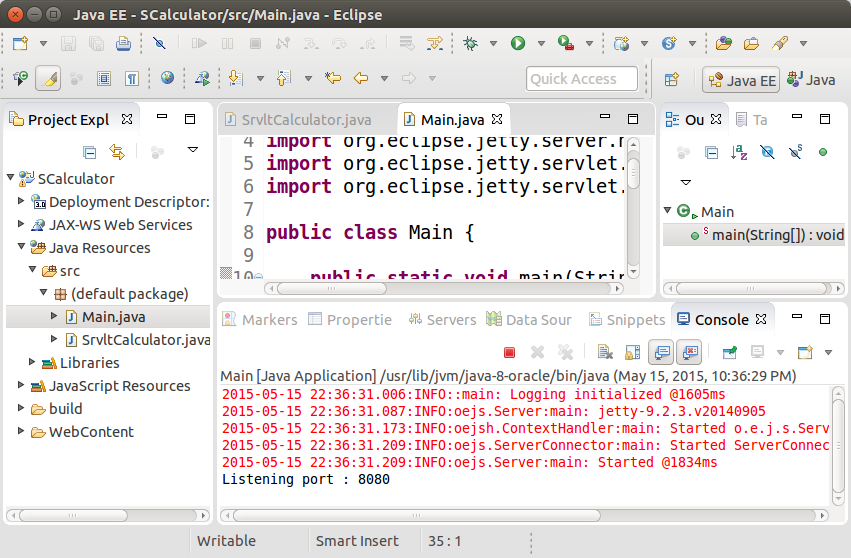
When you start the server, Eclipse can offer two options. Since the server contains a full-fledged servlet, the program can be run on an application server, such as, for example, Tomcat or a standalone Jetty. However, since we built jetty into an application, it can work independently - like a Java Application.

After starting the application, it issues the corresponding notifications and the line Listening port: port indicating that our server is running and waiting for requests.
Making requests through the browser
The easiest way to check server functionality is to access it through a browser.
When sending a query string, such as http: // localhost: 8080 / func? A = 8.78 & b = 4.15 & op = + , the server gives an error. The point is that the string does not comply with the standard of requests and must be encoded as a URL (the + symbol is not valid).

After coding, everything works without error. The + character is encoded by the URL as% 2B, which makes the request compliant with the standard. There are many online URL encoders / de-encoders on the Internet that can be used for this purpose.
Standardized request: http: // localhost: 8080 / func? A = 8.78 & b = 4.15 & op =% 2B
In a similar way, you can check the server's responses to other requests.
Server clients
Using a browser and sending requests directly is impractical, since it is very likely that an error would be made when manually forming a query string. The use of such a resource can be organized by:
- specialized web page with automatic generation of the query string and formatting the response using JavaScipt;
- mobile application;
- another server consuming the created resource for its internal needs.
Client - web page
A specialized web page is a simple type of client application.

The HTML code for the page can be found in the GitHub repository .
Creating a startup module
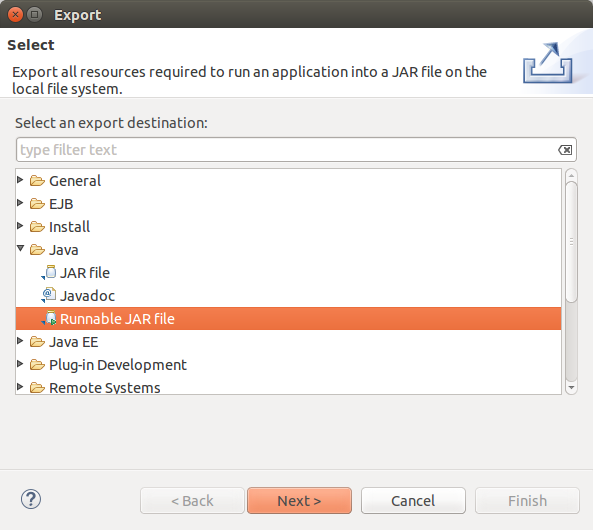
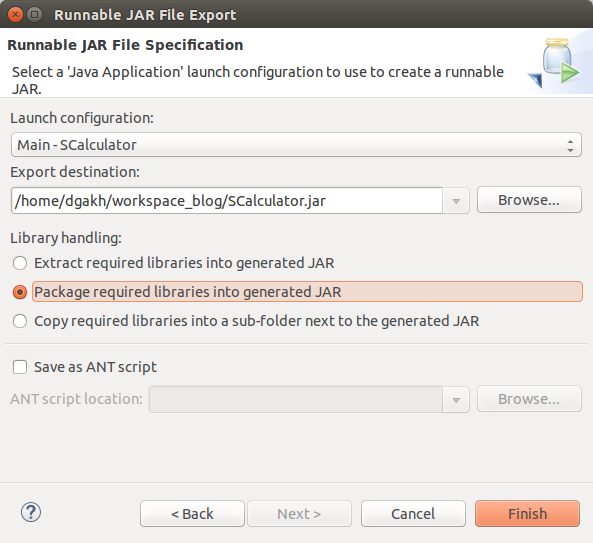
The created server can be arranged as a single independent JAR file to be launched. Such a file will only require the presence of the installed Java runtime environment and run from any folder of the file system. To create such a file, right-click on the project name in the Project Explorer panel, select Export and then Export ... in the context menu. In the Java section , select the Runnable JAR file and click the Next button.
In the settings of the created JAR file, we specify the Launch configuration as Main-SCalculator , the full name of the exported file and the checkbox for packing the necessary modules into this file.
A correctly created JAR file named SCalculator is launched by a simple command (when started from the same folder as it is located):
java -jar SCalculator.jar 
It is also possible to start the server by double clicking on the JAR file.
Results
Many of the elements described in this release were practically used to create high-load servers. Undoubtedly, more advanced techniques were used to achieve high speed and reliability, such as using the NGINX server in reverse proxy mode. However, it all starts with a simple one and I hope that I could simply and clearly describe the techniques that will be useful in practical development.
Links
For more information about embedding Jetty into an application, see http://docs.codehaus.org/display/JETTY/Embedding+Jetty
Connection of user libraries by the example of Tomcat is described by the link http://www.avajava.com/tutorials/lessons/what-is-a-user-library-and-how-do-i-use-it.html?page=1
You can find the GitHub repository here: https://github.com/dgakh/Studies/tree/master/Java/SWS-Embedded-Jetty
The presented material is based on the use of Eclipse Luna for Java EE Developers and Ubuntu 14.04.
Source: https://habr.com/ru/post/259067/
All Articles