Juniper emulator. VMware Virtual Lab

There are a lot of Cisco emulators, but what can a person do who wants to know the magical world of network communication through the prism of Juniper routers? Of course, the right approach is to buy second-hand glands on eBay or rent them, but this is not a cheap way. There is another way that is cheaper and that I want to share. It consists in creating a virtual environment for emulating Juniper routers based on VMware ESXi host. Cheap, convenient and as realistic as possible. Those who for some reason cannot afford to deploy a new one or use an existing virtual host will read this article for informational purposes only.
As in a good recipe, I immediately announce the ingredients, without which we can not do:
- 1. A piece of iron that can pull VMware ESXi + up to 2GB of RAM for each planned router. Disk 2 GB per router. After installation, the value of RAM can be reduced to 512 MB;
- 2. VMware ESXi - you can download from off.site. Registration required;
- 3. vSphere Client for managing a virtual host. You must also download from the office. VMware website;
- 4. Firefly Perimeter software router. You can download the OVA template on the official website: Link to Juniper Download Center Registration required;
- 5. Emulation of client computers. Download the OVA template here: Link to OVA template TinyLinux
You need to install VMware ESXi and connect to it using the vSphere Client, then you need to deploy OVA templates of the routers and client computers in the required quantity. This is done in the vSphere Client via the File - Deploy OVF Template menu.
It’s worthwhile to create enough virtual switches on the host. With them, we will connect our devices to the network. This is done in the Configuration tab of our VMware host.
')
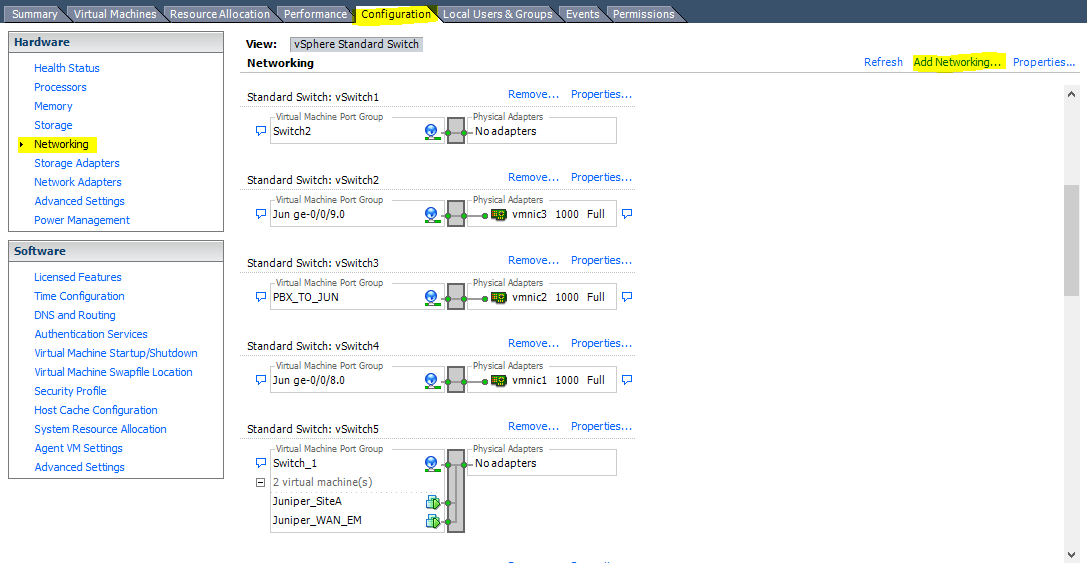
Next you need to go to the Networking section and click Add Networking ... In the Connection Type window that appears, select Virtual Machine and click Next, select Create vSphere standart switch and click Next, in the new window set a friendly name for the switch - for example Office_lan. Click Next and Finish. I recommend creating 5-7 virtual switches, including one that will be used to isolate the ports of routers. Important - you do not need to assign virtual physical interfaces of a virtual host to virtual switches.
Next, you need to add the required number of network cards to each router, I think 4-5 will be enough for many. In routers, they will be initialized under the names ge-0/0 / n, where n is the number of the network card starting from zero. To add a network card, right-click on the virtual router and select Edit Settings from the context menu. Click the Add button, then select the Ethernet Adapter device type and click Next. In the next window, you can immediately connect your adapter to a pre-created virtual switch.
It is necessary to understand that those ports that will be connected to one virtual switch will have Ethernet connectivity, as if you connected them directly by wire or through a normal hub / switch. You can see which ports in which virtual switchboard are connected, all on the same tab Edit Settings, which can be accessed by right-clicking on any virtual device on your host. In the same tab, you can quickly change the virtual switch for the network adapter - “overwrite the cable”.

To get started, you must create at least two routers, one virtual switch, and on each router connect a network interface to this switch. Next, you can configure the routers. To begin with, assign IP addresses to the ge-0/0/0 interfaces and check the IP connectivity, which confirms the correctness of the settings. To configure, you must enable virtual devices and on the enabled virtual device you must right-click and select Open Console in the context menu.
The next step is to connect client computers to the routers, which can be emulated with a very easy TinyLinux fork. You can deploy such clients in the same way as routers through the OVA file. In order to connect the computer and the router to each other, we connect the network interface of the client computer and the free interface of the router to the same virtual switch.
To bring the virtual network to real, it is enough to connect a virtual switch to one of the router's ports, to which the real physical VMware virtual host network interface is connected.
That's all, now you can configure your devices using the documentation from the official site of Juniper.
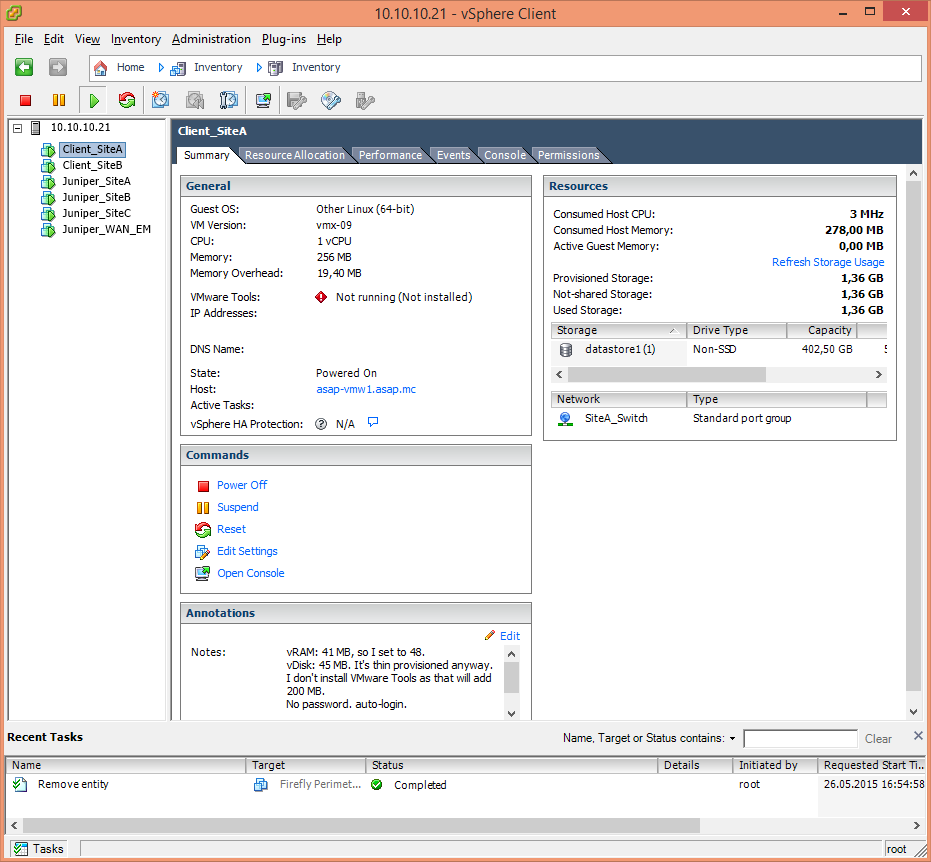
This is TinyLinux. With the help of the built-in package manager, it can be easily manned with any application, for example, Chromium browser or http server. This is very helpful when you configure source and destenation nat configurations.

And this is what the console looks like in which you will configure routers. This console itself is not very convenient due to the lack of a screen buffer (this means that you cannot view / scroll the text that went beyond the upper border of the window; select text with a mouse and copy / past from the browser, in this console, also will not work). The ideal solution would be to connect to routers via SSH, and you will return to this console only if you completely lost contact with the device, although with proper use of a commit confirmed you may never need it.

PS The tar spoon is still there. The aka Ethernet-switching switching functions are not supported, so there is no way to study Juniper switching equipment in this way.
Source: https://habr.com/ru/post/258949/
All Articles