How to make a video with a UFO
Not so long ago, removing a UFO was quite problematic, but with modern technology this can be done even in high resolution. For example:
Main steps:
All this can be done using the free and open Blender.
')
Process demo packed in a short video:
Further - in more detail about each stage.
Camera tracking is a re-creation of camera movement in three-dimensional space. This is done by tracking the markers - manually selected small areas of the frame. Ideally, these should be sharp contrasting areas, but Blender does an amazingly good job with many rather blurry and not very contrast markers. Often, you can successfully handle even spontaneously shot video.
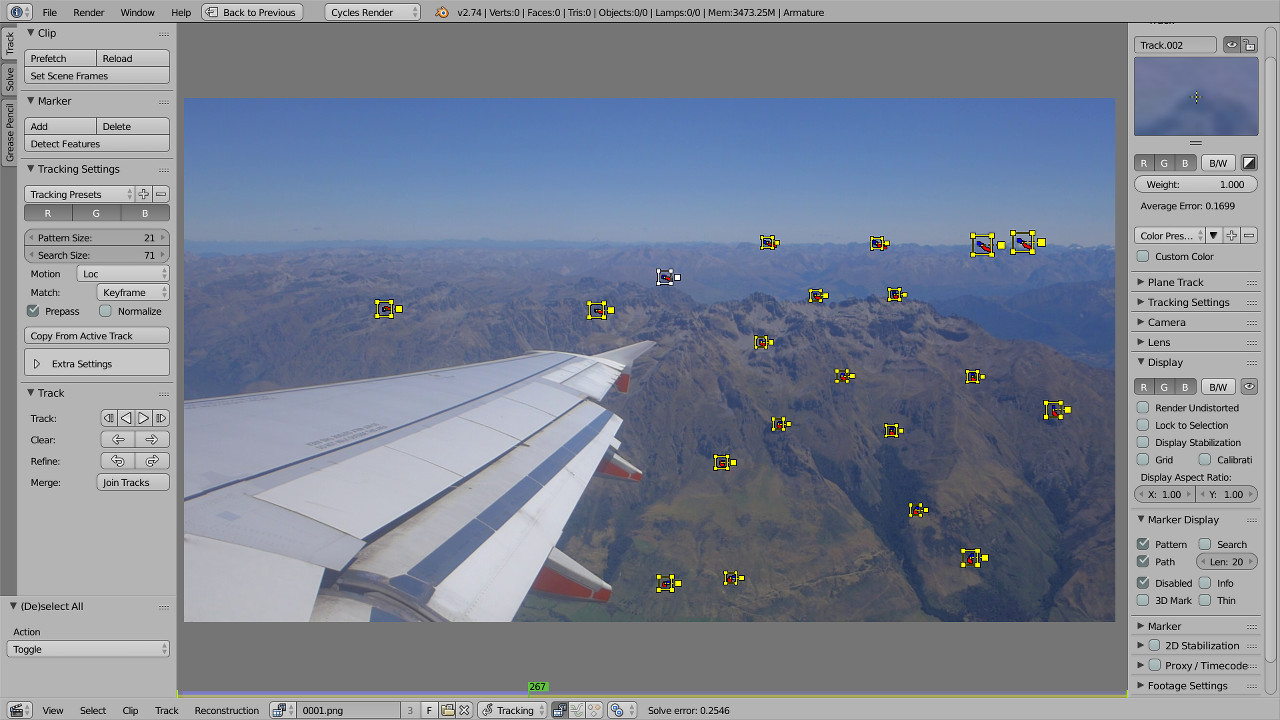
To correctly recreate the scene, it is also necessary to specify at least the approximate focal length used during the shooting. Unfortunately, the video file does not contain such information, so I compared the image with photos taken at about the same time. It was about 37.3 mm in 35 mm equivalent.
Success: the location of tags in three-dimensional space seems to be true, and the movements of the virtual camera repeat the movements of a real one, including shaking.
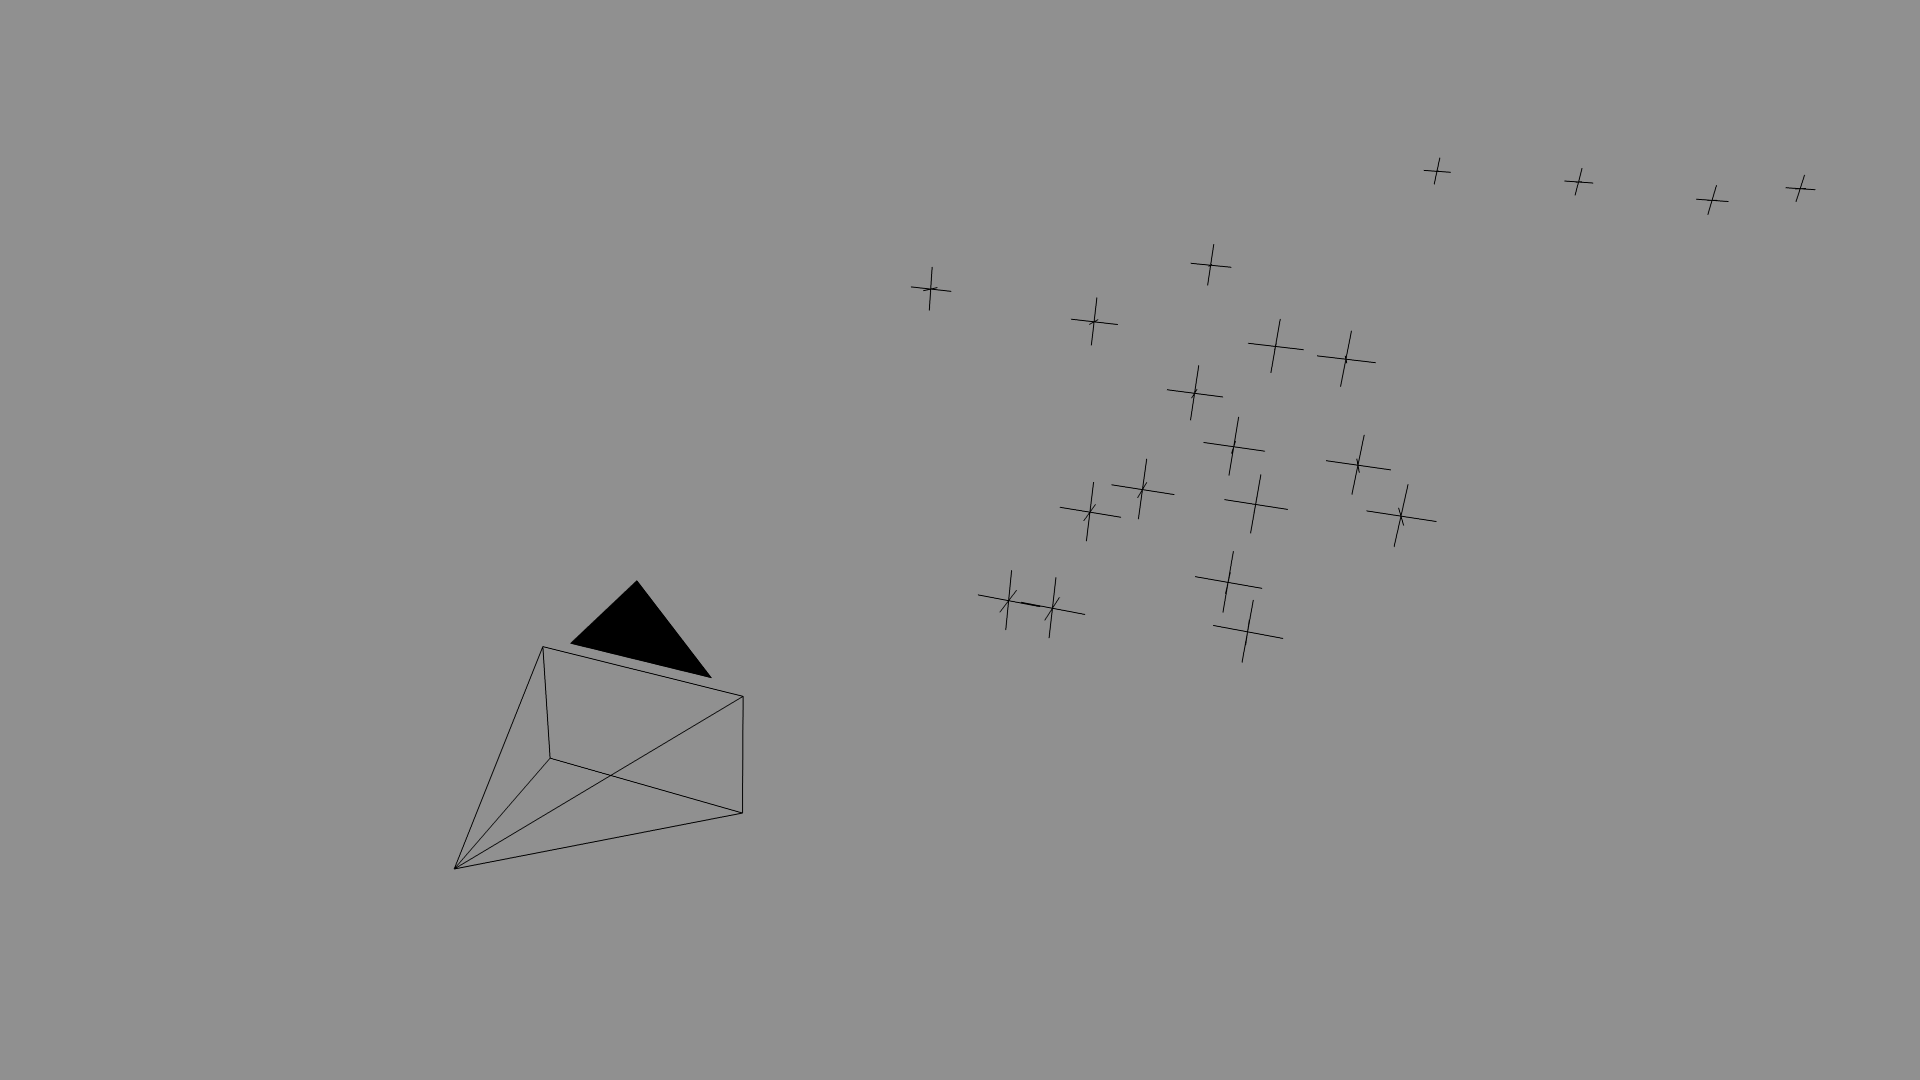
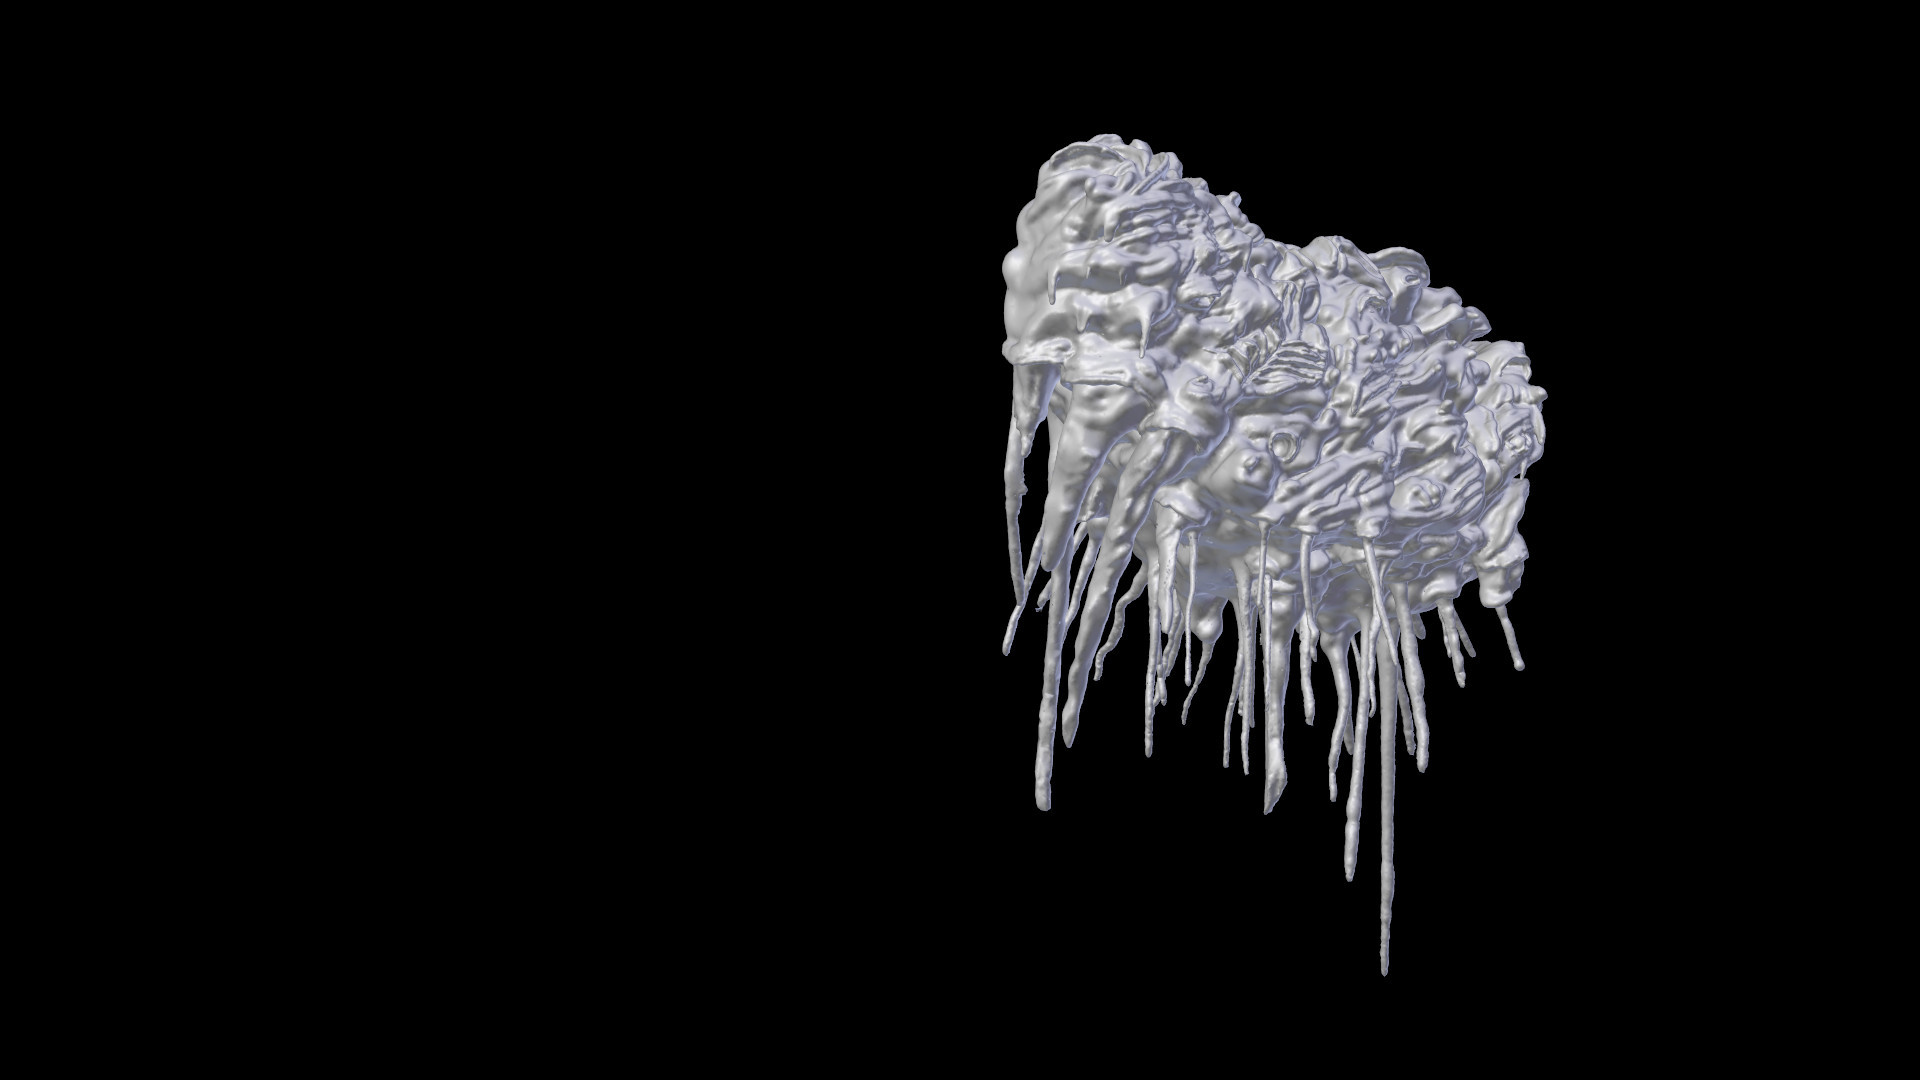
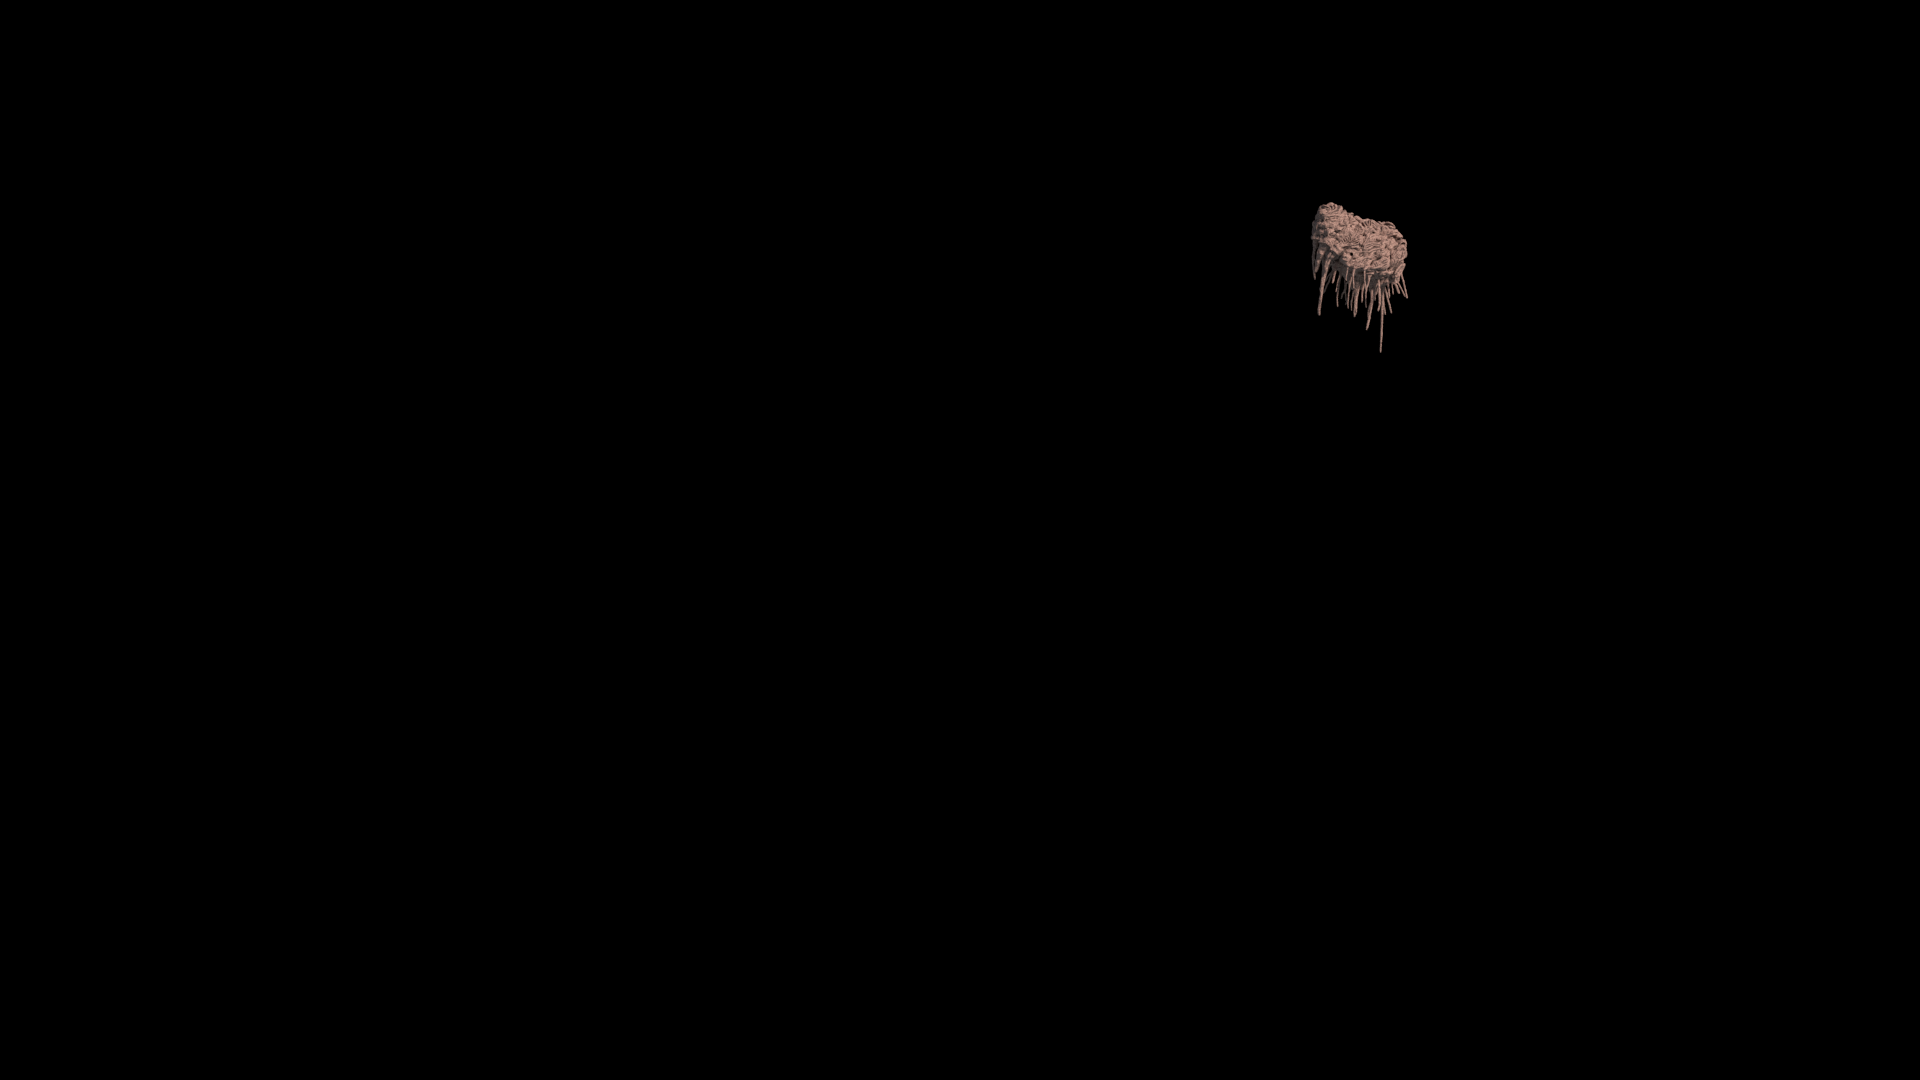
In the case of a UFO, no special elaboration of the model is required, unless you take a close-up shot of it.
The model should be placed in a suitable place, guided by the marks left after tracking.
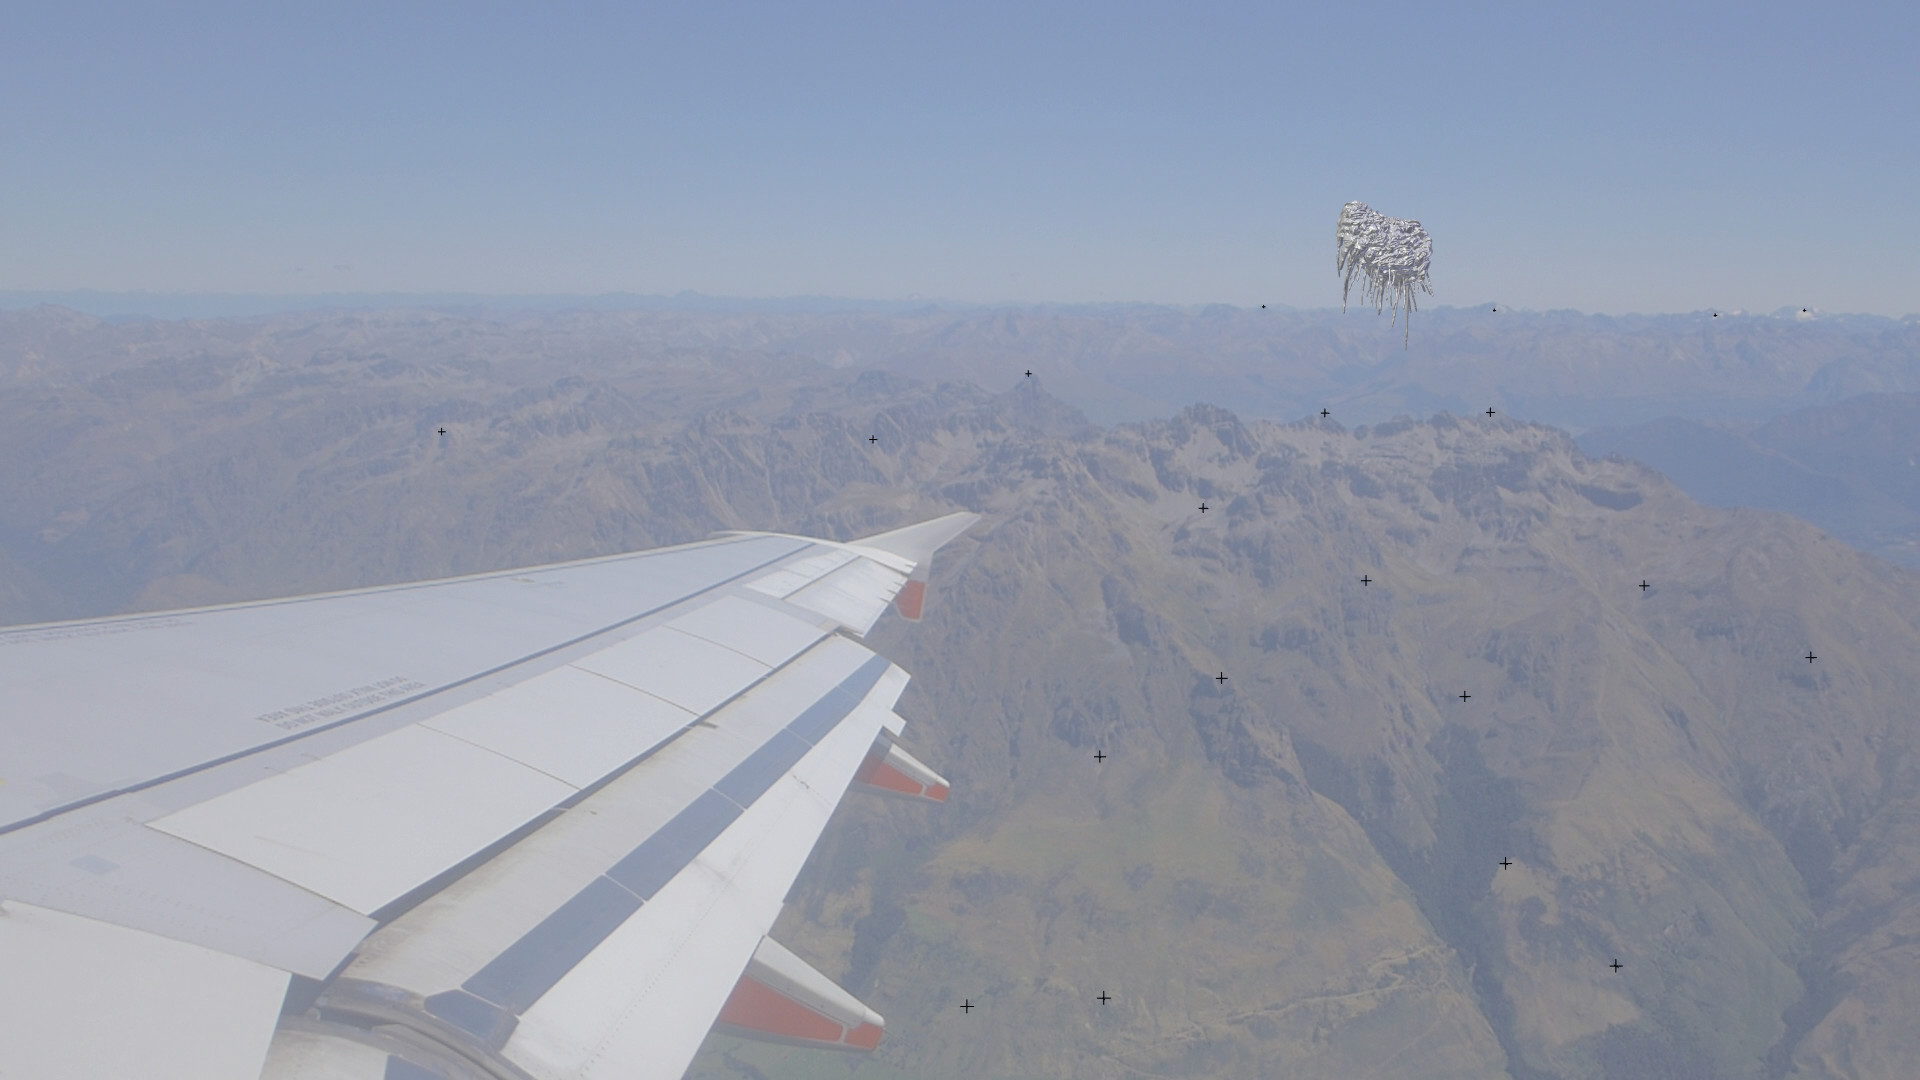
With lighting in a clear sky, everything is simple - we twist the parameters of the procedural texture "Sky" and the lamp "Sun" to achieve the desired result. It is not necessary to achieve a perfect match of brightness and shades - much can be corrected by post-processing.
It took just 14-15 seconds to render one frame using a video card based on the GeForce GTX 770. This is very fast, especially in comparison with the work I talked about last time . The reason is simple: the only object in open space that occupies the minimum area in the frame is the most favorable case that you can think of.
To save the rendered images, the OpenEXR format is used, which stores detailed information about the color and is great for further processing.
Compositing is the layout of the image of the components and additional processing. It is not enough just to impose a rendered image on the picture from the camera - it will stand out sharply.

First of all, it is necessary to bring the sharpness and distinctiveness of the details into conformity - even in the same resolution, each camera shoots in its own way. The rendered image must be specially blurred, and then artificially sharpened with a filter (as the camera does with its zamylennym source). Also, some semblance of chromatic aberrations and visual noise will not interfere (the better the camera, the weaker these effects, but they are always present). And, of course, imitation of aerial perspective (in this case, simple mixing of the desired color) is needed.
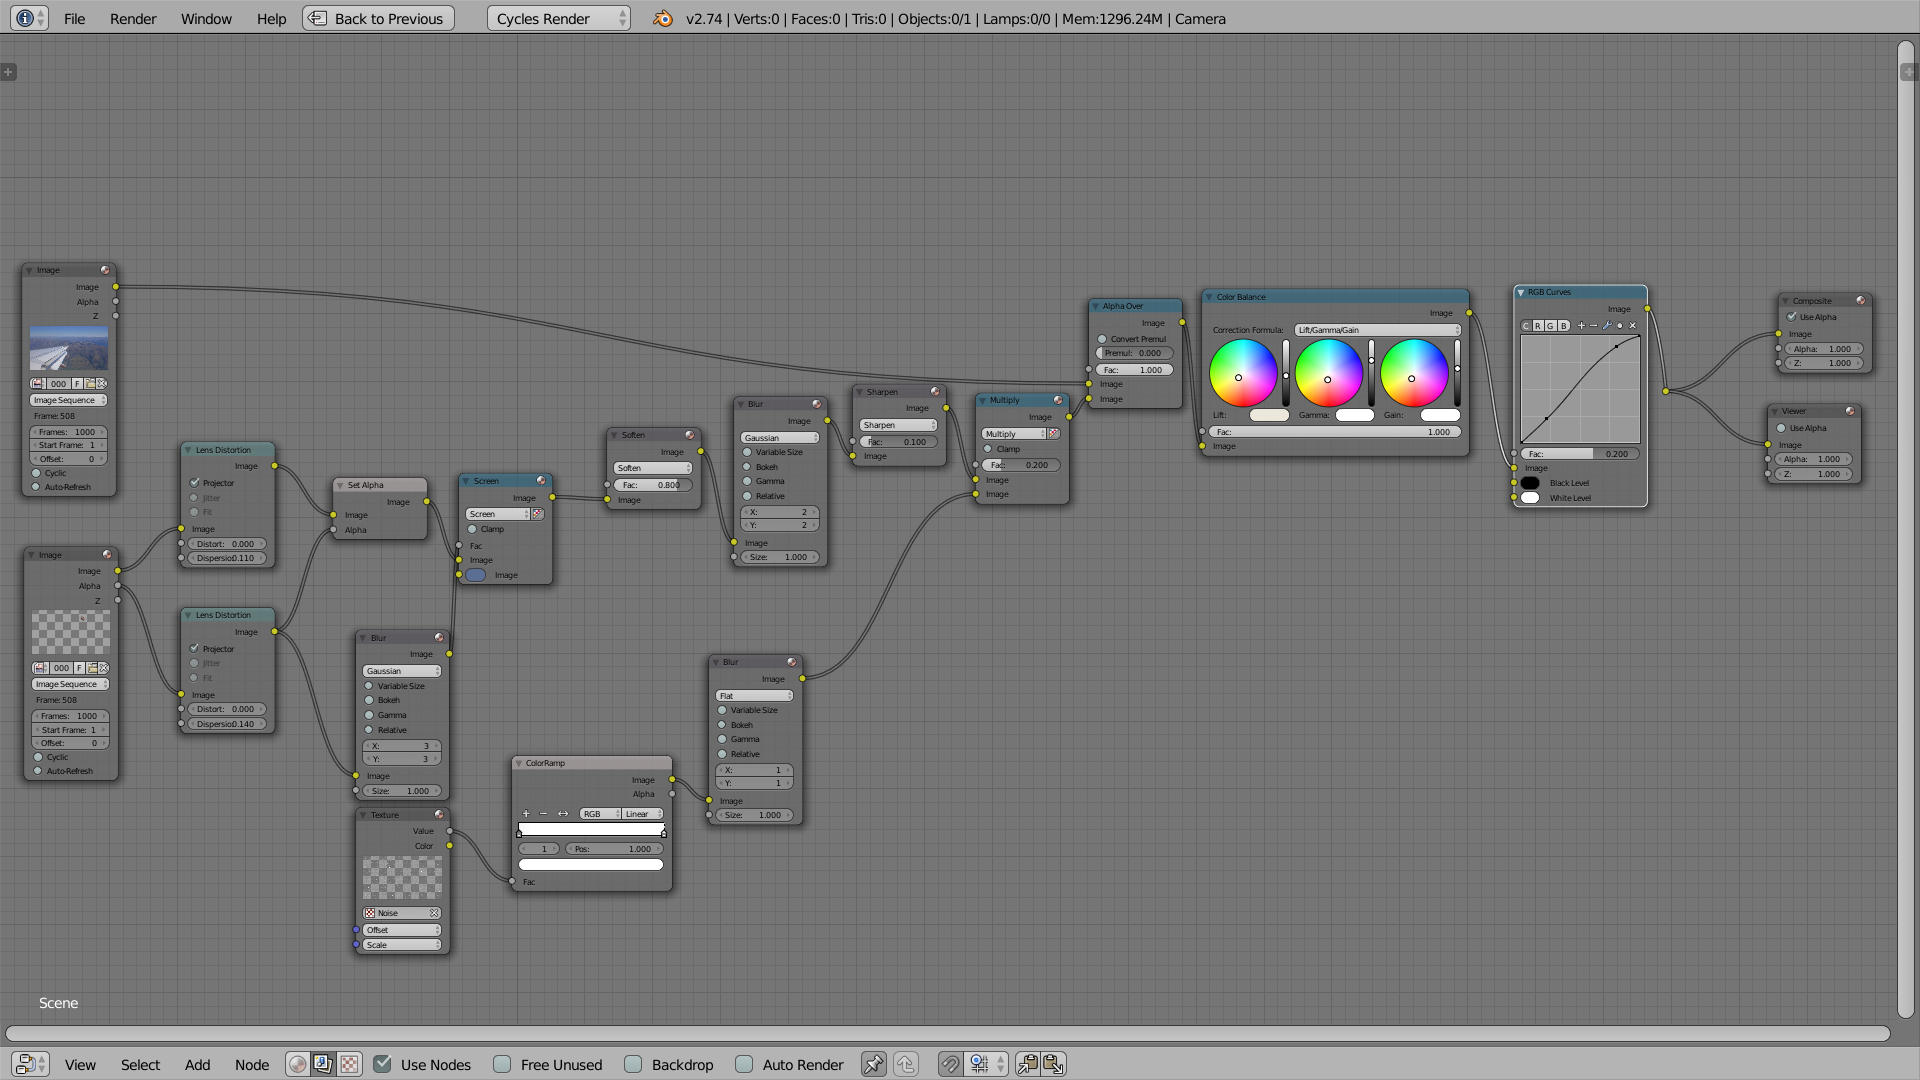
At the end, we slightly adjust the color balance, but so that the final video still looks like raw material from the camera.

Of course, in this way you can shoot not only UFOs, but also various other interesting things.
Main steps:
- Tracking camera on given points in the video.
- Creating a 3D-model and imitation of lighting.
- Rendering.
- Compositing (image layout and post-processing), color correction.
All this can be done using the free and open Blender.
')
Process demo packed in a short video:
Further - in more detail about each stage.
1. Camera tracking
Camera tracking is a re-creation of camera movement in three-dimensional space. This is done by tracking the markers - manually selected small areas of the frame. Ideally, these should be sharp contrasting areas, but Blender does an amazingly good job with many rather blurry and not very contrast markers. Often, you can successfully handle even spontaneously shot video.
To correctly recreate the scene, it is also necessary to specify at least the approximate focal length used during the shooting. Unfortunately, the video file does not contain such information, so I compared the image with photos taken at about the same time. It was about 37.3 mm in 35 mm equivalent.
Success: the location of tags in three-dimensional space seems to be true, and the movements of the virtual camera repeat the movements of a real one, including shaking.
2. Creating a 3D-model and imitation of lighting
In the case of a UFO, no special elaboration of the model is required, unless you take a close-up shot of it.
The model should be placed in a suitable place, guided by the marks left after tracking.
With lighting in a clear sky, everything is simple - we twist the parameters of the procedural texture "Sky" and the lamp "Sun" to achieve the desired result. It is not necessary to achieve a perfect match of brightness and shades - much can be corrected by post-processing.
3. Rendering
It took just 14-15 seconds to render one frame using a video card based on the GeForce GTX 770. This is very fast, especially in comparison with the work I talked about last time . The reason is simple: the only object in open space that occupies the minimum area in the frame is the most favorable case that you can think of.
To save the rendered images, the OpenEXR format is used, which stores detailed information about the color and is great for further processing.
4. Compositing, color correction
Compositing is the layout of the image of the components and additional processing. It is not enough just to impose a rendered image on the picture from the camera - it will stand out sharply.
First of all, it is necessary to bring the sharpness and distinctiveness of the details into conformity - even in the same resolution, each camera shoots in its own way. The rendered image must be specially blurred, and then artificially sharpened with a filter (as the camera does with its zamylennym source). Also, some semblance of chromatic aberrations and visual noise will not interfere (the better the camera, the weaker these effects, but they are always present). And, of course, imitation of aerial perspective (in this case, simple mixing of the desired color) is needed.
At the end, we slightly adjust the color balance, but so that the final video still looks like raw material from the camera.
Of course, in this way you can shoot not only UFOs, but also various other interesting things.
Source: https://habr.com/ru/post/258775/
All Articles