LFS: The dark side of power. Part 3
Foreword
So, it's time to put the last dots on “i” and tell you how to finally get Linux from the heap of executable files and libraries that we heroically collected and set up in the last article .
1. Unix System V Initialization Subsystem
This initialization subsystem has been used for a long time in Linux and has been the de facto standard. However, time passes, and one cannot, in general, call this approach obsolete. It is much more accurate to note that this initialization subsystem, in the trend of development of the GNU / Linux family of systems, has given way to systemd, born in the depths of Red Hat Corporation. There are distributions that still use initialization scripts. However, all the popular Linuxes almost every time came to the use of systemd, with the latter finally giving in to the conservative Debian with its daughter Ubuntu.
Actually, I regret that I didn’t immediately begin to build an LFS version using systemd. Simply, after the first unsuccessful attempt at assembly, I didn’t want to deviate from a stable path. Maybe I will come back to this issue, maybe just as I will not return. Time will tell. In the meantime, consider the basic principles of the System V initialization scripts.
When booting the system, the boot loader reads the Linux kernel from the root partition of the bootable media. After the kernel is initialized, control is transferred to the init process, which receives the PID = 1 (physically located in the / sbin / init file). This process works according to the settings specified in the / etc / inittab file.
')
The default is seven levels of system initialization.
- 0 - system stop
- 1 - system boot in single user mode
- 2 - system boot in multiuser mode without network support
- 3 - system boot in multiuser mode with network support
- 4 - not used
- 5 - system boot in multi-user mode with network support and graphical login
- 6 - system reboot
Each startup level corresponds to initialization scripts, in the case of LFS located in the /etc/rc.d/init.d/ directory. You don’t have to write them yourself - the LFS authors took care of this by including everything you need to configure in the LFS-Bootscripts package, which lies along the $ LFS / source path. We just have to install this package and make some minimum settings.
2. Installing LFS-Bootscripts, network configuration, / etc / inittab
Suppose the assembly of packages at the previous stage, you tired, and there were other things and you turned off the machine. Now you need to get into the collected system again. This requires chroot
Mount the partition with the system and VFS:
$ su - root # export LFS=/mnt/lfs # mount /dev/sda6 $LFS # mount -v --bind /dev $LFS/dev # mount -vt devpts devpts $LFS/dev/pts -o gid=5,mode=620 # mount -vt proc proc $LFS/proc # mount -vt sysfs sysfs $LFS/sys # mount -vt tmpfs tmpfs $LFS/run Perform root change:
# chroot "$LFS" /usr/bin/env -i \ > HOME=/root TERM="$TERM" PS1='[\u:\w]\$ ' \ > PATH=/bin:/usr/bin:/sbin:/usr/sbin \ > /bin/bash --login Go to the source directory and install the necessary package.
# cd /source # tar -pxf lfs-bootscripts-20150222.tar.bz2 # cd lfs-bootscripts-20150222 # make install Nothing particularly tricky and was not supposed - the scripts will simply be installed along the right paths.
And now proceed to configure. Generate Udev rules:
# bash /lib/udev/init-net-rules.sh Further, the manual offers us to check and edit the rule for naming network interfaces, located in /etc/udev/rules.d/70-persistent-net.rules. And here I was waiting for a bummer - the generation script gave an error - I can not generate this file.
The answer is in the same manual:
In some cases, such as when it comes to the network rules, it’s not. In these cases, this method cannot be used.
Yes, but the case with “Qemu or Xen” is just mine - I collected it under a virtual machine (VirtualBox, as is known, using the Qemu code). Well, let's write the rule for naming a network card manually. And now we don’t need to use the cat command to create the file - because we have collected and configured the whole Vim! And Vim is power
# vim /etc/udev/rules.d/70-persistent-net.rules We type the text of the rule:
# net device e1000 SUBSYSTEM=="net", ACTION=="add", DRIVERS=="?*", ATTR{address}=="08:00:27:f8:4c:26", ATTR{dev_id}="0x0", ATTR{type}="1", KERNEL=="eth*", NAME=="eth0" This rule, when the kernel detects a network device, with the MAC address specified by us as an attribute, assigns it the name eth0. The MAC address of your network card can be learned by giving the following command in the terminal:
# ip link 1: lo: <LOOPBACK,UP,LOWER_UP> mtu 65536 qdisc noqueue state UNKNOWN mode DEFAULT group default link/loopback 00:00:00:00:00:00 brd 00:00:00:00:00:00 2: enp0s3: <BROADCAST,MULTICAST,UP,LOWER_UP> mtu 1500 qdisc fq_codel state UP mode DEFAULT group default qlen 1000 link/ether 08:00:27:f8:4c:26 brd ff:ff:ff:ff:ff:ff The link / ether parameter of the enp03s device is the required poppy. The device is named the host system (and we remember that we only changed the root and meaning of some environment variables by running the “combat” bash, but we remained in the host system and all devices are available to us).
Now you can set up access to the network. In my case, when building on a VM, it goes to the network through virtual NAT, so a DHCP client is required. We specifically downloaded the dhcpcd package, now we will build it and install it on the system:
# tar -pxf dhcpcd-6.7.1.tar.bz2 # cd dhcpcd-6.7.1 # ./configure --libexecdir=/lib/dhcpcd --dbdir=/var/tmp # make # make install # cd .. # rm -rf dhcpcd-6.7.1/ In addition, install the scripts necessary for dhcpcd to work:
# tar -pxf blfs-bootscripts-20150304.tar.bz2 # cd blfs-bootscripts-20150304 # make install-service-dhcpcd And finally, let's create a config:
# vim /etc/sysconfig/ifconfig.eth0 With contents:
ONBOOT="yes" IFACE="eth0" SERVICE="dhcpcd" DHCP_START="" DHCP_STOP="-k" The meaning of the parameters is as follows:
- ONBOOT = "yes" - start the daemon when the system boots
- IFACE = "eth0" - getting ip from the server on the eth0 interface
- SERVICE = "dhcpcd" - starting service
- DHCP_START = "" - startup options
- DHCP_STOP = "- k" - stop parameters (kill)
Create a file / etc / hostname, in which we write the host name:
echo "lfs" > /etc/hostname After these operations, you can count on the fact that after a reboot, we will have a network.
Now let's set up init.
# vim /etc/inittab The manual offers the following script:
# Begin /etc/inittab # - 3 id:3:initdefault: # ( ) si::sysinit:/etc/rc.d/init.d/rc S # # l0:0:wait:/etc/rc.d/init.d/rc 0 l1:S1:wait:/etc/rc.d/init.d/rc 1 l2:2:wait:/etc/rc.d/init.d/rc 2 l3:3:wait:/etc/rc.d/init.d/rc 3 l4:4:wait:/etc/rc.d/init.d/rc 4 l5:5:wait:/etc/rc.d/init.d/rc 5 l6:6:wait:/etc/rc.d/init.d/rc 6 # Ctrl + Alt + Del - ca:12345:ctrlaltdel:/sbin/shutdown -t1 -a -r now # su:S016:once:/sbin/sulogin # 1:2345:respawn:/sbin/agetty --noclear tty1 9600 2:2345:respawn:/sbin/agetty tty2 9600 3:2345:respawn:/sbin/agetty tty3 9600 4:2345:respawn:/sbin/agetty tty4 9600 5:2345:respawn:/sbin/agetty tty5 9600 6:2345:respawn:/sbin/agetty tty6 9600 # End /etc/inittab The lines of this file consist of four fields separated by colons:
<id>:<runlevels>:<action>:<process> - id - string identifier - an arbitrary combination containing from 1 to 4 characters. Two strings with the same identifier are allowed.
- runlevels - the run levels at which this line is involved. Levels are listed in numbers without any separators, for example, 235 (work at 2, 3 and 5 levels)
- process - a process that should be launched at specified levels (the name of the program called at specified execution levels)
- action is an action that defines additional conditions for executing a command. Possible values
- respawn - restart the process when it is completed
- once - execute the process only once when moving to the specified level
- wait - process start and init initiation to start its mode
- sysinit - actions performed by init at the very beginning, before moving to any level of execution. Processes marked in this way are started before processes marked as boot and bootwait
- boot - the process will be started at the system boot stage, regardless of the level of execution
- The bootwait is the same as boot, but with init being put on hold.
- powerwait - actions performed when a power failure. Requires UPS
- ctrlaltdel - action is performed by pressing the "three magic buttons"
- off - ignore this element
- respawn - restart the process when it is completed
To implement actions at various execution levels, LFS provides the /etc/rc.d/init.d/rc script, which accepts a launch level as a parameter.
To perform a single-user login in case of a boot failure, the / sbin / sulogin command is called, this single-user login and executes.
The / sbin / shutdown process starts when the system is stopped / rebooted
/ sbin / agetty - creates and initializes a virtual terminal.
You can change the execution level during system operation by issuing a command from root
# init <runlevel> specifying the trigger level as a parameter. The halt command known to most is the alias to init 0, and the reboot command is the alias to init 6.
You can find out the current launch level by issuing the command:
# runlevel or:
# who -r 3. Clocks, localization and other pleasant things
For correct operation of the system clock, create a config.
/ etc / sysconfig / clock
# Begin /etc/sysconfig/clock UTC=1 # Set this to any options you might need to give to hwclock, # such as machine hardware clock type for Alphas. CLOCKPARAMS= # End /etc/sysconfig/clock Here it is indicated that the hardware clock will go according to universal universal time, and we have already made an amendment to the time zone when setting up the GLibc package.
Now you need to correctly configure the console font. We set all the locales we needed with GLibc. We are interested in Cyrillic, so we create a console configuration file in this form
/ etc / sysconfig / console
# Begin /etc/sysconfig/console UNICODE="1" KEYMAP="us" FONT="UniCyr_8x16" # End /etc/sysconfig/console - UNICODE = "1" - we indicate that we will use the locale in UTF-8
- KEYMAP = "us" - console layout
- FONT = "UniCyr_8x16 - set the Cyrillic console font
Set the locale by setting the default bash profile
/ etc / profile
# Begin /etc/profile export LANG=ru_RU.UTF-8 # End /etc/profile For order, you should also “bind” some keyboard settings used by the shell and the readline library, which is responsible for keyboard input.
/ etc / inputrc
# Begin /etc/inputrc # set horizontal-scroll-mode Off # 8- set meta-flag On set input-meta On # 8- set convert-meta Off # 8- set output-meta On # , set bell-style none # - escape- , # , # readline "\eOd": backward-word "\eOc": forward-word # for linux console "\e[1~": beginning-of-line "\e[4~": end-of-line "\e[5~": beginning-of-history "\e[6~": end-of-history "\e[3~": delete-char "\e[2~": quoted-insert # for xterm "\eOH": beginning-of-line "\eOF": end-of-line # for Konsole "\e[H": beginning-of-line "\e[F": end-of-line # End /etc/inputrc I don’t want to give particular attention to this configuration, so we’ll leave a detailed analysis of it as homework.
The following config defines the names of the shells, the use of which is allowed in the system
/ etc / shells
# Begin /etc/shells /bin/sh /bin/bash # End /etc/shells This is where the initial system setup is over, only a few finishing touches remain.
4. Building the kernel
The irony is that the kernel build is a smaller part of the whole work. Go to the / sources directory and unpack (once again) the source code:
# cd /sources # tar -pxf linux-3.19.tar.bz2 # cd linux-3.19 Prepare the kernel for compilation by checking the source tree:
# make mrproper It is necessary to generate the kernel build config:
# make menuconfig This will launch a configurator familiar to many not by hearsay.
What can be said about the required configuration. First, the LFS assembly manual recommends checking the installation of the following option:

Support for mounting the devtmpfs virtual file system in / dev - dynamically creating device files in memory and mounting / dev at an early stage of kernel boot.
Everything else depends on your hardware configuration and the features that you would like to include in the kernel. For example, I added only full support for NTFS, the rest left by default.
Save the config as .config, exit the configurator and build the kernel
# make Install kernel modules:
# make modules_install Copy the compiled kernel into the / boot directory, renaming it:
# cp -v arch/x86_64/boot/bzImage /boot/vmlinuz-3.19-lfs-7.7 Save the map file and the config of the assembled kernel:
# cp -v System.map /boot/System.map-3.19 # cp -v .config /boot/config-3.19 We are installing the documentation:
# install -d /usr/share/doc/linux-3.19 # cp -r Documentation/* /usr/share/doc/linux-3.19 Create configs for optional module loading, for example, for USB support:
# install -v -m755 -d /etc/modprobe.d # vim /etc/modprobe.d/usb.conf /etc/modprobe.d/usb.conf
# Begin /etc/modprobe.d/usb.conf install ohci_hcd /sbin/modprobe ehci_hcd ; /sbin/modprobe -i ohci_hcd ; true install uhci_hcd /sbin/modprobe ehci_hcd ; /sbin/modprobe -i uhci_hcd ; true # End /etc/modprobe.d/usb.conf We clean up after ourselves:
# cd .. # rm -rf linux-3.19/ 5. Mounting File Systems and Bootloader Configuration
Create a mount config / etc / fstab. I looked like this:
/ etc / fstab
/dev/sda6 / ext4 defaults 1 1 /dev/sda2 swap swap pri=1 0 0 proc /proc proc nosuid,noexec,nodev 0 0 sysfs /sys sysfs nosuid,noexec,nodev 0 0 devpts /dev/pts devpts gid=5,mode=620 0 0 tmpfs /run tmpfs defaults 0 0 devtmpfs /dev devtmpfs mode=0755,nosuid 0 0 / dev / sda2 and / dev / sda6 are the swap and the root partition of the LFS system, respectively.
Since I collected LFS from a system already installed on the HDD (Arch Linux), then for its first boot I preferred to use the Grub2 boot loader already installed on the hard disk. To configure, I used the config to create a custom boot menu item.
We leave from the collected system:
# loguot And in the host system, edit the file:
/etc/grub.d/40_custom
#!/bin/sh exec tail -n +3 $0 # This file provides an easy way to add custom menu entries. Simply type the # menu entries you want to add after this comment. Be careful not to change # the 'exec tail' line above. menuentry "GNU/Linux, Linux 3.19-lfs-7.7" { insmod=ext2 set root=(hd0,6) linux /boot/vmlinuz-3.19-lfs-7.7 root=/dev/sda6 ro } Then we regenerate the bootloader config:
# grub-mkconfig -o /boot/grub/grub.cfg And ... reboot:
# systemctl reboot If everything is in order and we were not mistaken, the OS selection menu will appear:
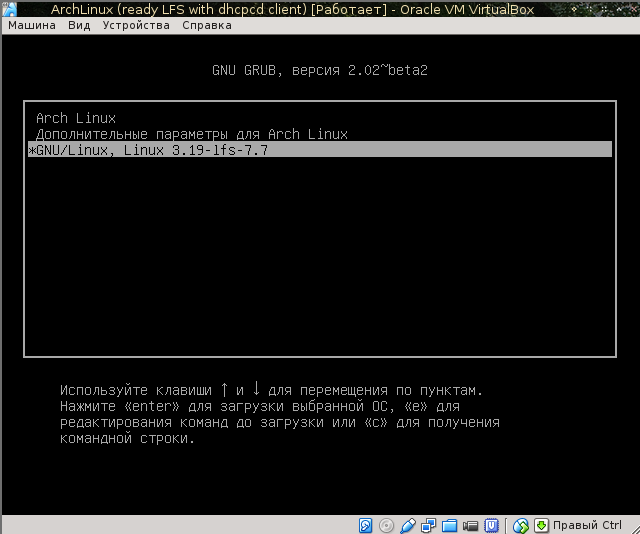
Choose the last item of our LFS system ...

Yes! The download started, you can see how the network interface rises, waiting for when we get the ip and ... login screen:
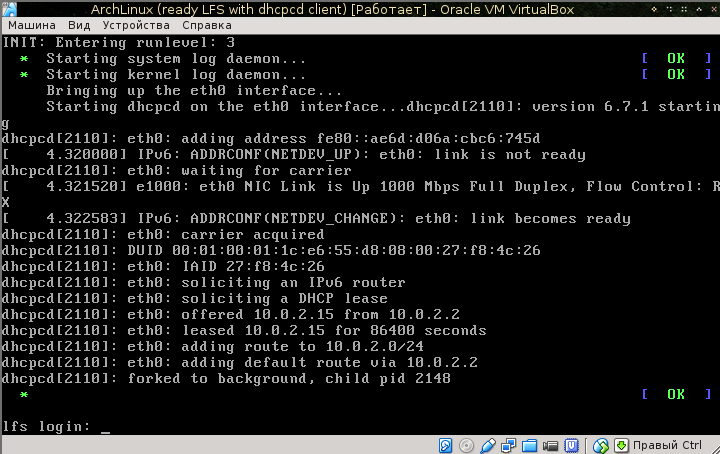
Login as root:
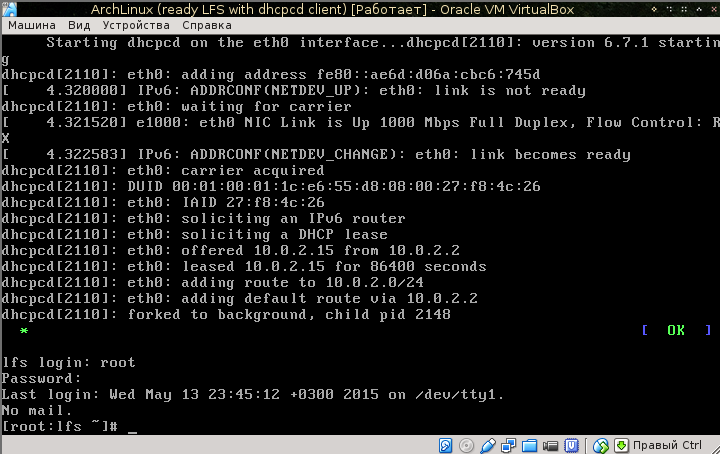
And we run something that will show us the correct locale setting:
# vim 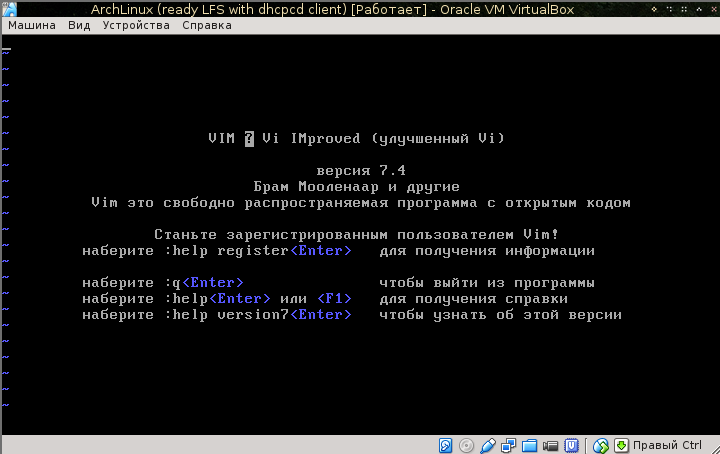
Russian language is where it should be. Check the network:
# ping ya.ru And watch the ping go:
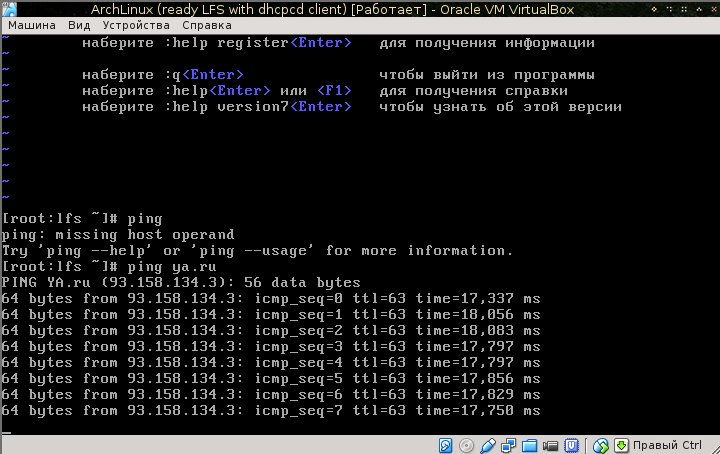
Well then
Now that the goal has been achieved .... Instead of concluding
We tried our hand at building Linux from scratch (from scratch). And we succeeded. We have a minimal working system with which you can continue to do anything - transfer to real hardware, try to turn it into a home system. You can admire and forget, because maintaining a home system without a package manager is pretty hard.
I did it just for fun, got some new knowledge, and in general I was satisfied, which I wish my readers.
PS: the system collected by me can be downloaded here . Under the link - a disk image for VirtualBox. The input parameters are as follows.
login: root
passwd: 123456
login: maisvendoo
passwd: maisvendoo
Source: https://habr.com/ru/post/258227/
All Articles