About RecyclerView and item selection
Hi% username%!
In this article I want to tell a little about the new widget in the Android SDK - RecyclerView, about the implementation of selection of elements and several useful "recipes" when working with it.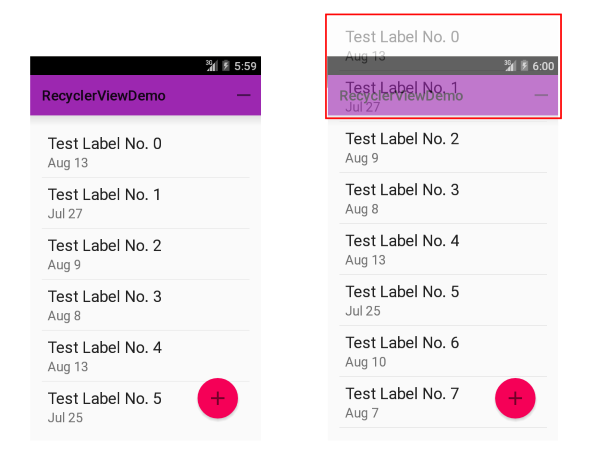
Before the release of the Android SDK 5.0 Lollipop, ListView and GridView widgets were used to display lists and tables. A general recommendation when working with this widget was to use the ViewHolder pattern. The essence of the pattern is that for each element of the list an object is created that stores references to individual views inside the element. Thus, you have to perform a rather expensive call findViewById (int) only once when creating an item.
An example of a typical ViewHolder straight from Google’s guides :
The link to such a holder for each element is stored in the root layout using the setTag (int, Object) method (from my point of view, it is also a crutch).
')
By the release of Android SDK 5.0, Google’s Lollipop developer finally dawned that the two widgets listed above are outdated and need to be replaced with something more stylish, fashionable and youthful. It was decided not to redo old widgets, but to write a new one. This is how RecyclerView came into being. So what are its differences, you ask?
I will give a brief basic, but for a more complete disclosure I advise you to read this article on Habré . So:
I tried it and the widget left me with mixed impressions. On the one hand, yes, it's great that now the use of the ViewHolder is mandatory, it seems to work faster too, it eats less memory. On the other hand, there are problems with the complexity and unfinishedness of the widget.
What do I mean by complexity? If something didn’t work in ListView (or didn’t work as planned), you could always get into the sources, figure out what the error was, fix it, tuck the crutches here and there and everything would start working. RecyclerView is much more difficult in terms of the logic of the work, you break the brain until you figure it out. I tried, but abandoned, too much time and effort is needed for this.
The second problem is the banal lack of functionality that was present in the ListView and GridView. You don’t need to go far for examples - the standard functionality of selecting elements (the further topic of this article), the indents between the elements. Previously, in order to add all this, you had to write literally a couple of lines of code, now dozens of lines will go to this. There are animations, but only for adding / deleting / editing an element. If you want, for example, to animate a partial change of an element, then a bird of oblomingo is already knocking on your door. The widget does not support animation of a part of the element, and if you animate an element from the outside (from the adapter, for example), then it is better not to do this - such manipulations leave the widget elements (those ViewHolders) in an undefined state, which leads to a completely fantastic behavior of your list.
Summarizing - if you have old widgets in your project and you are not using animations, then it is best to leave everything as it is and wait until the widget is filled with missing functionality. If you want simple animations and at the same time user interaction with the widget implies a simple one - try RecyclerView, suddenly like it.
So, let's move on to the main point - to the technical part of the article. Talk about how to select items in RecyclerView. At once I will make a reservation - the idea of implementation is drawn from the wonderful series of Bill Phillips articles on RecyclerView ( links at the end ), so that all of the following can be considered a free brief retelling.
In ListView, the setChoiceMode (int) method was used to select elements, but RecyclerView has no idea that elements can be allocated, so we need to teach our adapter to do this.
The scheme is as follows:
In the diagram, I schematically outlined the connections between objects. Dotted arrows - links, the rest - calls to methods. In green, I marked the objects that directly implement the selection logic.
The principle of operation is as follows:
In the adapter itself, you must make the following changes:
1. Create a SelectionHelper and register listeners (in this case, the adapter itself, but it could be an Activity, for example)
2. Wrap the created ViewHolders in the ViewHolderWrapper of the desired type.
3. Do not forget to attach our ViewHolder to the SelectionHelper in the adapter's onBindViewHolder (ViewHolder, int) method!
This is necessary because there is no other way to get a list of currently used ViewHolders from RecyclerView. If you do not keep their records, if necessary, update the selection of the selection of all selected elements (the user closed the ActionMode, for example), SelectionHelper simply can not do this. The views will remain highlighted when, in fact, they are not.
You may ask - “Why not just remember the allocated ViewHolders in the setItemSelected (ViewHolder, boolean) method?”. This is where the RecyclerView feature affects - it uses the newly created ViewHolder's.
It looks like this:
As a result, this will cause some elements to remain displayed with a selection.
And here another important point becomes obvious - you can’t keep strong references to ViewHolders! They can be removed from the RecyclerView depending on the phase of the moon and the desire of the left heel of Larry Page. In this case, if we keep strict references to them, a memory leak will occur. Therefore, only WeakReference is used to store references in ViewHolderWrapper and WeakHolderTracker .
4. It is also important not to forget in onBindViewHolder (ViewHolder, int) to visually display the selection if it is (if not, do not forget to remove it!). You remember that for a non-selected item, the ViewHolder that was previously used for a non-selected item and vice versa can be used?
I implemented it as follows:
4.1. SelectableRecyclerViewAdapter.onBindViewHolder (ViewHolder, int)
4.2. element layout file
CheckableAutofitHeightFrameLayout adds only 2 things to FrameLayout : first, it is always square (see onMeasure (int, int)) and, second, it adds state_checked to DrawableStates (those used in xml). As a result, you can use StateListDrawable on something like this to display the selection of such a layout:
5. Send the onSelectableChanged (boolean) event to the Activity and start the ActionMode:
In Adapter
As you can see, when you launch the ActionMode, it registers itself as a SelectionObserver. Thus, it is possible to update the number of selected items in the header. Remember to call unregisterSelectionObserver (SelectionObserver) when closing!
Seems to have sorted it out. The entire source code can also be viewed on GitHub .
In conclusion, I will briefly give a few more chips for working with RecyclerView, which you can find in the example.
1. If you do not need to select elements, but you just need to handle clicks, instead of the ViewHolderMultiSelectionWrapper, wrap the elements in ViewHolderClickWrapper using the wrapClickable (ViewHolder) method. The adapter itself in this case will look something like this:
2. GridLayoutManager can not automatically select the number of columns depending on the width of the content. I added this functionality to
The widget adjusts the width of the columns depending on the columnWidth parameter. An important point: if the available width is 330 pixels, and we pass the desired width to 100, the table will end up with 3 columns of 110 pixels each and the elements will be that width. That is why I also made CheckableAutofitHeightFrameLayout automatically changing its height depending on the width.
3. To add padding between elements, you can set paddingTop / Left on the RecyclerView and marginRight / Bottom on the elements, however it looks like a crutch. The recommended way is to add an ItemDecoration to the RecyclerView. In the example you can find a few. To add indents to the usual GridLayoutManager (by “normal” I mean the GridLayoutManager with the standard SpanSizeLookup , in it each element takes 1 span) can be used
That seems to be all. Thank you for your attention and for your lists to never slow down!
Ps. I express my deep gratitude to the user Qayatri for help in preparing the publication! Also, once again, thank artemgapchenko for a valuable comment!
In this article I want to tell a little about the new widget in the Android SDK - RecyclerView, about the implementation of selection of elements and several useful "recipes" when working with it.
Content
1. A bit of ViewHolder
Before the release of the Android SDK 5.0 Lollipop, ListView and GridView widgets were used to display lists and tables. A general recommendation when working with this widget was to use the ViewHolder pattern. The essence of the pattern is that for each element of the list an object is created that stores references to individual views inside the element. Thus, you have to perform a rather expensive call findViewById (int) only once when creating an item.
An example of a typical ViewHolder straight from Google’s guides :
static class ViewHolder { TextView text; TextView timestamp; ImageView icon; ProgressBar progress; int position; } The link to such a holder for each element is stored in the root layout using the setTag (int, Object) method (from my point of view, it is also a crutch).
')
2. Briefly about RecyclerView
By the release of Android SDK 5.0, Google’s Lollipop developer finally dawned that the two widgets listed above are outdated and need to be replaced with something more stylish, fashionable and youthful. It was decided not to redo old widgets, but to write a new one. This is how RecyclerView came into being. So what are its differences, you ask?
I will give a brief basic, but for a more complete disclosure I advise you to read this article on Habré . So:
- The widget itself no longer takes the responsibility of placing the elements. For this appeared LayoutManager'y .
- The ViewHolder pattern has become mandatory. Moreover, the widget has learned to re-use already created ViewHolders and to delete those that are no longer used (hence the name), which favorably affects the speed and size of the used memory.
- New, convenient way to work with animation.
I tried it and the widget left me with mixed impressions. On the one hand, yes, it's great that now the use of the ViewHolder is mandatory, it seems to work faster too, it eats less memory. On the other hand, there are problems with the complexity and unfinishedness of the widget.
What do I mean by complexity? If something didn’t work in ListView (or didn’t work as planned), you could always get into the sources, figure out what the error was, fix it, tuck the crutches here and there and everything would start working. RecyclerView is much more difficult in terms of the logic of the work, you break the brain until you figure it out. I tried, but abandoned, too much time and effort is needed for this.
The second problem is the banal lack of functionality that was present in the ListView and GridView. You don’t need to go far for examples - the standard functionality of selecting elements (the further topic of this article), the indents between the elements. Previously, in order to add all this, you had to write literally a couple of lines of code, now dozens of lines will go to this. There are animations, but only for adding / deleting / editing an element. If you want, for example, to animate a partial change of an element, then a bird of oblomingo is already knocking on your door. The widget does not support animation of a part of the element, and if you animate an element from the outside (from the adapter, for example), then it is better not to do this - such manipulations leave the widget elements (those ViewHolders) in an undefined state, which leads to a completely fantastic behavior of your list.
Summarizing - if you have old widgets in your project and you are not using animations, then it is best to leave everything as it is and wait until the widget is filled with missing functionality. If you want simple animations and at the same time user interaction with the widget implies a simple one - try RecyclerView, suddenly like it.
3. Select items
So, let's move on to the main point - to the technical part of the article. Talk about how to select items in RecyclerView. At once I will make a reservation - the idea of implementation is drawn from the wonderful series of Bill Phillips articles on RecyclerView ( links at the end ), so that all of the following can be considered a free brief retelling.
In ListView, the setChoiceMode (int) method was used to select elements, but RecyclerView has no idea that elements can be allocated, so we need to teach our adapter to do this.
The scheme is as follows:
In the diagram, I schematically outlined the connections between objects. Dotted arrows - links, the rest - calls to methods. In green, I marked the objects that directly implement the selection logic.
The principle of operation is as follows:
- ViewHolderWrapper sets itself as a ClickListener for the ViewHolder root view and begins to receive onClick and onLongClick events. Depending on the implementation, it can simply proxy these events in HolderClickObservable (ViewHolderClickWrapper), or, based on the current status of the SelectionHelper, select an item with a call to setItemSelected (ViewHolder, boolean) (ViewHolderMultiSelectionWrapper).
- SelectionHelper saves information about selected items and notifies listeners ( SelectionObserver ) about changes to the selection.
- The listener (in our case, the adapter) is responsible for the visual display of the selection of the element, as well as the interaction with it (in the diagram, call the startActionMode of the Activity ).
In the adapter itself, you must make the following changes:
1. Create a SelectionHelper and register listeners (in this case, the adapter itself, but it could be an Activity, for example)
mSelectionHelper = new SelectionHelper(mHolderTracker); mSelectionHelper.registerSelectionObserver(this); 2. Wrap the created ViewHolders in the ViewHolderWrapper of the desired type.
@Override public RecyclerView.ViewHolder onCreateViewHolder(ViewGroup viewGroup, int position) { LayoutInflater inflater = LayoutInflater.from(viewGroup.getContext()); ImageViewHolder holder = new ImageViewHolder( inflater.inflate(R.layout.gallery_item, viewGroup, false)); return mSelectionHelper.wrapSelectable(holder); } The wrapSelectable (ViewHolder) method of SelectionHelper: public <H extends RecyclerView.ViewHolder> H wrapSelectable(H holder) { new ViewHolderMultiSelectionWrapper(holder); return holder; } 3. Do not forget to attach our ViewHolder to the SelectionHelper in the adapter's onBindViewHolder (ViewHolder, int) method!
@Override public void onBindViewHolder(RecyclerView.ViewHolder viewHolder, int position) { Image image = mDataSet.getItem(position); ImageViewHolder imageViewHolder = (ImageViewHolder) viewHolder; imageViewHolder.bindInfo(image); Checkable view = (Checkable) viewHolder.itemView; view.setChecked(mSelectionHelper.isItemSelected(position)); mHolderTracker.bindHolder(imageViewHolder, position); } This is necessary because there is no other way to get a list of currently used ViewHolders from RecyclerView. If you do not keep their records, if necessary, update the selection of the selection of all selected elements (the user closed the ActionMode, for example), SelectionHelper simply can not do this. The views will remain highlighted when, in fact, they are not.
You may ask - “Why not just remember the allocated ViewHolders in the setItemSelected (ViewHolder, boolean) method?”. This is where the RecyclerView feature affects - it uses the newly created ViewHolder's.
It looks like this:
- Open the application. On the screen 10 elements - 10 ViewHolder'ov created for them.
- We start ActionMode, we start to select elements - 1,2,3.
- Scroll the view down, we see elements from 10 to 20. Do you think that 20 ViewHolders hang in memory now? No matter how! For a piece of data, RecyclerView will create new ViewHolders, and for the other, re-use existing ones. And it is not known in what order.
- Now, if we scroll the view back up, some of our 10 ViewHolders will be destroyed, new ones will be created instead. The rest will be used again and is not necessary for the same items.
- Cancel the ActionMode. SelectionHelper should scroll notifications to listeners about the changed selection on elements indicating ViewHolder for each element, but it no longer owns the actual data, all Holder's have changed!
As a result, this will cause some elements to remain displayed with a selection.
And here another important point becomes obvious - you can’t keep strong references to ViewHolders! They can be removed from the RecyclerView depending on the phase of the moon and the desire of the left heel of Larry Page. In this case, if we keep strict references to them, a memory leak will occur. Therefore, only WeakReference is used to store references in ViewHolderWrapper and WeakHolderTracker .
private abstract class ViewHolderWrapper implements android.view.View.OnClickListener { protected final WeakReference<RecyclerView.ViewHolder> mWrappedHolderRef; protected ViewHolderWrapper(RecyclerView.ViewHolder holder) { mWrappedHolderRef = new WeakReference<>(holder); } } WeakHolderTracker
public class WeakHolderTracker { private final SparseArray<WeakReference<RecyclerView.ViewHolder>> mHoldersByPosition = new SparseArray<>(); public void bindHolder(RecyclerView.ViewHolder holder, int position) { mHoldersByPosition.put(position, new WeakReference<>(holder)); } @Nullable private RecyclerView.ViewHolder getHolder(int position) { WeakReference<RecyclerView.ViewHolder> holderRef = mHoldersByPosition.get(position); if (holderRef == null) { mHoldersByPosition.remove(position); return null; } RecyclerView.ViewHolder holder = holderRef.get(); if (holder == null || (holder.getAdapterPosition() != position && holder.getAdapterPosition() != RecyclerView.NO_POSITION)) { mHoldersByPosition.remove(position); return null; } return holder; } public List<RecyclerView.ViewHolder> getTrackedHolders() { List<RecyclerView.ViewHolder> holders = new ArrayList<>(); for (int i = 0; i < mHoldersByPosition.size(); i++) { int key = mHoldersByPosition.keyAt(i); RecyclerView.ViewHolder holder = getHolder(key); if (holder != null) { holders.add(holder); } } return holders; } } 4. It is also important not to forget in onBindViewHolder (ViewHolder, int) to visually display the selection if it is (if not, do not forget to remove it!). You remember that for a non-selected item, the ViewHolder that was previously used for a non-selected item and vice versa can be used?
I implemented it as follows:
4.1. SelectableRecyclerViewAdapter.onBindViewHolder (ViewHolder, int)
Checkable view = (Checkable) viewHolder.itemView; view.setChecked(mSelectionHelper.isItemSelected(position)); 4.2. element layout file
<com.bejibx.android.recyclerview.example.ui.widget.CheckableAutofitHeightFrameLayout xmlns:android="http://schemas.android.com/apk/res/android" xmlns:tools="http://schemas.android.com/tools" android:layout_width="80dp" android:layout_height="80dp" android:background="#AAA" android:foreground="@drawable/gallery_item_foreground" tools:ignore="ContentDescription,RtlHardcoded"> <ImageView android:id="@+id/image" android:layout_width="match_parent" android:layout_height="match_parent" /> </com.bejibx.android.recyclerview.example.ui.widget.CheckableAutofitHeightFrameLayout> 4.3. CheckableAutofitHeightFrameLayout widget
public class CheckableAutofitHeightFrameLayout extends FrameLayout implements Checkable { private static final int[] CHECKED_STATE_SET = {android.R.attr.state_checked}; private boolean mIsChecked; private boolean mIsCheckable; public CheckableAutofitHeightFrameLayout(Context context) { super(context); } public CheckableAutofitHeightFrameLayout(Context context, AttributeSet attrs) { super(context, attrs); } public CheckableAutofitHeightFrameLayout(Context context, AttributeSet attrs, int defStyleAttr) { super(context, attrs, defStyleAttr); } @TargetApi(Build.VERSION_CODES.LOLLIPOP) public CheckableAutofitHeightFrameLayout(Context context, AttributeSet attrs, int defStyleAttr, int defStyleRes) { super(context, attrs, defStyleAttr, defStyleRes); } @Override protected int[] onCreateDrawableState(int extraSpace) { final int[] drawableState = super.onCreateDrawableState(extraSpace + 1); if (isChecked()) { mergeDrawableStates(drawableState, CHECKED_STATE_SET); } return drawableState; } @Override public boolean isCheckable() { return mIsCheckable; } @Override public void setCheckable(boolean isCheckable) { boolean wasCheckable = isCheckable(); mIsCheckable = isCheckable; if (!isCheckable && isChecked()) { setChecked(false); } else if (wasCheckable ^ mIsCheckable) { refreshDrawableState(); } } @Override public void setChecked(boolean isChecked) { boolean wasChecked = isChecked(); mIsChecked = isCheckable() && isChecked; if (wasChecked ^ mIsChecked) { refreshDrawableState(); } } @Override public boolean isChecked() { return mIsChecked; } @Override public void toggle() { setChecked(!mIsChecked); } @Override protected void onMeasure(int widthMeasureSpec, int heightMeasureSpec) { //noinspection SuspiciousNameCombination super.onMeasure(widthMeasureSpec, widthMeasureSpec); } } CheckableAutofitHeightFrameLayout adds only 2 things to FrameLayout : first, it is always square (see onMeasure (int, int)) and, second, it adds state_checked to DrawableStates (those used in xml). As a result, you can use StateListDrawable on something like this to display the selection of such a layout:
<selector xmlns:android="http://schemas.android.com/apk/res/android"> <item android:state_pressed="true"> <shape xmlns:android="http://schemas.android.com/apk/res/android"> <stroke android:color="@color/accent" android:width="1dp" /> </shape> </item> <item android:state_checked="true"> <shape xmlns:android="http://schemas.android.com/apk/res/android" android:shape="rectangle"> <stroke android:color="@color/accent" android:width="1dp" /> <solid android:color="@color/accent_alpha" /> </shape> </item> <item android:drawable="@android:color/transparent" /> </selector> and all the details of the display crawl into the xml-ki, in Java only need to set the appropriate state.5. Send the onSelectableChanged (boolean) event to the Activity and start the ActionMode:
In Adapter
@Override public void onSelectableChanged(boolean isSelectable) { if (isSelectable) { mActivity.startActionMode(); } } Running ActionMode in Activity
public class GalleryActivity extends Activity { private final ActionModeCallback mActionModeCallback = new ActionModeCallback(); private SelectableRecyclerViewAdapter mAdapter; @Override protected void onCreate(Bundle savedInstanceState) { super.onCreate(savedInstanceState); setContentView(R.layout.activity_main); RecyclerView recyclerView = (RecyclerView) findViewById(R.id.gallery); int columnWidth = getResources().getDimensionPixelSize(R.dimen.column_width); int vSpacing = getResources().getDimensionPixelSize(R.dimen.grid_spacing_vertical); int hSpacing = getResources().getDimensionPixelSize(R.dimen.grid_spacing_horizontal); recyclerView.setLayoutManager(new GridAutofitLayoutManager(this, columnWidth)); recyclerView.addItemDecoration(new GridSimpleSpacingDecoration(hSpacing, vSpacing)); DataSet<Image> dataSet = new DummyImagesDataSet(); mAdapter = new SelectableRecyclerViewAdapter(this, dataSet); recyclerView.setAdapter(mAdapter); } public void startActionMode() { startActionMode(mActionModeCallback); } private class ActionModeCallback implements ActionMode.Callback, SelectionObserver { private ActionMode mActionMode; @Override public boolean onPrepareActionMode(ActionMode actionMode, Menu menu) { return false; } @Override public void onDestroyActionMode(ActionMode actionMode) { SelectionHelper selectionHelper = mAdapter.getSelectionHelper(); selectionHelper.unregisterSelectionObserver(this); mActionMode = null; selectionHelper.setSelectable(false); } @Override public boolean onCreateActionMode(ActionMode actionMode, Menu menu) { mActionMode = actionMode; mActionMode.getMenuInflater().inflate(R.menu.gallery_selection, menu); mAdapter.getSelectionHelper().registerSelectionObserver(this); return true; } @Override public boolean onActionItemClicked(ActionMode actionMode, MenuItem menuItem) { switch (menuItem.getItemId()) { case R.id.menu_toast: Toast.makeText(GalleryActivity.this, R.string.text_simple_toast, Toast.LENGTH_SHORT).show(); break; } return true; } @Override public void onSelectedChanged(RecyclerView.ViewHolder holder, boolean isSelected) { if (mActionMode != null) { int checkedImagesCount = mAdapter.getSelectionHelper().getSelectedItemsCount(); mActionMode.setTitle(String.valueOf(checkedImagesCount)); } } @Override public void onSelectableChanged(boolean isSelectable) { if (!isSelectable) { mActionMode.finish(); } } } } As you can see, when you launch the ActionMode, it registers itself as a SelectionObserver. Thus, it is possible to update the number of selected items in the header. Remember to call unregisterSelectionObserver (SelectionObserver) when closing!
4. Conclusion + Bonus
Seems to have sorted it out. The entire source code can also be viewed on GitHub .
In conclusion, I will briefly give a few more chips for working with RecyclerView, which you can find in the example.
1. If you do not need to select elements, but you just need to handle clicks, instead of the ViewHolderMultiSelectionWrapper, wrap the elements in ViewHolderClickWrapper using the wrapClickable (ViewHolder) method. The adapter itself in this case will look something like this:
Hidden text
public class SelectableRecyclerViewAdapter extends RecyclerView.Adapter<RecyclerView.ViewHolder> implements SelectionObserver { private final SelectionHelper mSelectionHelper; public SelectableRecyclerViewAdapter() { mSelectionHelper = new SelectionHelper(); mSelectionHelper.registerSelectionObserver(this); } public SelectionHelper getSelectionHelper() { return mSelectionHelper; } @Override public RecyclerView.ViewHolder onCreateViewHolder(ViewGroup viewGroup, int position) { LayoutInflater inflater = LayoutInflater.from(viewGroup.getContext()); ImageViewHolder holder = new ImageViewHolder( inflater.inflate(R.layout.gallery_item, viewGroup, false)); return mSelectionHelper.wrapClickable(holder); } @Override public void onHolderClick(RecyclerView.ViewHolder holder) { // perform item click } @Override public boolean onHolderLongClick(RecyclerView.ViewHolder holder) { // perform item long click return false; } //... } 2. GridLayoutManager can not automatically select the number of columns depending on the width of the content. I added this functionality to
GridAutofitLayoutManager
public class GridAutofitLayoutManager extends GridLayoutManager { private int mColumnWidth; private boolean mColumnWidthChanged = true; public GridAutofitLayoutManager(Context context, int columnWidth) { /* Initially set spanCount to 1, will be changed automatically later. */ super(context, 1); setColumnWidth(checkedColumnWidth(context, columnWidth)); } public GridAutofitLayoutManager(Context context, int columnWidth, int orientation, boolean reverseLayout) { /* Initially set spanCount to 1, will be changed automatically later. */ super(context, 1, orientation, reverseLayout); setColumnWidth(checkedColumnWidth(context, columnWidth)); } private int checkedColumnWidth(Context context, int columnWidth) { if (columnWidth <= 0) { context.getResources().getDimensionPixelSize(R.dimen.rv_def_column_width); } return columnWidth; } public void setColumnWidth(int newColumnWidth) { if (newColumnWidth > 0 && newColumnWidth != mColumnWidth) { mColumnWidth = newColumnWidth; mColumnWidthChanged = true; } } /* I don't actually remember why I choose to set span count in onLayoutChildren, I wrote this class some time ago. But the point is we need to do so after view get measured, so we can get its height and width. */ @Override public void onLayoutChildren(RecyclerView.Recycler recycler, RecyclerView.State state) { if (mColumnWidthChanged && mColumnWidth > 0) { int totalSpace; if (getOrientation() == VERTICAL) { totalSpace = getWidth() - getPaddingRight() - getPaddingLeft(); } else { totalSpace = getHeight() - getPaddingTop() - getPaddingBottom(); } int spanCount = Math.max(1, totalSpace / mColumnWidth); setSpanCount(spanCount); mColumnWidthChanged = false; } super.onLayoutChildren(recycler, state); } } The widget adjusts the width of the columns depending on the columnWidth parameter. An important point: if the available width is 330 pixels, and we pass the desired width to 100, the table will end up with 3 columns of 110 pixels each and the elements will be that width. That is why I also made CheckableAutofitHeightFrameLayout automatically changing its height depending on the width.
3. To add padding between elements, you can set paddingTop / Left on the RecyclerView and marginRight / Bottom on the elements, however it looks like a crutch. The recommended way is to add an ItemDecoration to the RecyclerView. In the example you can find a few. To add indents to the usual GridLayoutManager (by “normal” I mean the GridLayoutManager with the standard SpanSizeLookup , in it each element takes 1 span) can be used
GridSimpleSpacingDecoration
public class GalleryActivity extends Activity { private final ActionModeCallback mActionModeCallback = new ActionModeCallback(); private SelectableRecyclerViewAdapter mAdapter; @Override protected void onCreate(Bundle savedInstanceState) { super.onCreate(savedInstanceState); setContentView(R.layout.activity_main); RecyclerView recyclerView = (RecyclerView) findViewById(R.id.gallery); int columnWidth = getResources().getDimensionPixelSize(R.dimen.column_width); int vSpacing = getResources().getDimensionPixelSize(R.dimen.grid_spacing_vertical); int hSpacing = getResources().getDimensionPixelSize(R.dimen.grid_spacing_horizontal); recyclerView.setLayoutManager(new GridAutofitLayoutManager(this, columnWidth)); recyclerView.addItemDecoration(new GridSimpleSpacingDecoration(hSpacing, vSpacing)); DataSet<Image> dataSet = new DummyImagesDataSet(); mAdapter = new SelectableRecyclerViewAdapter(this, dataSet); recyclerView.setAdapter(mAdapter); } //... That seems to be all. Thank you for your attention and for your lists to never slow down!
5. Useful links
- The first part of Bill Phillips' article on RecyclerView. Basic Information (in English)
- The second part of Bill Phillips' article on RecyclerView. About highlighting items (in English)
- Review article about RecyclerView (in English)
- ViewHolder Pattern Information for ListView (in English)
- Make the parallax header in RecyclerView
- Basic information about RecyclerView and CardView
- About switching to RecyclerView
- Java Link Types
- Useful library for working with RecyclerView (thanks to user artemgapchenko )
Ps. I express my deep gratitude to the user Qayatri for help in preparing the publication! Also, once again, thank artemgapchenko for a valuable comment!
Source: https://habr.com/ru/post/258195/
All Articles