Transitions with CoreAnimation: animating the appearance of the image
Recently, I came across an interesting concept banking application . It is interesting not only because it looks much more convenient than the mobile application of any bank, but also with its incredible animations. I liked some of them so much that I decided to immediately apply them somewhere. In particular, it seemed to me a very interesting animation of the appearance on the screen of a user's photo and icons of managing his card.
Right here.

In short, this is what was decided to achieve (in slow-mo!).
')
 As you can see, the animation consists of two parts: the drawing of the framing circle and the disclosure of the image. Please note that the image itself does not change its size during the animation, but only its visible part changes - that is, the mask is animated in this case, which closes our image. In addition, these two animations do not start at the same time: the second part, the one with the opening of the mask, waits until the circle is drawn in half, and only then reveals the image to us.
Let's make a few assumptions: firstly, in order not to waste time on step-by-step instructions for creating a project in Xcode, let's assume that you already have it and you are more or less familiar with its structure. Secondly, the code that will be shown below does not really depend on where you put it: in a UIViewController or a UIView, so you have room for creativity about where you will be doing the animations. The main thing you need is two @property:
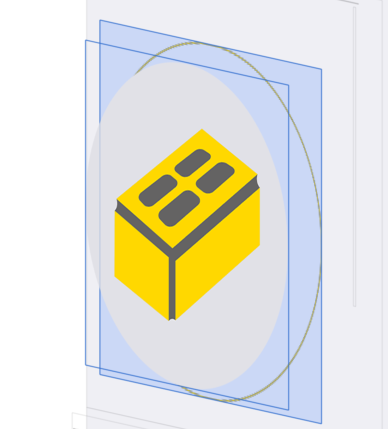 ... where imageToReveal is the subview of viewToDrawOn. If you are familiar with English, you should have already guessed that viewToDrawOn is a UIView object on which we will draw, and imageToReveal is an UIView object (or even a UIImageView) that we will mask. Here they are both declared with the IBOutlet keyword, because I'm a lazy guy and won't show you how to create these objects - I added them to the storyboard right in the Interface Builder visual editor. For the same reason, both of them are declared weak - there is no need for “strong” (strong) references to UIView objects, which in any case will be added to the hierarchy of higher-level UIViews, which already ensures that these objects will not be deleted. If my words about who for whom in this tandem is a feat are not enough - here is a picture for you.
In addition, I hid imageToReveal in the storyboard (a tick opposite to hidden). It could be done in the code, but I preferred to apply the maximum possible customization in the visual editor, making the source code as readable as possible.
Finally, go to the source code. We will work with CABasicAnimation. It (he?) Allows us to animate the change of some properties of objects of type CALayer - and this is very useful for us, since the framing circle and the mask that limits the display of our image are objects of type CAShapeLayer. Let's start with the circle.
First we create a CAShapeLayer object - it will be one of the layers of our UIView, which will have something like a graph describing a circle. And then we, as in children's coloring, will paint the shapes and contours of this graph.
Now go directly to the animation! As I promised, we will animate one of the properties of CAShapeLayer, and in our case this will be the strokeEnd property, which is responsible for the point on our graph, to which we need to paint the outline with the specified color. We will also set up our animation: the duration, the number of repetitions and even the speed with which the animation will develop over time (timingFunction).
In general, nothing new: we again create a circle and animate the change of one of its properties over time. In this case, we will change its radius - from one pixel, when the whole circle is just a point on the screen, up to half the length of the UIView side, which corresponds to the full open image (assuming that we are going to show a round picture or icon, as in that very concept banking application). Another difference from what we did earlier is that we will not paint the CAShapeLayer object, but will use it as a mask for the image. Thus, we will see only that part of the image that the mask will cut, and the larger the mask, the more the image will be visible through it. Imagine that you are looking into the slot in the fence: the slot is a mask, and the bigger it is, the more intimate details of what is happening behind the fence are available for your curious eyes!
If someone is wondering why I didn’t combine animations into a CAAnimationGroup group (because many of the settings are similar), it’s because we apply these animations to different layers. As far as I know, CAAnimation animations can only be grouped under the condition that they work with one layer. In addition, I admit, setting the delay for the second animation is probably not the most elegant solution, so if you can offer something better, do not hesitate!
As a final note, I would not recommend abusing masks in many different UIViews, since they will significantly slow down your application, of course, provided that there will be a lot of these masks. The most rational solution is to use the image already cropped to the circumference, and remove the mask at the end of the animation.
That's it, you should have the following:
If something else happened - I am truly sorry, you can download the Xcode project and find out what went wrong. Thank you and see you soon!
Right here.
In short, this is what was decided to achieve (in slow-mo!).
')
As you can see, the animation consists of two parts: the drawing of the framing circle and the disclosure of the image. Please note that the image itself does not change its size during the animation, but only its visible part changes - that is, the mask is animated in this case, which closes our image. In addition, these two animations do not start at the same time: the second part, the one with the opening of the mask, waits until the circle is drawn in half, and only then reveals the image to us.Let's make a few assumptions: firstly, in order not to waste time on step-by-step instructions for creating a project in Xcode, let's assume that you already have it and you are more or less familiar with its structure. Secondly, the code that will be shown below does not really depend on where you put it: in a UIViewController or a UIView, so you have room for creativity about where you will be doing the animations. The main thing you need is two @property:
@property (nonatomic, weak) IBOutlet UIView *viewToDrawOn; @property (nonatomic, weak) IBOutlet UIView *imageToReveal; In addition, I hid imageToReveal in the storyboard (a tick opposite to hidden). It could be done in the code, but I preferred to apply the maximum possible customization in the visual editor, making the source code as readable as possible.
Finally, go to the source code. We will work with CABasicAnimation. It (he?) Allows us to animate the change of some properties of objects of type CALayer - and this is very useful for us, since the framing circle and the mask that limits the display of our image are objects of type CAShapeLayer. Let's start with the circle.
Draw a framing circle
First we create a CAShapeLayer object - it will be one of the layers of our UIView, which will have something like a graph describing a circle. And then we, as in children's coloring, will paint the shapes and contours of this graph.
// — CAShapeLayer *circle = [CAShapeLayer layer]; // UIView CGFloat radius = self.viewToDrawOn.frame.size.width / 2.0f; circle.position = CGPointZero; circle.path = [UIBezierPath bezierPathWithRoundedRect:self.viewToDrawOn.bounds cornerRadius:radius].CGPath; // , circle.fillColor = [UIColor clearColor].CGColor; // — UIColor Hex, circle.strokeColor = [UIColor colorWithHex:@"ffd800"].CGColor; circle.lineWidth = 1.0f; [self.viewToDrawOn.layer addSublayer:circle]; Now go directly to the animation! As I promised, we will animate one of the properties of CAShapeLayer, and in our case this will be the strokeEnd property, which is responsible for the point on our graph, to which we need to paint the outline with the specified color. We will also set up our animation: the duration, the number of repetitions and even the speed with which the animation will develop over time (timingFunction).
// , , 0 1 ( 1 — ) CABasicAnimation *drawAnimation = [CABasicAnimation animationWithKeyPath:@"strokeEnd"]; drawAnimation.duration = kAnimationDuration; drawAnimation.repeatCount = 1.0; drawAnimation.fromValue = [NSNumber numberWithFloat:0.0f]; drawAnimation.toValue = [NSNumber numberWithFloat:1.0f]; drawAnimation.timingFunction = [CAMediaTimingFunction functionWithName:kCAMediaTimingFunctionEaseInEaseOut]; [circle addAnimation:drawAnimation forKey:@"drawOutlineAnimation"]; We open the image
In general, nothing new: we again create a circle and animate the change of one of its properties over time. In this case, we will change its radius - from one pixel, when the whole circle is just a point on the screen, up to half the length of the UIView side, which corresponds to the full open image (assuming that we are going to show a round picture or icon, as in that very concept banking application). Another difference from what we did earlier is that we will not paint the CAShapeLayer object, but will use it as a mask for the image. Thus, we will see only that part of the image that the mask will cut, and the larger the mask, the more the image will be visible through it. Imagine that you are looking into the slot in the fence: the slot is a mask, and the bigger it is, the more intimate details of what is happening behind the fence are available for your curious eyes!
// CGFloat initialRadius = 1.0f; CGFloat finalRadius = self.imageToReveal.bounds.size.width / 2.0f; // , CAShapeLayer *revealShape = [CAShapeLayer layer]; revealShape.bounds = self.imageToReveal.bounds; // — , revealShape.fillColor = [UIColor blackColor].CGColor; // , : UIBezierPath *startPath = [UIBezierPath bezierPathWithRoundedRect:CGRectMake(CGRectGetMidX(self.imageToReveal.bounds) - initialRadius, CGRectGetMidY(self.imageToReveal.bounds) - initialRadius, initialRadius * 2, initialRadius * 2) cornerRadius:initialRadius]; UIBezierPath *endPath = [UIBezierPath bezierPathWithRoundedRect:self.imageToReveal.bounds cornerRadius:finalRadius]; revealShape.path = startPath.CGPath; revealShape.position = CGPointMake(CGRectGetMidX(self.imageToReveal.bounds) - initialRadius, CGRectGetMidY(self.imageToReveal.bounds) - initialRadius); //, , , self.imageToReveal.layer.mask = revealShape; // . path — , , . CABasicAnimation *revealAnimationPath = [CABasicAnimation animationWithKeyPath:@"path"]; revealAnimationPath.fromValue = (__bridge id)(startPath.CGPath); revealAnimationPath.toValue = (__bridge id)(endPath.CGPath); revealAnimationPath.timingFunction = [CAMediaTimingFunction functionWithName:kCAMediaTimingFunctionEaseInEaseOut]; revealAnimationPath.duration = kAnimationDuration/2.0f; revealAnimationPath.repeatCount = 1.0f; // , revealAnimationPath.beginTime = CACurrentMediaTime() + kAnimationDuration/2.0f; revealAnimationPath.delegate = self; // , , hidden , .. dispatch_time_t timeToShow = dispatch_time(DISPATCH_TIME_NOW, (int64_t)(kAnimationDuration/2.0f * NSEC_PER_SEC)); dispatch_after(timeToShow, dispatch_get_main_queue(), ^{ self.imageToReveal.hidden = NO; }); revealShape.path = endPath.CGPath; [revealShape addAnimation:revealAnimationPath forKey:@"revealAnimation"]; If someone is wondering why I didn’t combine animations into a CAAnimationGroup group (because many of the settings are similar), it’s because we apply these animations to different layers. As far as I know, CAAnimation animations can only be grouped under the condition that they work with one layer. In addition, I admit, setting the delay for the second animation is probably not the most elegant solution, so if you can offer something better, do not hesitate!
As a final note, I would not recommend abusing masks in many different UIViews, since they will significantly slow down your application, of course, provided that there will be a lot of these masks. The most rational solution is to use the image already cropped to the circumference, and remove the mask at the end of the animation.
That's it, you should have the following:
If something else happened - I am truly sorry, you can download the Xcode project and find out what went wrong. Thank you and see you soon!
Source: https://habr.com/ru/post/258107/
All Articles