Automatically Testing JavaFX Applications

Good day!
In a world where the cost of an error at the implementation stage exceeds hundreds and thousands of times the cost of a correction at the development stage, you should always look for the answer to the question: “how can we test this automatically?” The global web practically does not cover the issues of automating testing JavaFX applications. But still managed to find some interesting ideas, and I want to share with you my observations.
')
In the article I will tell you how to find components on a JavaFX form, how to check their properties, how to click on them, and so on. This is the minimum required set of input points for automating the testing of JavaFX applications.
1. Baseline
A set of libraries: guava, testFx, hamcrest and JUnit.
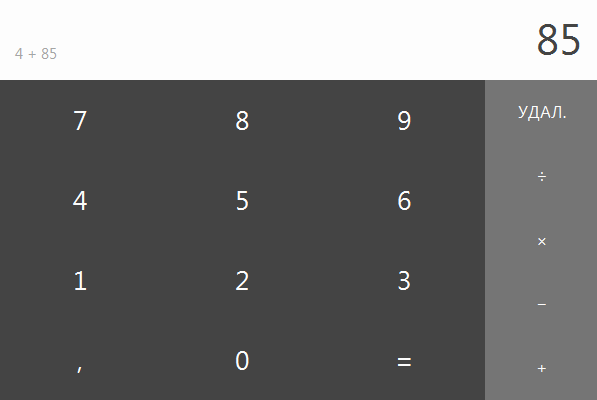
I basically will not describe the logic of the application itself, I will say only that this is a calculator written in haste - we will try to work with it for as long as possible with a black-box. Nevertheless, I will start from the launcher class itself:
public class CalculatorApp extends Application { private static Optional<Callback<Parent>> callback = Optional.empty(); public static void main(String[] args) { launch(args); } @Override public void start(Stage primaryStage) throws Exception { BorderPane root = new BorderPane(); root.setCenter(new Calculator()); Scene scene = new Scene(root); primaryStage.setScene(scene); primaryStage.show(); callback.ifPresent(o -> o.call(root)); } public static void onLoad(Callback<Parent> r) { CalculatorApp.callback = Optional.of(r); } } Why do I need a callback will become clear later. For now we only need to know about it:
public interface Callback<T> { void call(T arg); } In addition to the launcher, as you can guess, there is Calculator.java - the controller, Calculator.fxml - components with the entire hierarchy, layout and other, Calculator.css - the styles used by the components of our visual. In the end, our calculator looks something like this:
2. Initialize the test
public class FirstTest { private static GuiTest controller; @BeforeClass public static void setUpClass() { CalculatorApp.onLoad(r -> { controller = new GuiTest() { @Override protected Parent getRootNode() { return r; } }; }); FXTestUtils.launchApp(CalculatorApp.class); try { Thread.sleep(1000); } catch (InterruptedException e) { e.printStackTrace(); } } ... To automate testing using TestFX, we need GuiTest (), an abstract class containing many useful methods. It requires us to implement Parent getRootNode (). The callback passes the real root to the GuiTest implementation. This is enough to walk recursively through the component hierarchy, which TestFX actually does. I strongly advise you to look at the source of the library - there are many interesting things and the principles of its work are immediately understood.
FXTestUtils.launchApp(CalculatorApp.class); It's not necessary to wait - you can make a smarter wait for the application to load, but for simplicity, I have Thread.sleep (1000);
3. Methods
First of all, we need to teach our engine to press DEL. for use in Before:
private void clear() { controller.click("."); } Yes, just so simple - and this is only one of the ways. In fact, there is a smooth movement of the mouse and click. In order to avoid unnecessary time spending on beautifulness in the future, you can go to the forwarding of events directly to the desired node (but I will leave a slow option to show you the video in dynamics). And the forwarding of events is done somehow like this:
Event.fireEvent(your_node, new MouseEvent(MouseEvent.MOUSE_CLICKED, 0, 0, 0, 0, MouseButton.PRIMARY, 1, true, true, true, true, true, true, true, true, true, true, null)); Total we have what we achieved - cleaning the fields of the calculator (reset), which we will produce before each test:
@Before public void beforeTest() { clear(); } Similarly, we implement a method that calls us the desired number on the calculator.
public void click(int digit) { String numStr = Integer.toString(digit); for (int i = 0; i < numStr.length(); i++) { controller.click(String.valueOf(numStr.charAt(i))); } } Now I will show a more interesting variant of clicking on various controls. The task is to learn how to click on +, -, *, /, =. Let's take a look at our fxml and understand what these components differ in so unique.
<Label fx:id="eq"... <Label fx:id="divide"... <Label fx:id="multiply"... <Label fx:id="subtract"... <Label fx:id="add"... See full version of Calculator.fxml
<?xml version="1.0" encoding="UTF-8"?> <?import java.net.*?> <?import javafx.scene.control.*?> <?import java.lang.*?> <?import javafx.scene.layout.*?> <fx:root maxHeight="-Infinity" maxWidth="-Infinity" minHeight="-Infinity" minWidth="-Infinity" prefHeight="400.0" prefWidth="600.0" styleClass="root" type="GridPane" xmlns="http://javafx.com/javafx/8" xmlns:fx="http://javafx.com/fxml/1"> <columnConstraints> <ColumnConstraints hgrow="SOMETIMES" minWidth="10.0" percentWidth="27.0" prefWidth="100.0" /> <ColumnConstraints hgrow="SOMETIMES" minWidth="10.0" percentWidth="27.0" prefWidth="100.0" /> <ColumnConstraints hgrow="SOMETIMES" minWidth="10.0" percentWidth="27.0" prefWidth="100.0" /> <ColumnConstraints hgrow="SOMETIMES" minWidth="10.0" percentWidth="19.0" prefWidth="100.0" /> </columnConstraints> <rowConstraints> <RowConstraints minHeight="10.0" percentHeight="25.0" prefHeight="30.0" vgrow="SOMETIMES" /> <RowConstraints minHeight="10.0" percentHeight="25.0" prefHeight="30.0" vgrow="SOMETIMES" /> <RowConstraints minHeight="10.0" percentHeight="25.0" prefHeight="30.0" vgrow="SOMETIMES" /> <RowConstraints minHeight="10.0" percentHeight="25.0" prefHeight="30.0" vgrow="SOMETIMES" /> <RowConstraints minHeight="10.0" percentHeight="25.0" prefHeight="30.0" vgrow="SOMETIMES" /> </rowConstraints> <children> <StackPane maxHeight="1.7976931348623157E308" maxWidth="1.7976931348623157E308" GridPane.columnSpan="4"> <children> <TextField fx:id="input" alignment="CENTER_RIGHT" focusTraversable="false" maxHeight="1.7976931348623157E308" maxWidth="1.7976931348623157E308" styleClass="input" text="0" GridPane.columnSpan="4" /> <Label fx:id="description" styleClass="operation" StackPane.alignment="BOTTOM_LEFT" /> </children> </StackPane> <Label alignment="CENTER" maxHeight="1.7976931348623157E308" maxWidth="1.7976931348623157E308" onMouseClicked="#handleClick" text="3" GridPane.columnIndex="2" GridPane.rowIndex="3" /> <Label alignment="CENTER" maxHeight="1.7976931348623157E308" maxWidth="1.7976931348623157E308" onMouseClicked="#handleClick" text="9" GridPane.columnIndex="2" GridPane.rowIndex="1" /> <Label alignment="CENTER" maxHeight="1.7976931348623157E308" maxWidth="1.7976931348623157E308" onMouseClicked="#handleClick" text="2" GridPane.columnIndex="1" GridPane.rowIndex="3" /> <Label alignment="CENTER" maxHeight="1.7976931348623157E308" maxWidth="1.7976931348623157E308" onMouseClicked="#handleClick" text="1" GridPane.rowIndex="3" /> <Label alignment="CENTER" maxHeight="1.7976931348623157E308" maxWidth="1.7976931348623157E308" onMouseClicked="#handleClick" text="5" GridPane.columnIndex="1" GridPane.rowIndex="2" /> <Label alignment="CENTER" maxHeight="1.7976931348623157E308" maxWidth="1.7976931348623157E308" onMouseClicked="#handleClick" text="8" GridPane.columnIndex="1" GridPane.rowIndex="1" /> <Label alignment="CENTER" maxHeight="1.7976931348623157E308" maxWidth="1.7976931348623157E308" onMouseClicked="#handleClick" text="4" GridPane.rowIndex="2" /> <Label alignment="CENTER" maxHeight="1.7976931348623157E308" maxWidth="1.7976931348623157E308" onMouseClicked="#handleClick" text="7" GridPane.rowIndex="1" /> <Label alignment="CENTER" maxHeight="1.7976931348623157E308" maxWidth="1.7976931348623157E308" onMouseClicked="#handleClick" text="," GridPane.rowIndex="4" /> <Label fx:id="eq" alignment="CENTER" maxHeight="1.7976931348623157E308" maxWidth="1.7976931348623157E308" onMouseClicked="#handleEq" text="=" GridPane.columnIndex="2" GridPane.rowIndex="4" /> <Label alignment="CENTER" maxHeight="1.7976931348623157E308" maxWidth="1.7976931348623157E308" onMouseClicked="#handleClick" text="0" GridPane.columnIndex="1" GridPane.rowIndex="4" /> <Label alignment="CENTER" maxHeight="1.7976931348623157E308" maxWidth="1.7976931348623157E308" onMouseClicked="#handleClick" text="6" GridPane.columnIndex="2" GridPane.rowIndex="2" /> <GridPane styleClass="operations" GridPane.columnIndex="3" GridPane.rowIndex="1" GridPane.rowSpan="4"> <columnConstraints> <ColumnConstraints hgrow="SOMETIMES" minWidth="10.0" prefWidth="100.0" /> </columnConstraints> <rowConstraints> <RowConstraints minHeight="10.0" prefHeight="30.0" vgrow="SOMETIMES" /> <RowConstraints minHeight="10.0" prefHeight="30.0" vgrow="SOMETIMES" /> <RowConstraints minHeight="10.0" prefHeight="30.0" vgrow="SOMETIMES" /> <RowConstraints minHeight="10.0" prefHeight="30.0" vgrow="SOMETIMES" /> <RowConstraints minHeight="10.0" prefHeight="30.0" vgrow="SOMETIMES" /> </rowConstraints> <children> <Label alignment="CENTER" maxHeight="1.7976931348623157E308" maxWidth="1.7976931348623157E308" onMouseClicked="#clear" text="." /> <Label fx:id="divide" alignment="CENTER" maxHeight="1.7976931348623157E308" maxWidth="1.7976931348623157E308" onMouseClicked="#handleOperationSelect" text="÷" GridPane.rowIndex="1" /> <Label fx:id="multiply" alignment="CENTER" maxHeight="1.7976931348623157E308" maxWidth="1.7976931348623157E308" onMouseClicked="#handleOperationSelect" text="×" GridPane.rowIndex="2" /> <Label fx:id="subtract" alignment="CENTER" maxHeight="1.7976931348623157E308" maxWidth="1.7976931348623157E308" onMouseClicked="#handleOperationSelect" text="−" GridPane.rowIndex="3" /> <Label fx:id="add" alignment="CENTER" maxHeight="1.7976931348623157E308" maxWidth="1.7976931348623157E308" onMouseClicked="#handleOperationSelect" text="+" GridPane.rowIndex="4" /> </children> </GridPane> </children> <stylesheets> <URL value="@../../../style/base.css" /> <URL value="@../../../style/skin.css" /> <URL value="@Calculator.css" /> </stylesheets> </fx:root> We have unique fx: id, which we will use. For convenience, create an enumeration with operations:
public enum Operation { ADD, SUBTRACT, MULTIPLY, DIVIDE, EQ; } Now create your own org.hamcrest.Matcher implementation. We will pass our operation to the constructor, and then, resulting in lower case, we will compare with the incoming objects.
public class OperationMatcher implements Matcher<Node> { private Operation operation; public OperationMatcher(Operation operation) { this.operation = operation; } @Override public boolean matches(Object item) { if (item instanceof Labeled) { String expected = operation.toString().toLowerCase(); String id = ((Labeled)item).getId(); if (id != null) { if (expected.equals(id.toLowerCase())) { return true; } } } return false; } ... Of course, I have written a lot of superfluous here, but this is just to show that item is primarily a node and various checks and castings are applicable to it. Now we can use the GuiTest method:
public GuiTest click (Matcher matcher, MouseButton ... buttons), namely, create a method:
private void perform(Operation operation) { Matcher<Node> matcher = new OperationMatcher(operation); controller.click(matcher, MouseButton.PRIMARY); } So, it remains for us to check the resulting result. That is, to find a label (operation) and a textField (input) ... Nobody forbids us to write more matcher s - GuiTest naturally has a search method by matcher.
However, I’ll show another way, namely searching by styleClass (sleep is inserted again for simplicity - you have to wait for the drawing):
public void checkDescriptionField(String expectedText) throws InterruptedException { Thread.sleep(200); Node result = controller.find(".operation"); String actualText = ((Labeled) result).getText(); Assert.assertEquals(expectedText.trim(), actualText.trim()); } public void checkInputField(String expectedText) throws InterruptedException { Thread.sleep(200); Node result = controller.find(".input"); String actualText = ((TextField) result).getText(); Assert.assertEquals(expectedText.trim(), actualText.trim()); } It's time to write the simplest tests for addition and subtraction:
@Test public void testADD() throws InterruptedException { int digit1 = random.nextInt(1000); int digit2 = random.nextInt(1000); click(digit1); checkDescriptionField(String.valueOf(digit1)); checkInputField(String.valueOf(digit1)); perform(Operation.ADD); click(digit2); checkDescriptionField(digit1 + " + " + digit2); checkInputField(String.valueOf(digit2)); perform(Operation.EQ); checkInputField(String.valueOf(digit1 + digit2) + ",00"); } @Test public void testSubstract() throws InterruptedException { int digit1 = random.nextInt(1000); int digit2 = random.nextInt(1000); click(digit1); checkDescriptionField(String.valueOf(digit1)); checkInputField(String.valueOf(digit1)); perform(Operation.SUBTRACT); click(digit2); checkDescriptionField(digit1 + " − " + digit2); checkInputField(String.valueOf(digit2)); perform(Operation.EQ); checkInputField(String.valueOf(digit1 - digit2) + ",00"); } ", 00" for simplicity - it is clear what needs to be done through Formatters, it is clear that Threadsleep should be replaced with waiting, and clicks for event-throwing — then the tests will start to fly. But this is already beyond the scope of the story about the possibilities of TestFX.
By the way, I told you about TestFX of the third version - just a few weeks ago, alpha version 4.0.1 was released . Part of the testfx-legacy is especially interesting, but I will write about this when I dive deeper into the sources, - I will publish the article here in English.
The promised launch video of the tests written below:
Source: https://habr.com/ru/post/257981/
All Articles