PhoneGap for iOS and Android application development infrastructure
Today I will tell you about our experience in developing cross-platform mobile applications based on PhoneGap / Cordova. The project uses technologies such as HTML5, CSS3 and Angular.js. Grunt is used as a task manager to simplify and speed up the execution of routine tasks. All builds are compiled locally during the development process.
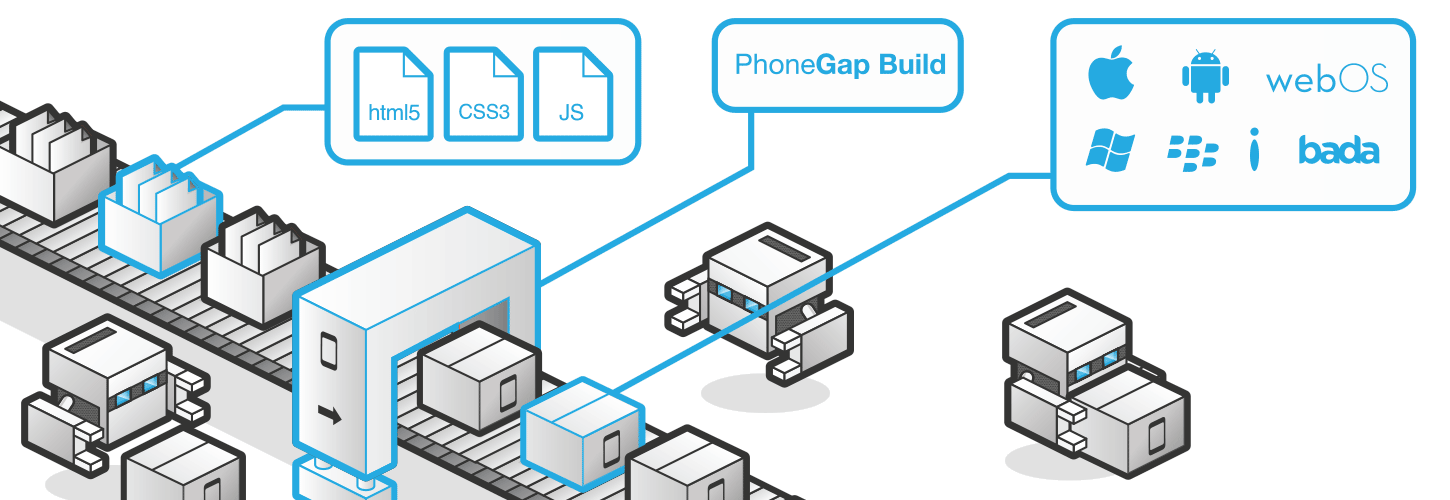
Source: build.phonegap.com
When the version is ready for the testing phase, it is compiled using PhoneGap Build and uploaded to Ubertesters , a mobile application distribution service that allows you to test quickly and efficiently on all connected devices. The app supports minimum iOS 6 and Android 4.1 (87.5% market share ).
To test the application locally, you need to install tools for PhoneGap / Cordova. It is important to make sure NodeJS is already installed, open a command prompt or Cygwin and do the following:
')
After the installation is complete, an empty project can be created and compiled for the required platform:
Note: phonegap = cordova. You can use cordova instead of phonegap when writing commands:
The build for iOS can only be done under Mac OS X (according to the terms of the Apple license agreement), there is no way to run the build for iOS under Windows.
The Android platform requires the SDK Tools; you can download it via the link (SDK Tools Only at the bottom of the page). Immediately after installation, you need to check in the Android SDK Manager that Android 5.0 (API level 21) was installed successfully. Android 5.0 is used as the target for the current version of Phonegap / Cordova in a local build.
• platforms - includes a separate code for each of the used platforms, compiles each time the build is performed;
• plugins are plugins used in the application. Plugins are described in more detail below;
• www - HTML5 based web application / Angular.js, PhoneGap / Cordova displays using the Web View system component;
• config.xml - the file must be located in the root folder of the project during the local assembly. PhoneGap Build requires a config.xml file in / www. The settings file is an important part of the PhoneGap-based project. It includes links to application resources, sets the necessary permissions and adjusts parameters for each of the platforms (for example, the status bar behavior). Application (bundle) id and publisher information must also be specified in config.xml.
A plugin is a package that allows you to automatically inject native code into an application and manage native methods from Cordova Web View. All the basic functions of the PhoneGap / Cordova API are implemented using plug-ins that provide access to device and platform features and functions that are not available to a regular web application: QR code scanning, NFC, Push notifications, and even Touch ID for iOS.
There is a registry of PhoneGap plugins. It is very important to use plug-ins compatible with the PhoneGap Build, otherwise assembly will be possible only locally.
To add a plug-in to a project during a local build, use the plugin add command from the project's root folder. The argument to this command is the URL of the Git repository containing the plugin code:
PhoneGap Build requires specifying an id in the config.xml file for each plug-in (something like dependencies). It is not necessary to indicate a specific version, but it is desirable, since different assemblies of the plug-in may be incompatible, and you will have to find out for a long time the reason for the sudden errors. Example from the plugin page:
Relevant .js files must be imported on the HTML page:
All plugins usually have documentation (though not always detailed) on GitHub.
Since we are using the Angular.js framework, and not pure JavaScript, an additional component is required to wrap plugins. It is called ngCordova.
ngCordova is a collection of more than 60 Angular.js extensions based on the Cordova API, which allows you to simplify the creation, testing and building of mobile applications PhoneGap / Cordova. The project is supported and developed by the Ionic Framework team. ngCordova provides simple Angular.js wrappers for the most popular and frequently used PhoneGap / Cordova plug-ins and allows you to take a photo, scan a QR code, upload a file, turn on the flash, get the current location, and much more with a few lines of code.
For the local assembly, it is still necessary to add a plugin with the command:
PhoneGap Build requires a link to the plugin id in config.xml:
ng-cordova.js is imported from the ngCordova package , the script tag must be located after importing angular.js, otherwise errors will appear that are not related to the project:
It is important to remember to add the ngCordova dependency to the module:
Each ngCordova wrapper has its own documentation . Plugin for Push notifications and QR scanner were used and tested in our project. The QR code scanner (Barcode Scanner) was integrated without any problems, you can even say "out-of-the-box", but the Push plug-in setup took quite a long time due to the lack of documentation - I had to gather information while viewing the huge list of issues on GitHub 'e.
Brief documentation is available on the ngCordova plugin page.
Important! Payload part of the push notification sent from the server must follow a certain format, otherwise there may be problems with the automatic appearance of notifications in the system tray.
It was found that the data object must have a “message” field (as notification text) and a “title” (if absent, the notification title will be empty). The “uri” field is necessary in order to specify the action that is performed when the notification is opened.
It is also important to note that the notificationReceived listener is triggered when the application is in the foreground, as well as in the case when the user opens the notification (transition from background to foreground). Push notifications appear automatically in the background and continue to arrive even after rebooting the system.
Brief documentation is available on the ngCordova plugin page.
At the moment when the application was developed, the part of the backend that is responsible for sending Apple Push notifications (APNS) was not ready. We decided to use a temporary solution for testing and debugging. Node Push Server was selected initially (as there were recommendations in some Phonegap / Cordova manuals), but during testing it turned out that it lacks support for custom fields for Push notifications on iOS (only badge, alert and sound are supported , and we need to transfer uri to open a certain page) and because of problems with the format it does not work correctly on iOS 6 and iOS 7 (the counter on the icon is not displayed).
There are several common solutions on the market, but we chose the Parse.com platform for our test notifications on iOS, because Free Plan conditions are sufficient for the development and testing process.
To set up notifications: first you need to register and go to the settings, “Settings” section, then go to the “Push” section in order to enable the processing of push notifications and download the required certificate (* .p12). You can learn more about how Apple Push Notification Service works here .
- What is PhoneGap Build?
PhoneGap Build is a free cloud service built on the basis of PhoneGap / Cordova, which allows you to build cross-platform mobile applications.
- Why do we need PhoneGap Build?
PhoneGap Build allows you to build for iOS, Android and Windows Phone at the same time, without having to install any SDK tools (of course, there is a share of cunning in this - it’s still better to build the build locally, at least on Android, before sending it for testing) . But more importantly, this service allows you to build for iOS in the cloud without a Mac.
PhoneGap Build has its own REST API , which can be used to automate the creation and updating of projects, run the build under iOS, Android and Windows Phone (you can choose the platform). If you use GitHub, it is possible to configure the service for automatic assembly after each commit in the repository. The REST API allows you to authorize each HTTP request to the server using a token, rather than passing the username and password in the header.
To use PhoneGap Build, you need to make settings:
- After registration, go to the "create new app". It is necessary to download the zipped contents of the www, config.xml folder should be inside. Access to private GitHub repositories is available only in the paid version of the account).
- Next, go to the account settings: click on the icon in the right corner, “Edit account” -> “Signing keys”, add the required certificates and keys (the build for iOS will be interrupted if there is no certificate * .p12 and profile, the build for Android will be completed in AdHoc mode, if the key is missing).
After the installation packages for all the required platforms are generated using PhoneGap Build, you can manually upload them to the distribution service. There are many alternatives: HockeyApp, TestFlight, TestFairy, but then we will look at Ubertesters and learn how to automate the assembly and distribution with the ability to integrate the Ubertesters Upload API.
- Why Ubertesters?
The features and benefits of this service are discussed in this article .
Ubertesters provides an SDK for all major platforms (even Phonegap / Cordova). Upload API, as already mentioned, allows you to use continuous integration and automate distribution.
To open access to the Upload API, go to the profile page.
Documentation is available here .
To allow automatic distribution of testers and developers teams to devices, you need to create a default distribution group: “Administration” -> “Distribution Groups” -> “Add distribution group”, select the “Default group” checkbox. Since in our case 2 platforms are supported, you need to remember to perform the operation for each of the projects (iOS and Android).
There are several ways to automate the build process for applications on PhoneGap / Cordova. Grunt , Ant , Maven can be used as a task manager and as a medium for continuous integration Jenkins CI or Team City .
Grunt requires two files: package.json (it defines dependencies and basic settings) and gruntfile.js (task configuration).
First you need to install grunt-cli:
Dependencies specified in package.json can be satisfied using npm install
All necessary modules will be installed in / node_modules
But you also need to install grunt-phonegap-build manually:
A sample of Gruntfile.js is available on Dropbox:
Several parameters need to be set before use:
Next, we will look at all the Grunt task manager tasks used in the project in the order in which they are used in the script.
We get the current version from the PhoneGap Build service using an HTTP GET request:
Methods and documentation PhoneGap Build Read API available on the link .
The result of http: phonegap_build_version is returned in JSON format and saved to the specified path:
At the moment, the script has a bug: phonegap_app.json must be created manually before launch (you can simply create an empty JSON file). The current version is passed as a parameter to modify_json.
Updates the value of the current version in package.json.
Magikarp increments the current version in package.json. Options available: major, minor and build.
The incremented version from package.json is passed to xmlpoke.
Changes the version in www / config.xml.
Compresses the contents of the www folder (not the folder itself, this is important!), Excluding unnecessary files. The compressed zip file is saved to the specified target / phonegapp.zip path.
At the moment, debug and release are no different (release key is not yet generated for Android). The compressed zip file is sent to the PhoneGap Build service. The task is completed only after the build (ios / android) and save the installation packages (ipa / apk).
Methods and documentation PhoneGap Build Write API methods are available here .
This task uploads the ipa assembly to Ubertesters using the Upload API. Here you can use any mobile application distribution service if it has a REST API.
The same task, but for Android apk.
Grunt is started locally using the 'grunt' command or on a configured build server (TeamCity in our case). It is also possible to customize TeamCity to trigger the build and distribution process at every commit.
So you can save a lot of time, using the integration integration when building and testing mobile applications.
Automating PhoneGap builds
Mobile App Distribution Services for iOS. Part 3: Ubertesters
Source: build.phonegap.com
When the version is ready for the testing phase, it is compiled using PhoneGap Build and uploaded to Ubertesters , a mobile application distribution service that allows you to test quickly and efficiently on all connected devices. The app supports minimum iOS 6 and Android 4.1 (87.5% market share ).
Setting up a local assembly and project structure
To test the application locally, you need to install tools for PhoneGap / Cordova. It is important to make sure NodeJS is already installed, open a command prompt or Cygwin and do the following:
')
npm install -g phonegap After the installation is complete, an empty project can be created and compiled for the required platform:
phonegap create my-app cd my-app phonegap platform add android phonegap run android Note: phonegap = cordova. You can use cordova instead of phonegap when writing commands:
cordova run android The build for iOS can only be done under Mac OS X (according to the terms of the Apple license agreement), there is no way to run the build for iOS under Windows.
The Android platform requires the SDK Tools; you can download it via the link (SDK Tools Only at the bottom of the page). Immediately after installation, you need to check in the Android SDK Manager that Android 5.0 (API level 21) was installed successfully. Android 5.0 is used as the target for the current version of Phonegap / Cordova in a local build.
Application structure
Files and folders
• platforms - includes a separate code for each of the used platforms, compiles each time the build is performed;
• plugins are plugins used in the application. Plugins are described in more detail below;
• www - HTML5 based web application / Angular.js, PhoneGap / Cordova displays using the Web View system component;
• config.xml - the file must be located in the root folder of the project during the local assembly. PhoneGap Build requires a config.xml file in / www. The settings file is an important part of the PhoneGap-based project. It includes links to application resources, sets the necessary permissions and adjusts parameters for each of the platforms (for example, the status bar behavior). Application (bundle) id and publisher information must also be specified in config.xml.
Plugins
A plugin is a package that allows you to automatically inject native code into an application and manage native methods from Cordova Web View. All the basic functions of the PhoneGap / Cordova API are implemented using plug-ins that provide access to device and platform features and functions that are not available to a regular web application: QR code scanning, NFC, Push notifications, and even Touch ID for iOS.
There is a registry of PhoneGap plugins. It is very important to use plug-ins compatible with the PhoneGap Build, otherwise assembly will be possible only locally.
To add a plug-in to a project during a local build, use the plugin add command from the project's root folder. The argument to this command is the URL of the Git repository containing the plugin code:
cordova plugin add https://github.com/phonegap-build/PushPlugin.git PhoneGap Build requires specifying an id in the config.xml file for each plug-in (something like dependencies). It is not necessary to indicate a specific version, but it is desirable, since different assemblies of the plug-in may be incompatible, and you will have to find out for a long time the reason for the sudden errors. Example from the plugin page:
<gap:plugin name="com.phonegap.plugins.pushplugin" version="2.4.0" /> Relevant .js files must be imported on the HTML page:
<script type="text/javascript" charset="utf-8" src="PushNotification.js"></script> All plugins usually have documentation (though not always detailed) on GitHub.
Since we are using the Angular.js framework, and not pure JavaScript, an additional component is required to wrap plugins. It is called ngCordova.
ngCordova
ngCordova is a collection of more than 60 Angular.js extensions based on the Cordova API, which allows you to simplify the creation, testing and building of mobile applications PhoneGap / Cordova. The project is supported and developed by the Ionic Framework team. ngCordova provides simple Angular.js wrappers for the most popular and frequently used PhoneGap / Cordova plug-ins and allows you to take a photo, scan a QR code, upload a file, turn on the flash, get the current location, and much more with a few lines of code.
For the local assembly, it is still necessary to add a plugin with the command:
cordova plugin add https://github.com/phonegap-build/PushPlugin.git PhoneGap Build requires a link to the plugin id in config.xml:
<gap:plugin name="com.phonegap.plugins.pushplugin" version="2.4.0" /> ng-cordova.js is imported from the ngCordova package , the script tag must be located after importing angular.js, otherwise errors will appear that are not related to the project:
<script src="scripts/angular.js"></script> <script src="scripts/ng-cordova.js"></script> It is important to remember to add the ngCordova dependency to the module:
angular.module('application', [ 'ngCordova' ]) Each ngCordova wrapper has its own documentation . Plugin for Push notifications and QR scanner were used and tested in our project. The QR code scanner (Barcode Scanner) was integrated without any problems, you can even say "out-of-the-box", but the Push plug-in setup took quite a long time due to the lack of documentation - I had to gather information while viewing the huge list of issues on GitHub 'e.
Push notifications for Android (Google Cloud Messaging)
Brief documentation is available on the ngCordova plugin page.
Important! Payload part of the push notification sent from the server must follow a certain format, otherwise there may be problems with the automatic appearance of notifications in the system tray.
It was found that the data object must have a “message” field (as notification text) and a “title” (if absent, the notification title will be empty). The “uri” field is necessary in order to specify the action that is performed when the notification is opened.
{ "data": { "message": "New message. You have 5 unread messages", "title": "Your Application", "uri": "http://www.yourapp.com/messages" } } It is also important to note that the notificationReceived listener is triggered when the application is in the foreground, as well as in the case when the user opens the notification (transition from background to foreground). Push notifications appear automatically in the background and continue to arrive even after rebooting the system.
Uri can be obtained in the condition 'message' of the structure of the switch case listener.
$rootScope.$on('$cordovaPush:notificationReceived', function(event, notification) { console.log(notification); switch (notification.event) { case 'registered': if (notification.regid.length > 0) { registerOnServer(notification.regid); } break; case 'message': console.log('message!'); utils.goToApiUrl(notification.payload.uri); break; case 'error': console.log('GCM error: ' + notification.msg); break; default: console.log('An unknown GCM event has occurred: ' + notification.event); break; } }); Push notifications on iOS
Brief documentation is available on the ngCordova plugin page.
At the moment when the application was developed, the part of the backend that is responsible for sending Apple Push notifications (APNS) was not ready. We decided to use a temporary solution for testing and debugging. Node Push Server was selected initially (as there were recommendations in some Phonegap / Cordova manuals), but during testing it turned out that it lacks support for custom fields for Push notifications on iOS (only badge, alert and sound are supported , and we need to transfer uri to open a certain page) and because of problems with the format it does not work correctly on iOS 6 and iOS 7 (the counter on the icon is not displayed).
There are several common solutions on the market, but we chose the Parse.com platform for our test notifications on iOS, because Free Plan conditions are sufficient for the development and testing process.
To set up notifications: first you need to register and go to the settings, “Settings” section, then go to the “Push” section in order to enable the processing of push notifications and download the required certificate (* .p12). You can learn more about how Apple Push Notification Service works here .
Sample code based on ngCordova documentation
function registerInCordova() { var iosConfig = { "badge": true, "sound": true, "alert": true, }; var authHeader = { headers: { 'X-Parse-Application-Id': 'YOUR_APPLICATION_ID', 'X-Parse-REST-API-Key': 'YOUR_REST_API_KEY', 'Content-Type': 'application/json' } }; $cordovaPush.register(iosConfig).then(function(deviceToken) { // Success -- send deviceToken to server, and store for future use console.log("deviceToken: " + deviceToken); $http.post("https://api.parse.com/1/installations", { "deviceType": "ios", "deviceToken": deviceToken, "channels": ["ALL"] }); }, function(err) { console.log("Registration error: " + err); }); } </spoiler> 'YOUR_APPLICATION_ID' 'YOUR_REST_API_KEY' “Settings” -> “Keys”. listener' , foreground background' foreground ( push ). <spoiler title=" listener'"> <source lang="javascript"> function registerForegroundListener() { $rootScope.$on('$cordovaPush:notificationReceived', function(event, notification) { console.log("Notification: " + JSON.stringify(notification)); if (notification.sound) { var snd = new Media(event.sound); snd.play(); } if (notification.badge) { $cordovaPush.setBadgeNumber(notification.badge).then(function(result) { console.log("Badge set successfully"); }, function(err) { console.log("Error on badge setting: " + err); }); } if (notification.uri) { utils.goToApiUrl(notification.uri); } }); } To send Push notifications via Parse.com to all registered devices, you must perform an HTTP POST request
curl -X POST \ -H "X-Parse-Application-Id: YOUR_APPLICATION_ID" \ -H "X-Parse-REST-API-Key: YOUR_API_KEY" \ -H "Content-Type: application/json" \ -d '{ "channels": [ "" ], "data": { "alert": "New Messages", "badge": 3, "uri": "api/messages" } }' \ https://api.parse.com/1/push Phonegap build
- What is PhoneGap Build?
PhoneGap Build is a free cloud service built on the basis of PhoneGap / Cordova, which allows you to build cross-platform mobile applications.
- Why do we need PhoneGap Build?
PhoneGap Build allows you to build for iOS, Android and Windows Phone at the same time, without having to install any SDK tools (of course, there is a share of cunning in this - it’s still better to build the build locally, at least on Android, before sending it for testing) . But more importantly, this service allows you to build for iOS in the cloud without a Mac.
PhoneGap Build has its own REST API , which can be used to automate the creation and updating of projects, run the build under iOS, Android and Windows Phone (you can choose the platform). If you use GitHub, it is possible to configure the service for automatic assembly after each commit in the repository. The REST API allows you to authorize each HTTP request to the server using a token, rather than passing the username and password in the header.
To use PhoneGap Build, you need to make settings:
- After registration, go to the "create new app". It is necessary to download the zipped contents of the www, config.xml folder should be inside. Access to private GitHub repositories is available only in the paid version of the account).
- Next, go to the account settings: click on the icon in the right corner, “Edit account” -> “Signing keys”, add the required certificates and keys (the build for iOS will be interrupted if there is no certificate * .p12 and profile, the build for Android will be completed in AdHoc mode, if the key is missing).
After the installation packages for all the required platforms are generated using PhoneGap Build, you can manually upload them to the distribution service. There are many alternatives: HockeyApp, TestFlight, TestFairy, but then we will look at Ubertesters and learn how to automate the assembly and distribution with the ability to integrate the Ubertesters Upload API.
Ubertesters
- Why Ubertesters?
The features and benefits of this service are discussed in this article .
Ubertesters provides an SDK for all major platforms (even Phonegap / Cordova). Upload API, as already mentioned, allows you to use continuous integration and automate distribution.
To open access to the Upload API, go to the profile page.
Documentation is available here .
Installation packages (ipa / apk) can be downloaded using curl
curl -X POST http://beta.ubertesters.com/api/client/upload_build.json -H "X-UbertestersApiKey:PERSONAL_API_KEY" -F "file=@upload.ipa" -F "title=build title" -F "notes=build notes" -F "status=in_progress" -F "stop_previous=true" To allow automatic distribution of testers and developers teams to devices, you need to create a default distribution group: “Administration” -> “Distribution Groups” -> “Add distribution group”, select the “Default group” checkbox. Since in our case 2 platforms are supported, you need to remember to perform the operation for each of the projects (iOS and Android).
Task automation
There are several ways to automate the build process for applications on PhoneGap / Cordova. Grunt , Ant , Maven can be used as a task manager and as a medium for continuous integration Jenkins CI or Team City .
Grunt configuration
Grunt requires two files: package.json (it defines dependencies and basic settings) and gruntfile.js (task configuration).
First you need to install grunt-cli:
npm install -g grunt-cli You can use the following settings for package.json
{ "name": "Your application", "version":"1.0.0", "description": "Your App", "main": "index.html", "author": "", "licenses": "", "devDependencies": { "form-data": "^0.2.0", "fs": "0.0.2", "grunt": "0.4.5", "grunt-contrib-compress": "0.9.1", "grunt-http": "^1.6.0", "grunt-magikarp": "^0.2.5", "grunt-modify-json": "^0.1.1", "grunt-xmlpoke": "^0.8.0", "needle": "", "read": "~1.0.4" } } Dependencies specified in package.json can be satisfied using npm install
All necessary modules will be installed in / node_modules
But you also need to install grunt-phonegap-build manually:
npm install grunt-phonegap-build A sample of Gruntfile.js is available on Dropbox:
Several parameters need to be set before use:
- var PHONEGAP_API_ID = "YOUR_PHONEGAP_API_ID";
- var PHONEGAP_TOKEN = "YOUR_PHONEGAP_TOKEN";
- var UBERTESTERS_API_KEY = "YOUR_UBERTESTERS_API_KEY";
- In the phonegap-build task configuration, the password for the iOS certificate must be specified.
Next, we will look at all the Grunt task manager tasks used in the project in the order in which they are used in the script.
Grunt Task List
1) http: phonegap_build_version
We get the current version from the PhoneGap Build service using an HTTP GET request:
http://build.phonegap.com/api/v1/apps/' + PHONEGAP_API_ID + '?auth_token=' + PHONEGAP_TOKEN Methods and documentation PhoneGap Build Read API available on the link .
2) readCurrentVersion
The result of http: phonegap_build_version is returned in JSON format and saved to the specified path:
ubertesters_response/phonegap_app.json At the moment, the script has a bug: phonegap_app.json must be created manually before launch (you can simply create an empty JSON file). The current version is passed as a parameter to modify_json.
3) modify_json
Updates the value of the current version in package.json.
4) magikarp
Magikarp increments the current version in package.json. Options available: major, minor and build.
5) readNextVersion
The incremented version from package.json is passed to xmlpoke.
6) xmlpoke
Changes the version in www / config.xml.
7) compress
Compresses the contents of the www folder (not the folder itself, this is important!), Excluding unnecessary files. The compressed zip file is saved to the specified target / phonegapp.zip path.
8) phonegap-build: debug
At the moment, debug and release are no different (release key is not yet generated for Android). The compressed zip file is sent to the PhoneGap Build service. The task is completed only after the build (ios / android) and save the installation packages (ipa / apk).
Methods and documentation PhoneGap Build Write API methods are available here .
9) http: ubertesters_ios
This task uploads the ipa assembly to Ubertesters using the Upload API. Here you can use any mobile application distribution service if it has a REST API.
10) http: ubertesters_android
The same task, but for Android apk.
11) PROFIT!
Grunt is started locally using the 'grunt' command or on a configured build server (TeamCity in our case). It is also possible to customize TeamCity to trigger the build and distribution process at every commit.
So you can save a lot of time, using the integration integration when building and testing mobile applications.
useful links
Automating PhoneGap builds
Mobile App Distribution Services for iOS. Part 3: Ubertesters
Source: https://habr.com/ru/post/257749/
All Articles