Super-fast start with Arduino: you take and do
When I started to do Arduino, it seemed to me that the whole world does nothing that does the same. In fact, it turned out that, like me, many simply find it difficult to start, “to enter” into the topic itself. So I decided to write a quick guide so that you could immediately take a few components and try this toy. Probably, after reading, you will even immediately understand in many ways what's what and without my future posts. So.

If you have not tried Arduino just because you can’t start without knowing what’s what, I’ll save you now.
Arduino is just like a Lego. But when they begin to explain it, a bunch of buzzwords pops up: development environment, hardware, stone, firmware, library, driver, sketch, executable file, components, programming skills, hardware and software, an arduino-compatible platform ... Yes, who wants it? it will come down, it is necessary to complicate a simple set of toys for children! =)
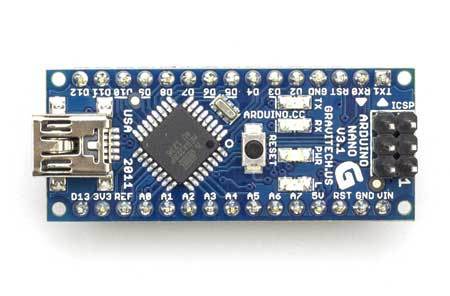
In fact, everything is simple: we have Arduino herself - this is the brain of our future toys, which we will assemble with her.
')
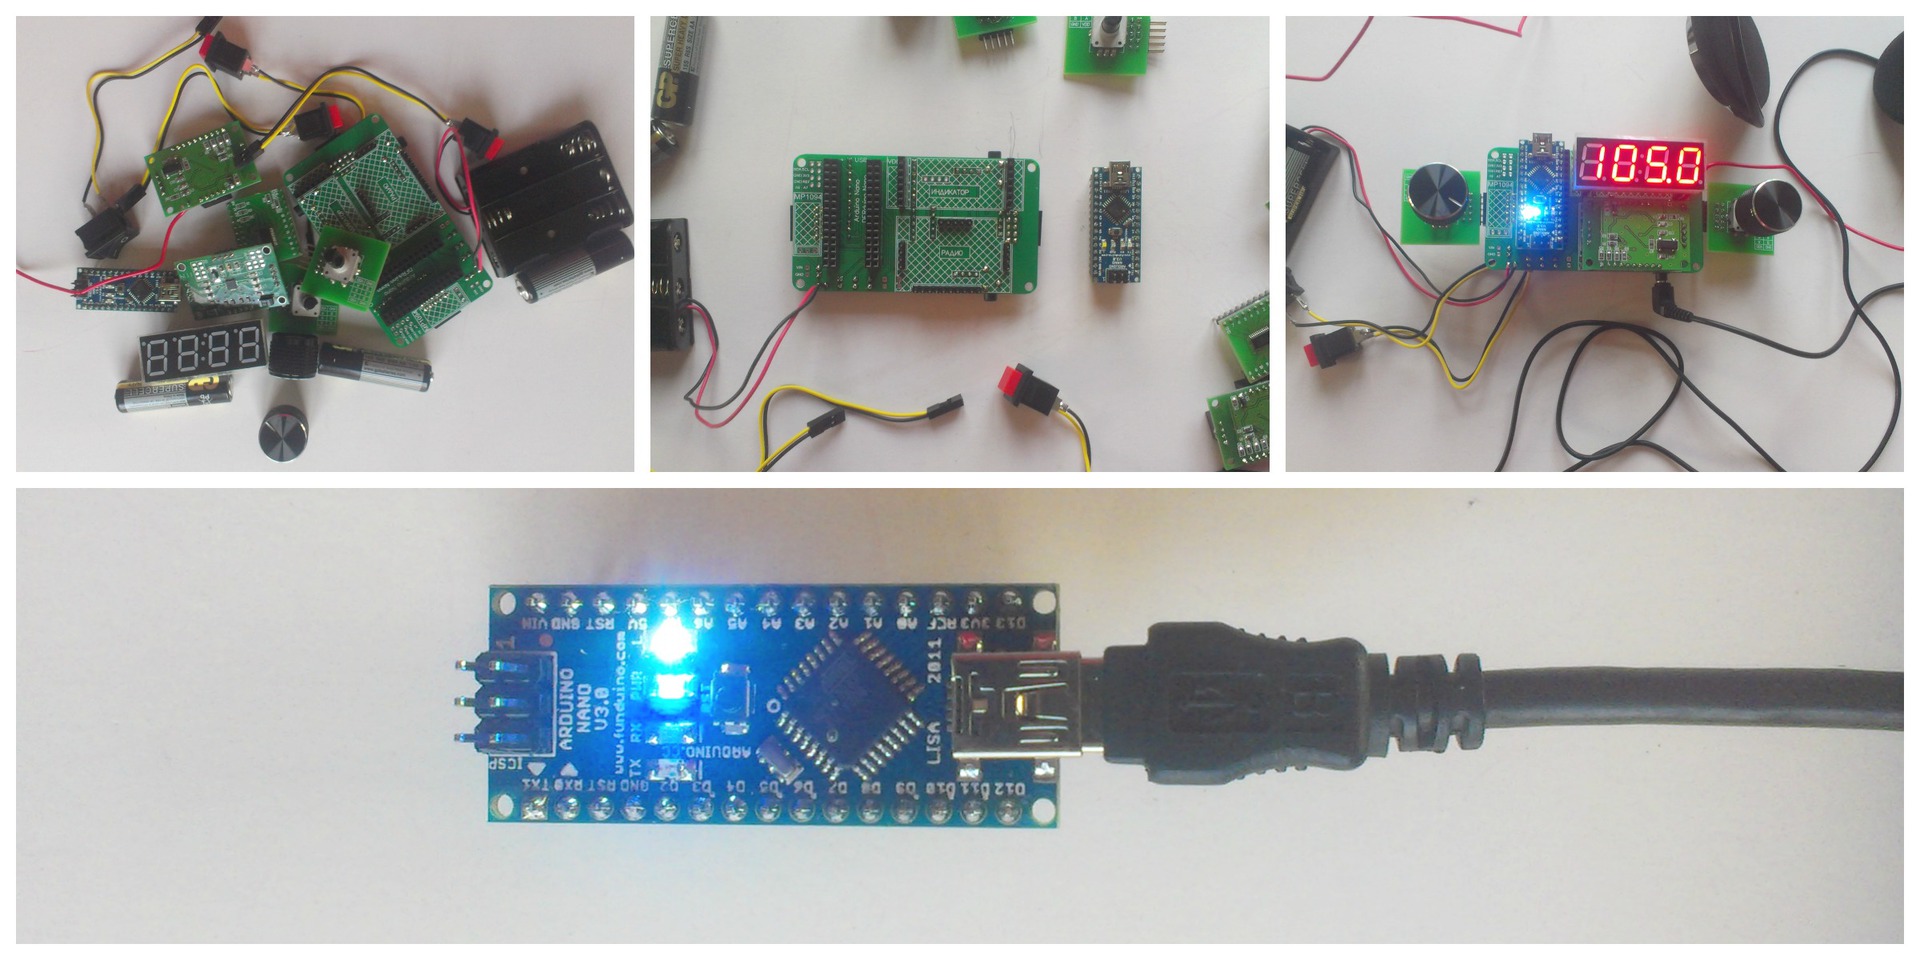
We have two ready-made shields to choose from. Why? We are now “plugging” Arduin into one shilda, see how it works, and then reprogram it and plug it into another - and again make sure that it works. So it will immediately become clear to us, and we will be able to move on - the benefit of the development directions together with Arduinoy is a lot.

The first shilda is super interesting. From it we will make a radio , which I will talk a lot about, but not now. The set is good because it has many components and can be differently build on the final functionality of the device. But all this later. Arduino in this set is already there, so it does not need to buy separately. The second shilda is super beautiful. With her, we will comfortably and intricately illuminate our world. About her, I also plan to tell a lot of things, but later. You can choose any other shields, but I liked these very ones, because, looking ahead, they have a great future;)
The action plan now is this: connect and reprogram our Arduin to see how it works and make sure that it is simple. Understand what will happen next.
Take this set . We collect radio according to the instructions . It's just how to collect a toy from the kinder surprise. Only much more exciting!
What did we just do? We “tied” the components into the finished shield, “stuck” in it to Arduin with the preloaded sketch for the operation of all these components. Everything, we have a ready device. And it works! =)
Everything, with the first shield, we saw how it all is going and working. Now - the most important thing: DISABLE POWER. We reach Arduino and take the following Shilda.
Our new shield, if you believe the inscriptions on it, is called MP 1051. Arduino has no eyes, so she does not know this shield and cannot work with it for now. Now we fix it.
In order for Arduin to know where on this shield there is, and what is there, we need this library . And in order for her to start manipulating this with all of us, we need some of these sketches - let's start from the first: we don't need a remote control for it.
You can load the library and sketch into Arduino using the IDE program. If the Arduino designer itself is similar to Lego, then the IDE program is similar to iTunes: in order to download music to your phone, do you need a special program? Millions of people cope with this task, we will cope with the IDE.
1. Download IDE here .
2. Install IDE as a normal program.
Learn more: for Windows
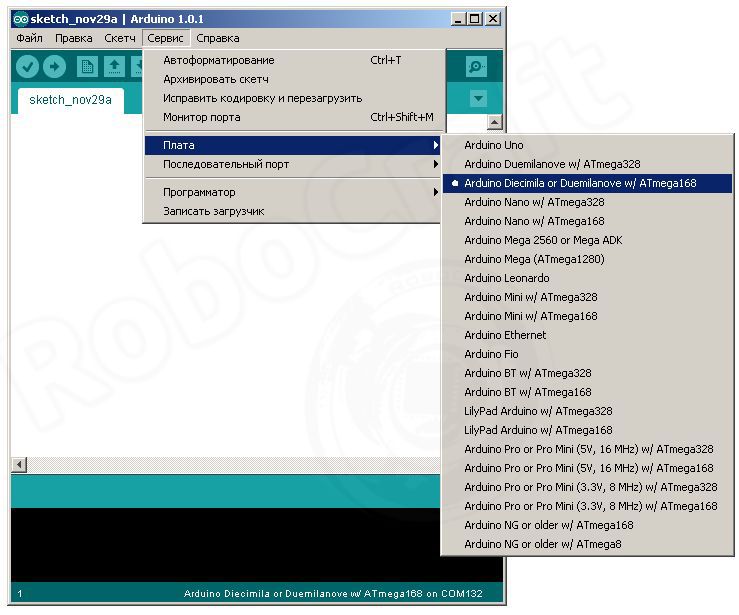
3. Connect Arduin via USB
4. Run IDE (with super-user rights, if it tells you something. If not, then hammer on these rights. If yes, download version 1.0.1 - everything older than that, on Linux, it works crookedly ).
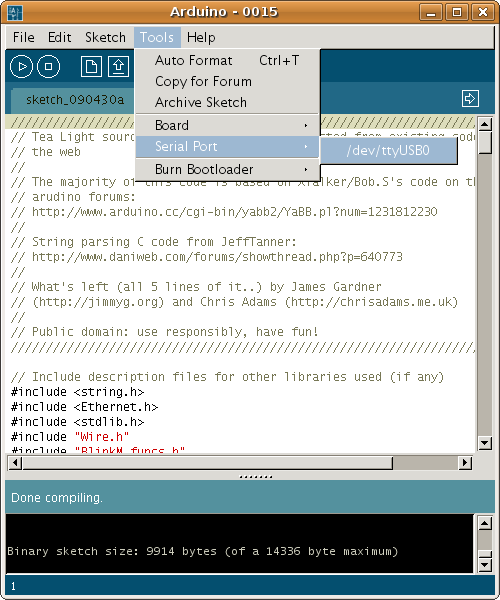
5. Select the type of Arduine. (Most likely, it will be selected automatically. But we have Amtel Mega 328p on the top of the Arduino Nano 3.0 kit and on the square processor, which means, choose Nano ATmega328 from the menu).
6. Check if the computer sees Arduin: you can see its port through which we connected it.
All is ready? Now let's deal with what to load and how, and after 5 minutes light bulbs (diodes!) On our new shield will be fun to light our house.
This is where the magic begins! =) But, for some reason, it was precisely by this exciting moment that the explanations were the most boring:
In order to program the microcontroller, we have three types of files: .h, .cc, .ino Files are compiled, the libraries are addressed. All of this is written in C, which operates with functions, variables, and then, so that a program written in C can be understood by the microcontroller, it is translated into machine code - compiled and then loaded into the controller ... you have no idea how much we care about it =) Everything is much simpler.
Library
Download the library for our new MP1051 shield.
Sketches
Everything! Let's quickly unite the Library + Sketch, compile them into machine code and download to the controller. It is fast.
Done!
Important:
As you can see, we never even opened a single sketch, and if they did, they didn’t open it for long. This is the beauty of libraries and sketches that have already been written under certain shields and components for Arduino.
If you now return Arduino to its place, to the radio shield (Important! De-energize the fee before changing to the shield!), Then the radio will no longer “work”. Want to return everything as it was? You already know how to do it!
Pay attention to the folders we need - libraries and examples. And also that the name of folders and files should be written in Latin in one word. You can use numbers and underscores. So, we return everything as it was:
Here are libraries for radio
Here is a sketch
Open all the necessary libraries (see the image.) + Copy the sketch here. Compile. Download. Done! You can put Arduino back into the radio shield and switch it on again (radio).
So quickly we have dealt with:
1. How to reprogram Arduino under different shilda using ready-made sketches and libraries.
2. Why do we need a sketch, why do we need a library. What to put.
3. How to work with the Arduino IDE program to upload a sketch with the library.
As you can see, everything is simple. It took me several days to “drive in” on my own. I hope someone I will save these few days. Good luck to you with Arduino DIY and see you soon: I’m planning a lot more to figure out on the basis of the modules and components I have and I’ll share with you ideas and skills.
Traditionally, at the end of the article - thanks!
Many thanks to user Alexey Korotich for sending useful links specifically for this article:
Arduino Video Tutorials on Youtube
RoboCraft
Official website manuals
A series of articles Arduino for beginners
If you have not tried Arduino just because you can’t start without knowing what’s what, I’ll save you now.
Arduino is just like a Lego. But when they begin to explain it, a bunch of buzzwords pops up: development environment, hardware, stone, firmware, library, driver, sketch, executable file, components, programming skills, hardware and software, an arduino-compatible platform ... Yes, who wants it? it will come down, it is necessary to complicate a simple set of toys for children! =)
In fact, everything is simple: we have Arduino herself - this is the brain of our future toys, which we will assemble with her.
')
We have two ready-made shields to choose from. Why? We are now “plugging” Arduin into one shilda, see how it works, and then reprogram it and plug it into another - and again make sure that it works. So it will immediately become clear to us, and we will be able to move on - the benefit of the development directions together with Arduinoy is a lot.
The first shilda is super interesting. From it we will make a radio , which I will talk a lot about, but not now. The set is good because it has many components and can be differently build on the final functionality of the device. But all this later. Arduino in this set is already there, so it does not need to buy separately. The second shilda is super beautiful. With her, we will comfortably and intricately illuminate our world. About her, I also plan to tell a lot of things, but later. You can choose any other shields, but I liked these very ones, because, looking ahead, they have a great future;)
The action plan now is this: connect and reprogram our Arduin to see how it works and make sure that it is simple. Understand what will happen next.
Step 1: Assemble the first shilda
Take this set . We collect radio according to the instructions . It's just how to collect a toy from the kinder surprise. Only much more exciting!
What did we just do? We “tied” the components into the finished shield, “stuck” in it to Arduin with the preloaded sketch for the operation of all these components. Everything, we have a ready device. And it works! =)
Step 2: Install IDE
Everything, with the first shield, we saw how it all is going and working. Now - the most important thing: DISABLE POWER. We reach Arduino and take the following Shilda.
Our new shield, if you believe the inscriptions on it, is called MP 1051. Arduino has no eyes, so she does not know this shield and cannot work with it for now. Now we fix it.
In order for Arduin to know where on this shield there is, and what is there, we need this library . And in order for her to start manipulating this with all of us, we need some of these sketches - let's start from the first: we don't need a remote control for it.
Mistress note:
If Arduino is a head, a brain, then:
A library is .h files and .cc files are arms and legs. That is what you can walk, run, dance, shine. The library gives Arduin an idea of what she (Arduin) “stuck” into and what she can now shine-move.
The sketch is the .ino files, and, in fact, it is the dance itself, the walk itself, the blink sequence itself or the brightness of the glow - in short, the sketch is responsible for what Arduina with her hands and feet does.
You can load the library and sketch into Arduino using the IDE program. If the Arduino designer itself is similar to Lego, then the IDE program is similar to iTunes: in order to download music to your phone, do you need a special program? Millions of people cope with this task, we will cope with the IDE.
1. Download IDE here .
2. Install IDE as a normal program.
Learn more: for Windows
3. Connect Arduin via USB
4. Run IDE (with super-user rights, if it tells you something. If not, then hammer on these rights. If yes, download version 1.0.1 - everything older than that, on Linux, it works crookedly ).
5. Select the type of Arduine. (Most likely, it will be selected automatically. But we have Amtel Mega 328p on the top of the Arduino Nano 3.0 kit and on the square processor, which means, choose Nano ATmega328 from the menu).
6. Check if the computer sees Arduin: you can see its port through which we connected it.
All is ready? Now let's deal with what to load and how, and after 5 minutes light bulbs (diodes!) On our new shield will be fun to light our house.
Troubleshooting:
If the port is not found, disconnect everything and close the program. Connect Arduino again, you can at the new port, open the program. This is similar to the mobile application on your phone: if it hangs, you restart it and it works again. Here is the same principle of troubleshooting. =)
Step 3: Use the sketch and library as intended
This is where the magic begins! =) But, for some reason, it was precisely by this exciting moment that the explanations were the most boring:
In order to program the microcontroller, we have three types of files: .h, .cc, .ino Files are compiled, the libraries are addressed. All of this is written in C, which operates with functions, variables, and then, so that a program written in C can be understood by the microcontroller, it is translated into machine code - compiled and then loaded into the controller ... you have no idea how much we care about it =) Everything is much simpler.
Library
Download the library for our new MP1051 shield.
- Unpack it - you will get the folder MP1051
- Go to where you have your Arduino IDE program with its folders.
In my case, it was the Downloads folder - where I downloaded the program, it lies in my place, and from there it starts up - nothing complicated.
- Copy the resulting MP1051 folder into the libraries folder
Sketches
- Download a set of sketches / drivers for our new MP1051 shield.
- Unpack
- Take the resulting examples folder and put it in MP1051, which is already in the libraries. Or - in the examples folder, all the same, in the directory of the Arduino program, but then it will have to be renamed to something.
Everything! Let's quickly unite the Library + Sketch, compile them into machine code and download to the controller. It is fast.
- Connect Arduino via USB
- Open IDE
- Select: Sketch - Import Library - MP1051 (will appear in the drop-down menu among other libraries)
- Select: File - Examples - MP1051 - Step_1
- Click: Tick (= Check)
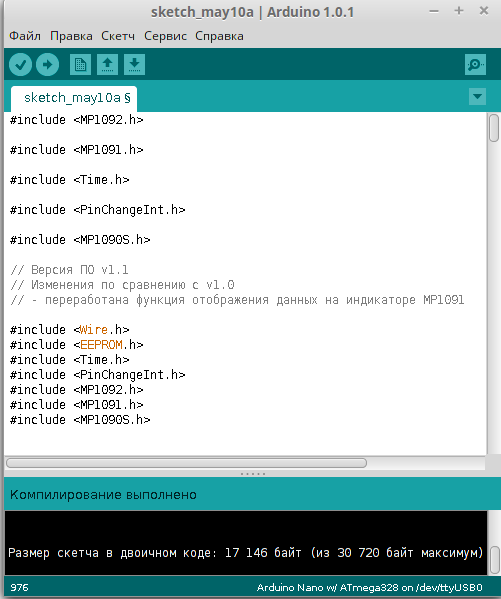
Happens: Compiling - Compiling complete
- Click: Right arrow (= Load sketch to Arduino)
Occurs: Download - Download complete
Done!
- Disconnect Arduino from USB
- Put it on the board (Important! The mini USB connector looks outside!)
- Connect it back to USB (this time USB will supply power)
Important:
- Before transplanting / landing Arduino on a shield / shilda, always de-energize the device
- Remove the Arduino from the shield before loading the sketch.
As you can see, we never even opened a single sketch, and if they did, they didn’t open it for long. This is the beauty of libraries and sketches that have already been written under certain shields and components for Arduino.
Back to the Future
If you now return Arduino to its place, to the radio shield (Important! De-energize the fee before changing to the shield!), Then the radio will no longer “work”. Want to return everything as it was? You already know how to do it!
Pay attention to the folders we need - libraries and examples. And also that the name of folders and files should be written in Latin in one word. You can use numbers and underscores. So, we return everything as it was:
Here are libraries for radio
Here is a sketch
Open all the necessary libraries (see the image.) + Copy the sketch here. Compile. Download. Done! You can put Arduino back into the radio shield and switch it on again (radio).
So quickly we have dealt with:
1. How to reprogram Arduino under different shilda using ready-made sketches and libraries.
2. Why do we need a sketch, why do we need a library. What to put.
3. How to work with the Arduino IDE program to upload a sketch with the library.
As you can see, everything is simple. It took me several days to “drive in” on my own. I hope someone I will save these few days. Good luck to you with Arduino DIY and see you soon: I’m planning a lot more to figure out on the basis of the modules and components I have and I’ll share with you ideas and skills.
Traditionally, at the end of the article - thanks!
Many thanks to user Alexey Korotich for sending useful links specifically for this article:
Arduino Video Tutorials on Youtube
RoboCraft
Official website manuals
A series of articles Arduino for beginners
Source: https://habr.com/ru/post/257747/
All Articles