Setting up a Mikrotik router to work with 3CX Phone System
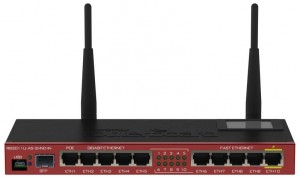
Mikrotik has long been producing highly flexible and inexpensive routing devices under the general name Mikrotik Routerboard. Despite the extensive line of these devices, they are united by a single operating system - Mikrotik RouterOS. Setting up Mikrotik routers to work with 3CX Phone System is not at all as difficult as it may seem at first glance. Consider the setting on the example of Wi-Fi router RB2011UiAS-2HnD-IN. This router is perfect for organizing access to the Internet for a small and medium-sized company.
Attention! Different Mikrotik models may have different presets. In particular, the models for the SMB segment are preinstalled in such a way as to provide Internet access via the first port of the Eth1 router with minimal settings. We will take advantage of this.
')
Basic configuration of the router to access the Internet
If you have a new router, download the Winbox utility and connect to the device at 192.168.88.1 with the username admin . After connection, click on the Quick Set menu button in the upper left corner.
![image [1]](https://habrastorage.org/getpro/habr/post_images/a5c/b27/396/a5cb27396a03fd8e9a2d8c911c5d97ff.png)
Here:
- Upgrade the firmware of the router. From there, start and continue after the device is rebooted.
- Wi-Fi settings of the router module (if your model has it).
- Internet access settings. In this case, PPPoE access is used through the Ethernet1 port.
- LAN settings and DHCP server. Attention! Setting up a DHCP server requires additional steps, as described below.
- Password access to the management interface of the router.
The settings are fairly obvious. After setting the parameters, click the Apply or OK button . .
Setting up a DHCP server
Go to IP > DHCP Server > Options .
Here you need to create a new DHCP option 66 and its value to specify the HTTP link for auto-tuning your IP phones. This link needs to be copied from the Settings > Auto-tune your phone section of the 3CX control console. In this case, the string must be taken in single quotes, for example, 'http://192.168.0.2/provisioning/hwz44ph6o9' .
![SNAGHTML5474749b [1]](https://habrastorage.org/getpro/habr/post_images/d0a/733/1ff/d0a7331ff85b4eff781acd6de0ac28ee.png)
To complete the configuration, go to IP > DHCP Server > Networks and configure the DHCP server. In this example, the DNS server, the domain name, the time server, and the option 66 created earlier in the DHCP are installed.
![image1 [1]](https://habrastorage.org/getpro/habr/post_images/fd0/8d9/485/fd08d9485f8ca6f097abcd0355daef32.png)
Disable SIP ALG
In order to avoid any problems in the work of remote connections in 3CX Phone System, you should disable the built-in SIP Application Layer Gateway router. To do this, go to IP > Firewall Service Ports and disable the SIP ALG service by clicking the button with the red cross on top.
![image2 [1]](https://habrastorage.org/getpro/habr/post_images/dc4/7cd/ba1/dc47cdba1035b5182af33bba597bd23f.png)
Creating firewall and NAT rules
In order to implement the Mikrotik Full Cone NAT router, or, in other words, publish the necessary ports of the 3CX Phone System server on the external interface, you should create a set of firewall rules. All rules are created uniformly.
Go to IP > Firewall > NAT and click the plus button to add a new rule. In this example, rules are created for two SIP providers with IP addresses 62.64.127.43 and 69.167.178.6 . Also, rules were created for external HTTPS connections (port 443 — status of additional numbers, indication of the presence of 3CXPhone clients and remote server administration) and rules for 3CX Tunnel (ports 5090 UDP and TCP).
![image3 [1]](https://habrastorage.org/getpro/habr/post_images/f76/1ff/1c2/f761ff1c20722ff6afc74c6852d9d8c1.png)
Rule for SIP server
Parameters are set in the General and Action tabs.
![image4 [1]](https://habrastorage.org/getpro/habr/post_images/18f/a72/0a9/18fa720a96506e3a0665287286a29db1.png)
![image5 [2]](https://habrastorage.org/getpro/habr/post_images/b1d/533/152/b1d5331529d02981a548d0b40421abf6.png)
Here:
- Direction of the rule
- External address for which this rule is effective. In this case, this is the IP address of the SIP provider. Attention! It is recommended to allow external incoming SIP and RTP traffic only for the necessary IP addresses, and not for the entire Internet!
- Protocol type
- The service port that is published
- The interface for which this rule is effective. In this case, this is the PPPoE interface for connecting the router to the ISP
- The action that the rule performs
- Local 3CX Phone System Server Address
- Local port of the published service
Rules for 3CX Tunnel and HTTPS
The rules are configured similarly, but the source address is not specified. That is, the rule applies to any host on the Internet.
![image6 [1]](https://habrastorage.org/getpro/habr/post_images/254/37f/fec/25437ffecb2e9e9033d5d528d657dfdd.png)
![image7 [1]](https://habrastorage.org/getpro/habr/post_images/114/203/536/11420353662d45b6b2dbe6770d87b938.png)
Optional: Configure NTP Time Server
If you want the Mikrotik router to also be a time server for IP phones on your network, you need to download and install the package that runs the NTP server in the router. The package archive for the current version of RouterOS can be downloaded here (relevant only for RouterOS 6.24 !). After downloading, unzip the archive and drag the ntp-6.24-mipsbe.npk file to the File List window, called up the Files side menu.
Attention! Upload the package file to the root of the file system. After that, reboot the router in the System > Reboot menu.
![image8 [1]](https://habrastorage.org/getpro/habr/post_images/893/400/846/893400846ae9ab942e14ec86af214447.png)
After reboot, enable the NTP server in the System > NTP Server menu.
![image9 [1]](https://habrastorage.org/getpro/habr/post_images/d90/08c/e37/d9008ce370a27c3be3354e80a72c7246.png)
In the System > NTP Client menu, set the IP address of your preferred NTP server to the Internet to set the exact time on the router.
![image10 [1]](https://habrastorage.org/getpro/habr/post_images/006/781/46f/00678146f5e434e405d9c2fed733beaa.png)
It is also recommended to set the current time in the System > Clock menu.
![image11 [1]](https://habrastorage.org/getpro/habr/post_images/bb2/813/c5e/bb2813c5e4b3468dfe0e636881d8e426.png)
This completes the setup of the Mikrotik router to work with the 3CX Phone System.
Of course, Mikrotik routers have many other important settings that can be used on your network, but they are beyond the scope of this article.
Source: https://habr.com/ru/post/257643/
All Articles