Free Data Recovery Test. Version of Habr's readers
Greetings to all Habrovchan !
In the previous article, we tested the top five free data recovery programs. In the comments, users of Habr noticed that we did not pay attention to the programs that at one time, perhaps, effectively saved the data, and offeredsix more eight other programs for data recovery. Here they are:
We tested them. Test results below.
')
Attention! Many screenshots.
UPD Added tests for two more utilities.
Like last time we recorded data on the drives. But this time, at the request of icoz , we added various file types to pictures and photos, among which are: doc, pdf, rar, etc.
The total number of files is 3272 .
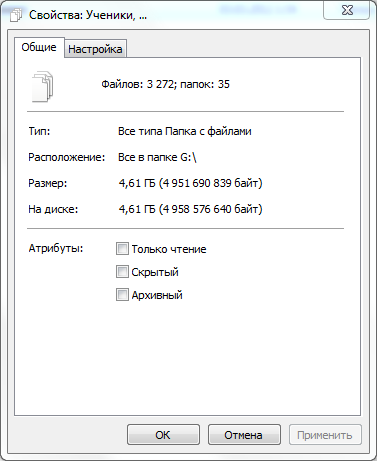
Among them, 2956 pictures and 316 documents of different types.

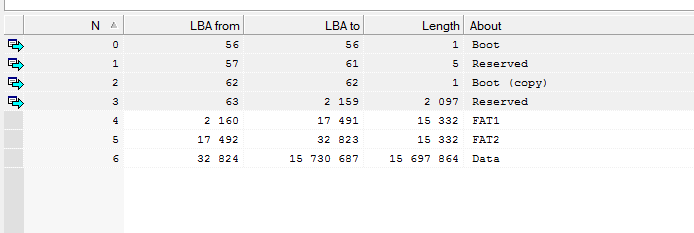
We again frayed part of the file system, all up to the FAT tables, thereby imitating the file system failure. With such failures, data access is usually lost, and a window appears asking you to format the disk.
The R.Saver program does not have a wizard that helps you select all the necessary parameters for data recovery, but there is a Russian-language menu with items that everyone can understand.
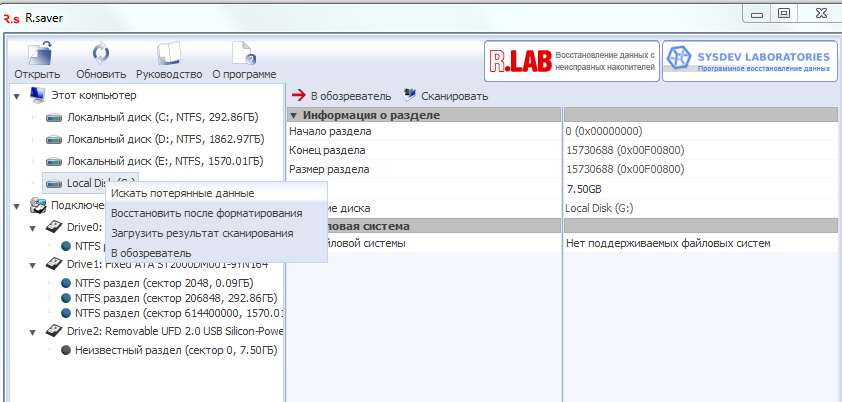
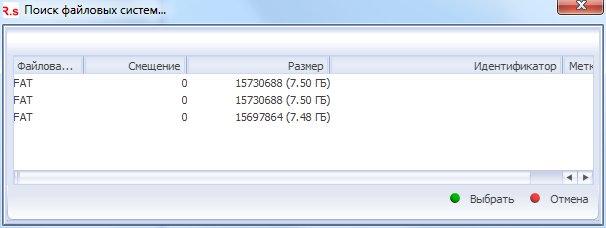
We start the search for lost data, and after a while a window appears in which you need to select one of the file systems

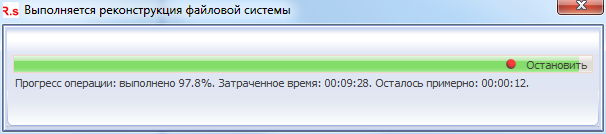
File system reconstruction begins:

And after a short period of time we get the result:
Test passed. Restoration result - 99% (still do not like absolute values)
In this program there is a wizard that helps the user to recover data. In the first step, you need to select the device from which you want to recover data:

Selecting the right, we get an error.
Everything ended very quickly. The test failed. Result of recovery - 0.
Immediately striking "modern" program interface:

Select the desired drive and file system:

And we get the result:

All is well, if not for one thing. Save data in the free version will not succeed. But nevertheless the test is passed. The recovery result is 99% .
The exact opposite of the previous program, if you compare the interface. Here he is like this:

Opinion of the author. In the middle of 2015, an “unprepared” person can be frightened / infuriated / enter into such a stupor / laugh such an interface of the program. One of my friends, the “humanist”, confused such a window with the “Blue screen of death” and prepared for the worst.
But nevertheless, we continue to test the program. Chose the necessary section:

Then you need to choose the type of file system, and then there may be a first stupor in people far from "all this." Fortunately, there are only two options - you can sort out:
Then the second difficulty is to select the directory where the recovered data will be saved, and, finally, start the recovery process:
The program runs longer than others:

But the result of the work is immediately available for further use:

Test passed. The recovery result is 99% . But there is one BUT . The directory structure will be lost, and the result of the recovery will be several file sets. In this test, in my opinion, this is a small minus.
Immediately it is worth noting that all programs except this one are tested on Silicon Power Ultima U03 drives. The RecoveRx utility is related to Transcend, and it would be logical to try it on a Transcend drive. The Transcend JetFlash 370 drive became the test subject. We recorded a slightly different data set on this drive: only photos.

All other conditions remain unchanged. We truncated the file system to FAT tables and tried to recover the data. Run the program (Framework 4.0 must be installed on the computer):
Chose our drive and got an error:

Different compatibility modes and admin rights did not help. The test failed. Result of recovery - 0.
The program is quite simple and intuitive interface. Select the desired logical drive:
The recovery process begins, and a window appears almost immediately:

After selecting the first option in a few seconds, the result appears:

Test passed. Result of recovery of 99% .
Like last time after a file system failure, we formatted all drives with default parameters using the operating system. Let's see if everyone can cope with this test.
In R.Saver there is an “understandable” menu item for all such cases:
Then the usual file system search is started.
Choose one of them:
We are waiting for a relatively short time:
And we get the result at the end:

There is no directory structure. Save the result and see that not all files are restored after formatting. But, nevertheless, the test is passed. The recovery result is 88% .
After starting the program in the wizard, select the desired drive:

And here we are already greeted with a warning window about the limited functionality of the demo version:

We skip this step and in the next step select all possible file types.

After a brief scan, we get the result:

Since we could not fully open the files, we evaluated the result by the preview images below. Data recovered very little, about two percent. The test failed. The recovery result is 2% .
Run the program and select our drive
On the machine, select the only file system;

And we understand that this is a new empty file system:

A little thought, click the button in the lower left corner, and the recovery process begins:
After the scan is complete, another file system appears:

Choose it and see a good result. But there is one BUT . In the free version of the program, we can not save data.

Test passed. The recovery result is 99% .
In this program, everything is very simple. One procedure for all possible problems. Choose a drive.

Select a section. Here you need to select the top:

Select the folder where the recovered data will be saved, and launch the scan:

And we get the result:
Like last time, the directory structure is lost, but the files are all intact. Excellent result. Test passed. The recovery result is 99% .
Run the program, select the desired device and alert. Oh, some incredible size sections.

Select any of them, then select file types. Let me remind you that on this drive only pictures and photos.
And then immediately we get the "result":

Tried other sections, even other drives after fast formatting. The result is the same.
The test failed. The recovery result is 0% .
Run the program, choose our logical drive:

Choose our section. He is the only one:

Understandably, it will be empty, and the software offers to scan the entire volume:

Starts a long scanning process:
We get the result:

At first glance, a lot of photos were found, but if you look at the window of the HEX editor, you can see that this is not jpg-photo, but some kind of garbage. After saving the data and evaluating the result, we see that the recovered data is very small. The test failed. The recovery result is 1%.
The final results table looks like this:
There are leaders and there are outsiders. Each leader has advantages and disadvantages.
It is clear that developers and managers devote much less time to free versions of software than paid versions of their products. We also have some free programs that help users in everyday life. For us, they are a kind of “sandbox” that many novice developers go through before getting into a serious project. Perhaps very soon you will see new versions of our free utilities.
That's all. And remember, Lost forever still can be found ...
PS In the comments to the previous article, users asked some interesting questions. I will try to answer some of them. There was a question about why photographs and pictures were taken as an example of data. This was not accidental, and the decision was based on the personal experience of “helping” our recovery department . The fact is that about 60-70% of the tasks that people handle are photos and videos. As a rule, the recovery of documents, if people are interested, the restoration work should be completed in a short time. This is not always possible for various reasons. People understand that it is faster and cheaper for them to fill in the missing data in the previous version of the document. With photos is another story altogether. As a rule, they depict solemn moments that happen once (weddings, birthdays, various ceremonies, etc.), and it is not possible to obtain the same data set except for restoring them in any other way.
There was also the question of why we use a separate drive for testing each program. Everything is very simple here and there is no secret intent. These drives are bought specifically for training seminars , and we need to simulate certain problems on them. For example, to record a lot of pictures of a certain subject (machine), then format and write pictures on top of another subject, for example, space. Then simulate the hardware problem and give the task to recover data from the first batch of files (machines). Using different drives, we do the work that we need, and at the same time we prepare material for articles on Habré.
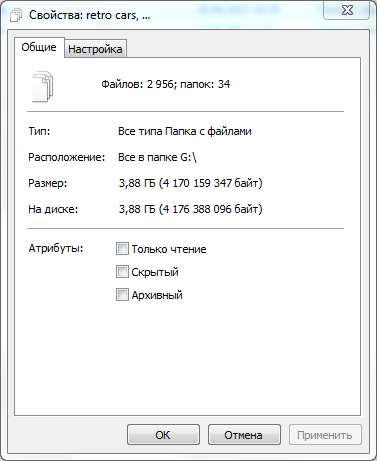
At the request of users, we will test a couple more programs. The drive stores pictures and photos.
Total number of files - 2956

Select the top menu item:

Then select the desired device:

And run the scan:

Scanning will take a very long time:

In the end we get the result - 2777 files . Very good. But the directory structure is gone.

Test passed. The recovery result is 94%.
Like last time, we run the scan and wait for a tremendous amount of time.
After another two-hour wait, we get the same result.
Test passed. The recovery result is 94%.
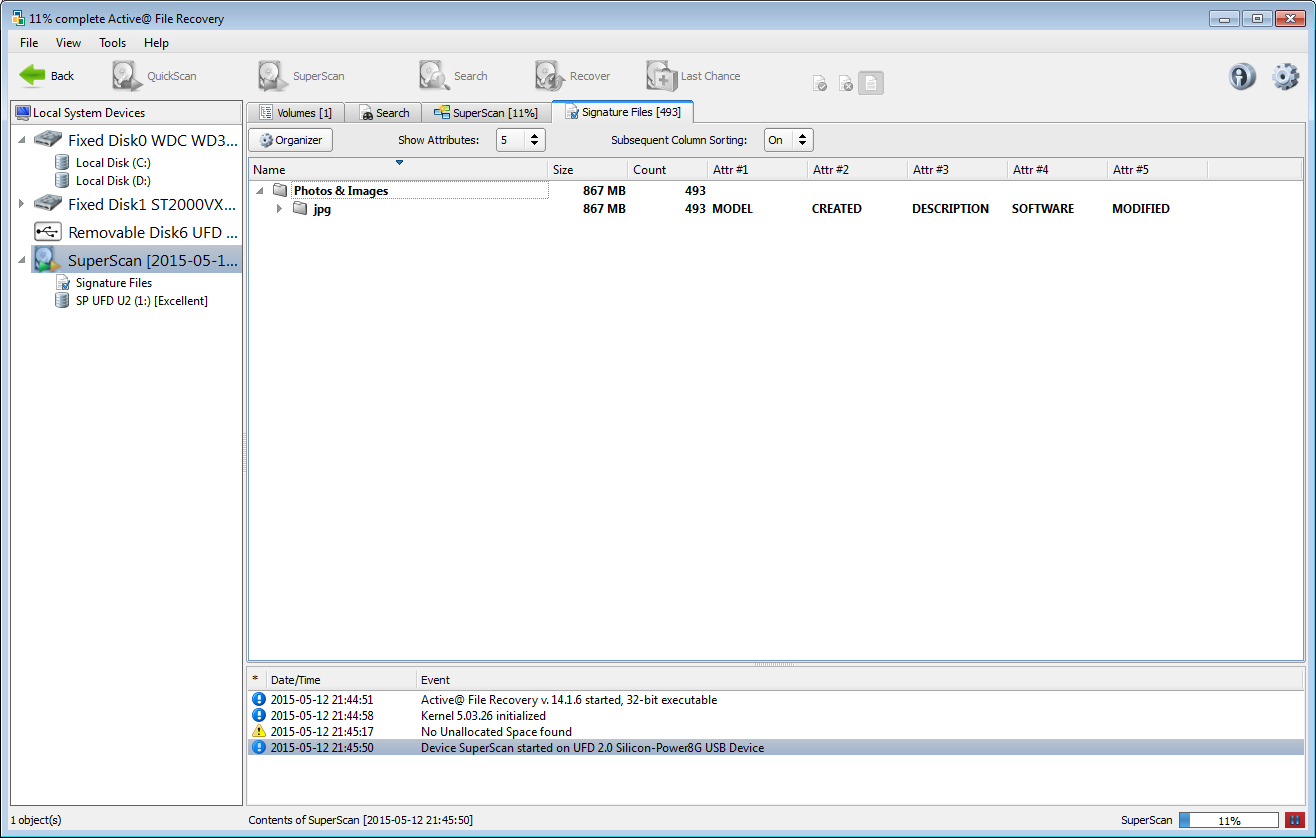
8. Active @ File Recovery 14
First test
Run the utility and select the desired device and start the scan

The map is gradually filled during the scan.
And the recovered data counter:
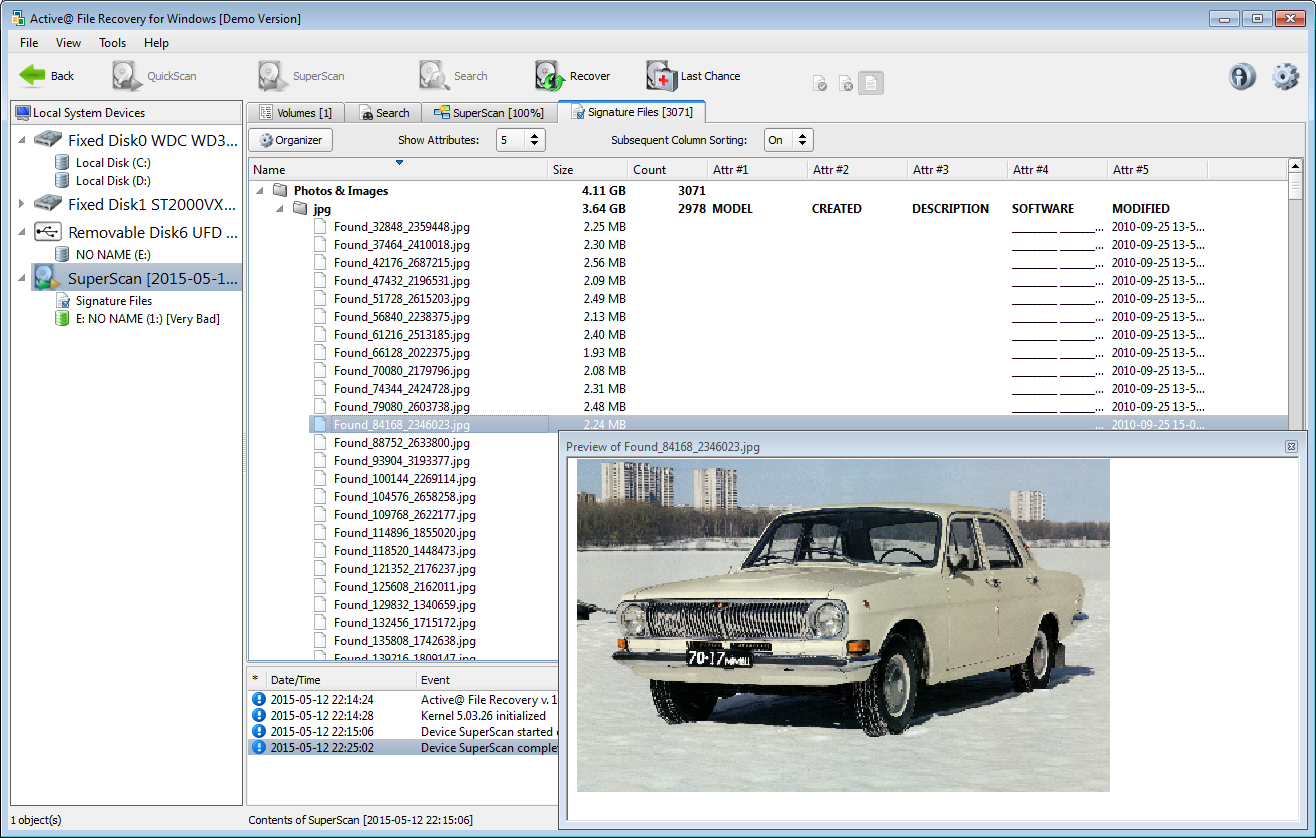
When trying to save the recovered data, we get the message:

Nevertheless, the preview shows that the files have been restored:

Test passed. Restoration result - 99% ***
Second test
Run the utility again, select the drive and start scanning:

Data in the preview is visible, but save them for free will not work.
However, the test passed. Restoration result - 99% ***
In the previous article, we tested the top five free data recovery programs. In the comments, users of Habr noticed that we did not pay attention to the programs that at one time, perhaps, effectively saved the data, and offered
- R.Saver 2.8
- Handy Recovery 5.5
- GetDataBack 1.0
- PhotoRec / TestDisk 7.0
- RecoveRx 3.0
- DMDE 2.10.2
- Zero Assumption Recovery 9.2
- Active @ File Recovery 14
We tested them. Test results below.
')
Attention! Many screenshots.
UPD Added tests for two more utilities.
Briefly about the tests
Like last time we recorded data on the drives. But this time, at the request of icoz , we added various file types to pictures and photos, among which are: doc, pdf, rar, etc.
The total number of files is 3272 .
Among them, 2956 pictures and 316 documents of different types.
Test one. File system failure
We again frayed part of the file system, all up to the FAT tables, thereby imitating the file system failure. With such failures, data access is usually lost, and a window appears asking you to format the disk.
1. R.Saver
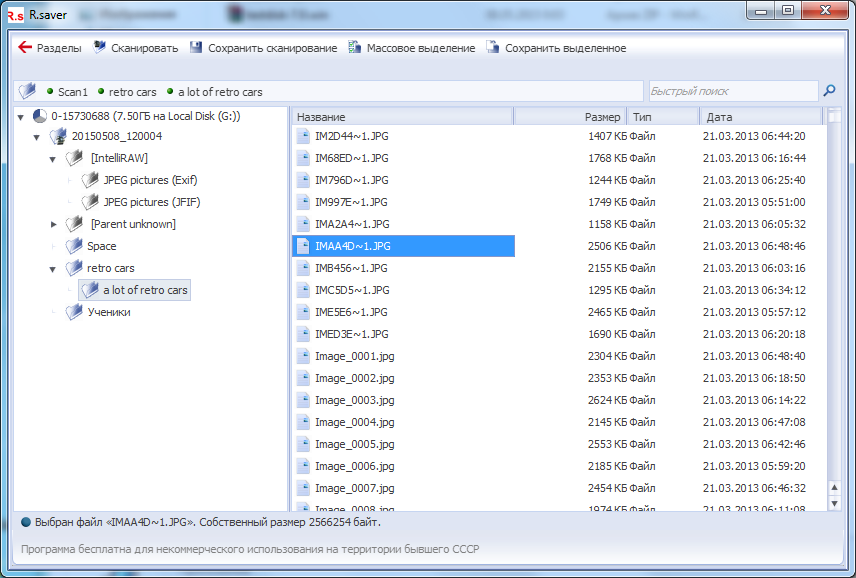
The R.Saver program does not have a wizard that helps you select all the necessary parameters for data recovery, but there is a Russian-language menu with items that everyone can understand.
We start the search for lost data, and after a while a window appears in which you need to select one of the file systems
File system reconstruction begins:
And after a short period of time we get the result:
Test passed. Restoration result - 99% (still do not like absolute values)
2. Handy Recovery
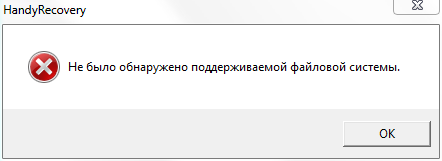
In this program there is a wizard that helps the user to recover data. In the first step, you need to select the device from which you want to recover data:
Selecting the right, we get an error.
Everything ended very quickly. The test failed. Result of recovery - 0.
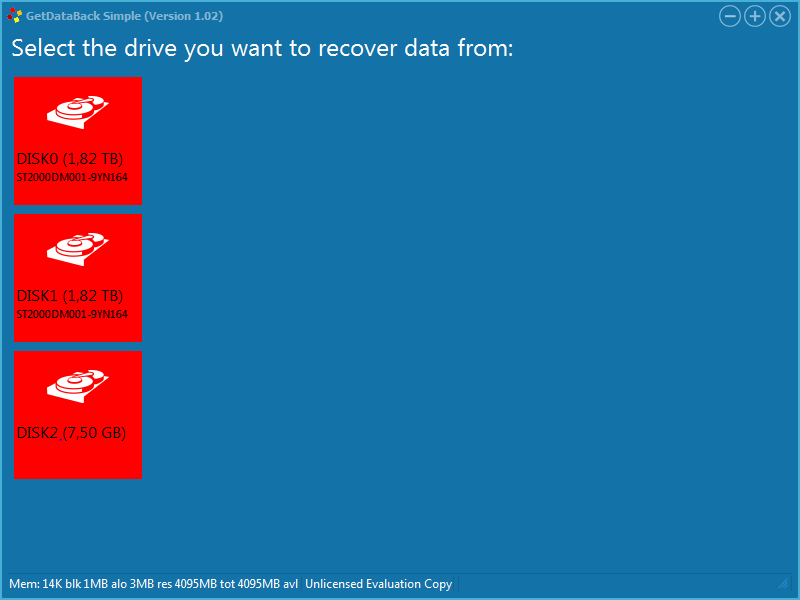
3. GetDataBack
Immediately striking "modern" program interface:
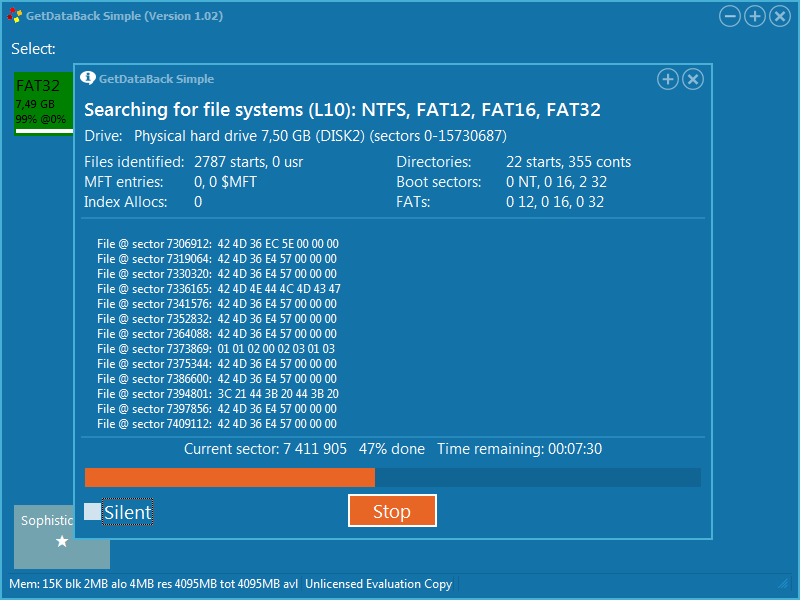
Select the desired drive and file system:
And we get the result:
All is well, if not for one thing. Save data in the free version will not succeed. But nevertheless the test is passed. The recovery result is 99% .
4. PhotoRec / TestDisk
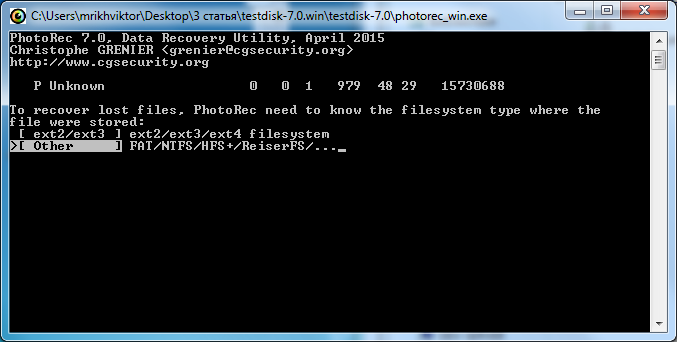
The exact opposite of the previous program, if you compare the interface. Here he is like this:
Opinion of the author. In the middle of 2015, an “unprepared” person can be frightened / infuriated / enter into such a stupor / laugh such an interface of the program. One of my friends, the “humanist”, confused such a window with the “Blue screen of death” and prepared for the worst.
But nevertheless, we continue to test the program. Chose the necessary section:
Then you need to choose the type of file system, and then there may be a first stupor in people far from "all this." Fortunately, there are only two options - you can sort out:
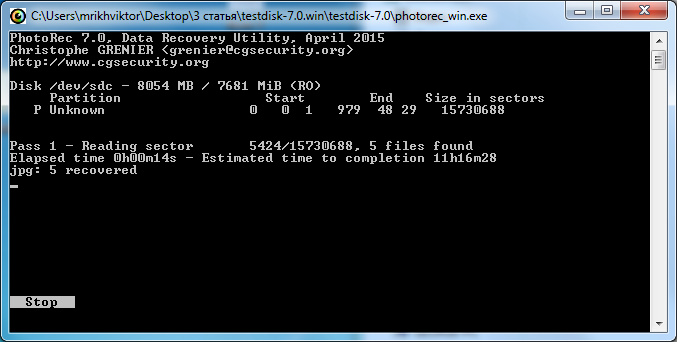
Then the second difficulty is to select the directory where the recovered data will be saved, and, finally, start the recovery process:
The program runs longer than others:
But the result of the work is immediately available for further use:
Test passed. The recovery result is 99% . But there is one BUT . The directory structure will be lost, and the result of the recovery will be several file sets. In this test, in my opinion, this is a small minus.
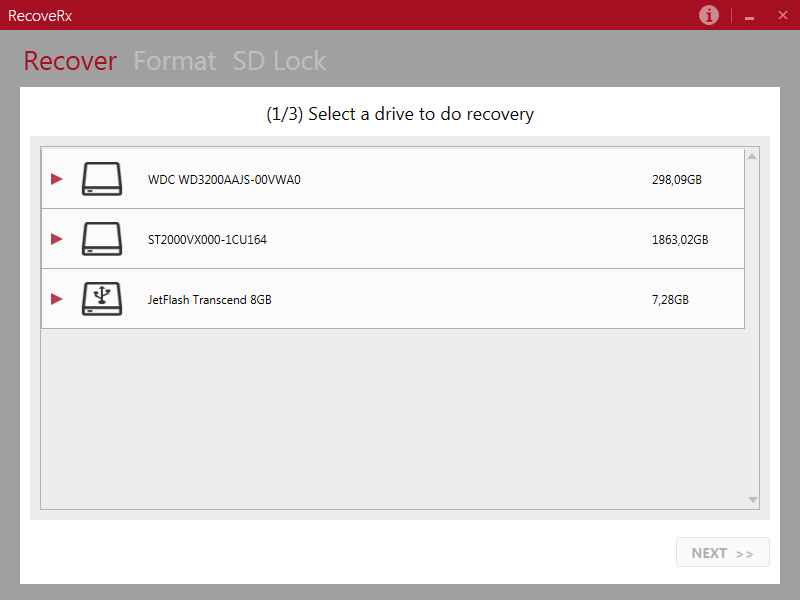
5. RecoveRx
Immediately it is worth noting that all programs except this one are tested on Silicon Power Ultima U03 drives. The RecoveRx utility is related to Transcend, and it would be logical to try it on a Transcend drive. The Transcend JetFlash 370 drive became the test subject. We recorded a slightly different data set on this drive: only photos.
All other conditions remain unchanged. We truncated the file system to FAT tables and tried to recover the data. Run the program (Framework 4.0 must be installed on the computer):
Chose our drive and got an error:
Different compatibility modes and admin rights did not help. The test failed. Result of recovery - 0.
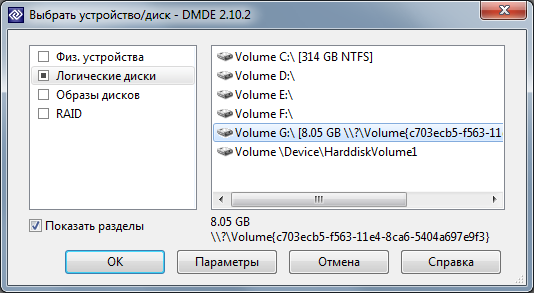
6. DMDE
The program is quite simple and intuitive interface. Select the desired logical drive:
The recovery process begins, and a window appears almost immediately:
After selecting the first option in a few seconds, the result appears:
Test passed. Result of recovery of 99% .
Test second. Fast formatting
Like last time after a file system failure, we formatted all drives with default parameters using the operating system. Let's see if everyone can cope with this test.
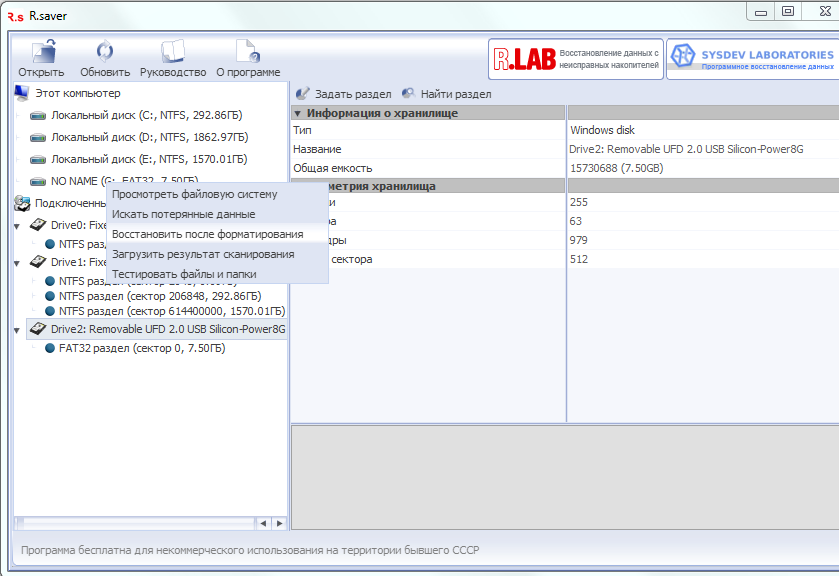
1. R.Saver
In R.Saver there is an “understandable” menu item for all such cases:
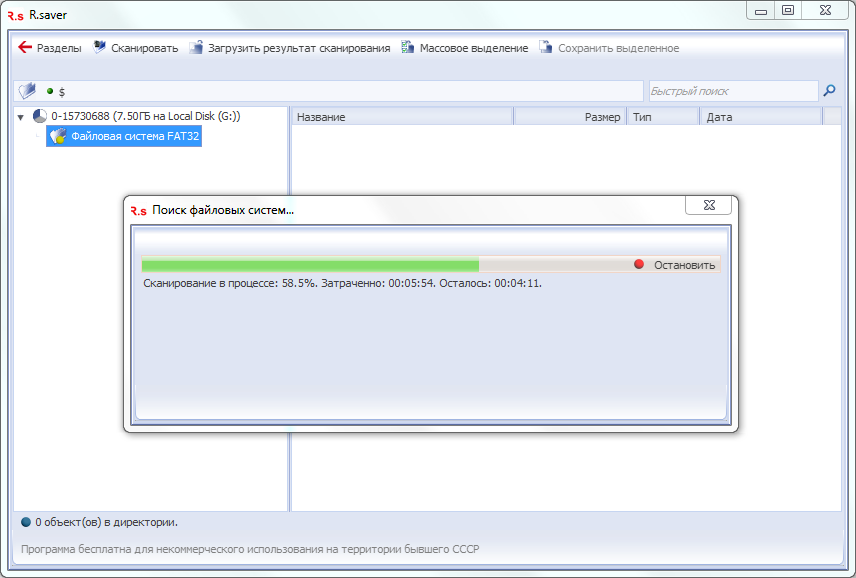
Then the usual file system search is started.
Choose one of them:
We are waiting for a relatively short time:
And we get the result at the end:
There is no directory structure. Save the result and see that not all files are restored after formatting. But, nevertheless, the test is passed. The recovery result is 88% .
2. Handy Recovery
After starting the program in the wizard, select the desired drive:
And here we are already greeted with a warning window about the limited functionality of the demo version:
We skip this step and in the next step select all possible file types.
After a brief scan, we get the result:
Since we could not fully open the files, we evaluated the result by the preview images below. Data recovered very little, about two percent. The test failed. The recovery result is 2% .
3. GetDataBack
Run the program and select our drive
On the machine, select the only file system;
And we understand that this is a new empty file system:
A little thought, click the button in the lower left corner, and the recovery process begins:
After the scan is complete, another file system appears:
Choose it and see a good result. But there is one BUT . In the free version of the program, we can not save data.
Test passed. The recovery result is 99% .
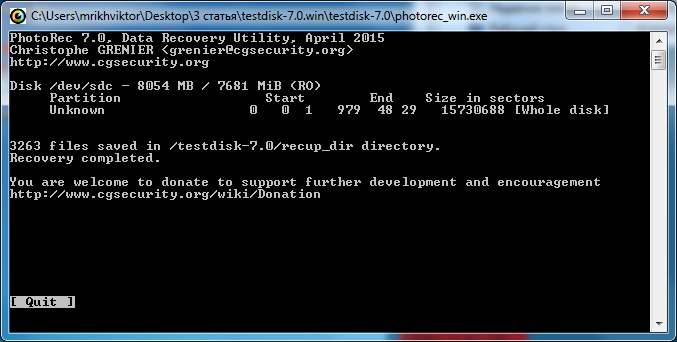
4. PhotoRec / TestDisk
In this program, everything is very simple. One procedure for all possible problems. Choose a drive.
Select a section. Here you need to select the top:
Select the folder where the recovered data will be saved, and launch the scan:
And we get the result:
Like last time, the directory structure is lost, but the files are all intact. Excellent result. Test passed. The recovery result is 99% .
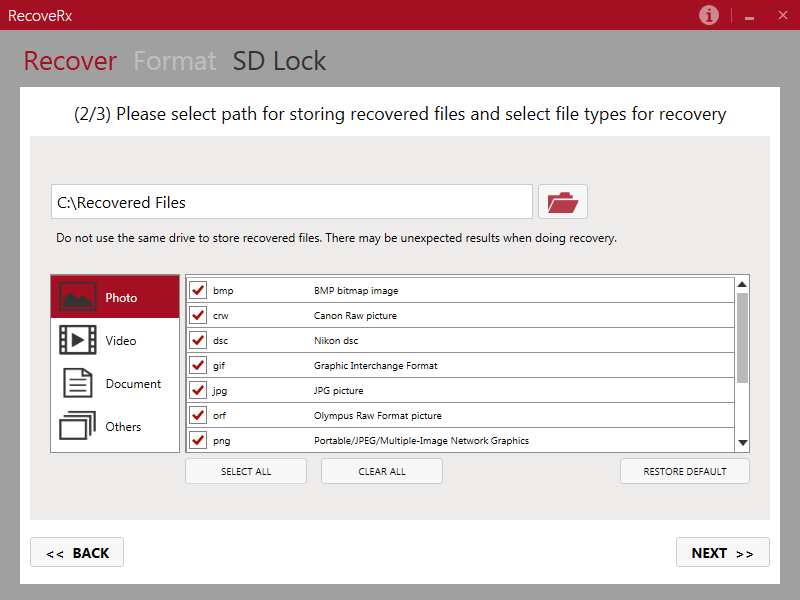
5. RecoveRx
Run the program, select the desired device and alert. Oh, some incredible size sections.
Select any of them, then select file types. Let me remind you that on this drive only pictures and photos.
And then immediately we get the "result":
Tried other sections, even other drives after fast formatting. The result is the same.
The test failed. The recovery result is 0% .
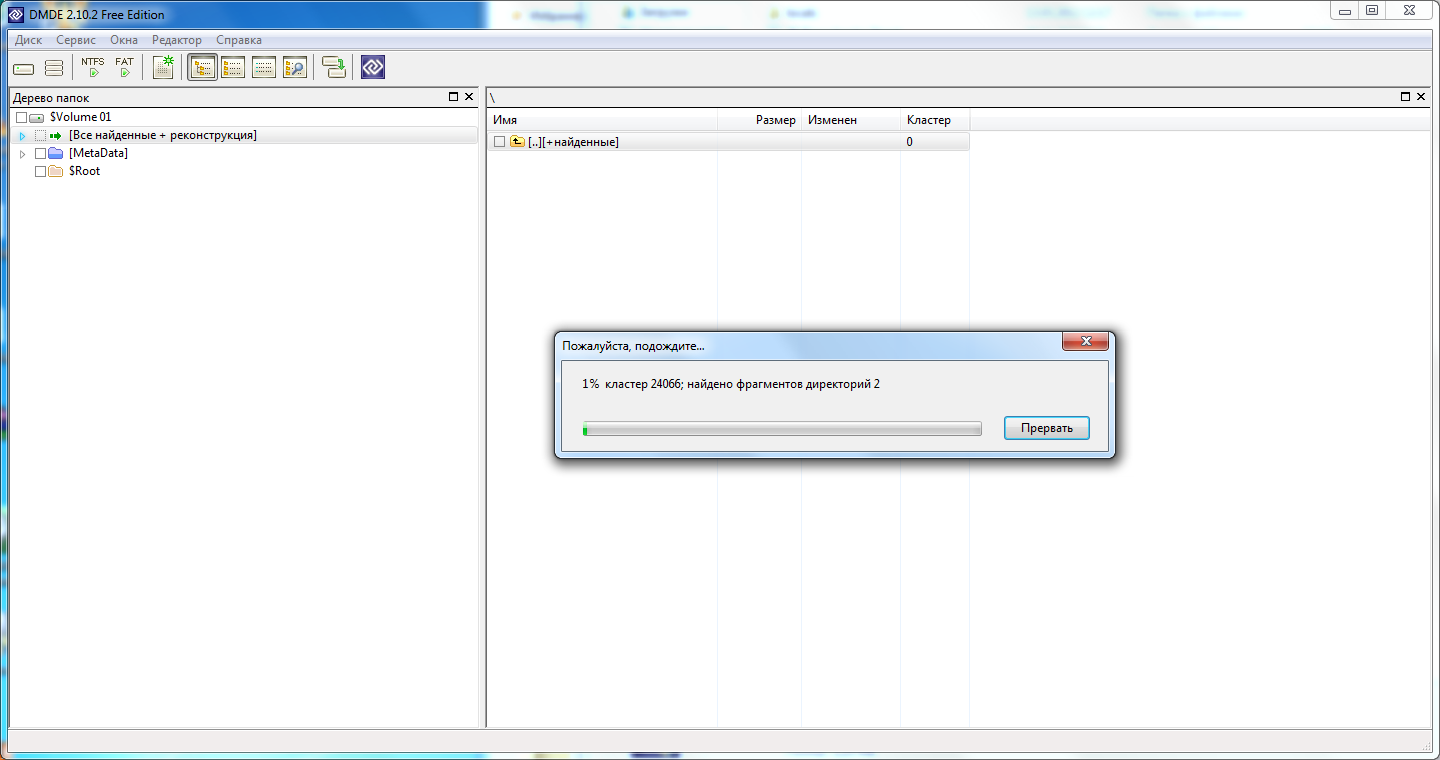
6. DMDE
Run the program, choose our logical drive:
Choose our section. He is the only one:
Understandably, it will be empty, and the software offers to scan the entire volume:
Starts a long scanning process:
We get the result:
At first glance, a lot of photos were found, but if you look at the window of the HEX editor, you can see that this is not jpg-photo, but some kind of garbage. After saving the data and evaluating the result, we see that the recovered data is very small. The test failed. The recovery result is 1%.
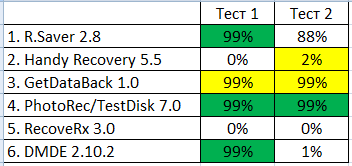
Results
The final results table looks like this:
There are leaders and there are outsiders. Each leader has advantages and disadvantages.
It is clear that developers and managers devote much less time to free versions of software than paid versions of their products. We also have some free programs that help users in everyday life. For us, they are a kind of “sandbox” that many novice developers go through before getting into a serious project. Perhaps very soon you will see new versions of our free utilities.
That's all. And remember, Lost forever still can be found ...
PS In the comments to the previous article, users asked some interesting questions. I will try to answer some of them. There was a question about why photographs and pictures were taken as an example of data. This was not accidental, and the decision was based on the personal experience of “helping” our recovery department . The fact is that about 60-70% of the tasks that people handle are photos and videos. As a rule, the recovery of documents, if people are interested, the restoration work should be completed in a short time. This is not always possible for various reasons. People understand that it is faster and cheaper for them to fill in the missing data in the previous version of the document. With photos is another story altogether. As a rule, they depict solemn moments that happen once (weddings, birthdays, various ceremonies, etc.), and it is not possible to obtain the same data set except for restoring them in any other way.
There was also the question of why we use a separate drive for testing each program. Everything is very simple here and there is no secret intent. These drives are bought specifically for training seminars , and we need to simulate certain problems on them. For example, to record a lot of pictures of a certain subject (machine), then format and write pictures on top of another subject, for example, space. Then simulate the hardware problem and give the task to recover data from the first batch of files (machines). Using different drives, we do the work that we need, and at the same time we prepare material for articles on Habré.
UPD
At the request of users, we will test a couple more programs. The drive stores pictures and photos.
Total number of files - 2956
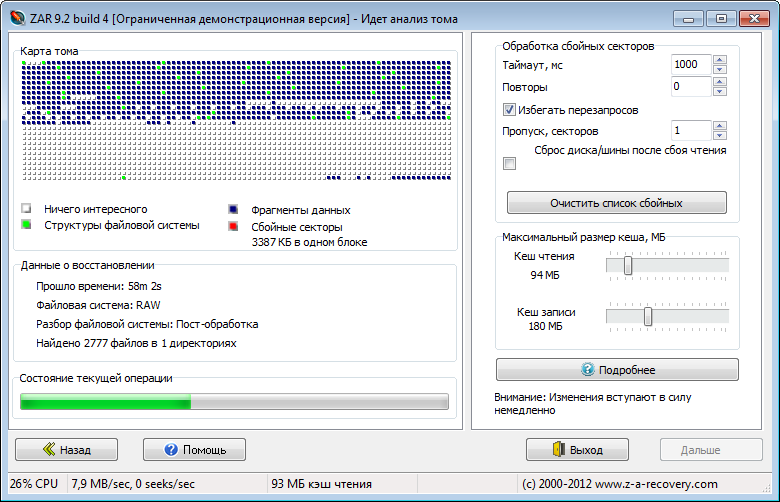
7. Zero Assumption Recovery 9.2.
First test
Select the top menu item:
Then select the desired device:
And run the scan:
Scanning will take a very long time:
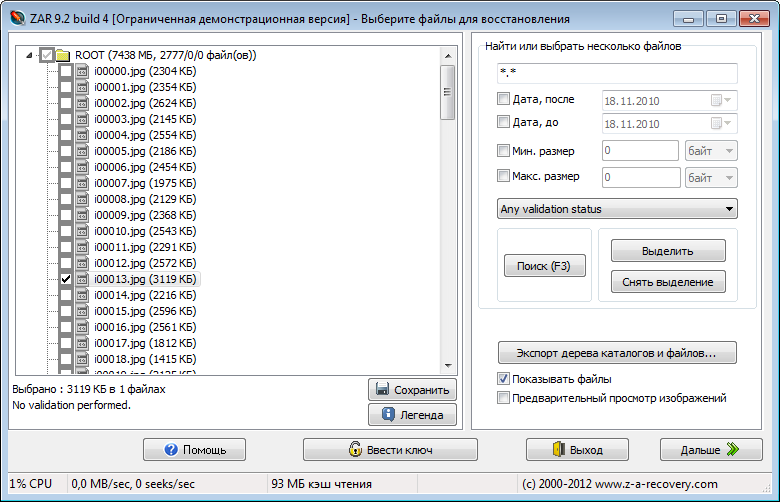
In the end we get the result - 2777 files . Very good. But the directory structure is gone.
Test passed. The recovery result is 94%.
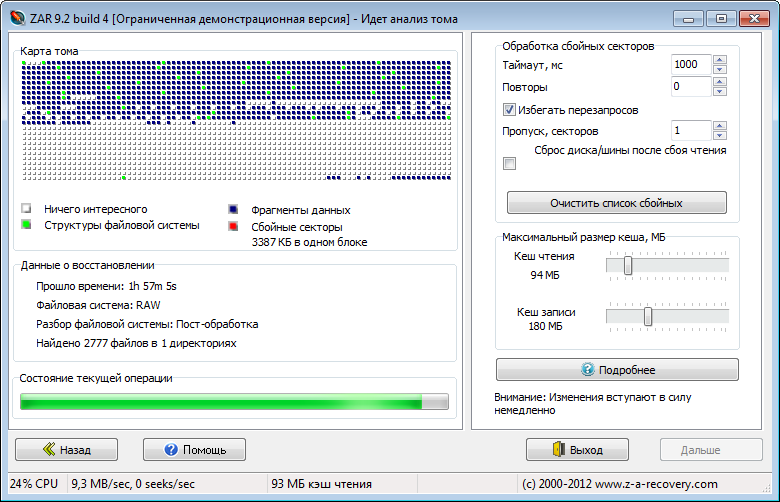
Second test
Like last time, we run the scan and wait for a tremendous amount of time.
After another two-hour wait, we get the same result.
Test passed. The recovery result is 94%.
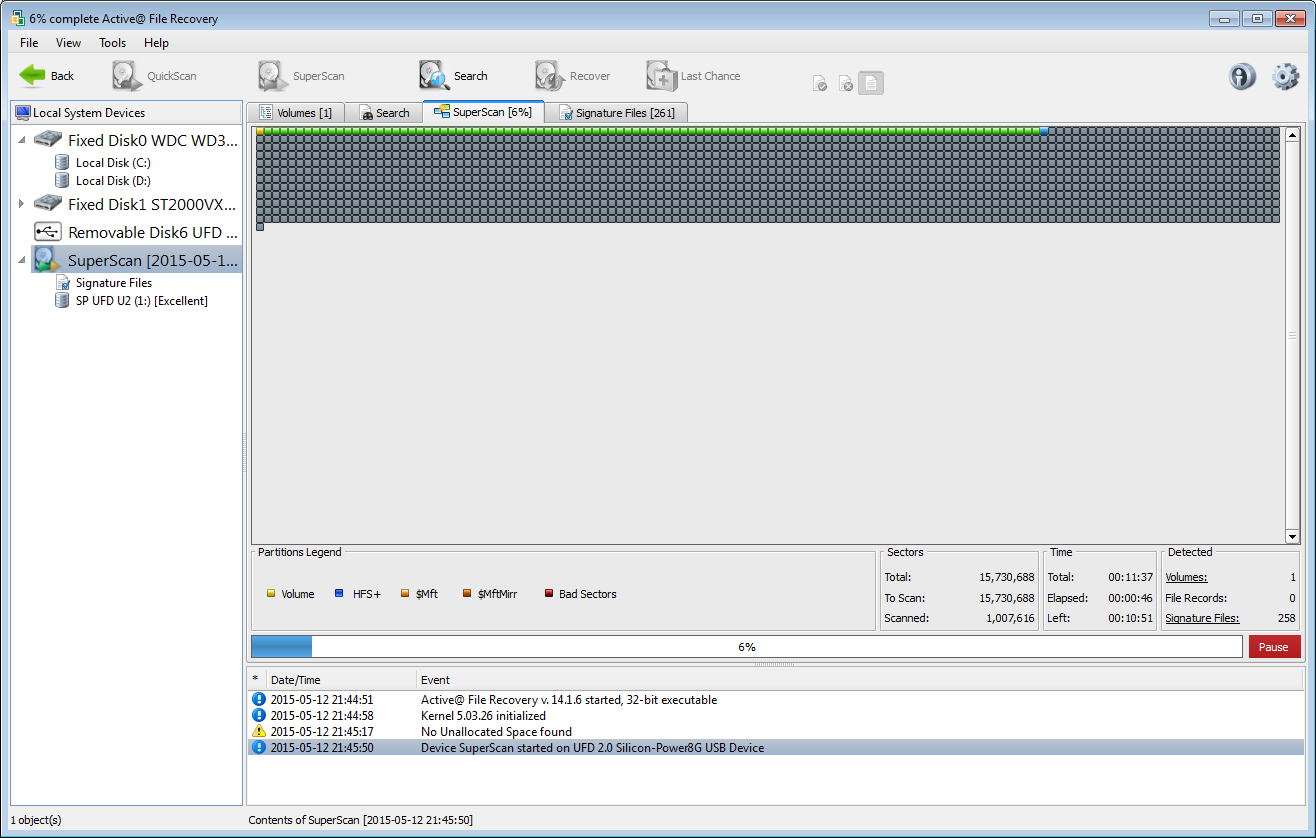
8. Active @ File Recovery 14
First test
Run the utility and select the desired device and start the scan
The map is gradually filled during the scan.
And the recovered data counter:
When trying to save the recovered data, we get the message:
Nevertheless, the preview shows that the files have been restored:
Test passed. Restoration result - 99% ***
Second test
Run the utility again, select the drive and start scanning:
Data in the preview is visible, but save them for free will not work.
However, the test passed. Restoration result - 99% ***
Source: https://habr.com/ru/post/257639/
All Articles