3D pen: prototyping or not?
As you remember from my previous posts, we are smoothly moving towards the possibility of collecting interesting things on our own. For training, we have already assembled a robot from the DIY designer, fascinatingly soldered a couple of schemes , and in front of me I have planned a couple of interesting posts for the very, very beginners. And today we will have a little rest and see if there will be enough 3D pens to prototype our ideas?
Of course, the first thing you will probably say is: do not complicate things. Buy a 3D printer and prototype as much as you want. I, in principle, for, but I would like to start to try the technology itself without having to master the software and 3D modeling. In addition, for a beginner the option with a pen is much more accessible. Well, in principle, this is a spectacular gadget with its capabilities.
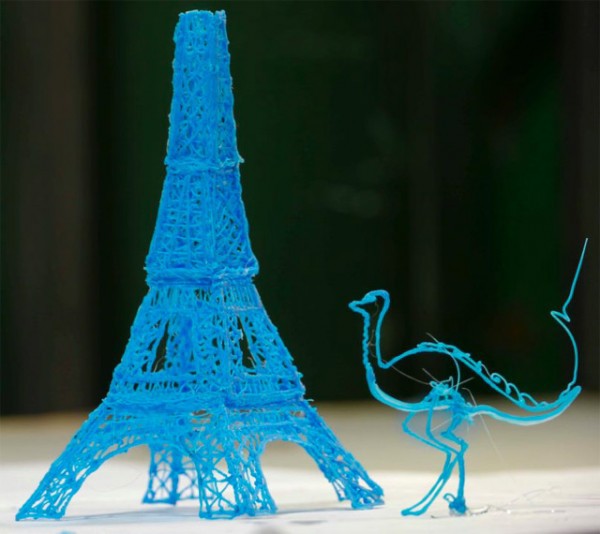
Oddly enough, 3D pens are really used for prototyping. Since the parts drawn by ABS plastic with the help of lines are very light, first of all they have found application in aeromodelling. On this YouTube channel, you can follow the desperate attempts of the representative of the foggy Albion to get such a model aircraft to fly. And this is his blog about the same.
')
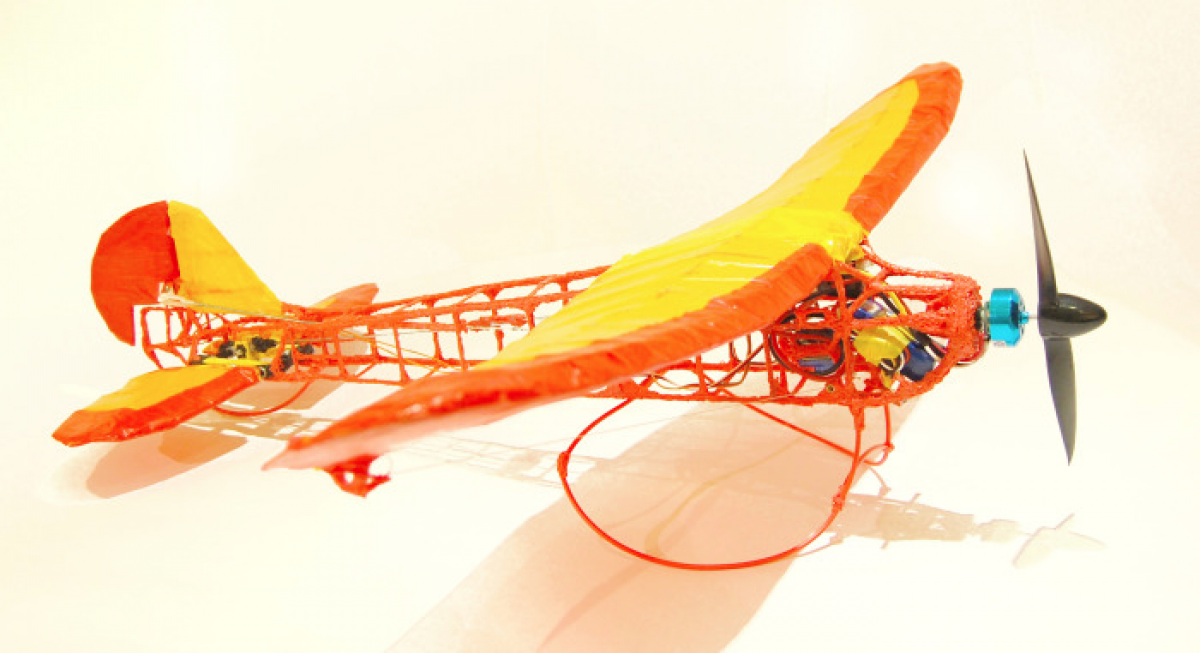
Although the model looks quite beautiful, unfortunately, none of the launches have so far taken place, they all look something like this:
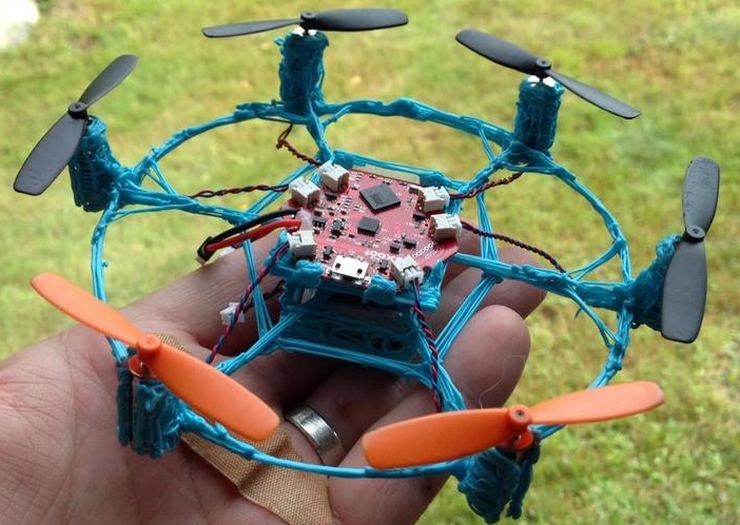
The craftsmen also created a drone from the post cap using a 3d pen. See a description of this project here .
The video of creating and launching another quadrocopter is especially pleasant to watch after the previous video - it just took and flew:
To a hostess on a note - the author of the project uses a rather interesting method of working with a 3D pen and ABS plastic to create such an uneasy, in fact, for hand-drawing details, like a propeller:
The second sphere in which 3D pens have already found application for the creation of technology is lighting. Pen can draw a lot of things where you can shove a light bulb, if you understand what I mean :
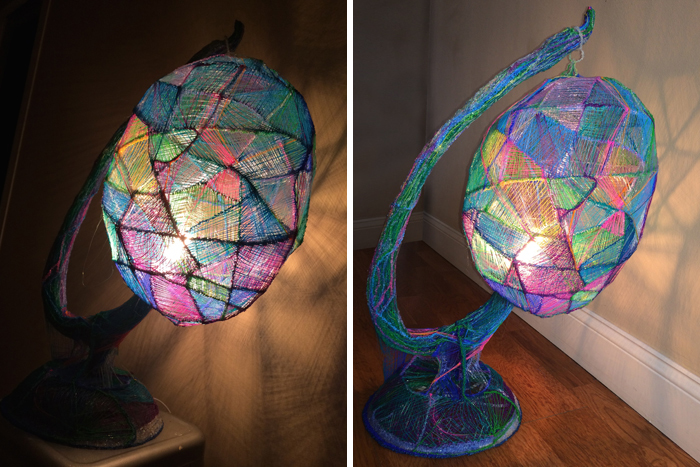
The lamp of the work of Brooklyn artist Rachel Goldsmith , which was written in PCmag .

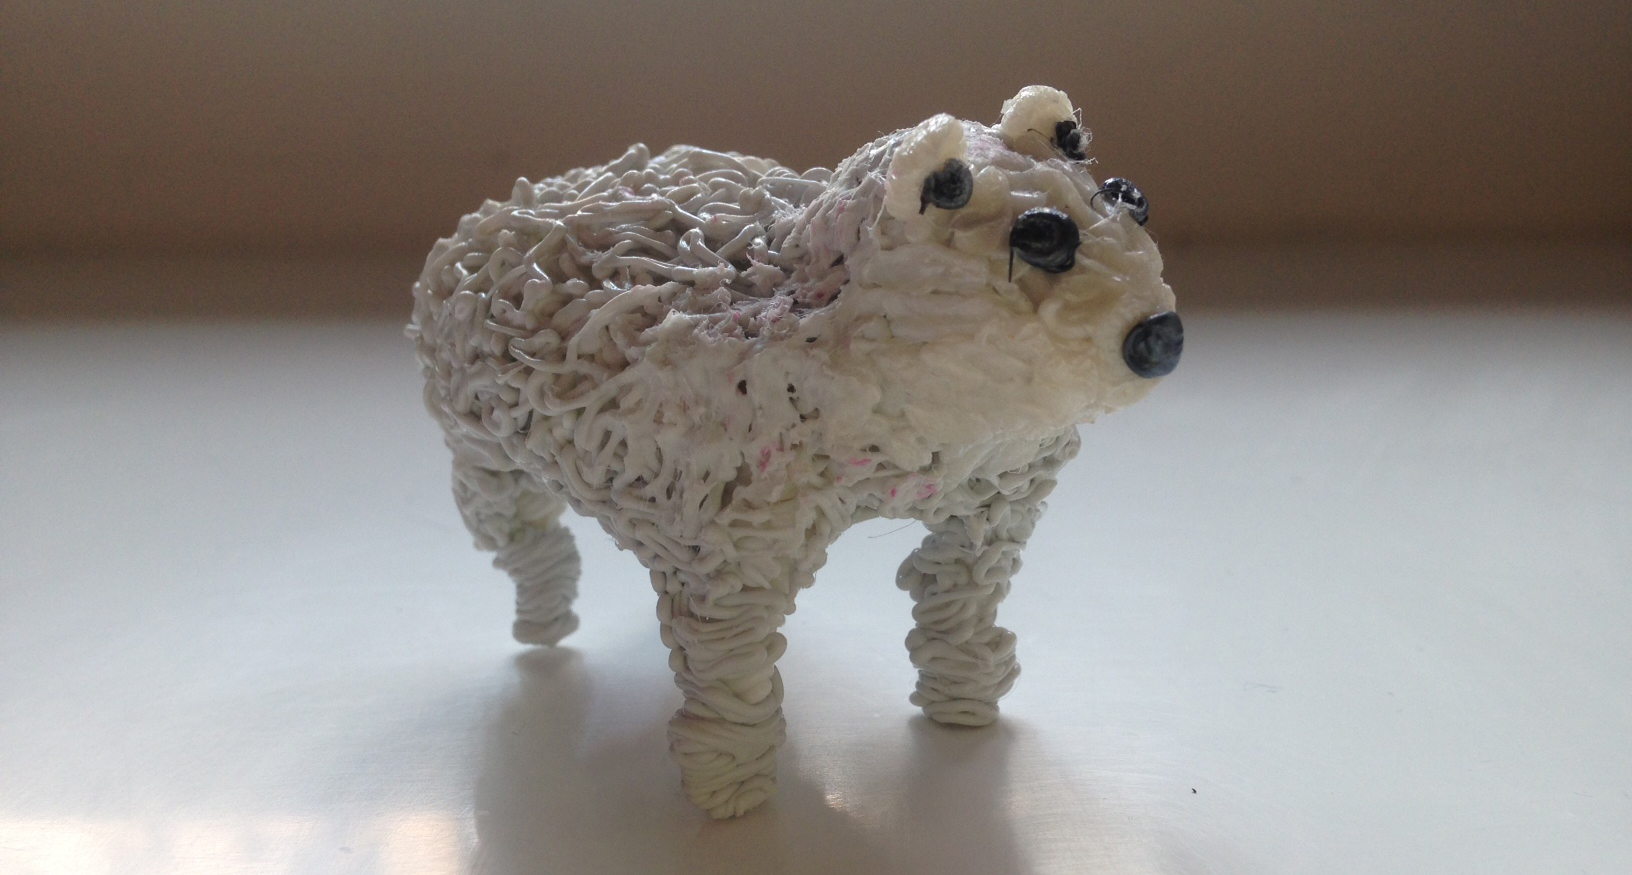
Korean painter Gina Sim's super-hard work — done on a papier-mâché base, then cut to remove from the base and glued together again with a pen. Her other works are no less impressive.
Our choice fell on the handle 3Dali . In this post, among others, the Myriwell pen is mentioned, the Russified copy of which is Dali. Compared to Doodler , the handle is smaller in size - it is more comfortable to hold in your hand - and it doesn’t make a noise like a cooler like a clipper, as the first version of the handle did.
The only thing that is heard during work is a slight crackle of plastic sometimes. In my childhood, such a crackle, like the characteristic smell, was when we burned the wires. Wires, Carl. How much has changed since then.
In addition to smaller dimensions, the handle is very light. In addition, it goes into standby after five minutes of inactivity - well done.

TTX
Model: RP-100A
Power supply: 12V DC
Material for printing: ABS plastic 1.75 mm
Feed Rate: Adjustable
Heating temperature: adjustable from 160 to 250
Heating power: 12V 3A
Nozzle diameter: 0.4 - 0.7 mm (indicated on the package)
Warranty period: 12 months
Complete set: adapter, the Russified instruction, ABS plastic of 3 flowers
Made in china
Pros:
Separately used REC plastic kit of 12 colors:
Diameter: 1.75mm
Heating temperature: 210 - 245
Weight: 300g
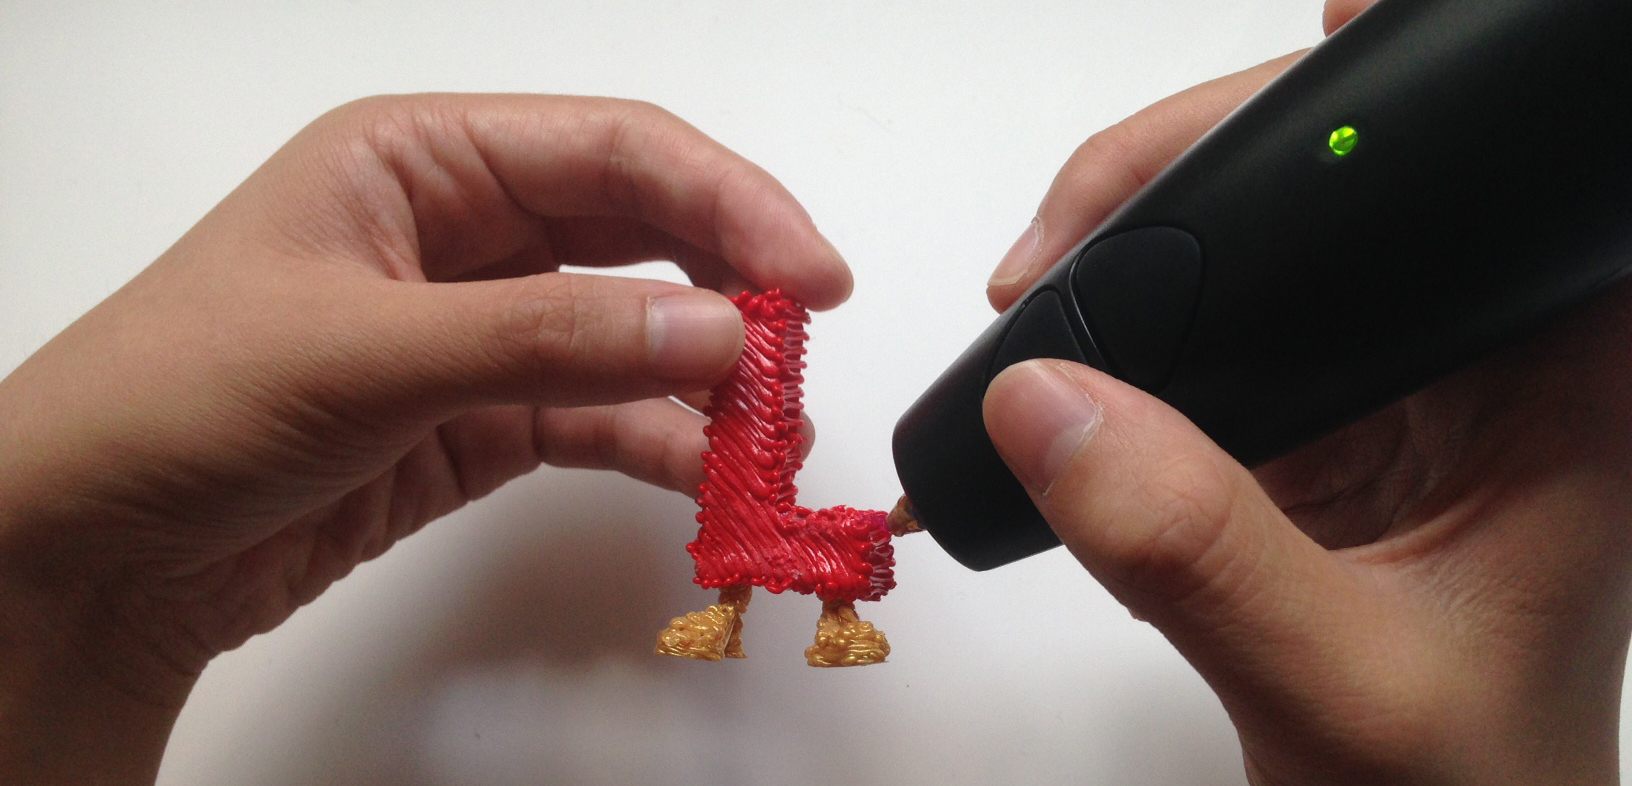
There is no other place: just like ordinary felt-tip pens, only much more fun. As usual, I was pleased with the simplest instruction on a small sheet, with images - a minimum of reading, maximum action!
Key parameters are heating rate and flow temperature. Their correct combination plus a bit of dexterity allows you to freely use the device.
For a start, fill your hand - here you can take pictures of snowflakes on a piece of paper. Download them here .
It is with these stencils that the rainbow girl begins her work, who has dedicated her channel to the possibilities of 3D drawing. Here is what she gets:
Important! All videos with 3D pens are sped up to varying degrees. In fact, the process of 3D modeling - more laborious and slow work with plastic.
Safety Technique:
Here is a DIY project site with a pen where you can find project descriptions and stencils (stencils) in the public domain. Pinterest dedicated to wire sculpture and products made with a 3D pen.
The project of the Brooklyn Bridge, stencils for which are publicly available from the link above.
Wire sculpture , which according to Wikipedia information appeared in ancient Egypt and received a second wind in the 20th century, is very similar to what you can create with a pen. The most interesting works we found in Frank Plant (Frank Plant) - an American sculptor living in Barcelona:

The man on the box and headphones - the work of Frank Plant.
Many of the works that can be found on the Internet, made with the help of 3d pens look depressingly clumsy. First, in the first 3Doodler, there were difficulties with the speed and temperature of the feed. Secondly, there were no certain techniques for working with a pen.

In this article, the expert shares already some of the developments. We checked what works and what doesn't:
Plastic film

How: Hold the pen perpendicularly and press down on the paper. Drive in a circular motion or straight, fairly quickly. The resulting plastic film is quite flexible.
In fact: ... and quite fragile. The method is not very .
Shaping

How: ABS freezes in the air, and PLA freezes a little slower, so there is 5-8 seconds to correct it with your fingers. The main thing is not to get burned. The finished product made of ABS can be slightly warmed up and bent by correcting irregularities.
In fact: this is torture if the plastic does not freeze immediately. It is better to adjust the temperature and feed rate so that this does not happen. If something does not work out, it is easier to simply cut with scissors and redo it. Fingers on plastic, we have not burned even once.
Hold the product with your second hand.
How: Second hand. The fact is that the first works all tried to paint right in the air. But the more part of the product is ready, the more convenient it is to take it in your free hand and twirl it while continuing to draw.
Actually: Works. That is how we made our “lamp” which you will see below.
Polished finished product
How: the article gives three options.
Actually: Probably, a soldering dryer is best for this purpose. Processing with sandpaper on ABS plastic will not give a result, but you can try a file - although there are chances that the part will break in the process.
Any basis

How: You can create a product on almost any basis, not only on paper or a table. You can emboss glass, small mirrors, fridge magnets, circuit boards, etc. into plastic. For example, this project of sea fish is created on a wooden blank. And these are fridge magnets:
Actually: Works great. Need a frame on which you can "pull" the plastic further. Therefore, it is better to either “draw” immediately and then pick it up, or use at least a lump of paper as a base.
"String theory"
How: The inaccurate appearance of many products was obtained because of frozen “tails” or “strings” that appeared if the handle was not taken at the wrong time. If you need to create a “string” of plastic (for example, you create a “lawn”) stretching from the product, stop pressing the plastic supply button and quickly remove the handle. If you want to avoid creating such a string, stop the flow of plastic and hold the knob in place for a few seconds.
Actually: Partly true, but on the finished product, such a string can simply be cut off with scissors. And it's easier than to fool like that.
First of all, nothing much :

Then we tried to use a pen to finish the device, which was soldered last time . You, probably, remember the series of red diodes which did not come on? All right, it still does not burn, but then:

It turned out exactly the prototype - everything we wanted. Here you also need to think over the base case and complete the installation. As in the examples above, the combination of light and plastic products made with a pen gives a nice effect.
I will experiment more, but I liked the process itself. Plastic can be replaced quickly and conveniently with different colors. There were no problems with the pen. In addition, the “lampshade” for the device, created “out of thin air”, pleased with this fact alone. Of course, unlike the prototype projects above, this is the wildest DIY for now, but we will continue to explore the possibilities of the device.
Verdict: quickly outline a prototype by hand or painstakingly draw a finished model using a 3D pen - you can. It will remain in my DIY arsenal, especially since plastic is being consumed quite economically. The main advantage here is the fascination of the process itself.
Software and 3D modeling are not needed - this is a plus, it is enough to draw a stencil and circle it with a pen. The products are lightweight and transmit light well - this can also be used.
Of the minuses - the products are quite fragile and brittle; look more like rainbow crafts, and not as technological devices.
Although the latter just can be used for DIY - I was completely satisfied with my “lampshade”. In this form, he will go to the contest from Masterkit . If I'm lucky, next time I will write about prototyping using a 3D printer (although, in my case, of course, this can only happen if there is no more work in the competition =).
At the end of this post, I would like to personally thank everyone who helped me with electronics in the comments to the previous post:
ploop , Anisotropic , eta4ever , Zuy , Ako_Ito , Zzzuhell , xReaper , laws , Deranged , Iv38 , vladikas , argz , apple01 , mickvav , AlNinyo , edejin , alecv , nikitosk , Hoshi , Phmphx , tdsh , tshs , tfsh , tfsh , hjin , alecv , nikitosk Impuls , LAVBoy , klirichek , @Arlakz, and also Alexey Korotich , Dmitry Gordeev , Rinat Ibragimov .
Many thanks for the patient answers to the questions and the books sent. Your support inspires you to move on and not be afraid of the new!
Of course, the first thing you will probably say is: do not complicate things. Buy a 3D printer and prototype as much as you want. I, in principle, for, but I would like to start to try the technology itself without having to master the software and 3D modeling. In addition, for a beginner the option with a pen is much more accessible. Well, in principle, this is a spectacular gadget with its capabilities.
What are the others doing?
Oddly enough, 3D pens are really used for prototyping. Since the parts drawn by ABS plastic with the help of lines are very light, first of all they have found application in aeromodelling. On this YouTube channel, you can follow the desperate attempts of the representative of the foggy Albion to get such a model aircraft to fly. And this is his blog about the same.
')
Although the model looks quite beautiful, unfortunately, none of the launches have so far taken place, they all look something like this:
The craftsmen also created a drone from the post cap using a 3d pen. See a description of this project here .
The video of creating and launching another quadrocopter is especially pleasant to watch after the previous video - it just took and flew:
To a hostess on a note - the author of the project uses a rather interesting method of working with a 3D pen and ABS plastic to create such an uneasy, in fact, for hand-drawing details, like a propeller:
The second sphere in which 3D pens have already found application for the creation of technology is lighting. Pen can draw a lot of things where you can shove a light bulb, if you understand what I mean :
The lamp of the work of Brooklyn artist Rachel Goldsmith , which was written in PCmag .
Korean painter Gina Sim's super-hard work — done on a papier-mâché base, then cut to remove from the base and glued together again with a pen. Her other works are no less impressive.
3Dali 3D pen: test drive
Our choice fell on the handle 3Dali . In this post, among others, the Myriwell pen is mentioned, the Russified copy of which is Dali. Compared to Doodler , the handle is smaller in size - it is more comfortable to hold in your hand - and it doesn’t make a noise like a cooler like a clipper, as the first version of the handle did.
The only thing that is heard during work is a slight crackle of plastic sometimes. In my childhood, such a crackle, like the characteristic smell, was when we burned the wires. Wires, Carl. How much has changed since then.
In addition to smaller dimensions, the handle is very light. In addition, it goes into standby after five minutes of inactivity - well done.
TTX
Model: RP-100A
Power supply: 12V DC
Material for printing: ABS plastic 1.75 mm
Feed Rate: Adjustable
Heating temperature: adjustable from 160 to 250
Heating power: 12V 3A
Nozzle diameter: 0.4 - 0.7 mm (indicated on the package)
Warranty period: 12 months
Complete set: adapter, the Russified instruction, ABS plastic of 3 flowers
Made in china
Pros:
- Simplicity
- Dimensions
- Temperature and feed rate controllers
- In case of device malfunction, free exchange is provided.
Separately used REC plastic kit of 12 colors:
Diameter: 1.75mm
Heating temperature: 210 - 245
Weight: 300g
How to draw?
There is no other place: just like ordinary felt-tip pens, only much more fun. As usual, I was pleased with the simplest instruction on a small sheet, with images - a minimum of reading, maximum action!
Key parameters are heating rate and flow temperature. Their correct combination plus a bit of dexterity allows you to freely use the device.
For a start, fill your hand - here you can take pictures of snowflakes on a piece of paper. Download them here .
It is with these stencils that the rainbow girl begins her work, who has dedicated her channel to the possibilities of 3D drawing. Here is what she gets:
Important! All videos with 3D pens are sped up to varying degrees. In fact, the process of 3D modeling - more laborious and slow work with plastic.
Safety Technique:
- Do not touch the tip - up to 230 degrees according to the instructions and up to 250 according to the performance characteristics.
- Children under 8 years old do not give (terrible injustice: of course, give, but under supervision).
- To air the room
- Included do not throw
- What horrible handle does not melt.
What to draw?
Here is a DIY project site with a pen where you can find project descriptions and stencils (stencils) in the public domain. Pinterest dedicated to wire sculpture and products made with a 3D pen.
The project of the Brooklyn Bridge, stencils for which are publicly available from the link above.
Wire sculpture , which according to Wikipedia information appeared in ancient Egypt and received a second wind in the 20th century, is very similar to what you can create with a pen. The most interesting works we found in Frank Plant (Frank Plant) - an American sculptor living in Barcelona:
The man on the box and headphones - the work of Frank Plant.
Equipment
Many of the works that can be found on the Internet, made with the help of 3d pens look depressingly clumsy. First, in the first 3Doodler, there were difficulties with the speed and temperature of the feed. Secondly, there were no certain techniques for working with a pen.
In this article, the expert shares already some of the developments. We checked what works and what doesn't:
Plastic film
How: Hold the pen perpendicularly and press down on the paper. Drive in a circular motion or straight, fairly quickly. The resulting plastic film is quite flexible.
In fact: ... and quite fragile. The method is not very .
Shaping
How: ABS freezes in the air, and PLA freezes a little slower, so there is 5-8 seconds to correct it with your fingers. The main thing is not to get burned. The finished product made of ABS can be slightly warmed up and bent by correcting irregularities.
In fact: this is torture if the plastic does not freeze immediately. It is better to adjust the temperature and feed rate so that this does not happen. If something does not work out, it is easier to simply cut with scissors and redo it. Fingers on plastic, we have not burned even once.
Hold the product with your second hand.
How: Second hand. The fact is that the first works all tried to paint right in the air. But the more part of the product is ready, the more convenient it is to take it in your free hand and twirl it while continuing to draw.
Actually: Works. That is how we made our “lamp” which you will see below.
Polished finished product
How: the article gives three options.
- Technique "Bonsai": cut off too much - it works.
- Soften hair dryer - does not work. It would be strange if the hair dryer (for the head!) Was heated to 230 ° C.
- Soften the handle spout - does not work. Or it works, but somehow it is not very effective.
Actually: Probably, a soldering dryer is best for this purpose. Processing with sandpaper on ABS plastic will not give a result, but you can try a file - although there are chances that the part will break in the process.
Any basis
How: You can create a product on almost any basis, not only on paper or a table. You can emboss glass, small mirrors, fridge magnets, circuit boards, etc. into plastic. For example, this project of sea fish is created on a wooden blank. And these are fridge magnets:
Actually: Works great. Need a frame on which you can "pull" the plastic further. Therefore, it is better to either “draw” immediately and then pick it up, or use at least a lump of paper as a base.
"String theory"
How: The inaccurate appearance of many products was obtained because of frozen “tails” or “strings” that appeared if the handle was not taken at the wrong time. If you need to create a “string” of plastic (for example, you create a “lawn”) stretching from the product, stop pressing the plastic supply button and quickly remove the handle. If you want to avoid creating such a string, stop the flow of plastic and hold the knob in place for a few seconds.
Actually: Partly true, but on the finished product, such a string can simply be cut off with scissors. And it's easier than to fool like that.
What have we got in the end?
First of all, nothing much :
Then we tried to use a pen to finish the device, which was soldered last time . You, probably, remember the series of red diodes which did not come on? All right, it still does not burn, but then:
It turned out exactly the prototype - everything we wanted. Here you also need to think over the base case and complete the installation. As in the examples above, the combination of light and plastic products made with a pen gives a nice effect.
I will experiment more, but I liked the process itself. Plastic can be replaced quickly and conveniently with different colors. There were no problems with the pen. In addition, the “lampshade” for the device, created “out of thin air”, pleased with this fact alone. Of course, unlike the prototype projects above, this is the wildest DIY for now, but we will continue to explore the possibilities of the device.
Verdict: quickly outline a prototype by hand or painstakingly draw a finished model using a 3D pen - you can. It will remain in my DIY arsenal, especially since plastic is being consumed quite economically. The main advantage here is the fascination of the process itself.
Software and 3D modeling are not needed - this is a plus, it is enough to draw a stencil and circle it with a pen. The products are lightweight and transmit light well - this can also be used.
Of the minuses - the products are quite fragile and brittle; look more like rainbow crafts, and not as technological devices.
Although the latter just can be used for DIY - I was completely satisfied with my “lampshade”. In this form, he will go to the contest from Masterkit . If I'm lucky, next time I will write about prototyping using a 3D printer (although, in my case, of course, this can only happen if there is no more work in the competition =).
At the end of this post, I would like to personally thank everyone who helped me with electronics in the comments to the previous post:
ploop , Anisotropic , eta4ever , Zuy , Ako_Ito , Zzzuhell , xReaper , laws , Deranged , Iv38 , vladikas , argz , apple01 , mickvav , AlNinyo , edejin , alecv , nikitosk , Hoshi , Phmphx , tdsh , tshs , tfsh , tfsh , hjin , alecv , nikitosk Impuls , LAVBoy , klirichek , @Arlakz, and also Alexey Korotich , Dmitry Gordeev , Rinat Ibragimov .
Many thanks for the patient answers to the questions and the books sent. Your support inspires you to move on and not be afraid of the new!
Source: https://habr.com/ru/post/257271/
All Articles