vCloud Director for the smallest (part 2): creating virtual machines
UPDATE: We have automated the creation of network and NAT rules. Now, when making a subscription, all this is created by itself :). All you have to do is deploy a virtual machine from a template or from scratch. At the same time, you still have the opportunity to change the network settings if necessary.
Just do not forget about the Firewall, which by default does not allow any traffic and requires setting up rules .
Part 1. Network Setup
In vCloud Director, virtual machines “live” in vApp containers, so creating a VM begins with the creation of vApp. You can select the following options:
')
In this material we consider in detail the first two cases.
Let's start with the simplest option - deploying vApp from a template. In CloudLite.ru you can not bother with downloading templates, as in the public catalog (Public Catalog) is a fairly wide choice of ready-made templates.
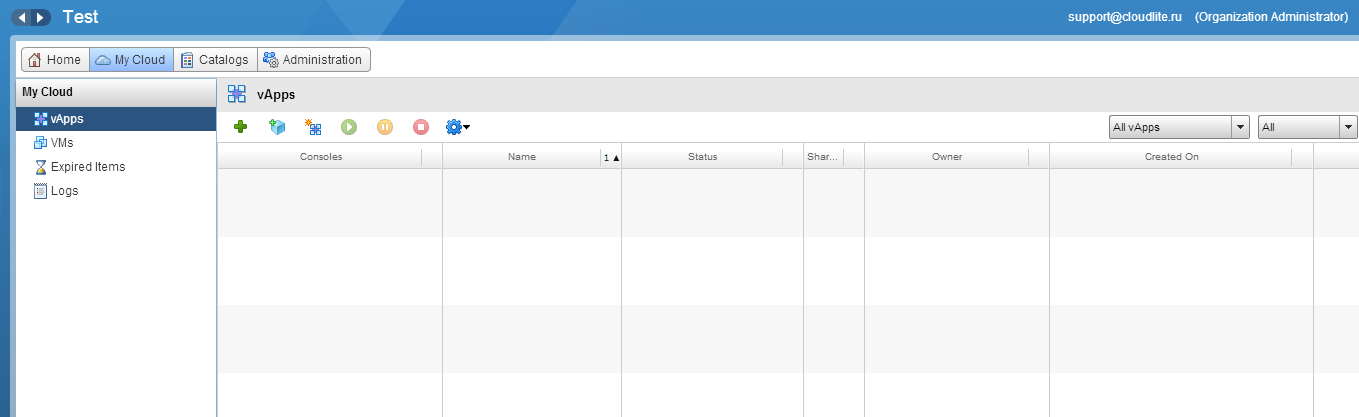
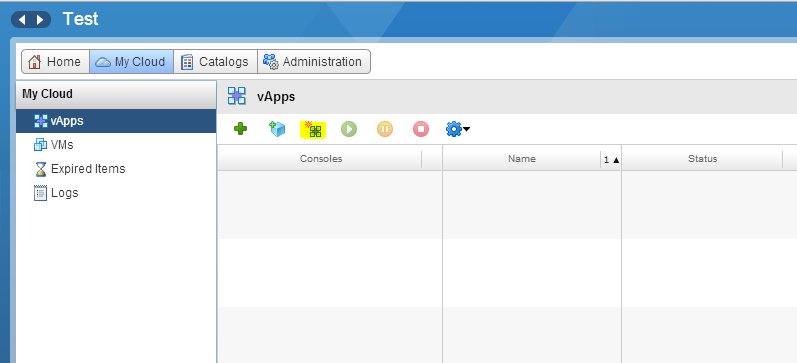
1. Go to the My Cloud section and select the vApps tab and click on the green + .
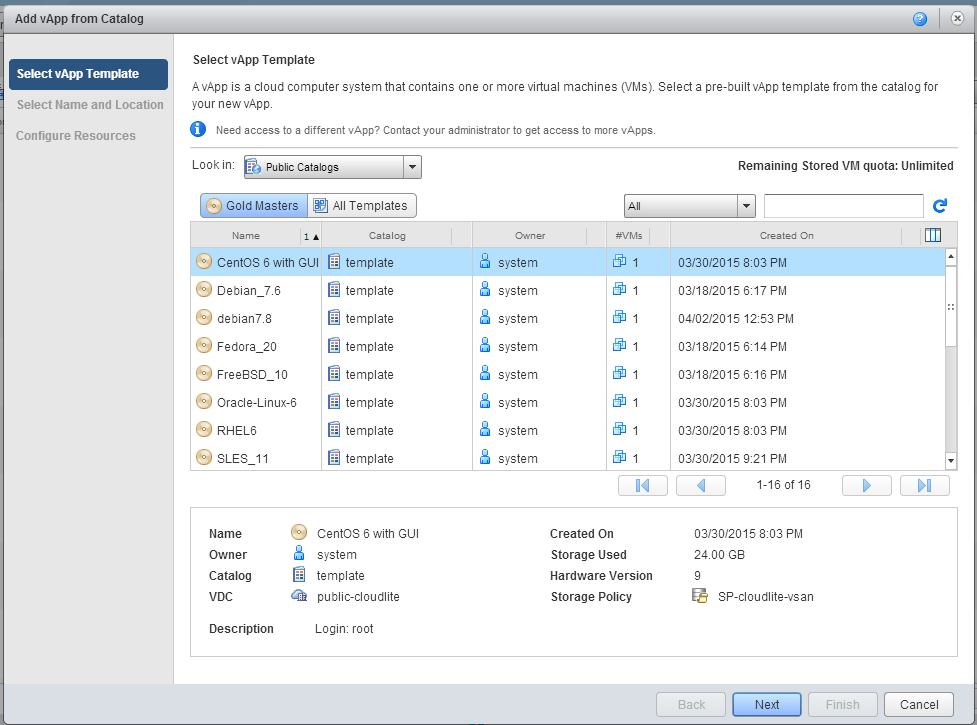
2. In the new window in the Look in field, select the Public Catalog.
The table below will display a list of available OS virtual machine templates. Select the desired.
At the bottom of the window will contain information about this template, including login to login, the necessary disk space, etc. Click Next .
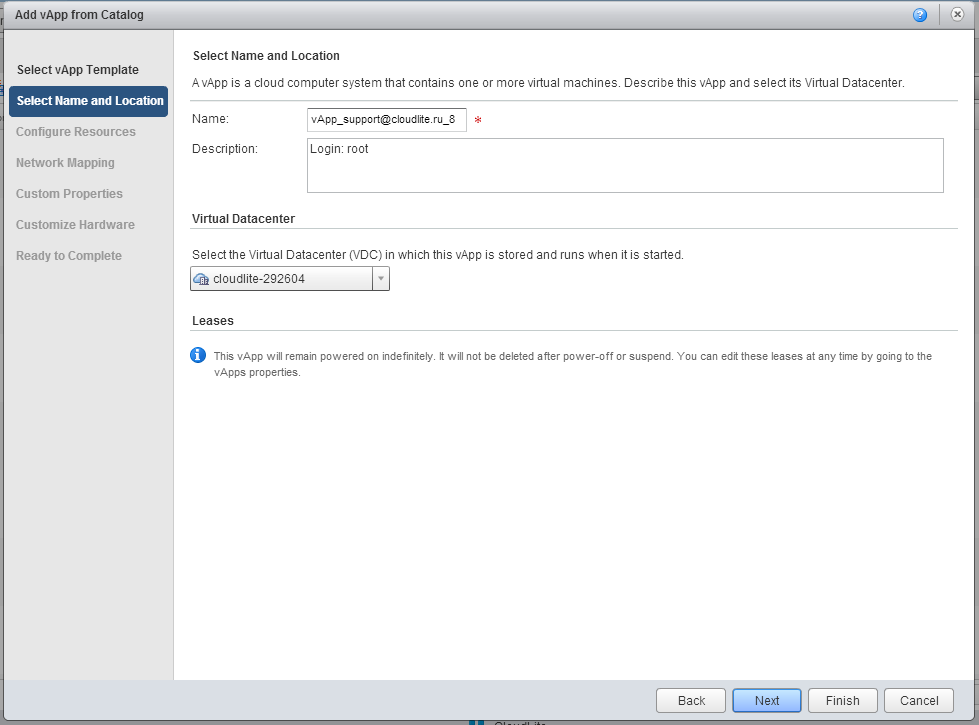
3. Enter the name or leave the existing (Name), fill in the description as necessary (Description). Click Next .
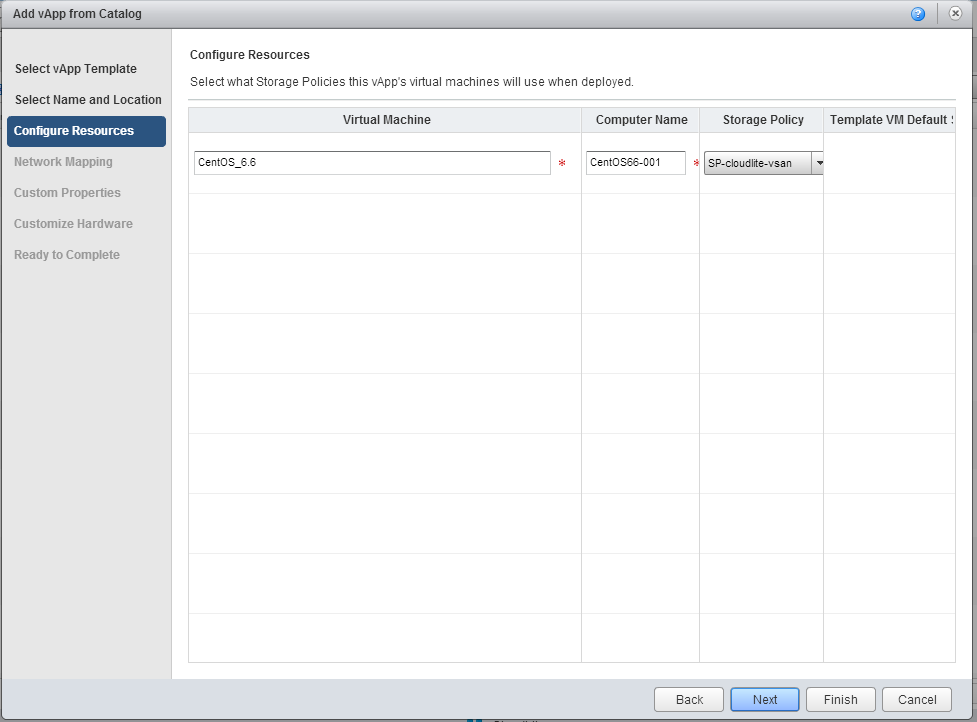
4. In the Configure Resources tab, if necessary, make changes to the Computer Name field (the name that will be displayed inside the guest OS during customization). Next button.
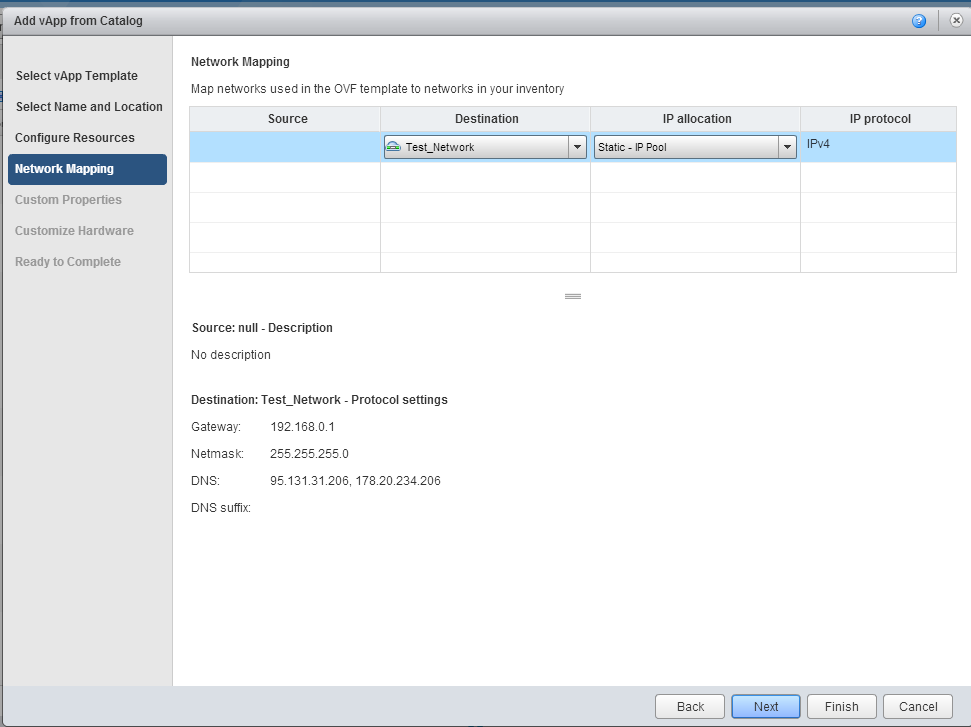
5. In the Network Mapping tab, set the network parameters.
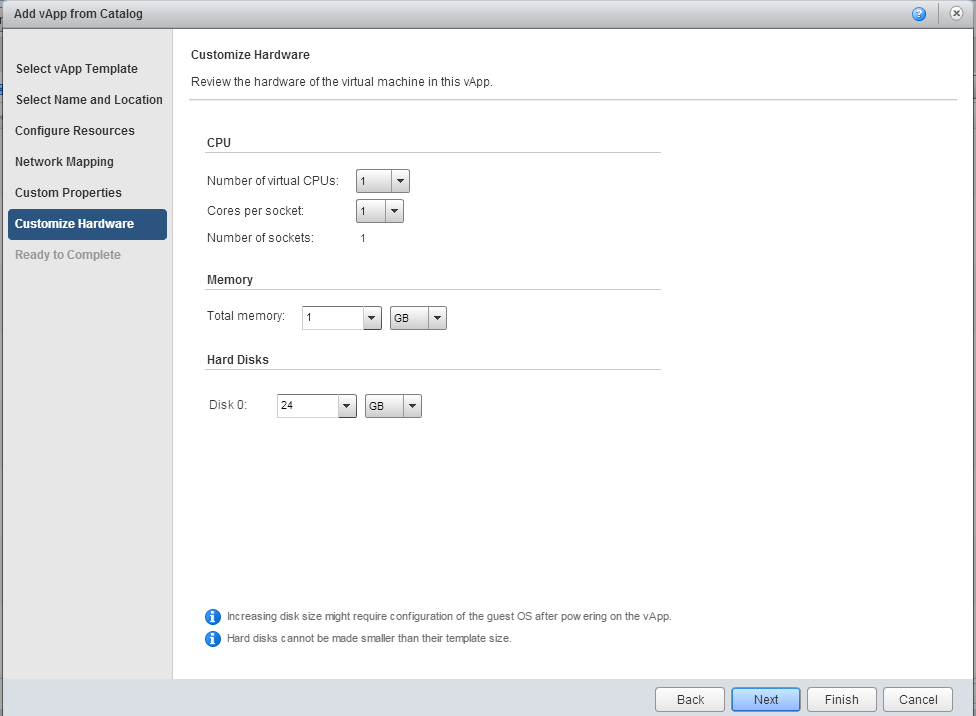
6. We skip the step Custom Properties and get to the tab Customize Hardware . Here are the parameters CPU, Memory, Hard Disk. We recommend not to change them while the VM is deployed, but rather to do it after its creation. Next button.
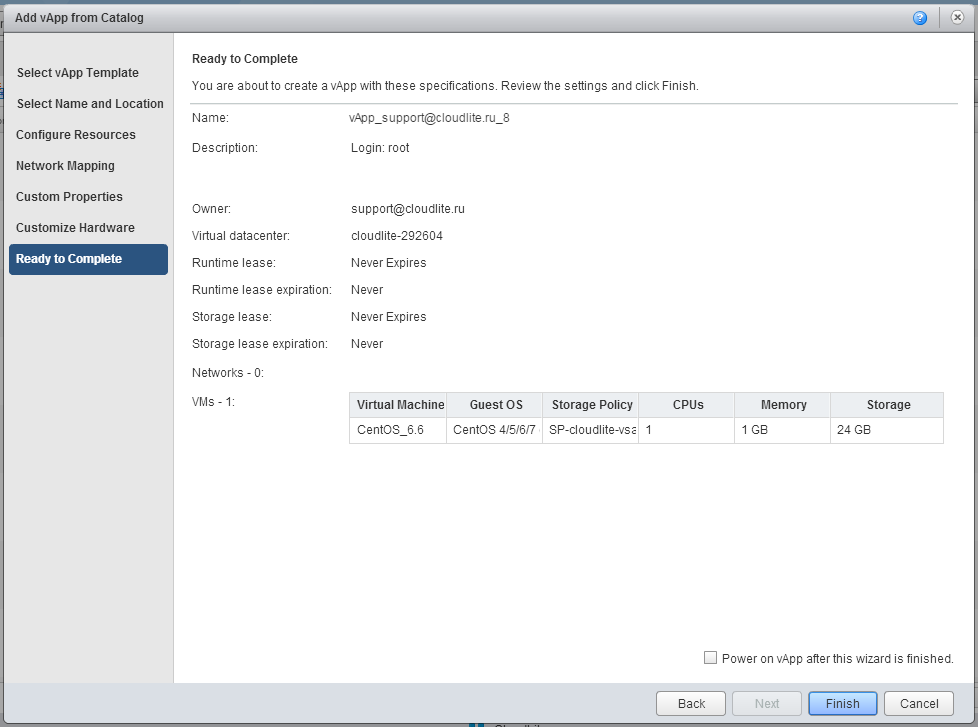
7. On the last tab Ready to Complete, carefully check all the parameters of your virtual machine selected in the previous steps. Here you can automatically launch the created virtual machine by ticking the checkbox Power on vApp after this wizard is finished . Click Finish .
If there is a desire to deploy VMs from its own template, then this can also be done in vCloud Director. To do this, create a directory (the folder into which you will download this template), well, and import the template itself . In the Look in field, respectively, instead of Public Catalog, select your catalog.
If you need to load your OS on the created virtual machine, then for this we create a vApp with an “empty” VM.
1. Go back to the My Cloud section, in the vApps tab, click on the icon marked with a yellow marker ( Build new vApp ).
2. In the window that appears, set the name of the VM.
In the Leases section, if necessary, you can set the time after which VMs contained in this container will be automatically turned off ( Runtime Lease ) and the period after which virtual machines of this vApp will be “frozen” ( Storage Lease ) and displayed in the Expired tab Items . The time specified in Storage Lease begins to run after the time specified in Runtime Lease.
Click Next .

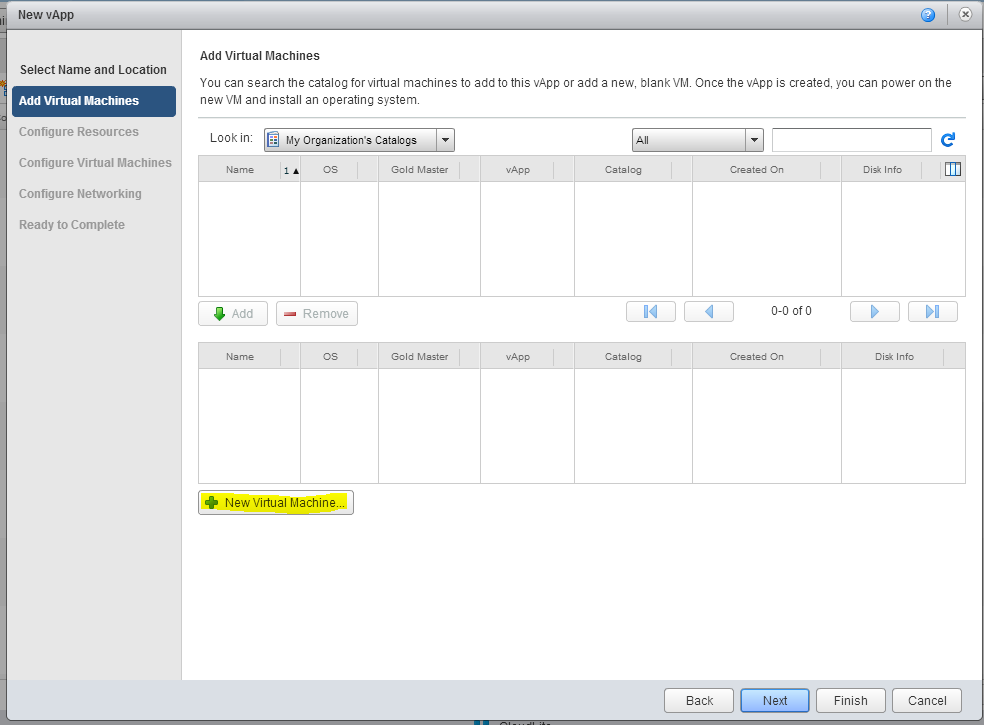
3. On the Add Virtual Machines tab, select the New Virtual Machine option. Click Next .
4. In the New Virtual Machine window that appears, you need to select the parameters of the virtual machine being created:
- name (Virtual Machine Name);
- the name that will be displayed inside the guest OS during customization (Computer Name);
- its description if necessary (Description);
- a family and a specific operating system, which we will later install. For example, choose Centos;
- the amount of RAM and disk;
- total number of virtual cores that will be allocated to the VM (Number of virtual CPUs);
- number of cores per virtual socket.
The last two parameters are important for licensing some operating systems. For example, for Windows Server Standard, the number of sockets should be no more than 4. In other cases, it is better to leave 1 core per socket.
Parameters that are set automatically and which we do not recommend changing:
- version of the virtual machine container (Virtual hardware version);
- bus type of virtual disks (Bus type). This is not related to the type of drives (SAS, SATA, VSAN) :).
- the number of virtual network adapters (Number of NICs). If there are no specialized needs, we recommend leaving 1.
Click OK .

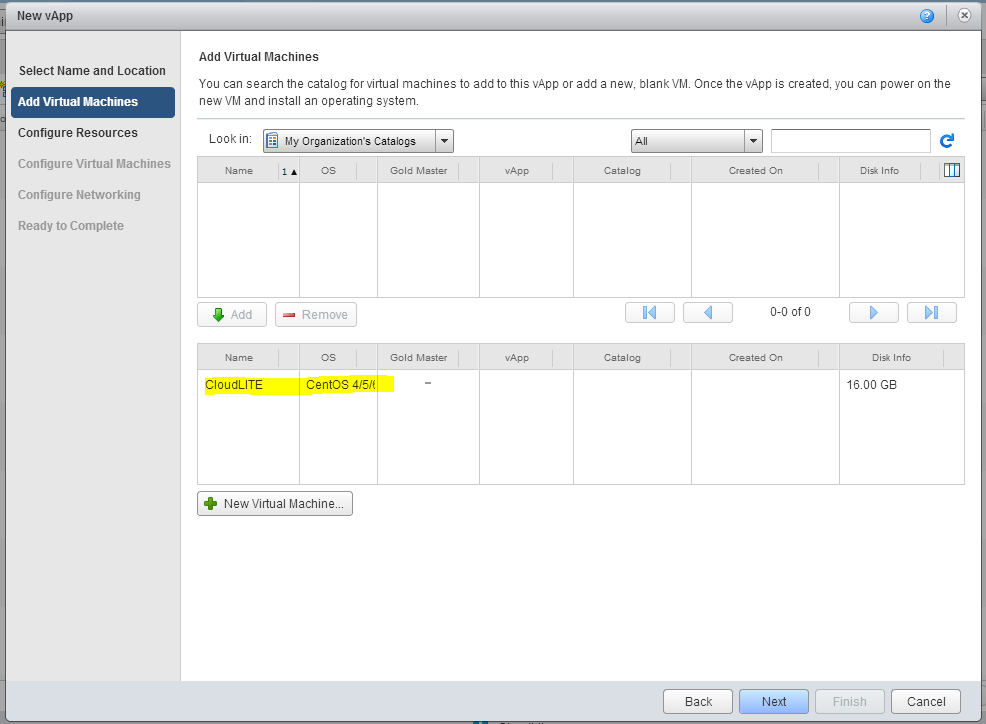
5. A new virtual machine appears in the list of created vApp. Click Next .
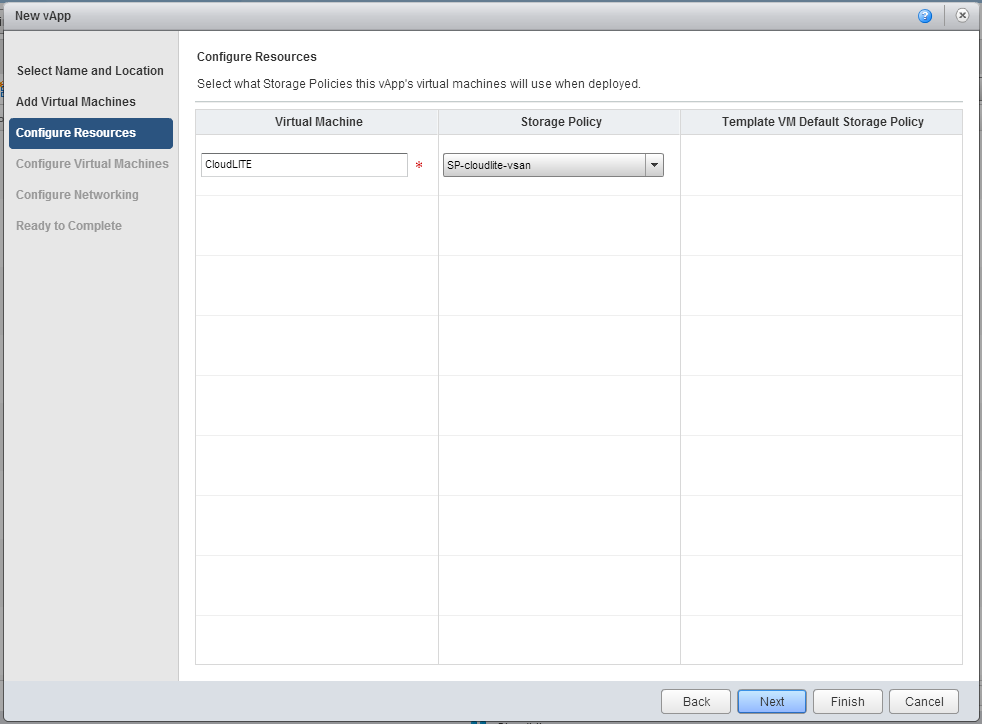
6. On the Configure Resources tab, simply click Next .
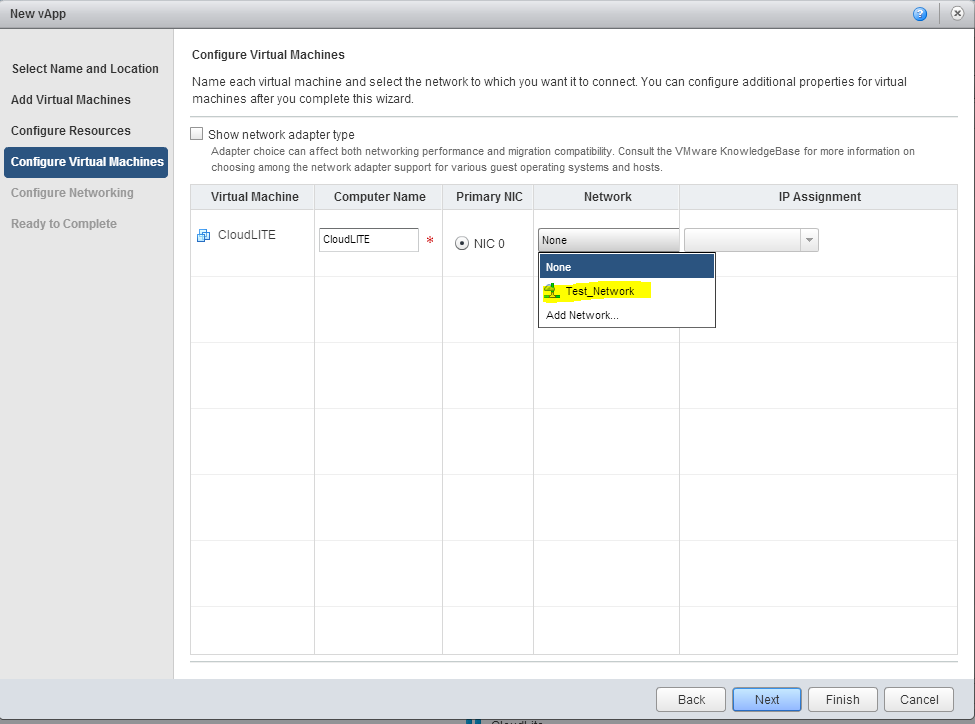
7. If necessary, make changes in the Computer Name field, select the network to which we want to connect the newly created virtual machine. In this case, select the Test_Network network that we created in the previous article . Click Next .
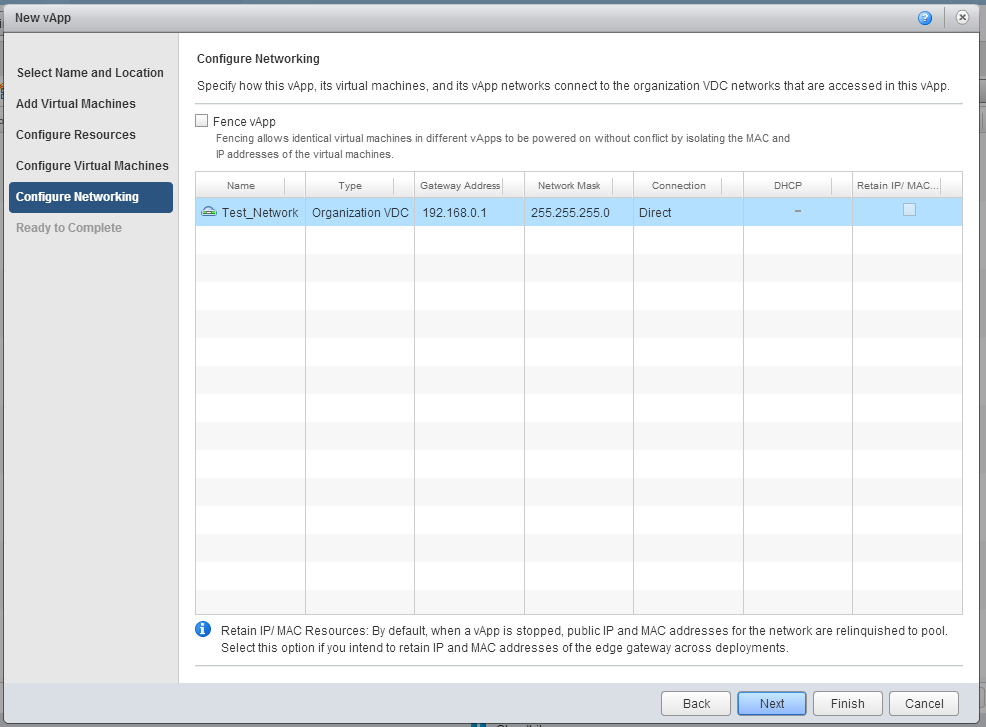
8. In the Configure Networking tab, you can view the network settings. You can also select the option Fence vApp . It allows you to assign identical IPs to virtual machines in different vApps, while avoiding IP address conflicts. This is useful if there are several test or development environments with identical VMs.
9. On the last tab, Ready to Complete, once again carefully check all the parameters of the virtual machine. If everything works out, then click Finish .

10. We are waiting for some time until the VM under Centos unfolds.

Next, you need to install the appropriate OS by mounting the installation disk image (ISO image) or the disk itself. Here are the detailed instructions for this case.
It's all very simple. The beginning is the same. as in the previous case. The only thing - this time we do not click on Add New Virtual Machine . Instead, click Next to win. In this “empty” vApp, then similarly, deploy a VM from a template or from scratch (without OS) in the same way as we have already done today.
Customization
When the VM is first turned on, so-called customization occurs when all the specified settings are applied to the virtual machine:
• name of the virtual machine;
• network settings;
• SID;
• administrator password.
If customization is not available, then VM parameters can be configured manually via the console.
Guest OS password
Read about the password for the guest OS here.
Actually, that's all for today.
You can go to train on cats in Cloudlite.ru :)
Questions on this material and suggestions on future tutorial topics leave in the comments.
Good luck in learning vCloud Director! :)
vCloud Director for the smallest (part 1): network setup
Just do not forget about the Firewall, which by default does not allow any traffic and requires setting up rules .
Part 1. Network Setup
In vCloud Director, virtual machines “live” in vApp containers, so creating a VM begins with the creation of vApp. You can select the following options:
')
- vApp from template (from VM with pre-installed OS);
- vApp c is an “empty” VM, i.e. without OS.
- “Empty” vApp and add VM there later.
In this material we consider in detail the first two cases.
Creating a virtual machine from a ready-made template
Let's start with the simplest option - deploying vApp from a template. In CloudLite.ru you can not bother with downloading templates, as in the public catalog (Public Catalog) is a fairly wide choice of ready-made templates.
1. Go to the My Cloud section and select the vApps tab and click on the green + .
2. In the new window in the Look in field, select the Public Catalog.
The table below will display a list of available OS virtual machine templates. Select the desired.
At the bottom of the window will contain information about this template, including login to login, the necessary disk space, etc. Click Next .
3. Enter the name or leave the existing (Name), fill in the description as necessary (Description). Click Next .
4. In the Configure Resources tab, if necessary, make changes to the Computer Name field (the name that will be displayed inside the guest OS during customization). Next button.
5. In the Network Mapping tab, set the network parameters.
6. We skip the step Custom Properties and get to the tab Customize Hardware . Here are the parameters CPU, Memory, Hard Disk. We recommend not to change them while the VM is deployed, but rather to do it after its creation. Next button.
7. On the last tab Ready to Complete, carefully check all the parameters of your virtual machine selected in the previous steps. Here you can automatically launch the created virtual machine by ticking the checkbox Power on vApp after this wizard is finished . Click Finish .
If there is a desire to deploy VMs from its own template, then this can also be done in vCloud Director. To do this, create a directory (the folder into which you will download this template), well, and import the template itself . In the Look in field, respectively, instead of Public Catalog, select your catalog.
Creating a virtual machine from scratch (without pre-installed OS)
If you need to load your OS on the created virtual machine, then for this we create a vApp with an “empty” VM.
1. Go back to the My Cloud section, in the vApps tab, click on the icon marked with a yellow marker ( Build new vApp ).
2. In the window that appears, set the name of the VM.
In the Leases section, if necessary, you can set the time after which VMs contained in this container will be automatically turned off ( Runtime Lease ) and the period after which virtual machines of this vApp will be “frozen” ( Storage Lease ) and displayed in the Expired tab Items . The time specified in Storage Lease begins to run after the time specified in Runtime Lease.
Click Next .
3. On the Add Virtual Machines tab, select the New Virtual Machine option. Click Next .
4. In the New Virtual Machine window that appears, you need to select the parameters of the virtual machine being created:
- name (Virtual Machine Name);
- the name that will be displayed inside the guest OS during customization (Computer Name);
- its description if necessary (Description);
- a family and a specific operating system, which we will later install. For example, choose Centos;
- the amount of RAM and disk;
- total number of virtual cores that will be allocated to the VM (Number of virtual CPUs);
- number of cores per virtual socket.
The last two parameters are important for licensing some operating systems. For example, for Windows Server Standard, the number of sockets should be no more than 4. In other cases, it is better to leave 1 core per socket.
Parameters that are set automatically and which we do not recommend changing:
- version of the virtual machine container (Virtual hardware version);
- bus type of virtual disks (Bus type). This is not related to the type of drives (SAS, SATA, VSAN) :).
- the number of virtual network adapters (Number of NICs). If there are no specialized needs, we recommend leaving 1.
Click OK .
5. A new virtual machine appears in the list of created vApp. Click Next .
6. On the Configure Resources tab, simply click Next .
7. If necessary, make changes in the Computer Name field, select the network to which we want to connect the newly created virtual machine. In this case, select the Test_Network network that we created in the previous article . Click Next .
8. In the Configure Networking tab, you can view the network settings. You can also select the option Fence vApp . It allows you to assign identical IPs to virtual machines in different vApps, while avoiding IP address conflicts. This is useful if there are several test or development environments with identical VMs.
9. On the last tab, Ready to Complete, once again carefully check all the parameters of the virtual machine. If everything works out, then click Finish .
10. We are waiting for some time until the VM under Centos unfolds.
Next, you need to install the appropriate OS by mounting the installation disk image (ISO image) or the disk itself. Here are the detailed instructions for this case.
Creating an “empty vApp
It's all very simple. The beginning is the same. as in the previous case. The only thing - this time we do not click on Add New Virtual Machine . Instead, click Next to win. In this “empty” vApp, then similarly, deploy a VM from a template or from scratch (without OS) in the same way as we have already done today.
Of important
Customization
When the VM is first turned on, so-called customization occurs when all the specified settings are applied to the virtual machine:
• name of the virtual machine;
• network settings;
• SID;
• administrator password.
If customization is not available, then VM parameters can be configured manually via the console.
Guest OS password
Read about the password for the guest OS here.
Actually, that's all for today.
You can go to train on cats in Cloudlite.ru :)
Questions on this material and suggestions on future tutorial topics leave in the comments.
Good luck in learning vCloud Director! :)
vCloud Director for the smallest (part 1): network setup
Source: https://habr.com/ru/post/257225/
All Articles