Making the application push

I want to share my

Guys, I read this article here: "About the problems and the solution of the task of delivering push notifications to millions of devices on various platforms . "
And another one: “How to send push notifications to the Windows Universal app” .
And I liked this one: “We work with notifications in Windows Phone 8.1” .
This article turned out to be quite understandable in a non-native and not always clear English language: "Windows Azure Notification Hubs: Tags and creating a breaking news app" .
The video from last year’s Build turned out to be interesting and still relevant.
Since not everything worked out for me exactly as in these articles, I further state my guide to action.
')
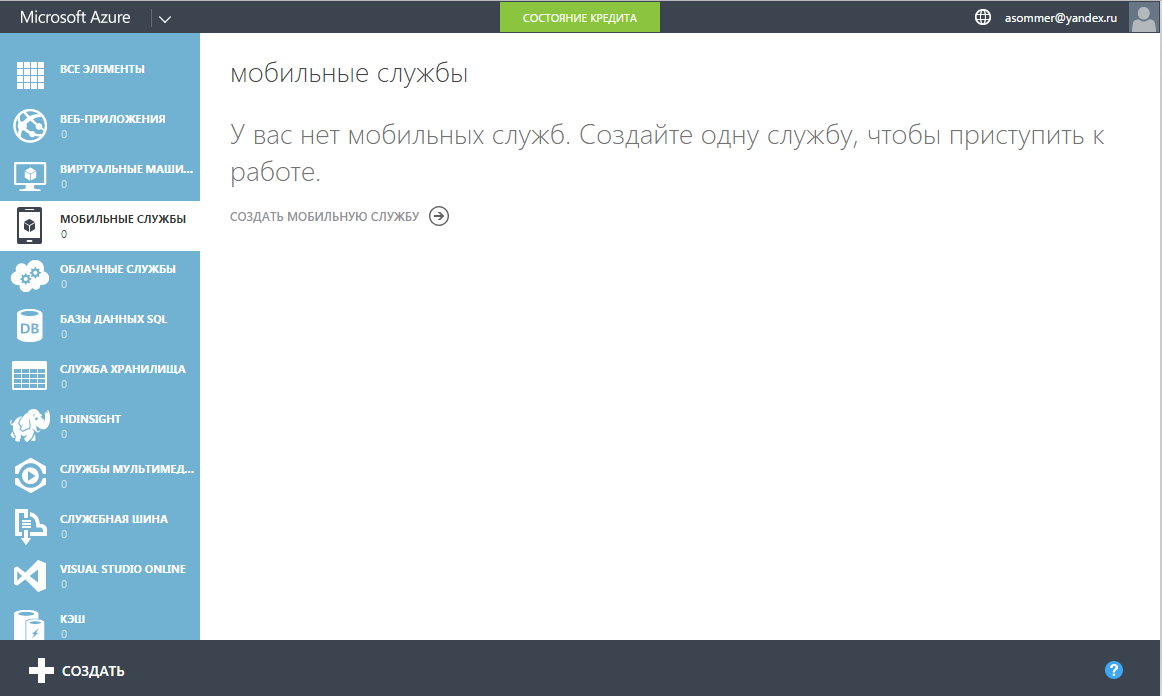
At https://portal.azure.com/ you can manage your account, view actions and resources, manage your subscription. But if you want to create various objects, and then manage them, then you can visit: https://manage.windowsazure.com
Going to the address https://manage.windowsazure.com and selecting the menu item "Mobile services", you can create a mobile service by clicking on the link "Create a mobile service"
Next, you can step by step select a name for your URL and specify the database parameters.
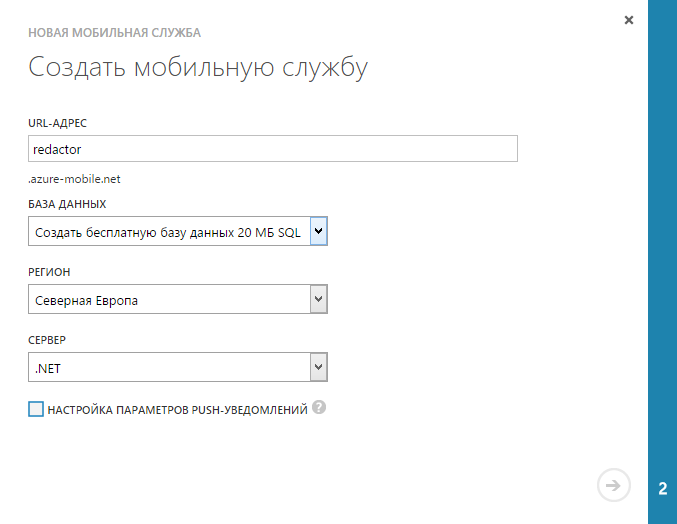
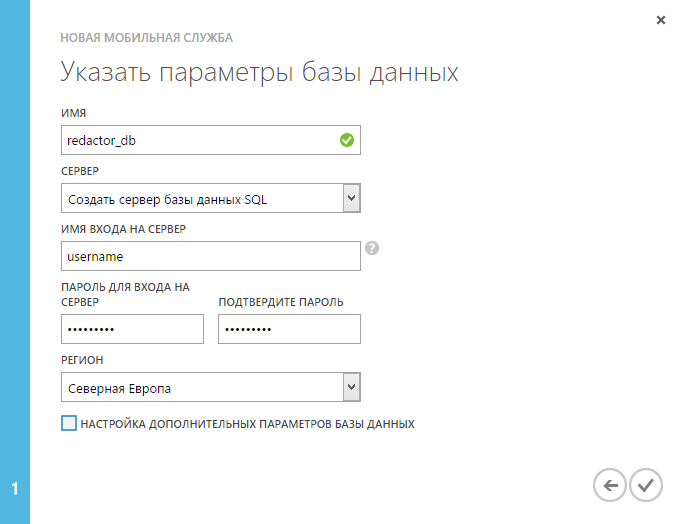
I limited myself to a free database and did not configure any additional parameters. The default settings are fine with me.
Alternatively, you can create a mobile service by clicking on the "CREATE" button in the lower left corner (see the first screenshot). In both the first and second variants, the steps are approximately the same.

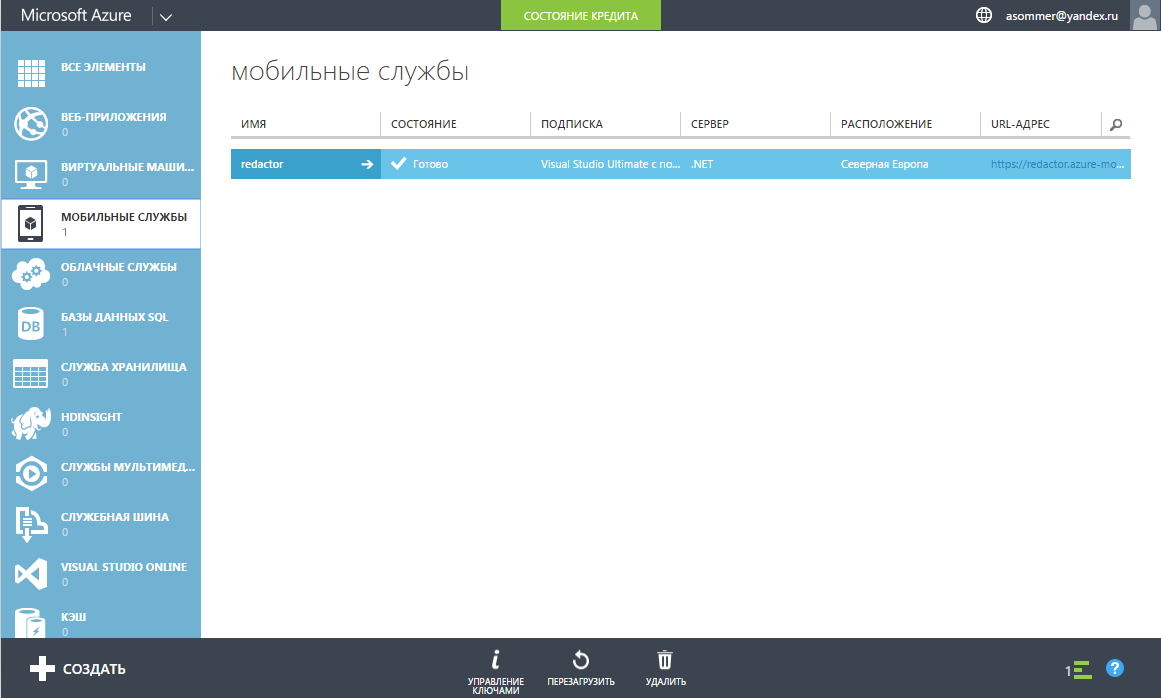
Having created the service in any of the ways, we will get this window:
Double clicking on the name of the service, we get to the panel of service management:
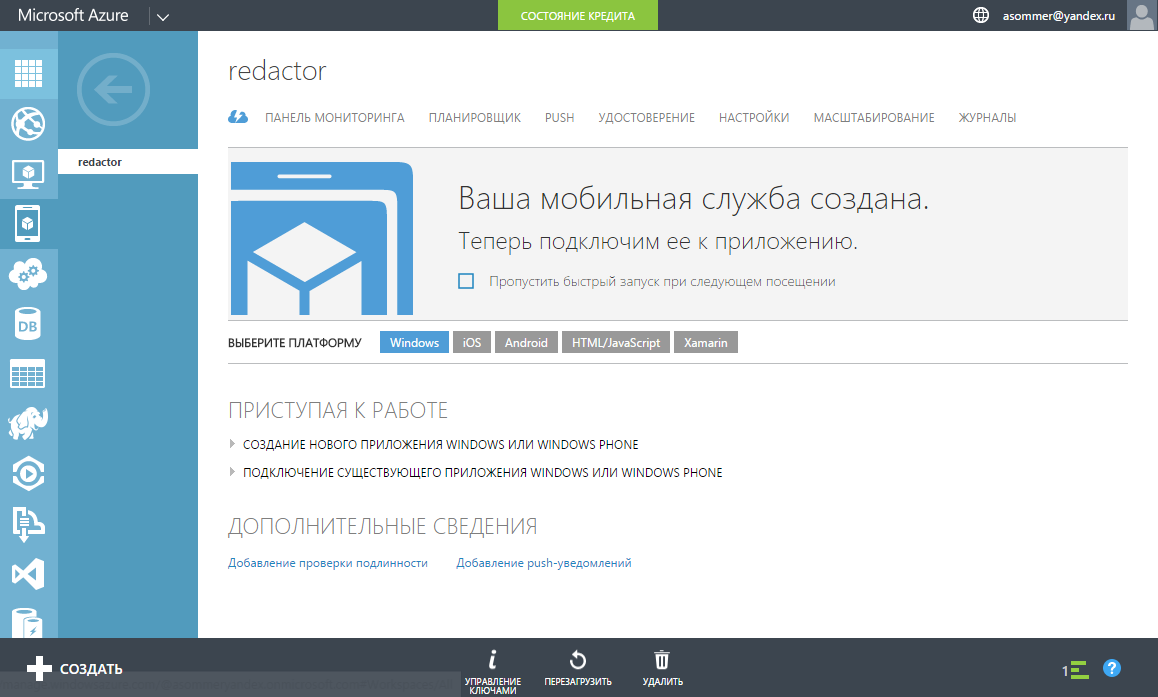
Select PUSH and see empty fields with client secret and SID of the packet:
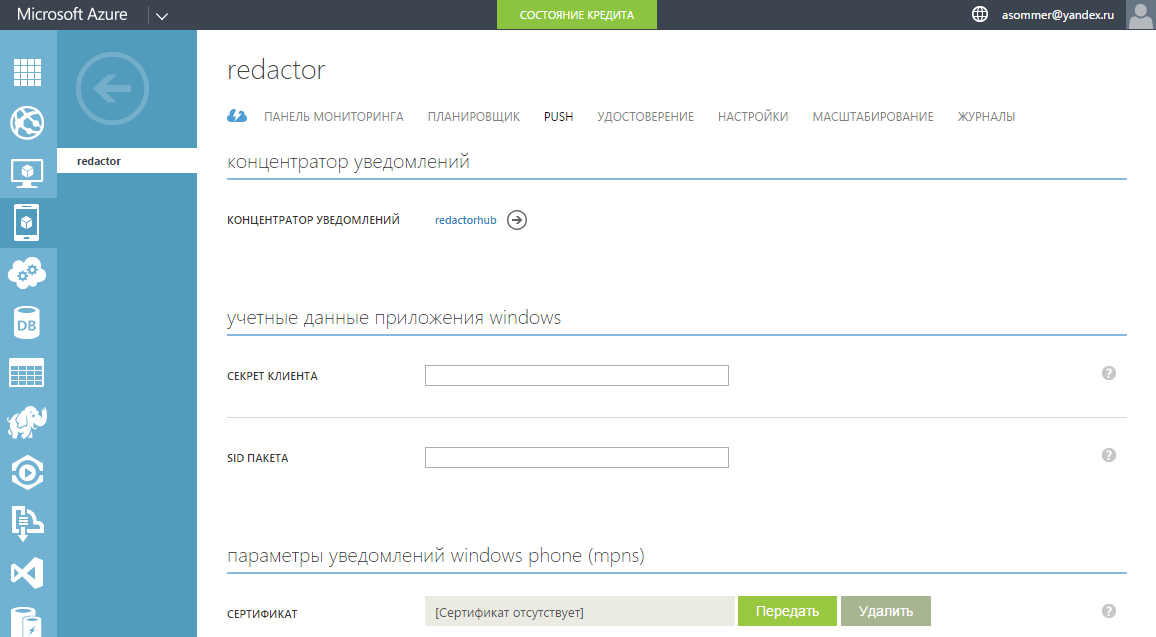
Prior to binding the application, both the client secret field and the packet SID field do not contain data.
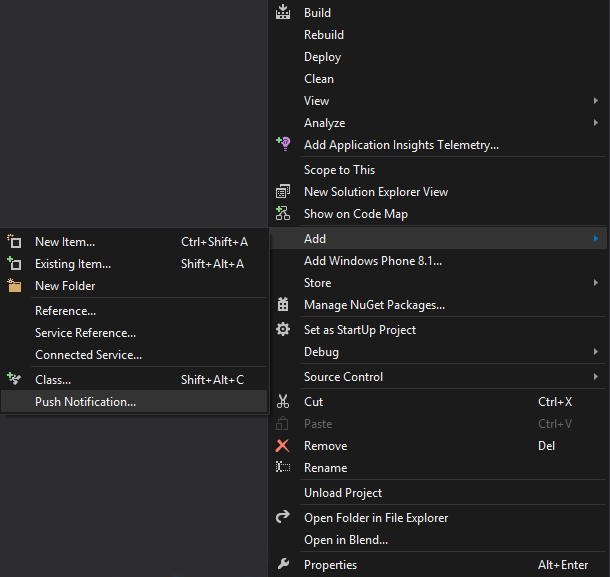
We distract from the website and work with the application to which we want to add push notifications. In order to bind our application to the newly created hub, first of all we need to open our application in Visual Studio.
Next, by calling the context menu on the project name (the project, not the solution), we will be able to add Push Notification to the application. In my English version of the studio, it looks like this:
Next steps “Next-Next” we select our application in the Store and the newly created service:

These actions are enough for your application to receive push notifications. If we update the page on the server, we will be able to see that the “client secret” and “SID packet” fields are already filled.
After the operation of adding Push notifications, some code will be added to your application automatically.
The following public variable will be added to the App class variable declarations in the App.xaml.cs file:
public static Microsoft.WindowsAzure.MobileServices.MobileServiceClient redactorClient = new Microsoft.WindowsAzure.MobileServices.MobileServiceClient("https://redactor.azure-mobile.net/", "TSIFgOYeMNUdwIViawpdeIJKXlcVIV57"); In the same App.xaml.cs, the channel registration will be added to the end of the OnLaunched event handling code:
RedactoR.redactorPush.UploadChannel(); The Services folder will automatically be created, inside which the MobileServices folder will be created, inside it another folder with the name of the redactor service created and already inside this folder is the push.register.cs file which contains the
Deploy the application and run it, so that it is registered in the hub.
Having created a binding, let's return to the site https://manage.windowsazure.com If you didn’t close the page, you can click on the hub name to get to its page. If closed, the same can be done from the general menu on the left:
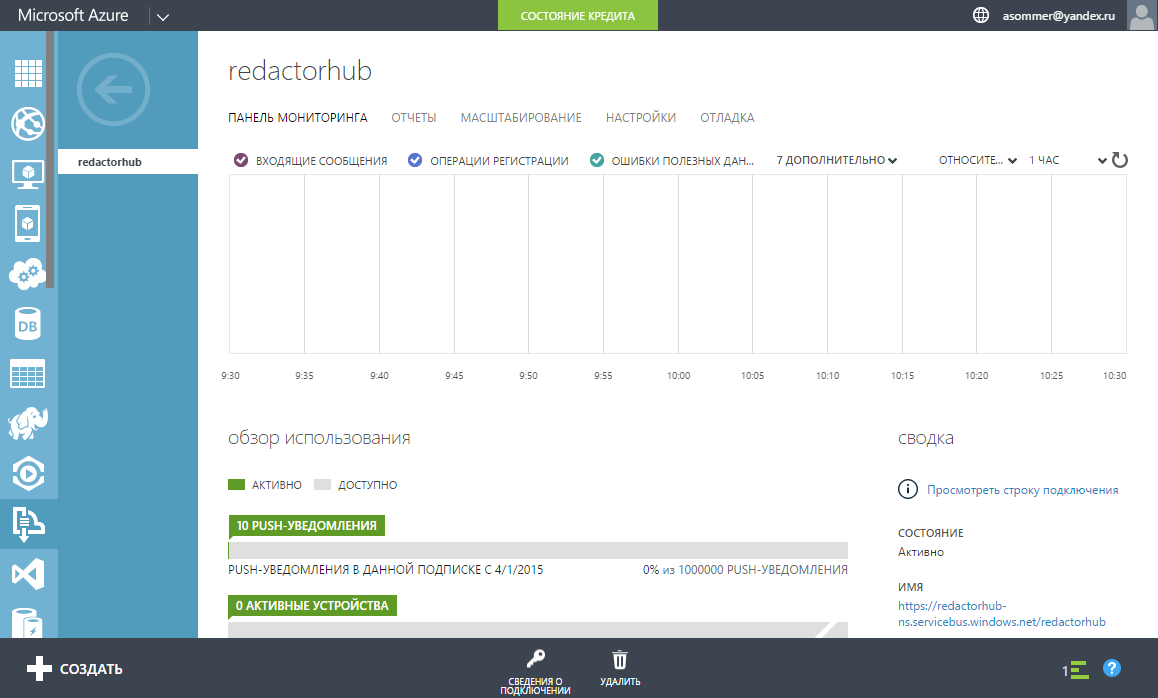
Pay attention to the link on the right with the name "View connection string". By clicking on it you can get guess what? That's right - the connection string! We will need it later.
From the hub, go to the tab "Debug", you can send a test push notification.
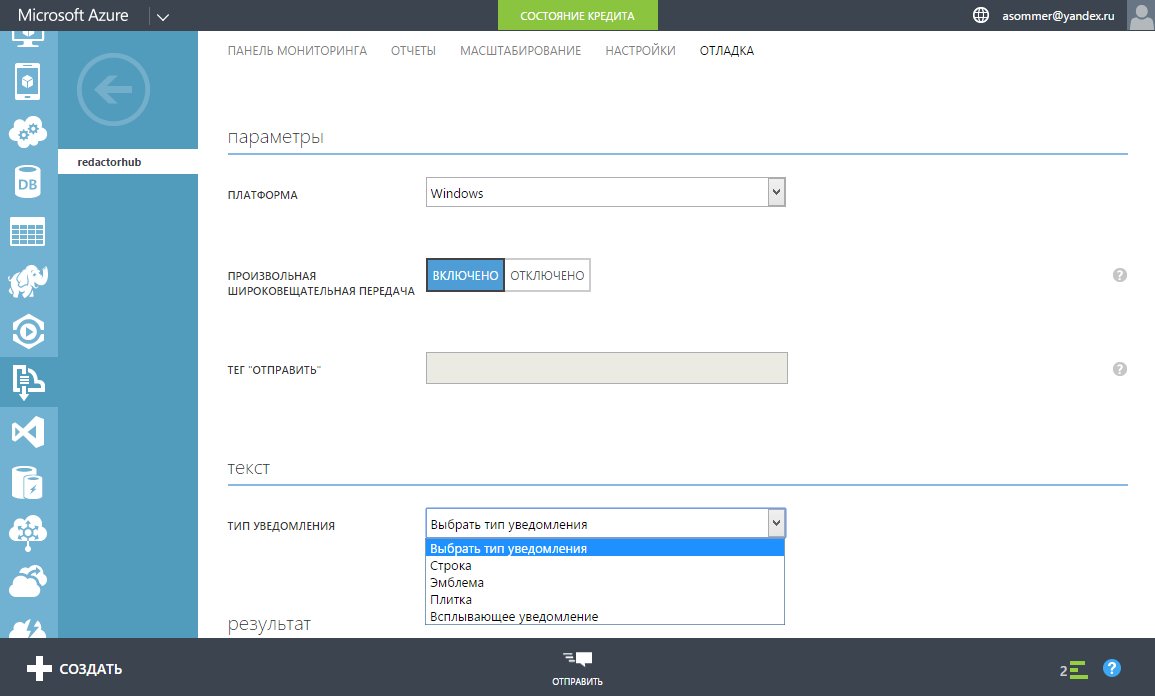
You can choose the type of notification to be sent: a line (raw notifications, to work with which you need to write an additional code), a logo, a tile and pop-up notifications (we can already send notifications of these types to our application).
Try sending a pop-up notification. If everything is OK, then you did everything right, and we will go ahead and make it a bit more complicated.
Pay attention to the SEND "SEND" field in the screenshot. When registering an application in a hub, we can specify certain keywords for a specific registration. Let's say we have a news application with various categories of news. In this case, we can send out certain notifications, say, only to users who prefer sports news.
To do this, we will need to change the UploadChannel code. Initially, it looks like this:
var channel = await Windows.Networking.PushNotifications.PushNotificationChannelManager.CreatePushNotificationChannelForApplicationAsync(); try { await App.redactorClient.GetPush().RegisterNativeAsync(channel.Uri); } catch (Exception exception) { HandleRegisterException(exception); } If you replace the line:
await App.redactorClient.GetPush().RegisterNativeAsync(channel.Uri); On:
string[] PushTags = { "", " 1" }; await App.redactorClient.GetPush().RegisterNativeAsync(channel.Uri, PushTags); then you can register the application to receive certain news sent with the tag "rally" or "formula 1". In a real program, the elements of the array PushTags, of course, are set dynamically.
In my case, I wanted to register users who use the Russian interface language with the “RU” tag, and those who use English with the “EN” tag and send them various messages. Those small changes I made have replaced the line:
await App.redactorClient.GetPush().RegisterNativeAsync(channel.Uri); On:
string tempstr; tempstr = Convert.ToString(Windows.Globalization.ApplicationLanguages.PrimaryLanguageOverride); if (tempstr.ToUpper() == "EN") { string[] PushTags = { "EN" }; await App.redactorClient.GetPush().RegisterNativeAsync(channel.Uri,PushTags); } else { string[] PushTags = { "RU" }; await App.redactorClient.GetPush().RegisterNativeAsync(channel.Uri, PushTags); } Now the application is registered in the hub either with the “RU” tag or with the “EN” tag, depending on the current application language. In the control panel of the site, you can turn off “Free Broadcast” and send a message only to those applications that have been registered with the tag of the desired language (that is, by specifying either “RU” or “EN” in the TAG “SEND” field)
Sending Notifications
From the Azure interface, it is convenient to send test notifications, but they are subject to certain restrictions - only 10 random users are sent.
Send a notification to all users in various ways. Usually proposed to create a mobile service. But a more convenient and easy way for a developer is to create a console application.
This method is quite clearly described in the following manual:
"Getting Started with Notification Hubs" .
I will briefly describe this method (it is quite simple).
Create a simple console application. Using the search by NuGet text manager "WindowsAzure.ServiceBus" we will find and install the Microsoft Azure Service Bus package. Using the NuGet Manager Console, you can install it using the following command:
Install-Package WindowsAzure.ServiceBus Add a namespace:
using Microsoft.ServiceBus.Notifications; And only one simple method:
private static async void SendNotificationAsync() { NotificationHubClient hub = NotificationHubClient .CreateClientFromConnectionString("< >", "< >"); var toast = @"<toast><visual><binding template=""ToastText01""><text id=""1"">, App!</text></binding></visual></toast>"; await hub.SendWindowsNativeNotificationAsync(toast); } It is here that we will need a connection string, which can be obtained on the website in the hub section. Click on the link “View connection string” (see the screenshot above) and copy the value of DefaultFullSharedAccessSignature, which looks like this:
Endpoint = sb: //redactorhub-ns.servicebus.windows.net/; SharedAccessKeyName = DefaultFullSharedAccessSignature; SharedAccessKey = kjeJDdtIdvE + 3dh3hyIRlkvPF3Ns0zPbewouDHMwe4v3 =
This text is inserted instead of <full access connection string>, and instead of <hub name> we insert the name of the hub (in my case it is redactorhub).
We add only 2 lines of code to the main method:
SendNotificationAsync(); Console.ReadLine(); 
Source: https://habr.com/ru/post/257209/
All Articles