Develop a simple game in the game maker. Episode 1
We continue to implement the Plants vs Zombies clone in Game Maker, studying the main features of game development in this environment. In this episode, we will cover such concepts as scripts, timelines, the keyword other, depth, redefine the Draw event, explore some useful functions, and talk about debugging games.
Now we can arrange the units as much as necessary, but in this lesson we will fix this. In the o_game object in the Create event we will add a new variable, pEnergy, which will be responsible for storing the amount of energy (in Plants vs Zombies, these are suns). For energy, you can buy units. Also add a new alarm, which will be responsible for generating new energy units (in the original the suns fell from above). So the event will now look like this:
')
pEnergy = 50; // player energy alarm[0] = room_speed; // generate enemies alarm[1] = room_speed * 3; // generate energy units Alarm 1 event:
/// generate energy elements instance_create(irandom(room_width - 40) + 40, irandom(room_height - 40) + 40, o_elem_energy); alarm[1] = room_speed * 6.5; Now we will make the "elements" of energy themselves, which will appear in a random place on the game screen, and then move. Create a new object, set the sprite, call it o_elem_energy. In the Create event, write such code
image_alpha = 0; eAmount = 25; // amount of energy to add alarm[0] = 1; // incr alpha image_alpha = 0 is a built-in variable that makes the sprite completely invisible when the rendering code is executed. image_alpha takes any value from 0 (invisible) to 1 (visible). 0.5 is 50% visibility. Using Alarm 0, we will increase alpha, i.e. make the sprite visible.
eAmount is a user variable that will store the amount of energy received by the player when clicked.
Code for Alarm 0:
/// Incr alpha if (image_alpha + 0.05 <= 1){ image_alpha += 0.05; alarm[0] = 1; } [Optimization corner]
In the last episode, our “bullets” used to shoot plants just flew horizontally and did it endlessly. When there are such bullets there, say, 100, this is not a problem, but at 1000, there may be a drop in performance. But in any case, it is necessary to get rid of unnecessary elements as soon as they are no longer necessary. Since as soon as the bullets fly out of the screen, they no longer interest us, they should be removed immediately. This can be done in 2 ways - through the standard Other event -> Outside View (or Outside Room, depends on your game), or simply to check if the object is not on the screen itself. There is no difference between them, standard events do exactly the same thing as the second method, they just do it for you. So add the Step event to the o_bullet object and add the following code:
if (x - sprite_width / 2 > room_width){ instance_destroy(); } Here, I hope everything is clear - as soon as the left border of the sprite goes beyond the scope of the room (room), we destroy the instance.
[/ Optimization Corner]
Now go back to the o_elem_energy object and create a Step event. We write this:
if (y + sprite_height/2 < 0){ instance_destroy(); }else{ y -= 2; } Here we move our instance every step 2 pixels up and, if the bottom border of the sprite is above the room, then we delete the instance.
The player will need to click on the element of energy to get it. To do this, create the Left Button event. This event is triggered not only when we press (Left pressed) or release the mouse or finger on the touch devices (Left released), but when the mouse just goes through our instance, which suits us perfectly. The code for this event could be:
/// grab energy with(o_game){ pEnergy += other.eAmount; } instance_destroy(); However, in the first episode, I promised that we would add support for the gamepad, and it is obvious that the gamepad does not have the Left Button event (or Left Pressed, or Left Released) instantiated. And, accordingly, when controlling a gamepad, there will be another way to select energy. And if so the code above will be duplicated. However, duplication, for obvious reasons, is bad, so it's time to get acquainted with an important element of Game Maker - scripts (Scripts folder). In fact, they are no different from the code that we write inside events, but the way it is triggered is different - you need to call it yourself. Scripts are very convenient with duplicate code, while scripts can still take parameters, as functions (methods) in any other programming language do.
We just have a case of the need to duplicate the code in the future, so instead of the code above in the Left Button event we write:
scr_elem_energy_grab(); This is the function call. Parameters can be passed in brackets, but now we do not need them. Game Maker now shows an error, because this function does not yet exist. Fix it - create a script, just like create objects / sprites / etc., rename it to scr_elem_energy_grab and put that code above (which starts with the comment /// grab energy). We save, close and now no errors and further repetition of the code when we develop a mechanism for catching energy with a gamepad.
Now when the instantiated object o_elem_energy triggers the Left Button event, we run the script scr_elem_energy_grab, which does the following - refers to the variable pEnergy of the instance instance of the o_game (we have one, so we can access it and o_game.pEnergy) and assign its value to a variable other.eAmount.
We have already encountered the keyword other, but here its meaning is somewhat different. Other.eAmount is a call to the instance variable of the object that started the with loop. You asked, and who launched it? Fine! Let's think? The with loop belongs to the object that called it. And who called him, he's in the script? Everything is simple - the script is launched on behalf of the instance object o_elem_energy and, accordingly, gets access to its variables. So other.eAmount is a call to the eAmount variable that we declared in the Create event of the o_elem_energy object. In Game Maker, everything is simple. If we write simply pEnergy = eAmount; then we will access the eAmount variable of the o_game instance, which does not exist, which will cause an error.
Once again for fixing, writing such constructions will often have to be independent of the complexity of the game. O_elem_energy has a variable eAmount. In the Left Button event, it runs on behalf of the scr_elem_energy_grab object, i.e. in the script, we can refer directly to the eAmount variable, however we add energy in the with loop. Events inside with occur on the face of the o_game object and we can no longer directly access eAmount. But we have the other keyword, with which we seem to go beyond the limits of the with loop and get access to eAmount again, because we are inside a script running on behalf of o_elem_energy. It is very simple and, I hope, it is clear to you.
Remember, in the first episode we registered the Global Left Released event, which always works on the whole “canvas” of the game. When we added a new Left Button event to the o_elem_energy object, a jamb formed. After all, it turns out that when we pick up energy, the Global Left Released event of the o_game object will be launched and, accordingly, the unit will be placed on the playing field. Strange behavior, isn't it? So you need to be very careful with Global events. This is very easy to fix, but we will still redo the placement mechanism for the units, so we’ll leave it for later, and the source code on github will temporarily fix this problem.
We realize the equivalent of sunflowers. Create a new object and call it o_unit_enery_generator, give it a sprite and set the parent object o_unit_parent. To avoid chaos among objects / sprites / scripts, there are groups in Game Maker. Right-click on the folder Objects -> Create new group. Give her any meaningful name, for example, grp_units. In it, we will store all user units. Drag them into this group. Do the same for enemy objects. The name of the groups and the sorting of objects by them are created solely for your convenience and no longer affects anything.
There is nothing new in the object code o_unit_enery_generator, so I just post its contents.
Create:
event_inherited(); HP = 15; genElemEnergyTime = room_speed * 2; alarm[0] = genElemEnergyTime; Alarm 0:
/// generate energy elements instance_create(x,y,o_elem_energy); alarm[0] = genElemEnergyTime; Now, when we have energy and it is generated, it would be nice to provide the opportunity to buy units, and for this we need some kind of GUI, where we can see the amount of available energy and select the desired unit. And this will do.
It's time to get acquainted with the event Draw. Previously, it did not interest us, because arranged the standard features for drawing objects of their sprites. Now we need something non-standard. This is a pretty important element in learning Game Maker.
So, add a Draw event to the o_game object.
draw_set_alpha(0.68); draw_rectangle_colour(0,0, elemGUI_width, elemGUI_height, c_blue, c_blue, c_blue, c_blue, false); draw_set_alpha(1); draw_text_colour(40,25, string(pEnergy), c_black, c_black, c_black, c_black, 1); draw_set_alpha is a standard function that sets the transparency (alpha channel) of everything drawn after it. For reasons I do not understand, the draw_rectangle_colour function does not have the ability to directly set transparency, so you have to use the draw_set_alpha method. Be careful, changing the alpha channel, you change the transparency of the whole draw, and not just what is written in this particular Draw event. This function also affects other objects, so as soon as you change the alpha, draw everything you need, return the transparency to its original position, i.e. in 1.
draw_rectangle_colour draws a blue-filled rectangle with the coordinates of the upper left corner (0; 0) and the coordinates of the lower right (elemGUI_width; elemGUI_height), respectively. Do not forget to declare these variables in the Create event with values, for example, 200 and 50, respectively.
draw_text_colour draws text of a given color, according to given coordinates. Since the pEnergy variable stores the number, you need to translate it into a string using string (). Although the types are not set directly in Game Maker and you can add a number to the string without any problems, but for the Draw event you need to convert numbers to strings.
[Attention]
And now the moment, if the object is given a sprite, then with such a code as above, it will not be drawn. Remember, in the first episode I mentioned that if we do not override the Draw event, then Game Maker itself will draw the sprite given to the object. So, with the code above, we override the Draw event, and if the sprite were given to the o_game object, then it would stop drawing. In order for the sprite to be drawn again, it is necessary to add draw_self () in the desired place of the overridden Draw event; This line is responsible for drawing the given sprite object.
Now consider another important point in Game Maker - depth. In the last episode, we have already seen it 1 time. It is time to elaborate on this point. Depth determines the order of rendering. The higher the Depth value, the object will be drawn in the lower layer. Depth values can be both positive and negative. Example - there are 3 obj0 objects with depth 0, obj1 with depth 100, obj2 with depth -20. Render order - obj1 -> obj0 -> obj2. Those. if all 3 objects are on the screen in the same coordinates, obj2 will appear on top of all.
Since o_game draws a GUI, it should be above all other layers. So put him a depth equal to -100. This can be done in the Create event or on the page of the object itself. You can change the depth from anywhere in the code.
So, we are drawing now exclusively blue rectangle with the inscription of the amount of available energy. But you need to draw the choice of a unit. This can be done in two ways - to make the unit selection buttons separate objects and simply place them along the coordinates on this rectangle, or you can draw icons directly into o_game and catch click events in the Step event (yes, you can do this instead of individual events). The second method is more sophisticated, but the first one is simpler and specifically in this case more correct.
So, we need objects, activating which we will be able to choose which particular unit we are going to install now. In fact, for this purpose we are suitable and 1 object. Create it and call it o_gui_unit.
Create event:
unitID = -1; isActivated = false; Left Pressed event:
with(o_game){ isPlaceUnitClick = false; } with(o_gui_unit){ isActivated = false; } isActivated = true; The first 3 lines are exactly the protection from incorrect clicks, so that when you click on a GUI, the object is not placed on the playing field. You can delete this, or add the line isPlaceUnitClick = true; in the Create object o_game.
Draw event:
if (isActivated){ draw_rectangle_colour(x - sprite_width/2 - 3, y - sprite_height/2 - 3, x + sprite_width/2 - 3, y + sprite_height/2 - 3, c_yellow, c_yellow, c_yellow, c_yellow, true); } draw_self(); if (unitID >= 0){ draw_text(x, y + sprite_height/2 + 5, string(o_game.unitCost[unitID])); } From the side of the code, what is happening in this object should be obvious - in the Left Pressed event we go through all instances of the o_gui_unit object and change the value of the user variable isActivated to false, which makes it not the current selected for us, but the current instance is active. If it is not clear, set comments.
Also set the depth object to -110. In general, any number, but less than o_game as the blue backing should be under the units, not over. Either manually change, or in Create you can write depth = o_game.depth - 10;
Never add 1-2 depth units to another object. Always leave a little (5-10 units) in case you have to change something.
One slippery moment. If the object does not have a sprite, and we call the function draw_self (); there will be an error there is nothing to draw. In this case, in this case, set any sprite. Anyway, he does not have time to draw, and we will ask the necessary one later. In general, it is better not to do this, but to put, for example, a check.
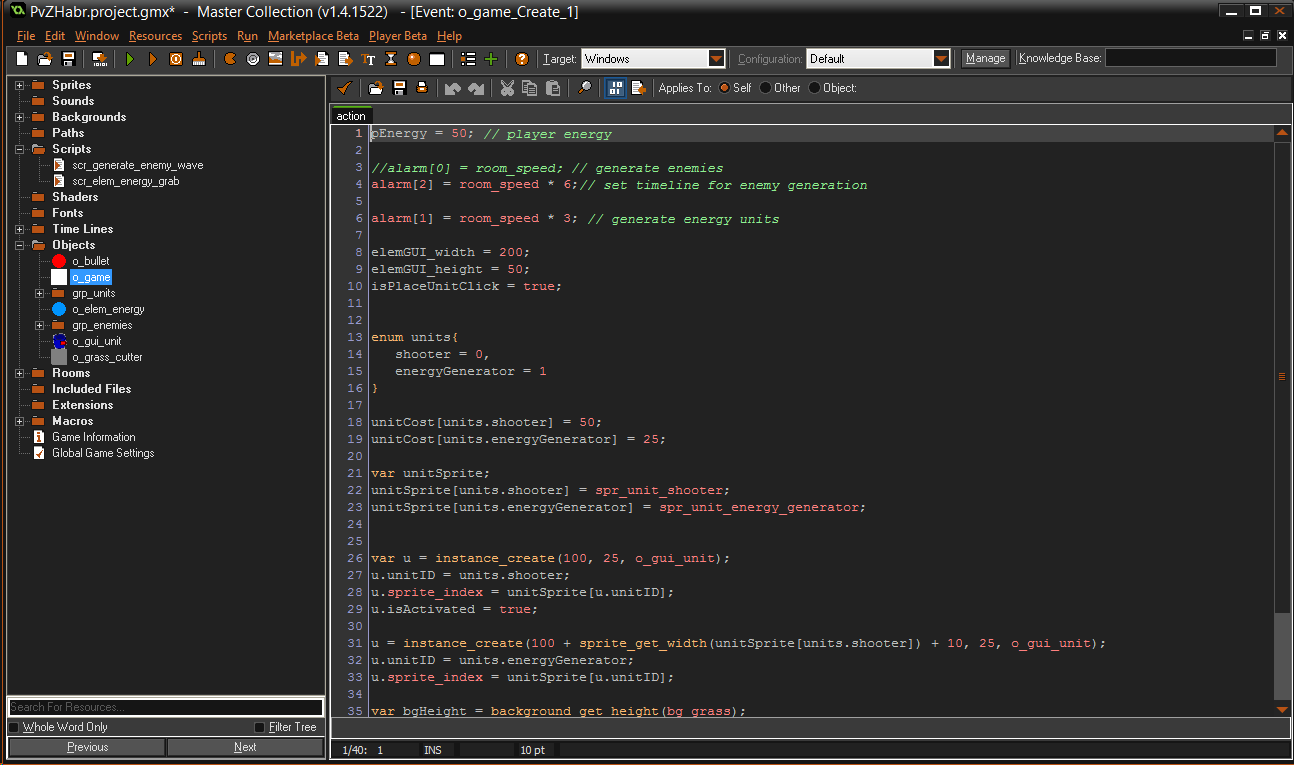
Now we need to change a little o_game. The Create event will now look like this:
pEnergy = 50; // player energy alarm[0] = room_speed; // generate enemies alarm[1] = room_speed * 3; // generate energy units elemGUI_width = 200; elemGUI_height = 50; isPlaceUnitClick = true; enum units{ shooter = 0, energyGenerator = 1 } unitCost[units.shooter] = 50; unitCost[units.energyGenerator] = 25; var unitSprite; unitSprite[units.shooter] = spr_unit_shooter; unitSprite[units.energyGenerator] = spr_unit_energy_generator; var u = instance_create(100, 25, o_gui_unit); u.unitID = units.shooter; u.sprite_index = unitSprite[u.unitID]; u.isActivated = true; u = instance_create(100 + sprite_get_width(unitSprite[units.shooter]) + 10, 25, o_gui_unit); u.unitID = units.energyGenerator; u.sprite_index = unitSprite[u.unitID]; A lot of code and part of it is clearly superfluous, but it looks great and for educational purposes only.
enum is a key word. With its help, we simply create a global array, the elements of which can be addressed in units.shooter, which will give us 0 - this is the value of this variable. Next we declare a custom array with prices for units. It would be possible not to use enum, then these 2 lines would look like this:
unitCost[0] = 50; unitCost[1] = 25; But then look for or remember what kind of unit 0 is, and what unit 1 can be difficult and lazy.
Next, we create, relatively speaking, buttons (more precisely, an o_gui_unit object) and set them with some properties.
Previously, we set the sprite to the object via the Game Maker interface, but this can be done manually via sprite_index. What we actually did.
Now, since we have the prices for objects and there is some sort of GUI, with which we can choose which unit we need to install, it’s time to change the Global Left Released code to
/// place user unit if (!isPlaceUnitClick){ isPlaceUnitClick = true; exit; } var tBgWidth = background_get_width(bg_grass); var tBgHeight = background_get_height(bg_grass); var iX = mouse_x - mouse_x % tBgWidth + tBgWidth/2; var iY = mouse_y - mouse_y % tBgHeight + tBgHeight/2; if (instance_position(iX, iY, o_unit_parent) != noone){ exit; } var currID = -1; with(o_gui_unit){ if (isActivated){ currID = unitID; break; } } if (pEnergy >= unitCost[currID]){ pEnergy -= unitCost[currID]; switch (currID) { case units.shooter: instance_create(iX, iY, o_unit_shooter); break; case units.energyGenerator: instance_create(iX, iY, o_unit_energy_generator); break; } } In the first check we look at this click on the field, or on our newly created GUI - i.e. when you click on the object o_gui_unit. The next 8 lines are familiar to us from the last episode, and then we analyze.
In the loop with we go through all instances of the object o_gui_unit and see which of them is currently active. As soon as we come across an active one, we write the unitID value of this instance into the currID variable. unitID we need to know the price and what object we will put. In the next test, we look at whether the player has enough energy to buy this unit, if enough - remove the appropriate amount of energy and see what kind of unit you need to put. Everything is as always simple.
If you, like me, can't wait to check what happened, we launch it and, strangely enough, it works. And I wanted to talk about debugging.
In the future, I will have to resort to the method “How to draw an owl”, because there will be nothing new from the theory, and if you paint the elementary things a series of these publications will be delayed for a long time. The Github code will be available, so I will only focus on new things, if you don't mind.
It would be nice to make lawn mowers as in the original, which are triggered by the approach of zombies to them. After that, they start moving in a straight line, destroying all enemies in their path. Lawn mowers are not eternal, after the first operation disappear. There is nothing new in the theory of lawn mowers. Implement yourself and check. The logic will be as follows: we add a collision event with o_enemy_parent to the lawn-mower and add a code that starts moving our lawn-mower to the right and destroys the instance with which it has a collision. You also need to remember to set the check for going beyond the screen (in the object itself) and automatically arrange in o_game from.
It's time to get to know Timeline. This concept is similar to the familiar alarm'y, but act as separate entities. Timelines allow you to execute code at certain steps (frames) you specify. Not the most frequently used feature in Game Maker, but suitable for some purposes. It is not very easy to work with them in the current version of Game Maker - it is difficult to select the desired step, it takes time. For convenience, you need to invent your own crutch - write a system to create a level directly from the game. But since the crutch for each game is different, there is nothing to blame the creators of Game Maker. In the case of this particular game, I would do something like this - we create a hotel room where you can arrange enemies. Then, relative to their x-coordinates on the screen, generate a code for the timeline. We will calculate the y-coordinate later (or random). This is really quite fast though it is more correct to write your own full-fledged level editor.
In order to learn, we will generate the generation of enemies in the game in waves through the Timeline. We will need a main timeline that will trigger the waves. Probably, it will be necessary to make each level a separate timeline.
Create an empty timeline, call it tl_level0 and click on the Add button. Enter the desired step, for example, 120, and confirm. Next we are given the opportunity to use all the same features as inside any event of any object. In the code, you will need to create enemies, so as not to duplicate the creation code, we will use scripts. For example, we add to the event steps 120, 240, 600, 1200 code - scr_generate_enemy_wave (3) ;. And for the next few steps (waves), we will pass a larger number as an argument.
A new moment, above, we used a function that takes no arguments, this time we will try something new. In this line, we pass the number 3 to the script. The script itself will look like this:
/// scr_generate_enemy_wave(maxEnem); var maxEnem = argument0; var enCount = 1 + irandom(maxEnem); while(--enCount >= 0){ var tBgHeight = background_get_height(bg_grass); var cycleCnt = 0; var eY, eX = room_width + sprite_get_width(spr_enemy_zombie)/2 + 1; do{ if (++cycleCnt > 200) break; eY = irandom(room_height - room_height % tBgHeight); eY = eY - eY % tBgHeight + tBgHeight/2; }until(instance_position(eX, eY, o_enemy_parent) == noone) instance_create(eX, eY, o_enemy_zombie); show_debug_message("enemy created"); } , /// , , , .
var maxEnem = argument0; 0, . argument0, argument1, argument2 .. — . Those.calling scr_generate_enemy_wave (3); we put 3 in the argument0 variable.
Then we just put the enemy on the playing field, after checking whether there is already a unit under it.
[Do you know?]
In Game Maker, there is no way not to pass an argument if it is used in the script. If you forget - nothing terrible, Game Maker will not compile the game and remind you where you forgot to pass the argument.
Notice the show_debug_message ("enemy created") ;? This is the most primitive, but most commonly used debugging method. This standard feature allows you to display a message in the Game Maker console. The string that you passed to this function will be displayed. In our case it will be - “enemy created”.
[Do you know?]
Game Maker' , - show_debug_message , , . - GM show_debug_message - - . , .
Game Maker , timeline'. Create o_game alarm[2] = room_speed * 6;// set timeline for enemy generation
Alarm 2 :
timeline_index = tl_level0; timeline_position = 0; timeline_running = true; — tl_level0, 0( 0) . , , (), . Game Maker , , «» , .
, . show_debug_message, get_timer(); . Game Maker. 1.4, . .

. , , , .. F6. , — .
/. show_debug_overlay CPU/GPU. ( Draw), , , , .
show_error . ( , / ) .
, YoYoGames( Game Maker) , show_debug_message get_timer .
GraphicRiver, . ( ), - . OpenGameArt. .
( _1_ , _2_ ), . , . , , Edit Sprite -> File -> Create from Stip. , .

. 64 (Edit -> Transform -> Stretch). , Game Maker , .
, , . , — 1 . . Create : image_speed = 0.2; 5 .
Game Maker SWF Spine . , Spine- .
Well, in the end we will add another unit in order to learn a little more about the frequently used features of Game Maker. You can find it on Github, it is called o_enemy_zombie_fast. It has some interesting points. Consider the Step event:
if (isActive){ with(o_unit_parent){ if (distance_to_point(other.x, other.y) <= 220){ other.cHspeed = other.cHspeed2; break; } } } event_inherited(); The first thing that catches your eye is that the event_inherited function can be called anywhere in the code, not necessarily at the beginning. Sometimes it is very useful. And one more thing specifically in this case is controversial by the criterion of optimality, but nevertheless this function is very useful - distance_to_point. It calculates the distance between (x; y) of the object that caused it and some point, the coordinates of which we transmit. The distance_to_object function is also useful, it calculates the distance between (x; y) of your object and the nearest instance of the object passed in the parameters.
In general, Game Maker has already prepared a lot of standard useful functions that save time on writing your own code.
So, the game gradually takes the desired form. It will now look something like this:
2 , 70% , Game Maker. , , .
:
—
—
—
—
— /
—
— View
Github
Game Maker ,
— Google Play Services, Game Circle(Amazon) Game Center ( )
— -
— Facebook API
— Game Maker
— Box2D
—
— -
— Facebook API
— Game Maker
— Box2D
—
Source: https://habr.com/ru/post/257123/
All Articles