Developing a simple plugin for JIRA to work with the database: we give our plugin a normal appearance
In the first part, we made a simple plugin for JIRA for working with a database. Now we give our plugin a “standard” look and feel of JIRA.

First, let's add some functionality to our plugin. Let now for each project there will be a list of students, i.e. the student will be tied to a strictly one project, and we will add students the names just in case. Accordingly, we will have to redo the extradition of students. Now we will issue only students who are tied to a specific project. To do this, we will have to rewrite the class Students, adding there are necessary student attributes; Add a new method to the StudentDAO interface (and, of course, the StudentDAOImpl class) to get a list of students for the project; and rewrite the execute () and doAdd () methods in the MyAction class according to the new changes.
Actually, now you can go to the main content.
')
After thinking about the appearance of our tab, we will work with images. Let the images be in the images folder. Then in the atlassian-plugin.xml file in the <atlassian-plugin> tag add the line
We will describe the styles for the logos on the page in icon.css and add these styles in atlassian-plugin.xml to the <web-resource key = "my-resources"> tag
In icon.css, we already use image paths according to the path we specified in the name property when we added images to the project. For example,
Actually, we rule our success.vm for using the REST-API by changing the tag as follows:
Here you need to display the download, and in the tag
Add an entry point to our REST-API. To do this in the file atlassian-plugin.xml in the tag <atlassian-plugin> we write
We will add 3 classes to the resource.XML package for our API to work: XmlStudent.java - the student’s view on request and XmlStudents.java - the list of students. And Mapper.java is a general class with static methods for converting different types to XML. Details about the used annotations can be found here .
Well, add the API itself. Add the StudentResource class to the resource package. This class must be inherited from the AbstractResource class. Specify for this class the
Actually, a simple API for JIRA is ready, now if, for example, in the browser I’ll go to:
localhost : 8080 / rest / simple-api / 1.0 / project / 10002 / students
then I will get an answer:
{"Pid": 10002, "count": 2, "students": [{"id": 4, "name": "Vasya", "surname": "Pupkin", "pid": 10002, "created" : "2014-05-07 14: 48: 15.83"}, {"id": 5, "name": "Igor", "surname": "Petrov", "pid": 10002, "created": "2014 -05-07 17: 47: 58.5 "}]}
Now you need to write js, which will produce data from the API in our workpiece. Since we will give the data about students to the table, then we will use the standard JIRARestfultable functionality. The problem with writing a plugin was to find documentation for version 4.4. Therefore, I will stop here in more detail.
First, create a template for displaying information in the table - student.soy:
The student input parameter is a JSON object containing information about the student. From this template, the js-code will be automatically created, which then will draw a row in the table.
To transform this template into js code, you need to add jiraSoyTransformer to the same tag - an element that will make the js script from the * .soy template.
In order for JIRARestfultable to work correctly, you need to add the following element for the work of the internationalization mechanism to the same tag:
Add a StudentRow.js script that creates rows from templates. The scripts are generic in general, so I will not dwell on them.
Now create a script to initialize our student-init.js table:
It is necessary to add all the specified files to the <my-resources> tag. Actually, nothing complicated:
Now we implement the removal, editing and adding students.
To begin, we will do everything in appearance, and then we will do REST Api for it.
Let's alter student.soy a bit by adding the JIRA.Templates.Student.editStudentRow template to edit and add students. In the JIRA.Templates.Student.studentRow template, we add the appearance of the standard JIRA backlight for editable fields and the delete button. Let's write the EditStudentRow.js script to create a row for editing from the JIRA.Templates.Student.editStudentRow template. And add the ability to edit in student-init.js. In StudentRow.js. In the getStudent function, we add the handling of pressing the delete button.
It remains to add the new EditStudentRow.js file in atlassian-plugin.xml to the my-resources tag. And we got:
With the look we are done. Let's figure out what requests are being poisoned when you click on each button:
addition:
deletion:
change:
In url: 10000 is the project id, 10 is the id of the line to be changed, the changed values are sent to request, i.e. if we didn’t change the surname, the request would be:
Before writing the processing of these requests, we supplement our StudentDAO.java with the necessary add and remove methods.
And it remains to add request processing to StudentResource.java.
Actually, that's all. You can, of course, continue to write about MultiSelect and SingleSelect for Jira and how to use them (your own UserPicker, ProjectPicker, RolePicker, etc.), how to move the rows inside the table and many other trivialities that can be easily implemented using restfultable and REST Api .
Plugin code on github .
The first part .
More projects:
How to create software for a microtomograph for 5233 man-hours
Control access to electronic documents. From DefView to Vivaldi
Developing a simple plugin for JIRA to work with a database
Developing a simple plugin for JIRA to work with the database: we give our plugin a normal appearance
Windows Service Auto Update for Poor AWS
First, let's add some functionality to our plugin. Let now for each project there will be a list of students, i.e. the student will be tied to a strictly one project, and we will add students the names just in case. Accordingly, we will have to redo the extradition of students. Now we will issue only students who are tied to a specific project. To do this, we will have to rewrite the class Students, adding there are necessary student attributes; Add a new method to the StudentDAO interface (and, of course, the StudentDAOImpl class) to get a list of students for the project; and rewrite the execute () and doAdd () methods in the MyAction class according to the new changes.
Actually, now you can go to the main content.
')
After thinking about the appearance of our tab, we will work with images. Let the images be in the images folder. Then in the atlassian-plugin.xml file in the <atlassian-plugin> tag add the line
<resource type="download" name="images/" location="images/" /> We will describe the styles for the logos on the page in icon.css and add these styles in atlassian-plugin.xml to the <web-resource key = "my-resources"> tag
<resource type="download" name="icon.css" location="myaction/css/icon.css"/> In icon.css, we already use image paths according to the path we specified in the name property when we added images to the project. For example,
.project-config-icon48-students{ background: transparent url(images/student-48px.png) no-repeat 0 0; } Actually, we rule our success.vm for using the REST-API by changing the tag as follows:
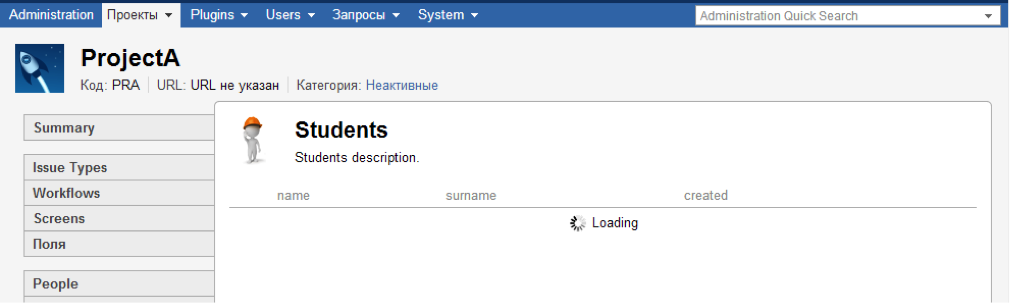
<body> <div id="project-config-panel-students" class="project-config-panel"> <div class="project-config-panel-header project-config-icon48-students"> <h2>Students</h2> <p>Students description.</p> </div> <form id="project-config-students" class="loading" action="#"> <table class="aui" id="project-config-students-table"> <thead> <tr> <th><!--icon--></th> <th>name</th> <th>surname</th> <th>created</th> <th><!--buttons--></th> <th><!--throbber--></th> </tr> </thead> <tbody> </tbody> </table> <div class="jira-restfultable-init"> <span class="jira-restfultable-throbber"></span> <span class="jira-restfultable-loading">Loading</span> </div> </form> </div> </body> Here you need to display the download, and in the tag
<table> students will be displayed. A page without a REST API looks like this:
Add an entry point to our REST-API. To do this in the file atlassian-plugin.xml in the tag <atlassian-plugin> we write
<rest key="pluginRESTpoints" path="/simple-api" version="1.0" /> We will add 3 classes to the resource.XML package for our API to work: XmlStudent.java - the student’s view on request and XmlStudents.java - the list of students. And Mapper.java is a general class with static methods for converting different types to XML. Details about the used annotations can be found here .
Well, add the API itself. Add the StudentResource class to the resource package. This class must be inherited from the AbstractResource class. Specify for this class the
@Path("project/{pid}/students") annotation @Path("project/{pid}/students") , responsible for the way in which we will access this class via the REST-API, and the @Produces({"application/json"}) annotation @Produces({"application/json"}) , responsible for the type of data transmitted. In the class, create a method getStudents, which will issue a list of students. We @GET for it the @GET annotation corresponding to the request method. The parameters of the method will be: @PathParam("pid") String pid - is responsible for the project id and is taken from the path, @QueryParam("id") String id - is responsible for the student id and is taken from the query. Details about annotations can be found here .Actually, a simple API for JIRA is ready, now if, for example, in the browser I’ll go to:
localhost : 8080 / rest / simple-api / 1.0 / project / 10002 / students
then I will get an answer:
{"Pid": 10002, "count": 2, "students": [{"id": 4, "name": "Vasya", "surname": "Pupkin", "pid": 10002, "created" : "2014-05-07 14: 48: 15.83"}, {"id": 5, "name": "Igor", "surname": "Petrov", "pid": 10002, "created": "2014 -05-07 17: 47: 58.5 "}]}
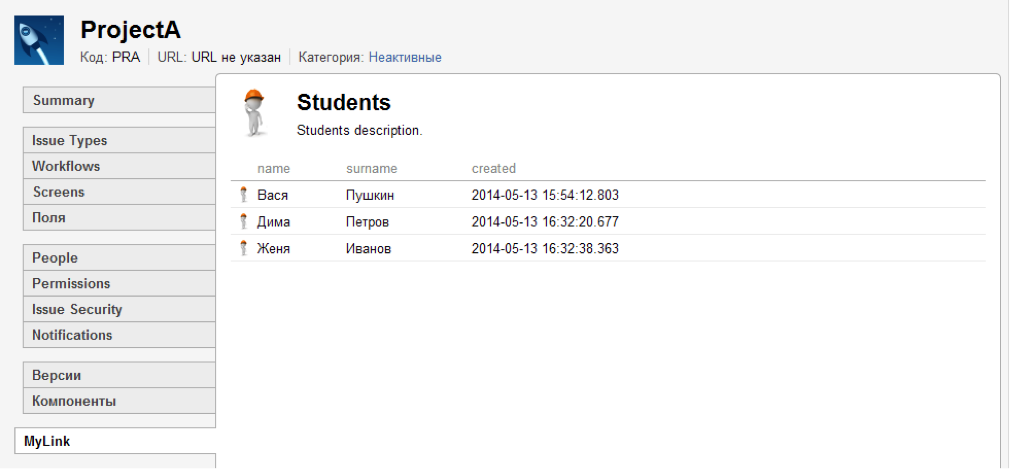
Now you need to write js, which will produce data from the API in our workpiece. Since we will give the data about students to the table, then we will use the standard JIRARestfultable functionality. The problem with writing a plugin was to find documentation for version 4.4. Therefore, I will stop here in more detail.
First, create a template for displaying information in the table - student.soy:
{namespace JIRA.Templates.Student} /** * @param student */ {template .studentRow} <td class="jira-restfultable-icon project-config-student-icon"> <span class="project-config-icon project-config-icon-student"></span> </td> <td class="project-config-student-name"> {$student.name} </td> <td class="project-config-student-surname"> {$student.surname} </td> <td class="project-config-student-created"> {$student.created} </td> <td class="jira-restfultable-operations"></td> <td class="project-config-throbber"></td> {/template} The student input parameter is a JSON object containing information about the student. From this template, the js-code will be automatically created, which then will draw a row in the table.
To transform this template into js code, you need to add jiraSoyTransformer to the same tag - an element that will make the js script from the * .soy template.
<transformation extension="soy"> <transformer key="jiraSoyTransformer"/> </transformation> In order for JIRARestfultable to work correctly, you need to add the following element for the work of the internationalization mechanism to the same tag:
<transformation extension="js"> <transformer key="jsI18n"/> </transformation> Add a StudentRow.js script that creates rows from templates. The scripts are generic in general, so I will not dwell on them.
jQuery.namespace("JIRA.Admin.Student.StudentRow"); JIRA.Admin.Student.StudentRow = JIRA.RestfulTable.Row.extend({ initialize: function() { JIRA.RestfulTable.Row.prototype.initialize.apply(this, arguments); }, render: function() { var data = this.model.toJSON(), id = this.model.get("id"), $el = this.$el; $el.attr("id", "student-" + id + "-row").attr("data-id", id); $el.html(JIRA.Templates.Student.studentRow({ student: data })); return this; } }); Now create a script to initialize our student-init.js table:
jQuery(function() { var $table = AJS.$("#project-config-students-table"); var $project = AJS.$("meta[name=projectId]").attr("content"); function getResourceURL() { return contextPath + "/rest/simple-api/1.0/project/" + $project + "/students"; } function getStudent(callback) { JIRA.SmartAjax.makeRequest({ url: getResourceURL(), complete: function(xhr, status, response) { if (response.successful) { callback(response.data.students); } else { $table.trigger("serverError", [JIRA.SmartAjax.buildSimpleErrorContent(response)]); } } }); } getStudent(function(students) { JIRA.Admin.StudentTable = new JIRA.RestfulTable({ el: $table, url: getResourceURL(), entries: students, noEntriesMsg: 'There are currently no students for this project.', views: { row: JIRA.Admin.Student.StudentRow } }); jQuery(".jira-restfultable-init").remove(); JIRA.userhover($table); }); }); It is necessary to add all the specified files to the <my-resources> tag. Actually, nothing complicated:

Now we implement the removal, editing and adding students.
To begin, we will do everything in appearance, and then we will do REST Api for it.
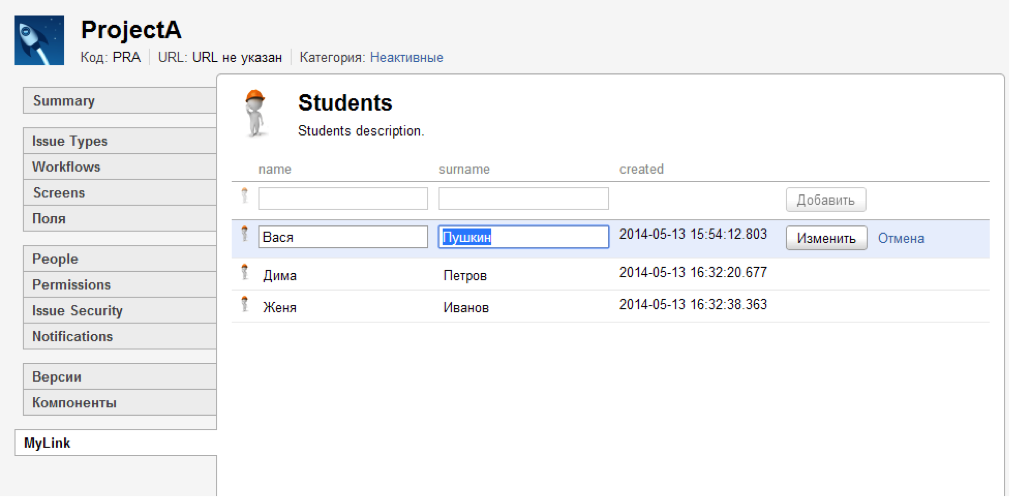
Let's alter student.soy a bit by adding the JIRA.Templates.Student.editStudentRow template to edit and add students. In the JIRA.Templates.Student.studentRow template, we add the appearance of the standard JIRA backlight for editable fields and the delete button. Let's write the EditStudentRow.js script to create a row for editing from the JIRA.Templates.Student.editStudentRow template. And add the ability to edit in student-init.js. In StudentRow.js. In the getStudent function, we add the handling of pressing the delete button.
It remains to add the new EditStudentRow.js file in atlassian-plugin.xml to the my-resources tag. And we got:

With the look we are done. Let's figure out what requests are being poisoned when you click on each button:
addition:
url: http://localhost:8080/rest/simple-api/1.0/project/10000/students method: POST request: {"name":"","surname":""} deletion:
url: http://localhost:8080/rest/simple-api/1.0/project/10000/students/10?[ request] method: DELETE 1. request: id=10&name=&surname=&pid=10000&created=2014-05-13 15:54:12.803 change:
url: http://server/rest/simple-api/1.0/project/10000/students/10 method: PUT request: {"id":10,"name":"","surname":""} In url: 10000 is the project id, 10 is the id of the line to be changed, the changed values are sent to request, i.e. if we didn’t change the surname, the request would be:
{"id":10,"name":""} Before writing the processing of these requests, we supplement our StudentDAO.java with the necessary add and remove methods.
And it remains to add request processing to StudentResource.java.
Actually, that's all. You can, of course, continue to write about MultiSelect and SingleSelect for Jira and how to use them (your own UserPicker, ProjectPicker, RolePicker, etc.), how to move the rows inside the table and many other trivialities that can be easily implemented using restfultable and REST Api .
Plugin code on github .
The first part .
More projects:
How to create software for a microtomograph for 5233 man-hours
Control access to electronic documents. From DefView to Vivaldi
Developing a simple plugin for JIRA to work with a database
Developing a simple plugin for JIRA to work with the database: we give our plugin a normal appearance
Windows Service Auto Update for Poor AWS
Source: https://habr.com/ru/post/257007/
All Articles