How to create a template for Joomla
Introduction
In the previous article, we learned how to create a WordPress theme. Let's today, on the basis of the same Corporate Blue template, try to create a website on the second most popular CMS - Joomla! Since the article describes mainly the layout, we assume that Joomla! you have already installed. If you do not know how to install Joomla!, Then the instructions can be found here . In this guide, we will not describe CSS styles and HTML code in detail — this was done in the very first article . Instead, consider in detail the features of creating a template just for Joomla!
Adding a template
To begin with, in any place convenient for you, create a folder of our template "whitesquare". It should contain three subfolders: css, images and language. In the css and images folders, create index.html files with the following contents:
<!DOCTYPE html><title></title> These files are stubs and, according to CMS requirements, should display a blank page when accessing these folders directly.
Next, in the css folder, create an empty stylesheet file template.css, and in the language folder a subfolder en-GB, which will contain an empty en-GB.tpl_whitesquare.ini file and an en-GB.tpl_whitesquare.sys.ini file with the following contents:
TPL_WHITESQUARE_XML_DESCRIPTION="Whitesquare is the Joomla 3 site template." 
')
Let's take a detailed look at what it all means. The language folder is needed for localization, it may contain subfolders with different languages: en-GB, ru-RU, etc. Each language folder includes two files with keys. Keys are a pair with the name of the key and its value. Key names for different languages will be the same, and values will be different. This mechanism allows you to use the template to create websites in different languages. Since this is a learning example, we will use only English - en-GB. The first file en-GB.tpl_whitesquare.ini will contain the keys that the users of the site will see, and the second file en-GB.tpl_whitesquare.sys.ini will contain the keys of the administrative functions.
Next, you need to create empty files component.php, error.php and index.php. We will need them in the future.
The next step is to add images: favicon.ico, template_preview.png and template_thumbnail.png. The last two are thumbnails of the future template and they are 640x480 and 206x150 respectively.
The last file to add is templateDetails.xml. At this stage it is the most important file, it contains a detailed description of our template:
<?xml version="1.0" encoding="utf-8"?> <!DOCTYPE install PUBLIC "-//Joomla! 2.5//DTD template 1.0//EN" "http://www.joomla.org/xml/dtd/1.6/template-install.dtd"> <extension version="2.5" type="template" client="site"> <name>whitesquare</name> <creationDate>2015-02-25</creationDate> <author>pcklab</author> <authorEmail></authorEmail> <authorUrl>http://www.pcklab.com</authorUrl> <copyright>© 2014 Pixel Cook Laboratory. All Rights Reserved.</copyright> <license>GNU General Public License version 2 or later; see LICENSE.txt</license> <version>1.0.0</version> <description>TPL_WHITESQUARE_XML_DESCRIPTION</description> <files> <folder>css</folder> <folder>images</folder> <folder>js</folder> <folder>language</folder> <filename>component.php</filename> <filename>error.php</filename> <filename>favicon.ico</filename> <filename>index.php</filename> <filename>template_preview.png</filename> <filename>template_thumbnail.png</filename> <filename>templateDetails.xml</filename> </files> <positions> </positions> <languages folder="language"> <language tag="en-GB">en-GB/en-GB.tpl_whitesquare.ini</language> <language tag="en-GB">en-GB/en-GB.tpl_whitesquare.sys.ini</language> </languages> </extension> Most of the content of this file is clear, you only need to clarify the following:
The description field contains the same localization key that we specified in en-GB.tpl_whitesquare.sys.ini
The files field contains a complete list of all files and folders in the root of the template.
The languages field contains a list of language files, and we will need the positions field later.
Now that the template frame is ready, let's add it to the CMS. To do this, open the Joomla! Admin panel, select the menu item Extension -> Extension manager, go to the Install from Directory tab and in the Install Directory field specify the path to the whitesquare folder in which we created the template files.
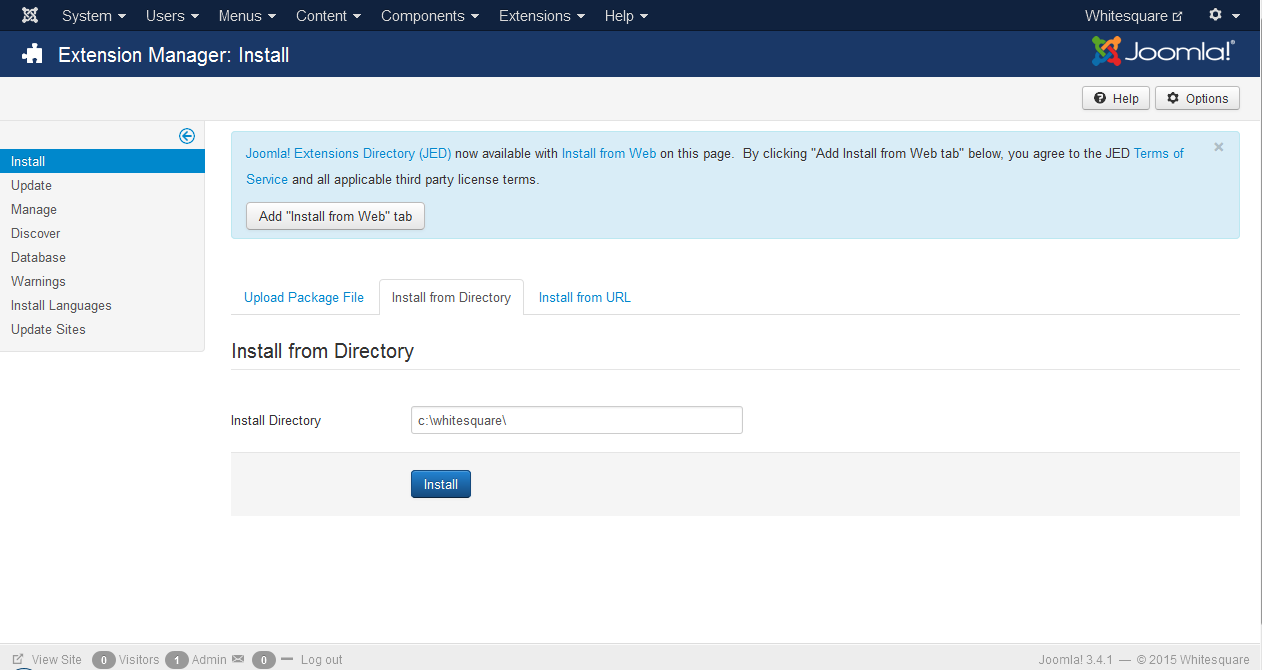
Click the Install button and the template will be added to the system. It remains only to activate the template. Go to the Extension -> Template manager menu, find the whitesquare template in the list and in the Default field, click on the asterisk, this will make our template the default template. After that, you can already open the address of the site where Joomla! and see a blank page of our site.
Preliminary inspection

If you look at the layout, you can see that our page consists of a header and a footer, which are repeated on all pages. Also, on all pages except the main one, there is a sidebar on the left and the name of the page. Search and all types of menus, we will arrange in the form of modules Joomla!, And all texts will be decorated through a localization mechanism.
Page structure
Most Joomla! Template Creation Guides limited to creating layouts and styles for it. We will describe the whole procedure for creating a full-fledged site on Joomla! within the provided layouts.
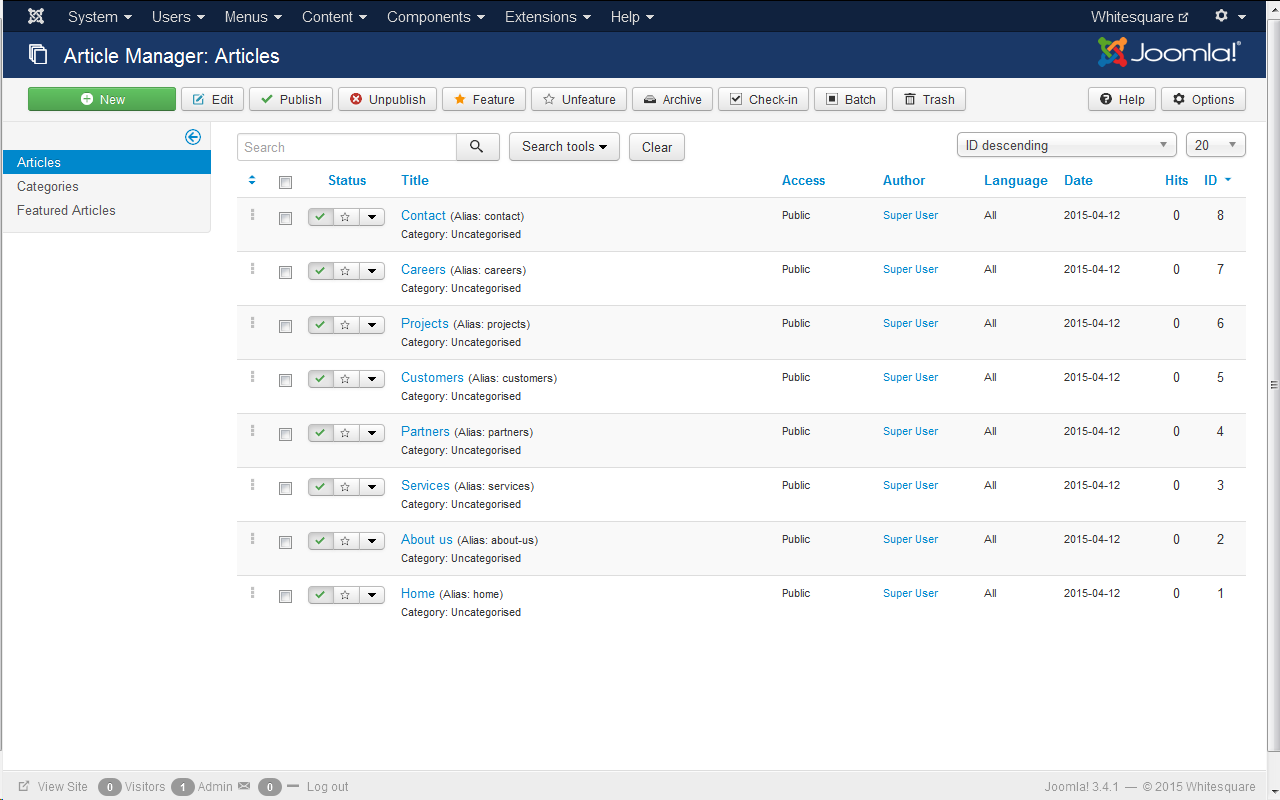
Let's start with the page structure. Pages are managed in the admin panel through the menu Content -> Article Manager. To add a new page, click the New button and fill out the form. In the Title field, enter the page title. Leave the remaining fields unchanged. Thus add the pages Home, About us, Services, Partners, Customers, Projects, Careers, Contact. After adding, the list of pages should look like this:
Page template
The next step we need to do is the Joomla! Page template. Open the index.php file that we created in our template folder and add code to it that will create the page frame:
<?php defined('_JEXEC') or die; $app = JFactory::getApplication(); $doc = JFactory::getDocument(); $menu = $app->getMenu(); $lang = JFactory::getLanguage(); $template_url = $this->baseurl . '/templates/' . $this->template; $doc->addStyleSheet($template_url . '/css/template.css'); $doc->addStyleSheet('http://fonts.googleapis.com/css?family=Oswald:400,300'); $is_home_page = $menu->getActive() == $menu->getDefault($lang->getTag()); ?> <!doctype html> <html> <head> <jdoc:include type="head"/> <meta http-equiv="X-UA-Compatible" content="IE=Edge"> <!--[if lt IE 9]> <script src="http://html5shiv.googlecode.com/svn/trunk/html5.js"></script> <![endif]--> </head> <body> <div class="wrapper"> <header></header> <nav class="main-navigation"></nav> <div class="main-heading"></div> <jdoc:include type="message"/> <jdoc:include type="component"/> </div> <footer></footer> </body> </html> Let's analyze in detail what is written here. First comes the PHP block, in which we define the necessary variables. The first line is the standard Joomla! Security check. Next, we set the application, document, menu, and language variables. To connect styles and images, you also need a variable containing the path to our template. And the last variable will contain a check - whether the displayed page is home. Among other things, in the same block we connect the local CSS file of our template and remote font styles.
Next comes the standard html template, in the body of which we place two blocks - .wrapper and footer. The head section starts with connecting standard Joomla! Next comes the meta tag of translating Internet Explorer into modern mode, and then a special script to support HTML5 tags in older versions of IE. The .wrapper block contains empty blocks for the header and page title. The last but most important command is to connect the component inside the .wrapper block - it will add the content of the page to the template and display informational messages.
Now you need to stylize the resulting page. Save the page background to the images / bg.png file and add some basic styles to the template.css file:
Show code
body { margin: 0; border-top: 5px solid #7e7e7e; background: #f8f8f8 url(../images/bg.png); color: #8f8f8f; font: 12px Tahoma, sans-serif; } a { color: #525252; } img { border: 0; } p { margin: 20px 0; } .pull-left { float: left; } .pull-right { float: right; } .aligncenter { display: block; margin-right: auto; margin-left: auto; } .inputbox { padding: 0 10px; height: 30px; border: 1px solid #e7e7e7; background-color: #f3f3f3; color: #b2b2b2; vertical-align: top; } .button { height: 32px; border: none; background-color: #29c5e6; color: #fff; font-family: 'Oswald', sans-serif; } .image { outline: 1px solid #c9c9c9; border: 1px solid #fff; } figure img { display: block; } .wrapper { margin: auto; max-width: 960px; } header { padding: 20px 0; } aside { float: left; width: 250px; } aside + .item-page { margin-left: 280px; padding-bottom: 50px; } footer { clear: both; background: #7e7e7e; color: #dbdbdb; font-size: 11px; } After these actions, we should have a gray page with a large non-stylized heading. We will return to it later.
Logo

After we are finished with the frame of the main page, proceed to its filling. Let's start with the logo. Save the logo image in images / logo.png. Insert the markup for the logo into the header block of our template:
<header> <a href="/"><img src="<?php echo $template_url;?>/images/logo.png" alt="<?php echo JText::_('TPL_WHITESQUARE_LOGO');?>"></a> </header> As an alternative text for the image, text is inserted through the standard localization function Text :: _ (). We do not yet have the key TPL_WHITESQUARE_LOGO, so let's add it to the \ language \ en-GB \ en-GB.tpl_whitesquare.ini file:
TPL_WHITESQUARE_LOGO="Whitesquare logo" Unfortunately, after this text will not appear on the page of the site. The fact is that we add a localization key to a template that is already in use by the system, and Joomla! so arranged that it reads the localization keys from this file only during the initial installation of the template. You can of course delete the template and add it to the system again, but we will proceed more simply by adding the same key to the system file {joomla_root} \ language \ en-GB \ en-GB.tpl_whitesquare.ini, where {joomla_root} is a folder in which is installed Joomla!
Search form

Joomla! already contains its own search form module. You can find it in the Extensions -> Module Manager section of the admin panel. If it is not installed in your CMS, you can install it by clicking the New button and selecting the Search item from the list.
In order to place this module in a template, you need to create your own “position” for this module. Positions (positions) are specially marked areas of the template, into which the modules are inserted. Positions are described in the templateDetails.xml file in the positions block:
<positions> <position>search</position> </positions> After that, go back to the Module Manager and open the Search module for editing. And in the fields specify the following values:
Box Label: Space
Box Text: Search
Search Button: Yes
Button position: Right
Search Button Image: No
Button text: GO
Show Title: Hide
Position: Whitesquare Search
And on the Advanced tab, in the Module Class Suffix field, enter “-block”. This will separate the styles of the search form from the content of the search page.
Now that the module is ready, you need to insert it into the index.php template:
<header> ... <jdoc:include type="modules" name="search"/> </header> It remains to add styles in template.css:
Show code
.search-block { float: right; } .search-query { margin-right: -4px; } Navigation

The menu on the pages of the site is created in three stages: first you need to create an abstract menu and define its items, then determine its position in the template, and the last step is to create a module that will connect the abstract menu with a specific position.
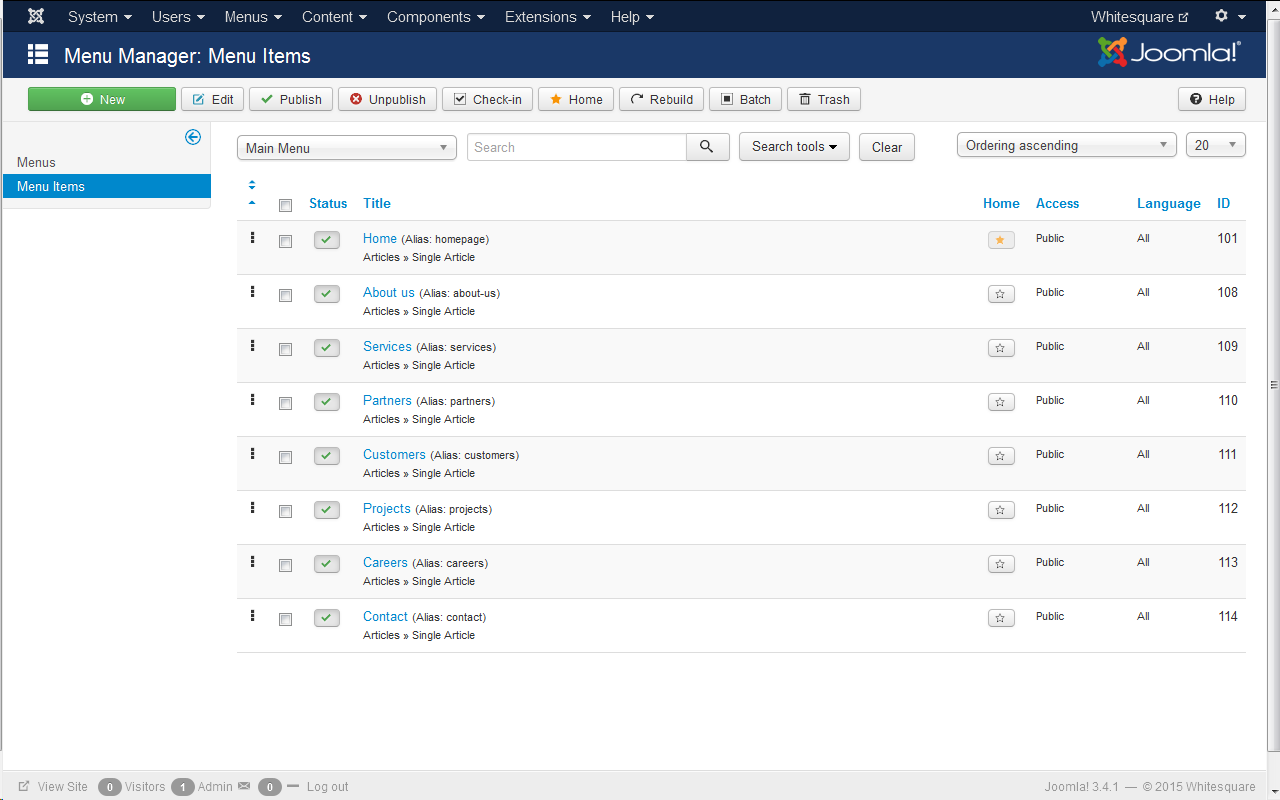
Menu lists are managed in the Menus -> Menu Manager section of the admin panel. By default, there is already a menu called Main Menu. Go into it.
In order to create a new menu item - click the New button and fill in the opened form - as follows:
Menu Title: the name of the page, for example, About us
Menu Item Type: Single Article
Select Article: About us
Similarly create all the main menu items: Home, About us, Services, Partners, Customers, Projects, Careers, Contact.
Next, open templateDetails.xml and add the main menu item:
<positions> … <position>menu</position> </positions> Next you need to create a module that will contain the menu. The default main menu module is already installed in Joomla !, it is called the Main Menu. Open it through the menu Extensions -> Module Manager -> Main Menu. In the Select Menu field, specify Main Menu, and in the Position: Whitesquare Menu field. In the field of this, go to the Advanced tab and select the value nav in the Module tag field and enter “-top” in the Menu Class Suffix field. This will allow us to set CSS classes for this menu more flexibly and semantically.
Let's now add the desired position to the template itself immediately after the header:
... </header> <nav class="main-navigation"> <jdoc:include type="modules" name="menu"/> </nav> At this stage, the menu will already appear on the pages, but without styles. We style it:
Show code
.main-navigation { border: 1px solid #e7e7e7; background: #f3f3f3; } .menu-top { margin: 0; padding: 0; } .menu-top li { display: inline-block; margin: 0; padding: 10px 30px; list-style-position: inside; text-transform: uppercase; font: 14px 'Oswald', sans-serif; } .menu-top li.current { background: #29c5e6; } .menu-top a { color: #b2b2b2; text-decoration: none; } .menu-top li.current a { color: #fff; } Page title

Joomla! automatically inserts article headers into the content of the page, but on the main page we don’t need a title, and on others it should have a completely different layout, so let's just turn off the automatic insertion of the title and insert the title inside the template in the way we need it.
First, a little theory. The settings for displaying page elements are set in Joomla! in three places:
- In the Article Manager settings, global settings are set for all articles.
- In the properties of each article, the settings of this article are set and the global
- If a menu is added to the page, the settings of the menu item pointing to this page will interrupt all other settings.
Based on this, let's turn off page elements globally, because Our design is strict and does not provide for unnecessary elements. And, as necessary, we will include the necessary settings for specific pages. So do the following:
- In the admin panel go to Content -> Article manager, click the Options button and on the first tab Articles for all fields, put the values Hide and No.
- Further, in the same place, in the Article manager, go to each article on the Options tab and set the value Use Global for all fields.
- And the last step go to Menus -> Menu Manager -> Main Menu and for each page on the Options tab also set the value for all fields to Use Global.
After these actions, the page title will disappear from all pages of the site. Now you need to bring it back to all pages except the main one, by pasting its call into index.php immediately after navigation:
</nav> <?php if (!$is_home_page): ?> <div class="main-heading"> <h1><?php echo $this->getTitle();?></h1> </div> <?php endif;?> Now we need to stylize the resulting block. Save the header background to the images /h1-bg.png file and add style rules:
Show code
.main-heading { margin: 30px 0; padding-left: 20px; background: transparent url(../images/h1-bg.png); } .main-heading h1 { display: inline-block; margin: 0; padding: 0 10px; background: url(../images/bg.png); color: #7e7e7e; text-transform: uppercase; font: 40px/40px 'Oswald', sans-serif; } Footer

Now we proceed to the most difficult part of our template. Let's cut the images and save them in the images folder
images / footer-logo.png - footer logo
images / social.png - sprites of big icons
images / social-small.png - sprites of small icons
After all the resources are prepared, let's take a look at the Sitemap block. It consists of two columns. Now, when native support for moving text across columns is not very well supported in popular browsers, it is much easier to make a two-column menu. To do this, in the Menus -> Menu Manager section, create a Sitemap left menu with Home, About, Services, and Sitemap right items with Partners, Support, and Contact items. Menu items should refer to the relevant articles. For each of these two menus, you need to create sitemap-left and sitemap-right positions and associate the menu with the positions through the new Sitemap left and Sitemap right modules. When adding modules on the Advanced tab, in the Menu Class Suffix field, insert the –sitemap value to distinguish this type of menu from the rest of the CSS styles.
Next we do the layout in the footer block of the index.php file:
<footer> <div class="footer-content"> <div class="twitter"> <h3 class="footer-heading"><?php echo JText::_('TPL_WHITESQUARE_TWITTER_FEED_TITLE');?></h3> <time datetime="2012-10-23"><a href="#" class="twitter-time">23 oct</a></time> <p>In ultricies pellentesque massa a porta. Aliquam ipsum enim, hendrerit ut porta nec, ullamcorper et nulla. In eget mi dui, sit amet scelerisque nunc. Aenean aug</p> </div> <div class="sitemap"> <h3 class="footer-heading"><?php echo JText::_('TPL_WHITESQUARE_SITEMAP_TITLE');?></h3> <div class="column first"> <jdoc:include type="modules" name="sitemap-left"/> </div> <div class="column"> <jdoc:include type="modules" name="sitemap-right"/> </div> </div> <div class="social"> <h3 class="footer-heading"><?php echo JText::_('TPL_WHITESQUARE_SOCIAL_TITLE');?></h3> <a href="http://twitter.com/" class="social-icon twitter-icon"></a> <a href="http://facebook.com/" class="social-icon facebook-icon"></a> <a href="http://plus.google.com/" class="social-icon google-plus-icon"></a> <a href="http://vimeo.com/" class="social-icon-small vimeo-icon"></a> <a href="http://youtube.com/" class="social-icon-small youtube-icon"></a> <a href="http://flickr.com/" class="social-icon-small flickr-icon"></a> <a href="http://instagram.com/" class="social-icon-small instagram-icon"></a> <a href="/index.php?option=com_content&view=category&id=2&format=feed&type=rss" class="social-icon-small rss-icon"></a> </div> <div class="footer-logo"> <a href="/"><img src="<?php echo $template_url;?>/images/footer-logo.png" alt="<?php echo JText::_('TPL_WHITESQUARE_LOGO');?>"></a> <p><?php echo JText::_('TPL_WHITESQUARE_COPYRIGHT');?></p> </div> </div> </footer> This block uses several localized lines, let's add them to the localization files, as we did in the logo block:
TPL_WHITESQUARE_TWITTER_FEED_TITLE="Twitter feed" TPL_WHITESQUARE_SITEMAP_TITLE="Sitemap" TPL_WHITESQUARE_SOCIAL_TITLE="Social networks" TPL_WHITESQUARE_COPYRIGHT="Copyright © 2012 Whitesquare. A <a href="http://pcklab.com">pcklab</a> creation" Register styles in template.css:
Show code
.footer-content { margin: auto; padding: 10px 0; max-width: 960px; height: 90px; } .footer-heading { margin: 0 0 10px 0; border-bottom: 1px solid #919191; color: #fff; text-transform: uppercase; font: 14px 'Oswald', sans-serif; } footer a { color: #dbdbdb; } footer p { margin: 5px 0; } .twitter-time { color: #b4aeae; } .twitter { float: left; width: 300px; } .twitter p { padding-right: 15px; } .sitemap { float: left; margin-left: 20px; padding-right: 15px; width: 150px; } .sitemap .column { display: inline-block; margin-left: 40px; } .sitemap .column.first { margin-left: 0; } .menu-sitemap { margin: 0; padding: 0; list-style-type: none; } .sitemap a { display: block; margin-bottom: 5px; text-decoration: none; font-size: 12px; } .sitemap a:hover { text-decoration: underline; } .social { float: left; margin-left: 20px; width: 130px; } .social-icon { display: inline-block; margin-right: 10px; width: 30px; height: 30px; background: url(../images/social.png) no-repeat; } .social-icon-small { display: inline-block; margin: 5px 6px 0 0; width: 16px; height: 16px; background: url(../images/social-small.png) no-repeat; } .twitter-icon { background-position: 0 0; } .facebook-icon { background-position: -30px 0; } .google-plus-icon { background-position: -60px 0; } .vimeo-icon { background-position: 0 0; } .youtube-icon { background-position: -16px 0; } .flickr-icon { background-position: -32px 0; } .instagram-icon { background-position: -48px 0; } .rss-icon { background-position: -64px 0; } .footer-logo { float: right; margin-top: 20px; text-align: right; font-size: 10px; } As a result, the internal page of the site should look like this:

Home page
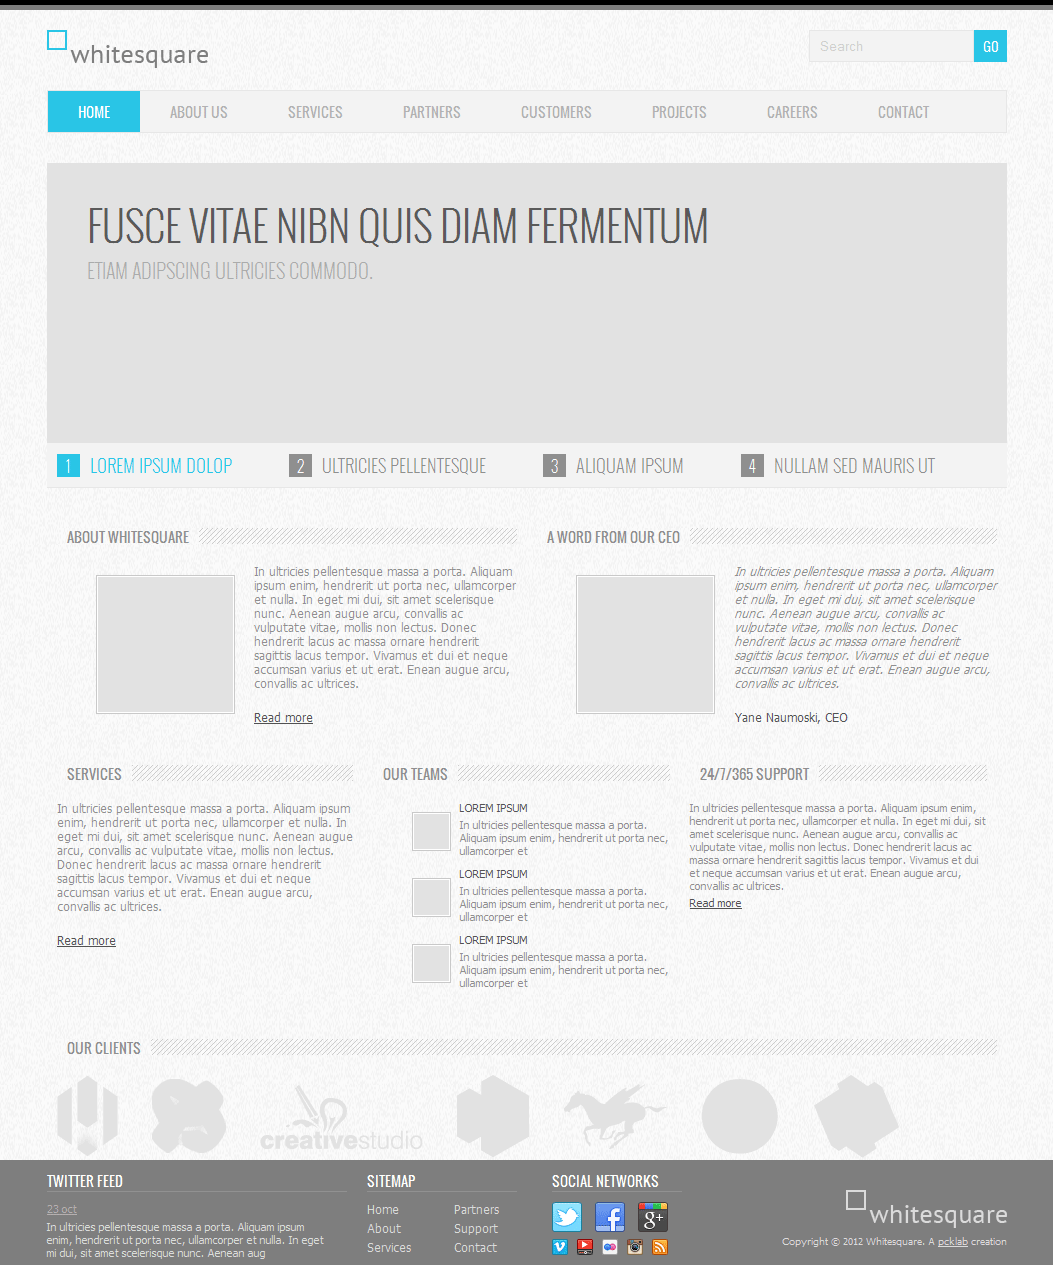
Homepage has already been created. Filling it with content goes beyond creating a Joomla! Template, however we will try to recreate the full picture from the psd layout and fill it with the main page. The content of the page is filled from the admin panel so that the site owner can enter this panel and change something on the page without changing the code of the template itself. First of all, you need to cut all the images on this page and save it to the images folder, which is located in the root of the folder where Joomla! Is installed. Let's call these images like this:
home-1.png
home-2.png
home-3.png
home-4.png
home-5.png
clients-1.png
clients-2.png
clients-3.png
clients-4.png
clients-5.png
clients-6.png
clients-7.png
Next, go to the admin panel to the form to edit the main page Content -> Article Manager -> Home and on the Content tab, click Tools -> Source code and enter the contents of the page:
Show code
<div class="slider"> <div class="content"> <div class="title">Fusce vitae nibn quis diam fermentum</div> <div class="subtitle">Etiam adipscing ultricies commodo.</div> </div> <ol class="links"> <li class="active">Lorem ipsum dolop</li> <li>Ultricies pellentesque</li> <li>Aliquam ipsum</li> <li>Nullam sed mauris ut</li> </ol> </div> <article class="teaser" style="width: 50%;"> <div class="heading"> <h3 class="heading-text">About whitesquare</h3> </div> <figure class="image"><img src="images/home-1.png" alt="" width="135" height="135" /></figure> In ultricies pellentesque massa a porta. Aliquam ipsum enim, hendrerit ut porta nec, ullamcorper et nulla. In eget mi dui, sit amet scelerisque nunc. Aenean augue arcu, convallis ac vulputate vitae, mollis non lectus. Donec hendrerit lacus ac massa ornare hendrerit sagittis lacus tempor. Vivamus et dui et neque accumsan varius et ut erat. Enean augue arcu, convallis ac ultrices. <p class="more"><a href="about-us/">Read more</a></p> </article> <article class="teaser" style="width: 50%;"> <div class="heading"> <h3 class="heading-text">A word from our ceo</h3> </div> <figure class="image"><img src="images/home-2.png" alt="" width="135" height="135" /></figure> <i>In ultricies pellentesque massa a porta. Aliquam ipsum enim, hendrerit ut porta nec, ullamcorper et nulla. In eget mi dui, sit amet scelerisque nunc. Aenean augue arcu, convallis ac vulputate vitae, mollis non lectus. Donec hendrerit lacus ac massa ornare hendrerit sagittis lacus tempor. Vivamus et dui et neque accumsan varius et ut erat. Enean augue arcu, convallis ac ultrices.</i> <p class="more">Yane Naumoski, CEO</p> </article> <article class="teaser" style="width: 33%;"> <div class="heading"> <h3 class="heading-text">Services</h3> </div> In ultricies pellentesque massa a porta. Aliquam ipsum enim, hendrerit ut porta nec, ullamcorper et nulla. In eget mi dui, sit amet scelerisque nunc. Aenean augue arcu, convallis ac vulputate vitae, mollis non lectus. Donec hendrerit lacus ac massa ornare hendrerit sagittis lacus tempor. Vivamus et dui et neque accumsan varius et ut erat. Enean augue arcu, convallis ac ultrices. <p class="more"><a href="services/">Read more</a></p> </article> <article class="teaser" style="width: 33%;"> <div class="heading"> <h3 class="heading-text">Our teams</h3> </div> <div class="small-block"> <figure class="image"><img src="images/home-3.png" alt="" width="35" height="35" /></figure> <h4 class="teaser-small-heading">Lorem ipsum</h4> <p class="teaser-small-paragraph">In ultricies pellentesque massa a porta. Aliquam ipsum enim, hendrerit ut porta nec, ullamcorper et</p> </div> <div class="small-block"> <figure class="image"><img src="images/home-4.png" alt="" width="35" height="35" /></figure> <h4 class="teaser-small-heading">Lorem ipsum</h4> <p class="teaser-small-paragraph">In ultricies pellentesque massa a porta. Aliquam ipsum enim, hendrerit ut porta nec, ullamcorper et</p> </div> <div class="small-block"> <figure class="image"><img src="images/home-5.png" alt="" width="35" height="35" /></figure> <h4 class="teaser-small-heading">Lorem ipsum</h4> <p class="teaser-small-paragraph">In ultricies pellentesque massa a porta. Aliquam ipsum enim, hendrerit ut porta nec, ullamcorper et</p> </div> </article> <article class="teaser" style="width: 33%;"> <div class="heading"> <h3 class="heading-text">24/7/365 Support</h3> </div> <p class="teaser-small-paragraph">In ultricies pellentesque massa a porta. Aliquam ipsum enim, hendrerit ut porta nec, ullamcorper et nulla. In eget mi dui, sit amet scelerisque nunc. Aenean augue arcu, convallis ac vulputate vitae, mollis non lectus. Donec hendrerit lacus ac massa ornare hendrerit sagittis lacus tempor. Vivamus et dui et neque accumsan varius et ut erat. Enean augue arcu, convallis ac ultrices.</p> <p class="teaser-small-paragraph more"><a href="contact/">Read more</a></p> </article> <article class="teaser clients" style="width: 100%;"> <div class="heading"> <h3 class="heading-text">Our clients</h3> </div> <img src="images/clients-1.png" alt="" width="61" height="83" /> <img src="images/clients-2.png" alt="" width="74" height="83" /> <img src="images/clients-3.png" alt="" width="163" height="83" /> <img src="images/clients-4.png" alt="" width="72" height="83" /> <img src="images/clients-5.png" alt="" width="104" height="83" /> <img src="images/clients-6.png" alt="" width="78" height="83" /> <img src="images/clients-7.png" alt="" width="87" height="83" /></article> Now it remains to stylize this code.
Show code
.slider { margin-top: 30px; text-transform: uppercase; font-weight: 300; font-family: 'Oswald', sans-serif; } .slider .content { padding: 30px 40px; height: 220px; background: #e2e2e2; } .slider .title { color: #5a5a5a; font-size: 42px; } .slider .subtitle { color: #acacac; font-size: 20px; } .slider .links { display: block; margin: 0; padding: 10px; border-bottom: 1px solid #e7e7e7; background: #f3f3f3; color: #8f8f8f; counter-reset: list 0; } .slider .links li { display: inline-block; margin-right: 55px; font-size: 18px; line-height: 23px; cursor: pointer; } .slider .links li.active { color: #29c5e6; } .slider .links li:before { display: inline-block; margin-right: 10px; width: 23px; background: #8f8f8f; color: #fff; content: counter(list) " "; counter-increment: list; text-align: center; font-size: 16px; cursor: pointer; } .slider .links li.active:before { background: #29c5e6; } .teaser { display: block; float: left; box-sizing: border-box; padding: 0 10px; vertical-align: top; } .teaser .heading { margin: 40px 0 20px; height: 16px; background: transparent url(../images/h1-bg.png); } .teaser .bullet { display: inline-block; margin-right: -4px; width: 16px; height: 16px; background: #29c5e6; vertical-align: top; } .teaser .heading-text { display: inline-block; margin: 0; padding: 0 10px; background: url(../images/bg.png); text-transform: uppercase; font: normal 14px/16px 'Oswald', sans-serif; } .teaser .image { float: left; margin-right: 20px; } .teaser .small-block { margin-bottom: 10px; } .teaser .small-block .image { margin-right: 10px; } .teaser .more, .teaser .more a { margin-bottom: 0; color: #525252; } .teaser-small-heading { display: block; margin: 0; color: #525252; text-transform: uppercase; font-weight: normal; font-size: 11px; } .teaser-small-paragraph { margin: 4px 0; font-size: 11px; } .clients img { display: inline-block; margin-right: 30px; } Sidebar
If you look at the psd layouts, you will see that the internal pages differ from the main ones by the presence of the left column.
Let's add it to index.php before calling the page content:
<?php if (!$is_home_page): ?> <aside> <nav class="aside-navigation"> <jdoc:include type="modules" name="submenu"/> </nav> <h2 class="sidebar-heading"><?php echo JText::_('TPL_WHITESQUARE_OFFICES_TITLE');?></h2> <div class="map"> <img src="/images/sample.png" width="230" height="180" alt="<?php echo JText::_('TPL_WHITESQUARE_OFFICES_TITLE');?>"> </div> </aside> <?php endif;?> <jdoc:include type="component"/> This block will be displayed on all pages except the main one. Here the layout consists of two parts: the display of the navigation submenu and the block map of offices.
For completeness, as a submenu, I propose to show a list of all posts on the site. The submenu is created in the same way as we created other kinds of menus. Create articles under the names: Lorem ipsum, Donec tincidunt laoreet, Vestibulum elit, Etiam pharetra, Phasellus placerat. Then create a new menu called Submenu and add the above pages to it. After that, create a submenu position in templateDetails.xml and a Submenu module using this position and the Submenu menu. In the properties of the module on the Advanced tab, specify the Menu Class Suffix: “-aside”
The block of the map does not cause any special questions, do not forget to just add a new localization key:
TPL_WHITESQUARE_OFFICES_TITLE="Our offices" As a map stub, create an empty sample.png file and save it in the images folder in the root of the Joomla!
In conclusion, we need to add styles for the layout:
Show code
.aside-navigation { border: 1px solid #e7e7e7; background: #f3f3f3; } .menu-aside { margin: 0; padding: 0; text-transform: uppercase; } .menu-aside li { padding: 10px; border-top: 1px solid #e7e7e7; list-style: square inside; font: 14px 'Oswald', sans-serif; font-weight: 300; } .menu-aside li:first-child { border: none; } .menu-aside li.current-menu-item, .menu-aside li.current-menu-item a { color: #29c5e6; } .menu-aside a { color: #8f8f8f; text-decoration: none; } .sidebar-heading { margin: 30px 0 0 0; padding: 10px; background: #29c5e6; color: #fff; text-transform: uppercase; font: 14px 'Oswald', sans-serif; } .map { margin: 0 0 30px 0; padding: 10px; border: 1px solid #e7e7e7; background: #f3f3f3; } About us page
Now let's fill the contents of the About us page. In the same way as we filled the main page - prepare images and add them to the images folder of the Joomla! Name the images like this:
about-1.png
about-2.png
team-Nobriga.jpg
team-Pittsley.jpg
team-Rousselle.jpg
team-Shoff.jpg
team-Simser.jpg
team-Tondrea.jpg
team-Venuti.jpg
team-Wollman.jpg
Next, go to the article editing in the admin panel and add the code through the menu Tools -> Source code:
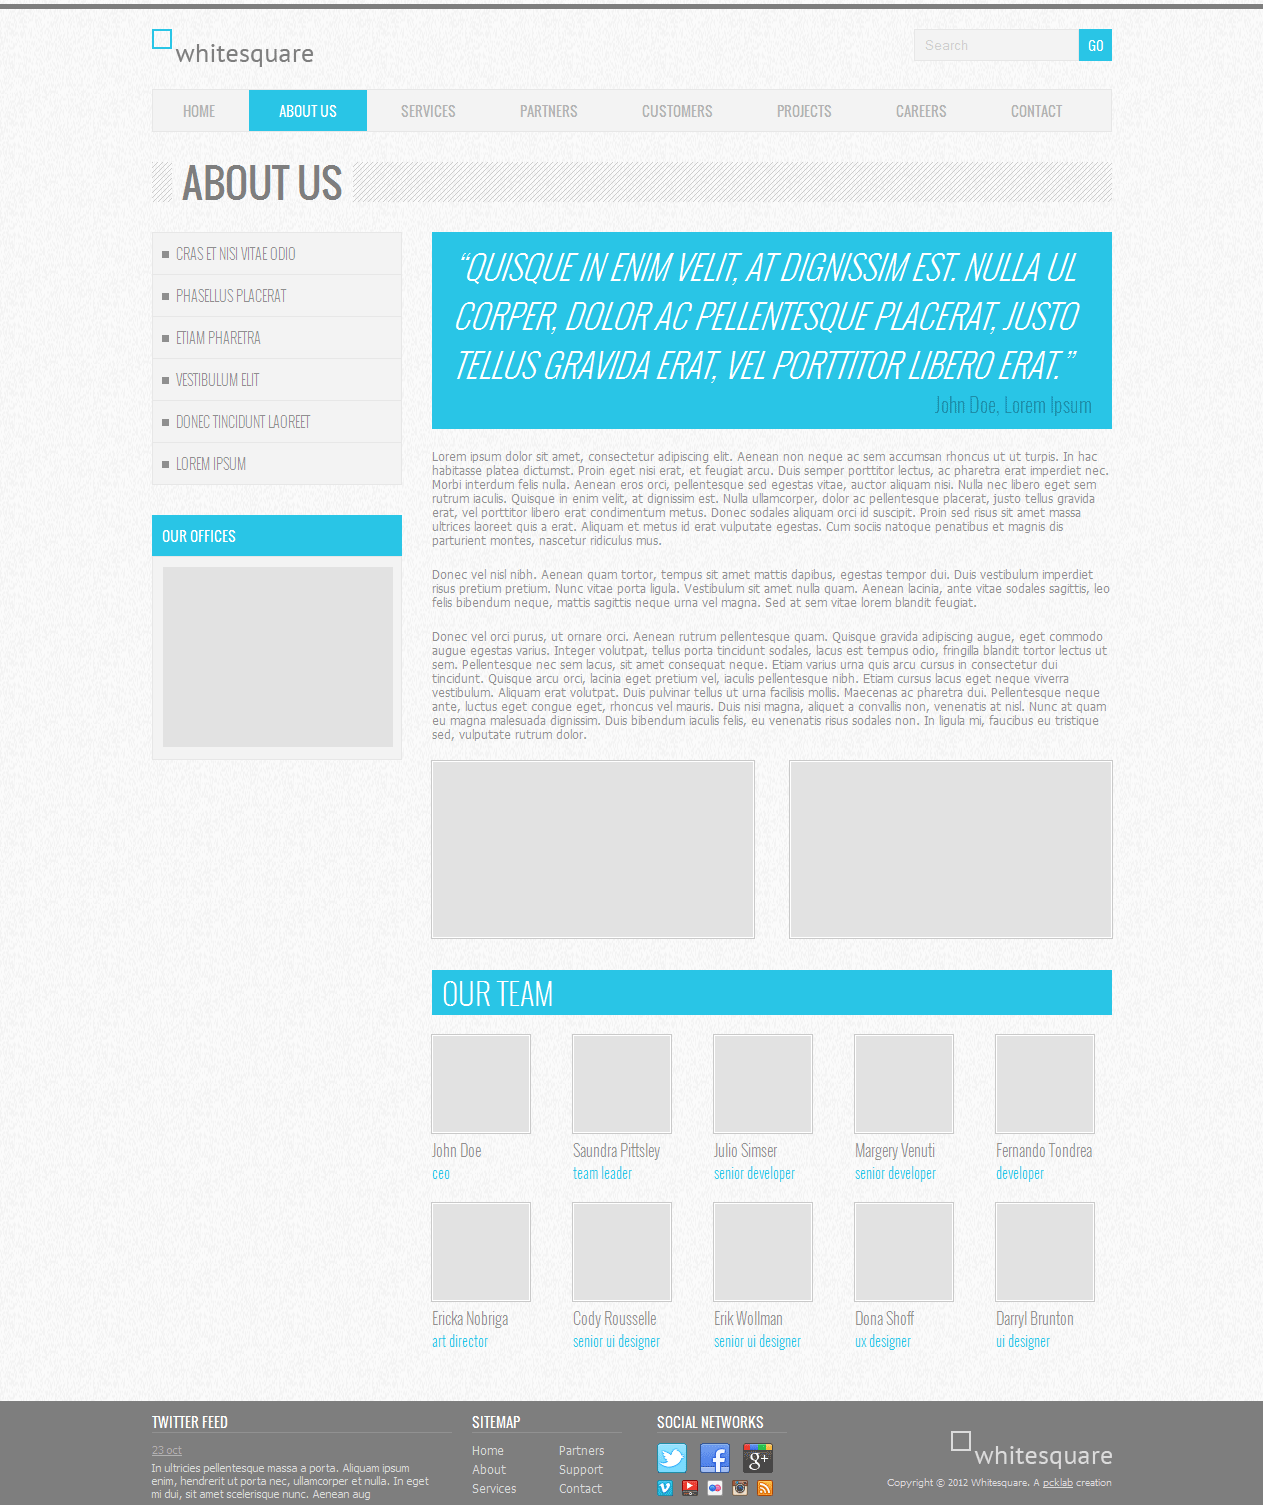
Show code
<blockquote class="main-blockquote"> <p>“QUISQUE IN ENIM VELIT, AT DIGNISSIM EST. NULLA UL CORPER, DOLOR AC PELLENTESQUE PLACERAT, JUSTO TELLUS GRAVIDA ERAT, VEL PORTTITOR LIBERO ERAT.”</p> <cite>John Doe, Lorem Ipsum</cite></blockquote> <p>Lorem ipsum dolor sit amet, consectetur adipiscing elit. Aenean non neque ac sem accumsan rhoncus ut ut turpis. In hac habitasse platea dictumst. Proin eget nisi erat, et feugiat arcu. Duis semper porttitor lectus, ac pharetra erat imperdiet nec. Morbi interdum felis nulla. Aenean eros orci, pellentesque sed egestas vitae, auctor aliquam nisi. Nulla nec libero eget sem rutrum iaculis. Quisque in enim velit, at dignissim est. Nulla ullamcorper, dolor ac pellentesque placerat, justo tellus gravida erat, vel porttitor libero erat condimentum metus. Donec sodales aliquam orci id suscipit. Proin sed risus sit amet massa ultrices laoreet quis a erat. Aliquam et metus id erat vulputate egestas. Cum sociis natoque penatibus et magnis dis parturient montes, nascetur ridiculus mus.</p> <p>Donec vel nisl nibh. Aenean quam tortor, tempus sit amet mattis dapibus, egestas tempor dui. Duis vestibulum imperdiet risus pretium pretium. Nunc vitae porta ligula. Vestibulum sit amet nulla quam. Aenean lacinia, ante vitae sodales sagittis, leo felis bibendum neque, mattis sagittis neque urna vel magna. Sed at sem vitae lorem blandit feugiat.</p> <p>Donec vel orci purus, ut ornare orci. Aenean rutrum pellentesque quam. Quisque gravida adipiscing augue, eget commodo augue egestas varius. Integer volutpat, tellus porta tincidunt sodales, lacus est tempus odio, fringilla blandit tortor lectus ut sem. Pellentesque nec sem lacus, sit amet consequat neque. Etiam varius urna quis arcu cursus in consectetur dui tincidunt. Quisque arcu orci, lacinia eget pretium vel, iaculis pellentesque nibh. Etiam cursus lacus eget neque viverra vestibulum. Aliquam erat volutpat. Duis pulvinar tellus ut urna facilisis mollis. Maecenas ac pharetra dui. Pellentesque neque ante, luctus eget congue eget, rhoncus vel mauris. Duis nisi magna, aliquet a convallis non, venenatis at nisl. Nunc at quam eu magna malesuada dignissim. Duis bibendum iaculis felis, eu venenatis risus sodales non. In ligula mi, faucibus eu tristique sed, vulputate rutrum dolor.</p> <p><img class="image" src="/images/about-1.png" alt="about-1" width="320" height="175" /><img class="image pull-right" src="/images/about-2.png" alt="about-2" width="320" height="175" /></p> <h2 class="content-heading">Our team</h2> <div class="team-row"> <figure><img class="image" src="/images/team-Doe.jpg" alt="" width="96" height="96" /><figcaption>John Doe<span class="occupation">ceo</span></figcaption></figure> <figure><img class="image" src="/images/team-Pittsley.jpg" alt="" width="96" height="96" /><figcaption>Saundra Pittsley<span class="occupation">team leader</span></figcaption></figure> <figure><img class="image" src="/images/team-Pittsley.jpg" alt="" width="96" height="96" /><figcaption>Julio Simser<span class="occupation">senior developer</span></figcaption></figure> <figure><img class="image" src="/images/team-Simser.jpg" alt="" width="96" height="96" /><figcaption>Margery Venuti<span class="occupation">senior developer</span></figcaption></figure> <figure><img class="image" src="/images/team-Venuti.jpg" alt="" width="96" height="96" /><figcaption>Fernando Tondrea<span class="occupation">developer</span></figcaption></figure> </div> <div class="team-row"> <figure><img class="image" src="/images/team-Tondrea.jpg" alt="" width="96" height="96" /><figcaption>Ericka Nobriga<span class="occupation">art director</span></figcaption></figure> <figure><img class="image" src="/images/team-Nobriga.jpg" alt="" width="96" height="96" /><figcaption>Cody Rousselle<span class="occupation">senior ui designer</span></figcaption></figure> <figure><img class="image" src="/images/team-Rousselle.jpg" alt="" width="96" height="96" /><figcaption>Erik Wollman<span class="occupation">senior ui designer</span></figcaption></figure> <figure><img class="image" src="/images/team-Wollman.jpg" alt="" width="96" height="96" /><figcaption>Dona Shoff<span class="occupation">ux designer</span></figcaption></figure> <figure><img class="image" src="/images/team-Shoff.jpg" alt="" width="96" height="96" /><figcaption>Darryl Brunton<span class="occupation">ui designer</span></figcaption></figure> </div> And styles in template.css:
Show code
.main-blockquote { margin: 0; padding: 10px 20px; background: #29c5e6; font-weight: 300; font-family: 'Oswald', sans-serif; } .main-blockquote p { margin: 0; color: #fff; font-style: italic; font-size: 33px; } .main-blockquote cite { display: block; margin: 0; color: #1d8ea6; text-align: right; font-style: normal; font-size: 20px; } .content-heading { clear: both; margin: 30px 0 0 0; padding: 0 10px; background: #29c5e6; color: #fff; text-transform: uppercase; font: 30px 'Oswald', sans-serif; font-weight: 300; } .footer-content { margin: auto; padding: 10px 0; max-width: 960px; height: 90px; } .footer-heading { margin: 0 0 10px 0; border-bottom: 1px solid #919191; color: #fff; text-transform: uppercase; font: 14px 'Oswald', sans-serif; } footer a { color: #dbdbdb; } footer p { margin: 5px 0; } .team-row figure { display: inline-block; margin: 20px 0 0; font-weight: 300; font-family: 'Oswald', sans-serif; } .team-row figure + figure { margin-left: 43px; } .team-row figcaption { margin-top: 5px; font-weight: 300; font-size: 16px; } .team-row .occupation { display: block; color: #29c5e6; font-size: 14px; } Search page
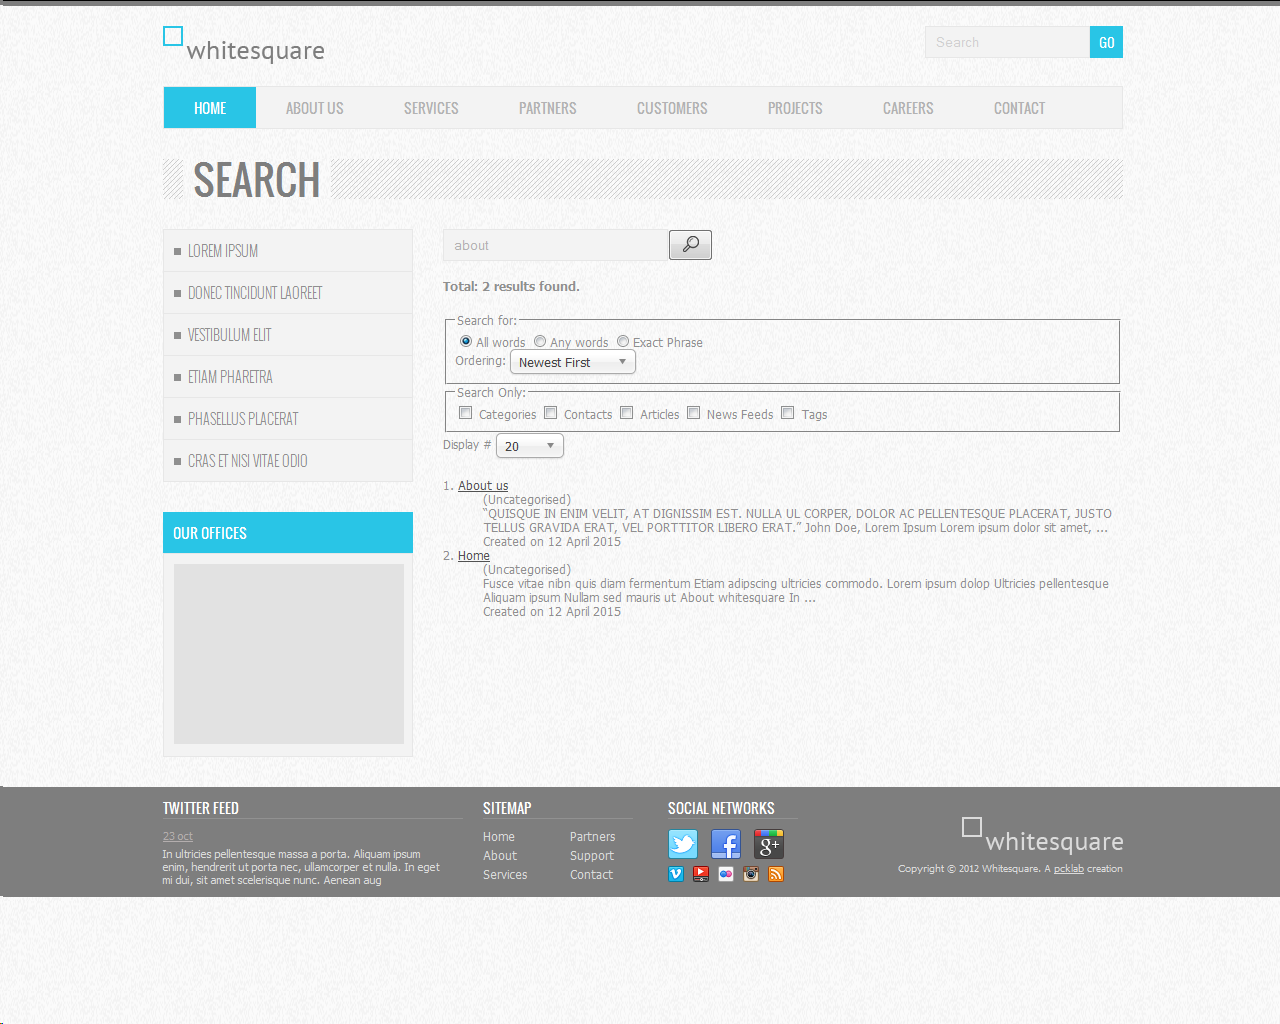
At the very beginning, when we created a template for the header, we added a search to it. The result of the search is a page that now does not look good. Let's add styles for it:
Show code
.search { margin-left: 280px; padding-bottom: 50px; } .icon-search { display: inline-block; width: 21px; height: 21px; background: url(../images/search.png) center center no-repeat; } .search .btn-toolbar { height: 30px; } The search module provides that the template should have a search icon for the button, but since it is not in the design, you will have to add it yourself. To do this, find any free icon with a magnifying glass image and save it as search.png in the images folder of the template. The size of the picture should be 16x16 pixels.
Print page
In addition to index.php in the root of the template are 2 more php files. The first one is omponent.php. This file displays a print page that the user can open by clicking on the print icon in the content of each article. At the very beginning, we turned off the display of these icons in articles via the menu Content -> Article Manager -> Options -> Show Print Icon in the admin panel. But, since we are making a universal template, we are obliged to create this file. Fill it with the following contents:
<?php defined('_JEXEC') or die; $app = JFactory::getApplication(); $doc = JFactory::getDocument(); $menu = $app->getMenu(); $lang = JFactory::getLanguage(); $template_url = $this->baseurl . '/templates/' . $this->template; $doc->addStyleSheet($template_url . '/css/template.css'); $doc->addStyleSheet('http://fonts.googleapis.com/css?family=Oswald:400,300'); $is_home_page = $menu->getActive() == $menu->getDefault($lang->getTag()); ?> <!doctype html> <html> <head> <jdoc:include type="head"/> <meta http-equiv="X-UA-Compatible" content="IE=Edge"> <!--[if lt IE 9]> <script src="http://html5shiv.googlecode.com/svn/trunk/html5.js"></script> <![endif]--> </head> <body> <div class="wrapper"> <?php if (!$is_home_page): ?> <div class="main-heading"> <h1><?php echo $this->getTitle();?></h1> </div> <?php endif;?> <jdoc:include type="component"/> </div> </body> </html> As you can see, this file completely repeats the structure of the index.php file. The only difference is that we have removed the unnecessary blocks for printing: the cap, footer and side column.
Error page

The last page left to make is the error output page. Its template is described in the error.php file. The code for this file will look like this:
<?php defined('_JEXEC') or die; $template_url = $this->baseurl . '/templates/' . $this->template; ?> <!doctype html> <html> <head> <title><?php echo $this->error->getCode(); ?> <?php echo $this->error->getMessage(); ?></title> <link rel="stylesheet" href="<?php echo $template_url; ?>/css/template.css" type="text/css"/> <link rel="stylesheet" href="http://fonts.googleapis.com/css?family=Oswald:400,300" type="text/css"/> <meta http-equiv="X-UA-Compatible" content="IE=Edge"> <!--[if lt IE 9]> <script src="http://html5shiv.googlecode.com/svn/trunk/html5.js"></script> <![endif]--> </head> <body> <div class="wrapper"> <header> <a href="/"><img src="<?php echo $template_url;?>/images/logo.png" alt="<?php echo JText::_('TPL_WHITESQUARE_LOGO');?>"></a> </header> <div class="main-heading"> <h1><?php echo JText::_('TPL_WHITESQUARE_ERROR');?></h1> </div> <?php echo $this->error->getCode(); ?> <?php echo $this->error->getMessage(); ?> </div> </body> </html> In general, the structure here is similar to the previous pages, but there are a few nuances. Firstly, this page type does not support constructions of the form “<jdoc: include type =" ... "/>", so we had to abandon all modules and even the dynamic head block, so the tags in the head block are manually written. A new localization key has appeared in the page header: TPL_WHITESQUARE_ERROR with the value “Error”. Do not forget to register it in the localization files. And in the content area of the page displays messages with the error code and text.
Conclusion
This is the creation of a Joomla template! it is finished. The finished project can be downloaded here .
Links to other articles about the layout of this template:
How to create a web page. Part 1
How to create a web page. Part 2 - Bootstrap
Layout for the smallest. ( xnim )
1- Bootstrap ( lexnekr )
WordPress
Source: https://habr.com/ru/post/256635/
All Articles