Automatic 3D packaging size scanner
Recently we have been given a very specific task, from the warehouse of one of the Russian distributors of electronic components, from which we send our products to our customers, among many other parcels. Oh well! Let's try ... Moreover, some time ago we had such an ultrasonic sensor in the samples for measuring distances. In terms of price, it was noticeably different from the widespread ones, but the manufacturer promised better measurement accuracy. Yes, and just at that time we made our own version of the microcontroller , compatible with Arduino Leonardo in functions, providing the board with screw connectors, LCD sockets and a number of other lotions designed to expand the capabilities of the module in the future.
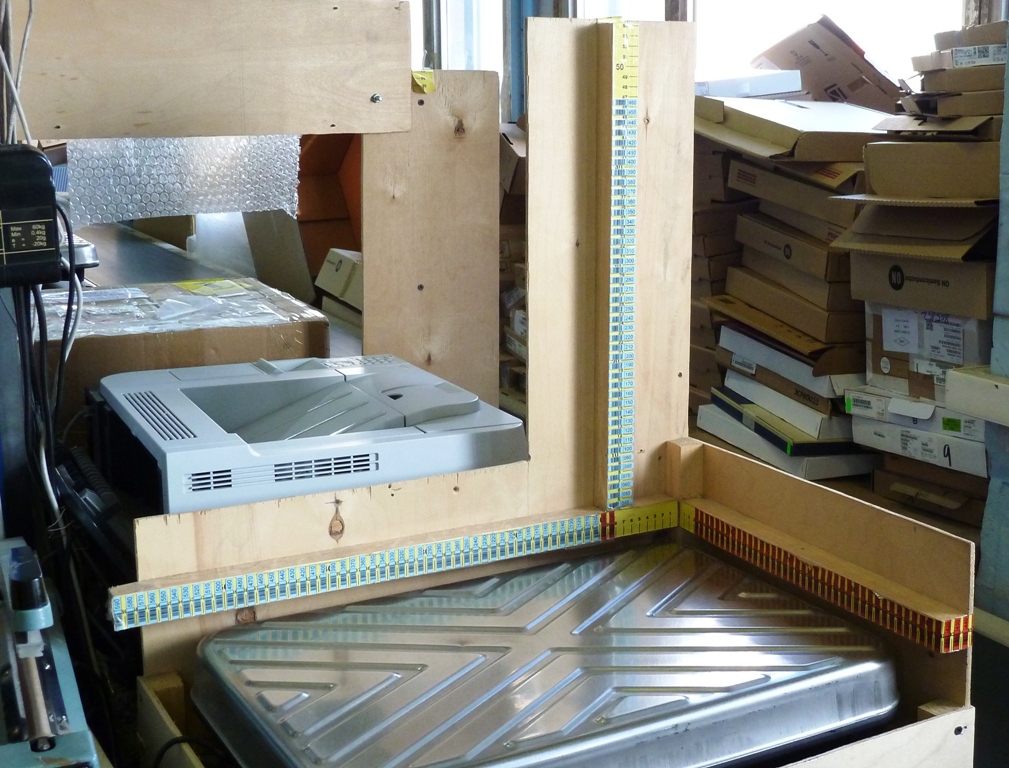
This is how the workplace of the packer looks like, where it weighs and measures the packaging:
')
Let's try to improve and automate it.
The silver surface is a scale, they are connected to the computer through its own COM port and automatically transfer the weight to the accounting system. But to measure the size of the box local innovators placed next to the weights of the ruler, from improvised means. This markedly increased labor productivity, but the data had to be entered by hand using the keyboard.
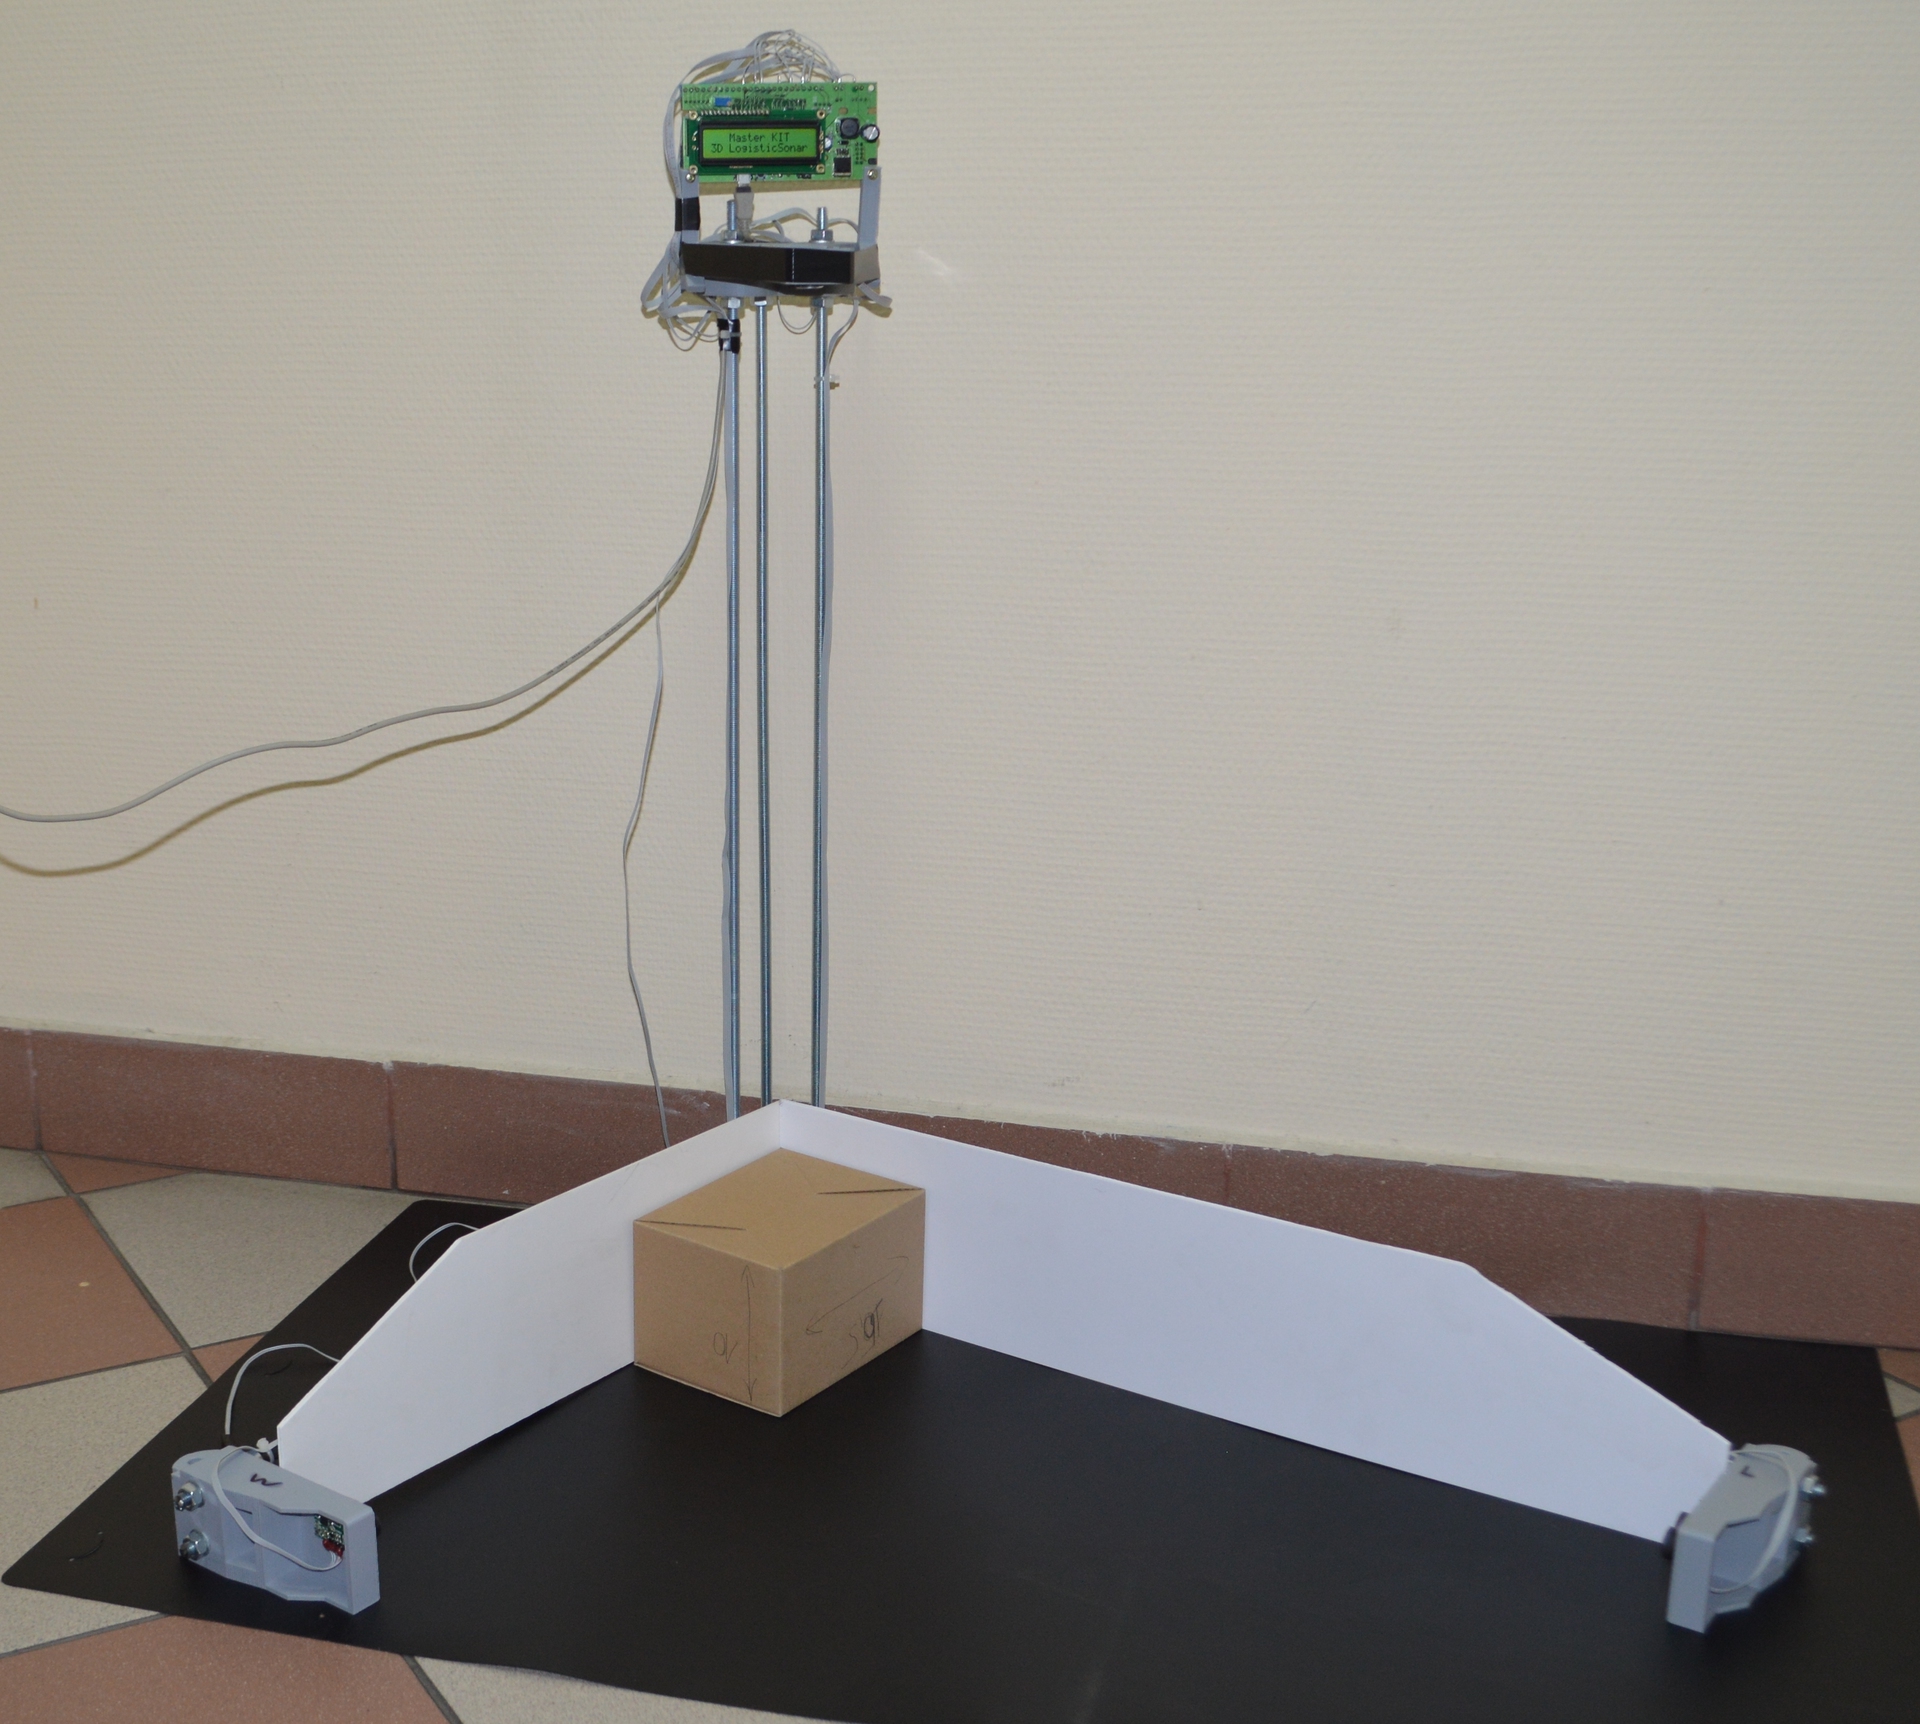
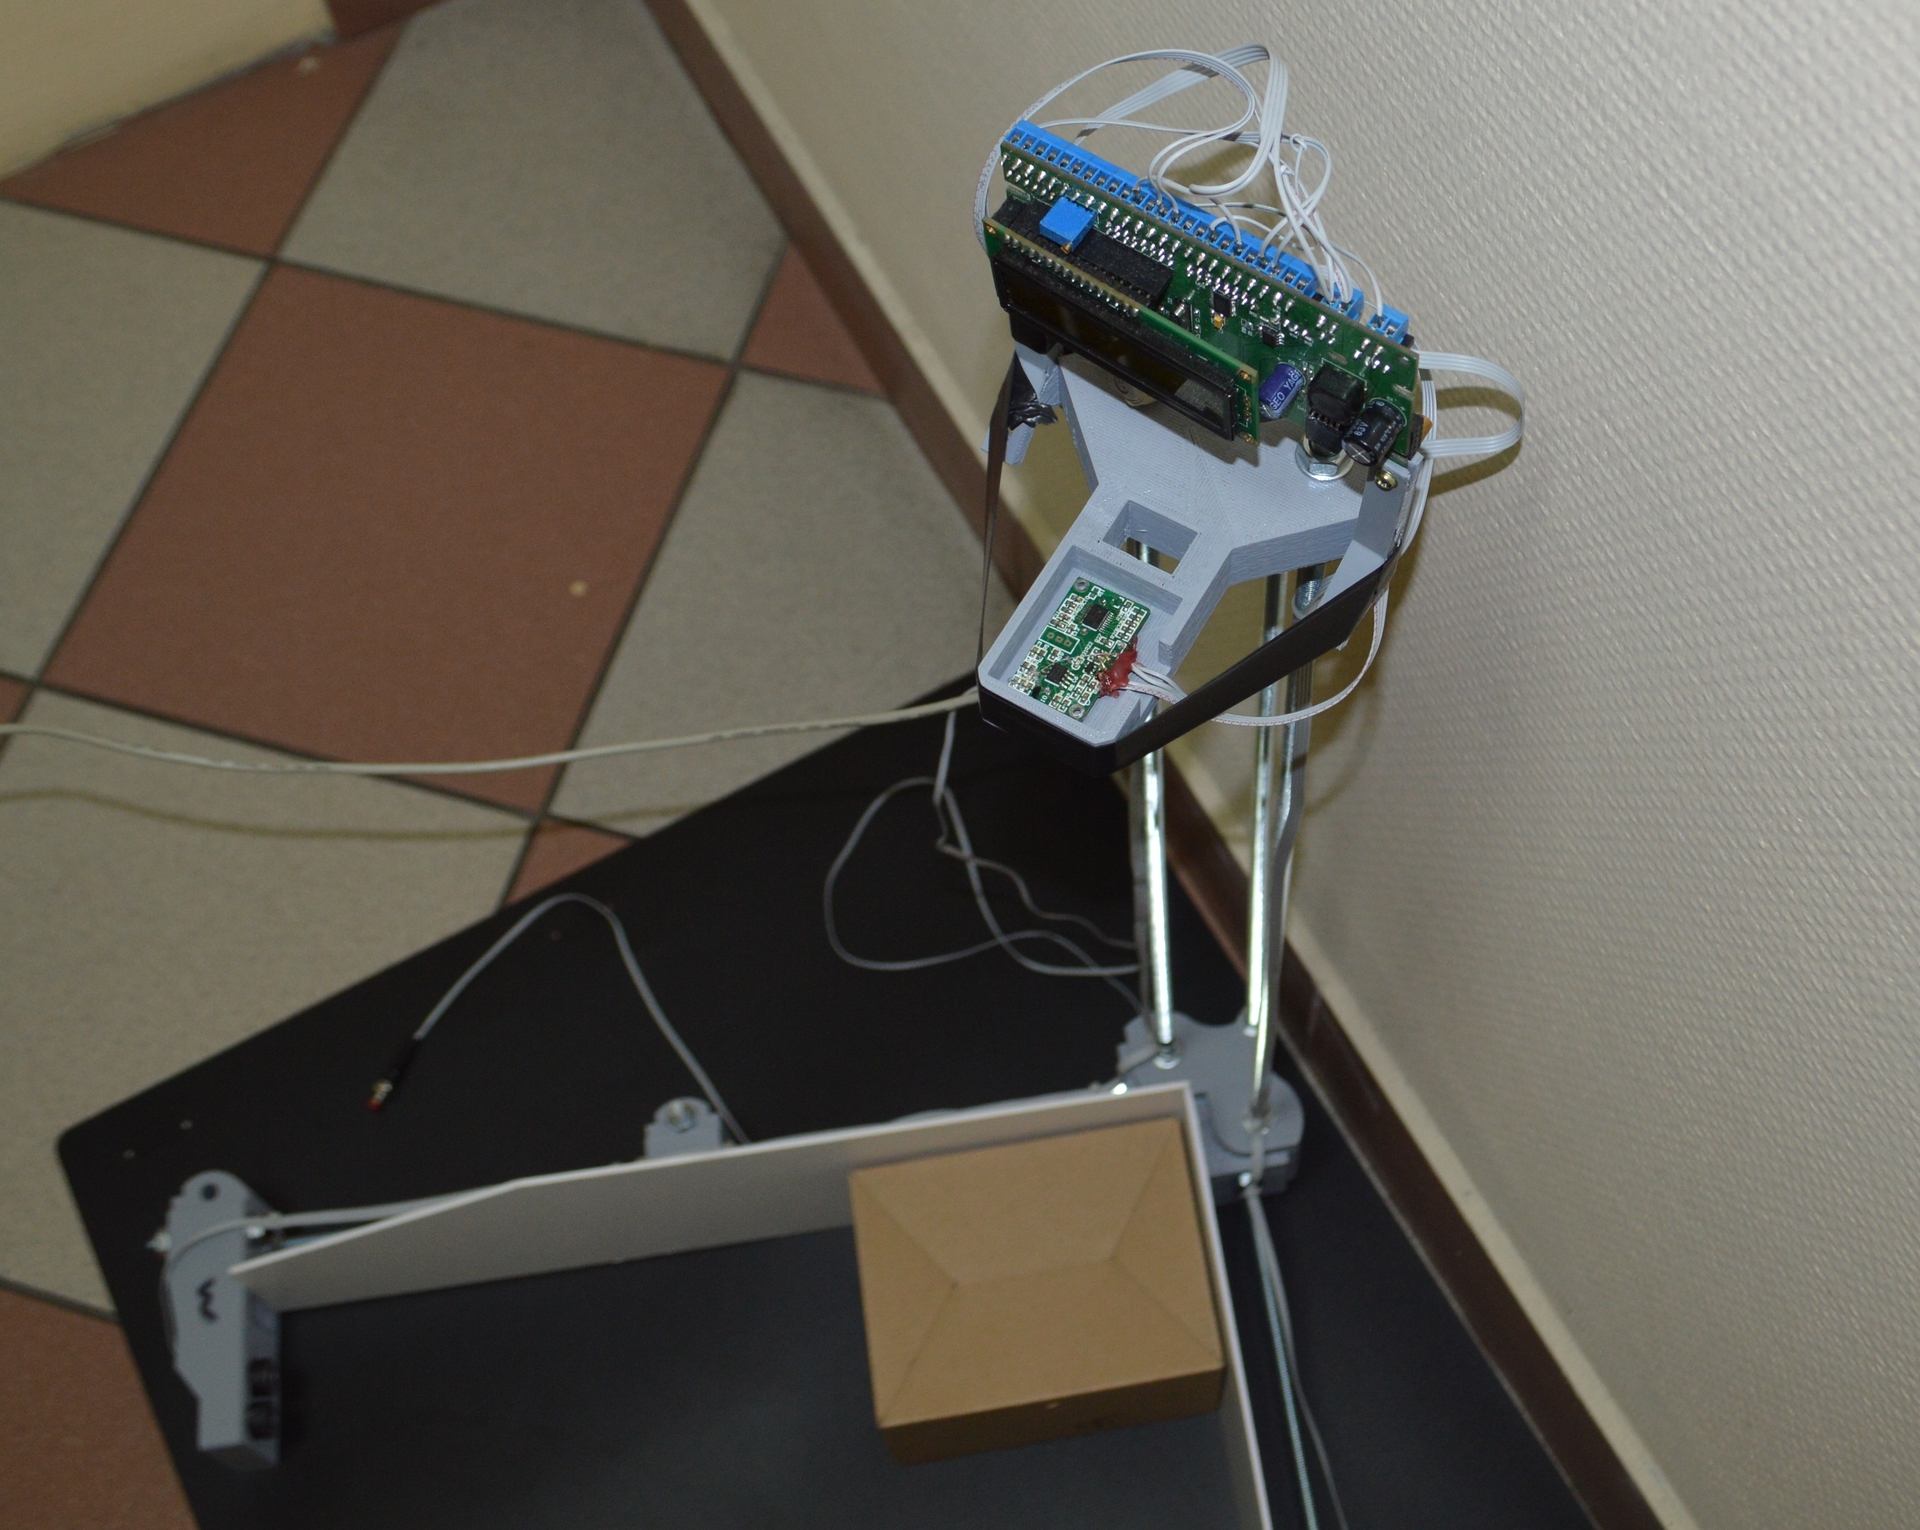
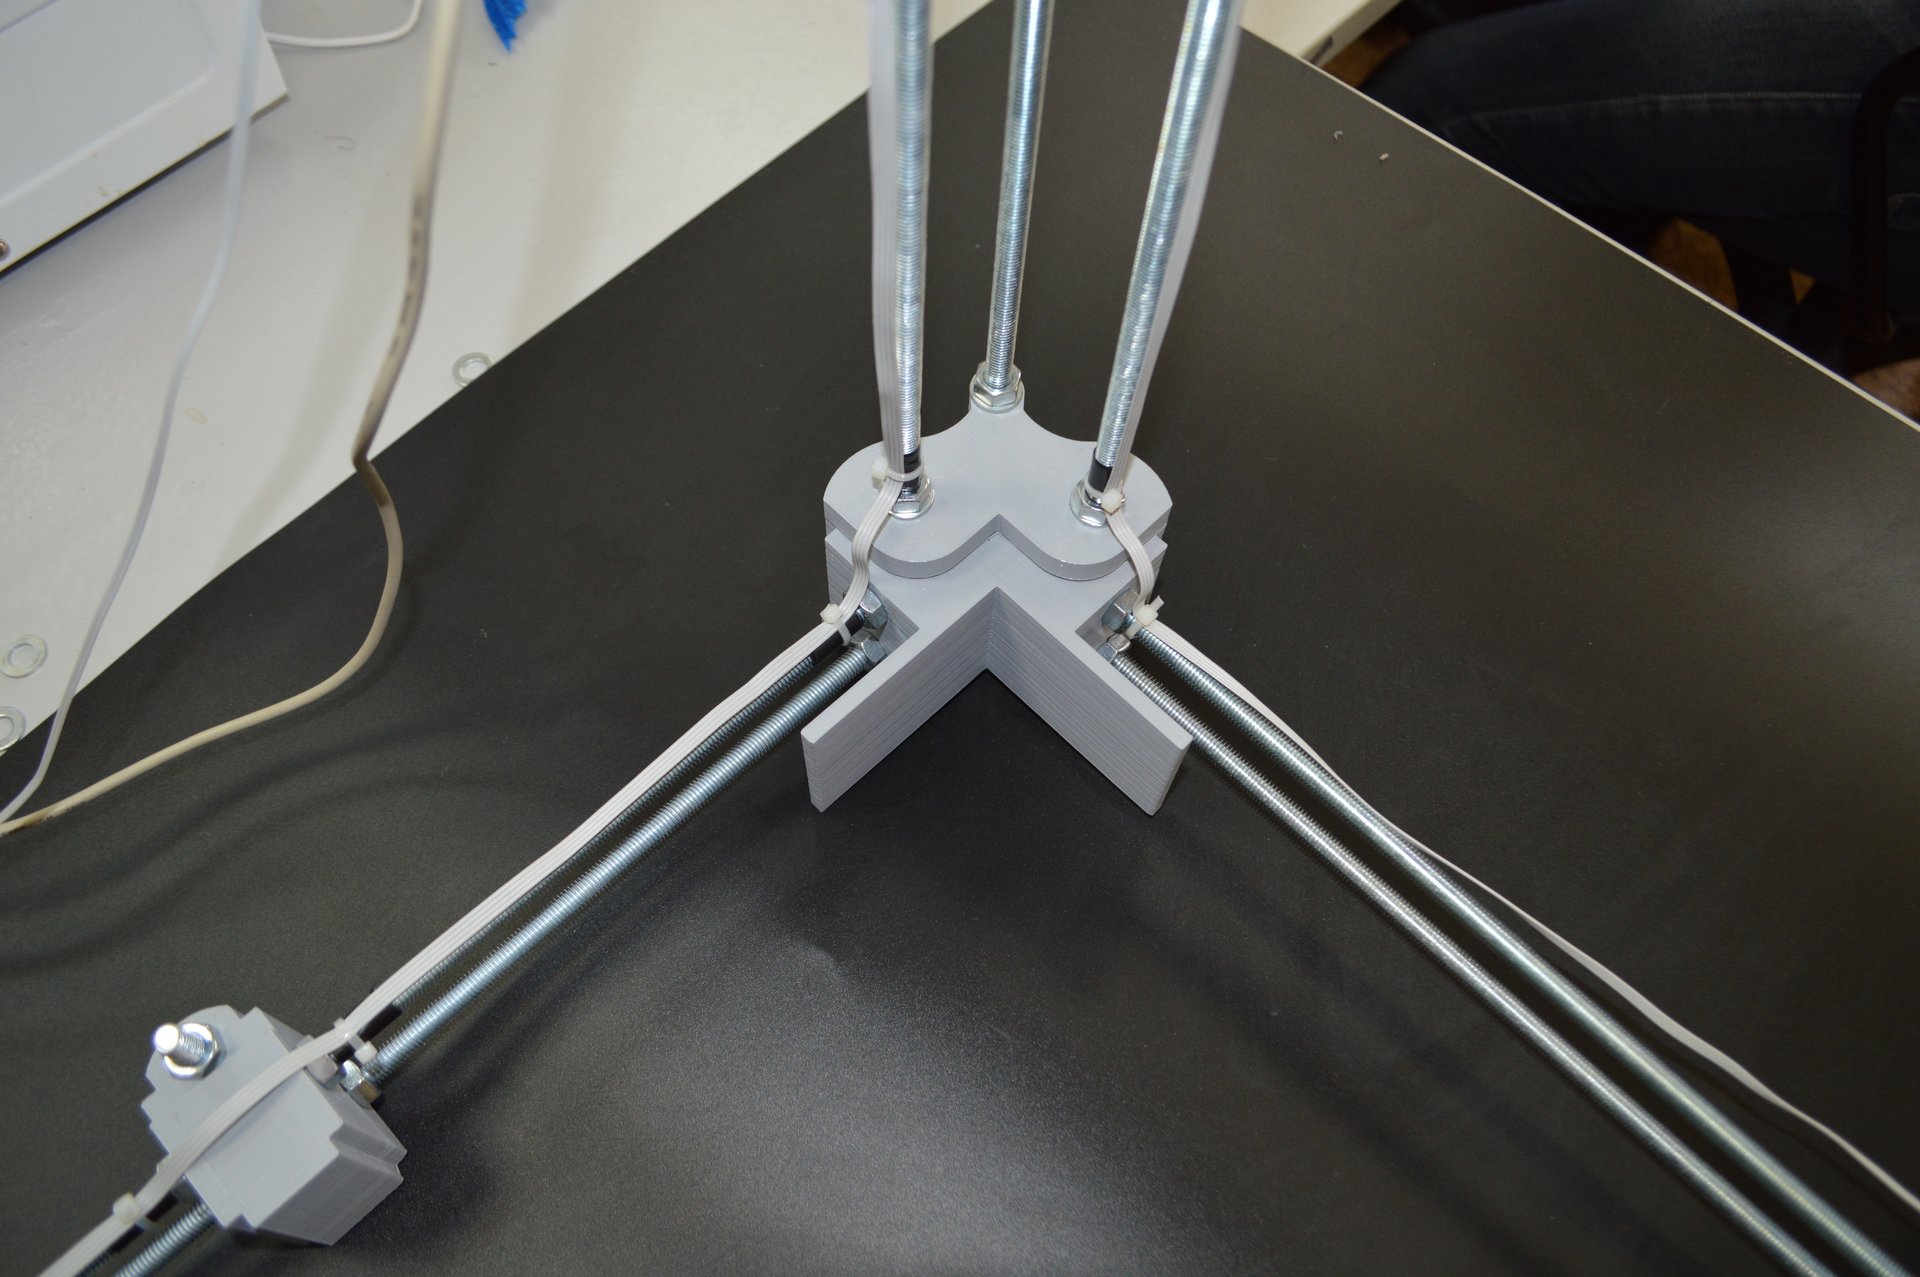
So, for the prototype we take the workplace as a basis and add sensors to the Wood-Cartesian coordinate system, unfold them inside the axes, connect to the microcontroller, write a sketch to ARDUINO IDE using the sensor library and Leonardo built-in capabilities. Namely, the fact that the Atmega 32u4 microcontroller uses the connection to the computer via the built-in USB interface using the HID-devices technology. This is how keyboards, mice, barcode scanners work. This is exactly what we need - to transfer data to the keyboard buffer, simulating manual data entry.
Here's a video that turned out in the "draft version"
We wrote a simple sketch. Realizing only the basic functions, but nothing prevents you from complementing it with various services such as manual calibration, changing the unit of measurement, setting the transmitted symbols depending on the accounting system used, etc. The memory of the controller is large enough and will allow it to be done in the future if necessary.
In the meantime, the sketch works according to this logic:
• After switching on, each of the three sensors measures the distance from itself to the opposite wall and remembers this distance as a basic
• It switches to the operating mode and cyclically measures the current distance.
• If the current distance is significantly different from the base distance - the device assumes that a box has been placed in the measurement area. The measurement occurs in three axes according to the formula:
Side Size = Baseline - Current Distance
• The size on three axes is written to the corresponding variables.
• Transfer to a computer by pressing the button by the operator. This is done to eliminate false positives.
• After transferring data, pressing the button is blocked until the box is removed. The system will feel it by measuring the current distance - it will again be equal to the base.
• The cycle is repeated - the system is waiting for a new box
So, we made, installed, set up the sensors for the experiment at fixed base distances ... and left for trial operation. What did she show? We did not get the measurement accuracy of the measurements, but the accuracy is quite appropriate for the logistical task.
Besides:
• Increased productivity - Yes.
• Convenience for the packer - Yes.
The second stage of our development has begun - the conversion to the presentation. The designer took up the matter and, using SketchUp and several cups of coffee, developed a design somewhat similar to the well-known 3D printer RepRap.
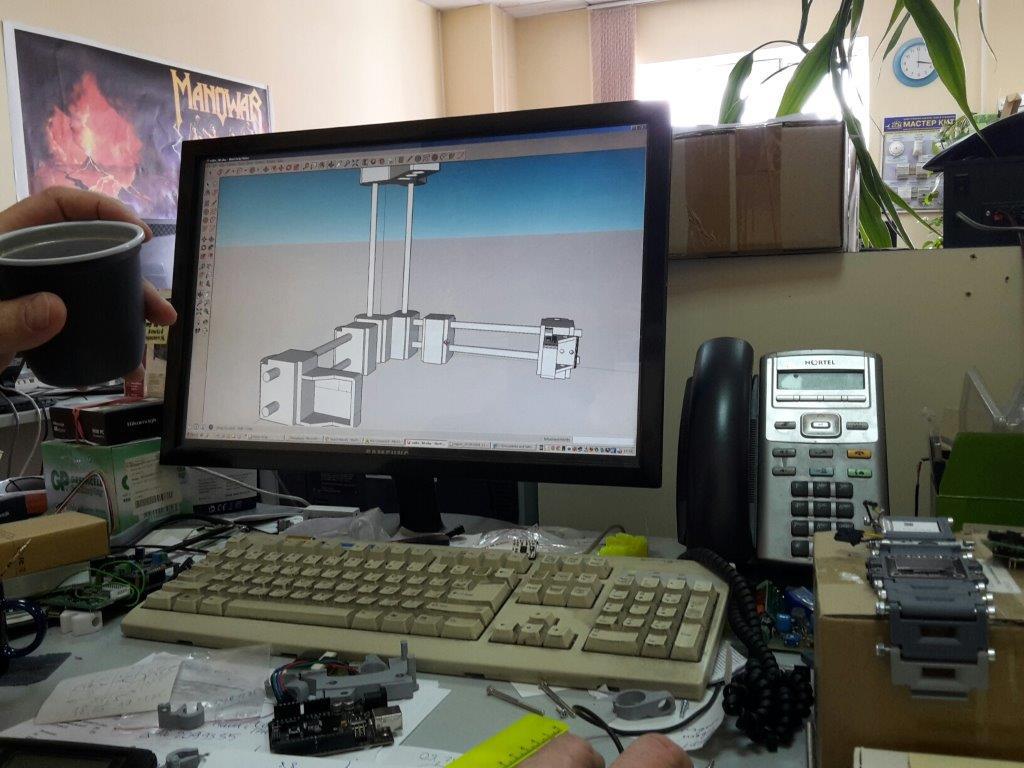
As a matter of fact, on a 3D printer we were going to print the parts necessary for the designer. Here's what happened in the end:
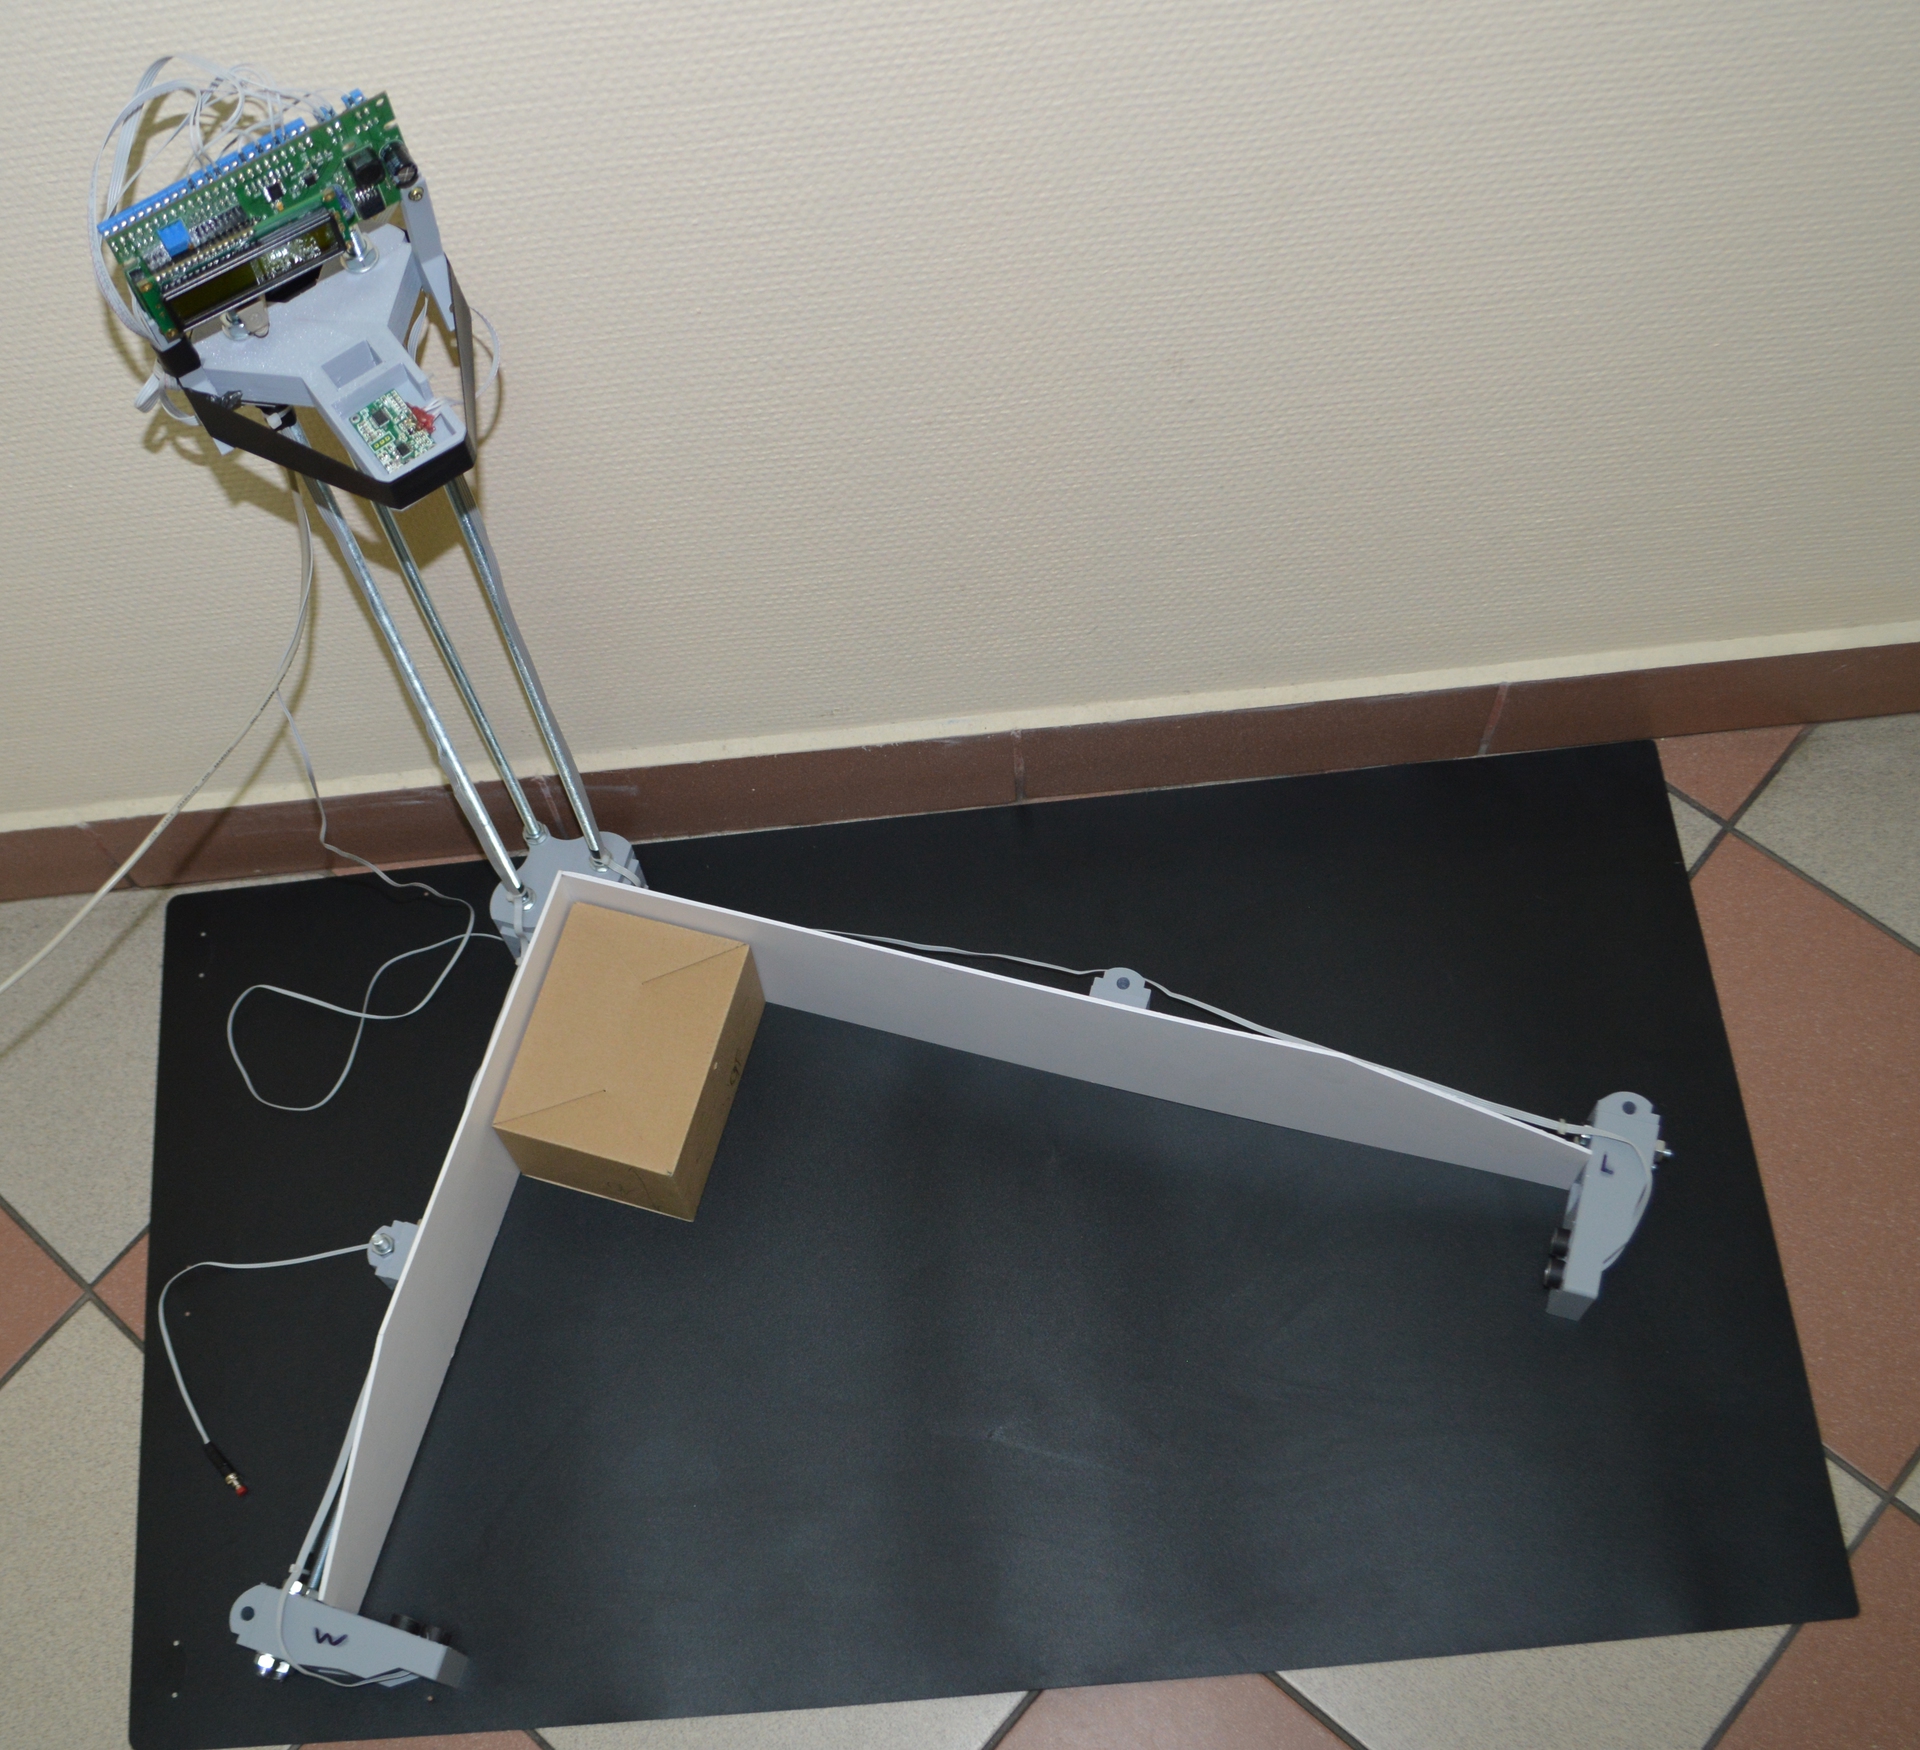

Here you can download STL files .
Having fun with ears and crazy wrist watches , we found commercial application for our 3D printer.
Results:
Now we will finish our scanner and send it to the warehouse for permanent operation, about which we will write and remove a new movie.
This is how the workplace of the packer looks like, where it weighs and measures the packaging:
')
Let's try to improve and automate it.
The silver surface is a scale, they are connected to the computer through its own COM port and automatically transfer the weight to the accounting system. But to measure the size of the box local innovators placed next to the weights of the ruler, from improvised means. This markedly increased labor productivity, but the data had to be entered by hand using the keyboard.
So, for the prototype we take the workplace as a basis and add sensors to the Wood-Cartesian coordinate system, unfold them inside the axes, connect to the microcontroller, write a sketch to ARDUINO IDE using the sensor library and Leonardo built-in capabilities. Namely, the fact that the Atmega 32u4 microcontroller uses the connection to the computer via the built-in USB interface using the HID-devices technology. This is how keyboards, mice, barcode scanners work. This is exactly what we need - to transfer data to the keyboard buffer, simulating manual data entry.
Here's a video that turned out in the "draft version"
We wrote a simple sketch. Realizing only the basic functions, but nothing prevents you from complementing it with various services such as manual calibration, changing the unit of measurement, setting the transmitted symbols depending on the accounting system used, etc. The memory of the controller is large enough and will allow it to be done in the future if necessary.
In the meantime, the sketch works according to this logic:
• After switching on, each of the three sensors measures the distance from itself to the opposite wall and remembers this distance as a basic
• It switches to the operating mode and cyclically measures the current distance.
• If the current distance is significantly different from the base distance - the device assumes that a box has been placed in the measurement area. The measurement occurs in three axes according to the formula:
Side Size = Baseline - Current Distance
• The size on three axes is written to the corresponding variables.
• Transfer to a computer by pressing the button by the operator. This is done to eliminate false positives.
• After transferring data, pressing the button is blocked until the box is removed. The system will feel it by measuring the current distance - it will again be equal to the base.
• The cycle is repeated - the system is waiting for a new box
So, we made, installed, set up the sensors for the experiment at fixed base distances ... and left for trial operation. What did she show? We did not get the measurement accuracy of the measurements, but the accuracy is quite appropriate for the logistical task.
Besides:
• Increased productivity - Yes.
• Convenience for the packer - Yes.
The second stage of our development has begun - the conversion to the presentation. The designer took up the matter and, using SketchUp and several cups of coffee, developed a design somewhat similar to the well-known 3D printer RepRap.
As a matter of fact, on a 3D printer we were going to print the parts necessary for the designer. Here's what happened in the end:
Here you can download STL files .
Having fun with ears and crazy wrist watches , we found commercial application for our 3D printer.
Results:
Now we will finish our scanner and send it to the warehouse for permanent operation, about which we will write and remove a new movie.
Source: https://habr.com/ru/post/256431/
All Articles