Overview of Wireframesketcher features on the example of creating a site layout
 Wireframesketcher - designed for prototyping graphical interfaces .
It can create interactive prototypes of websites and applications for desktop computers and smartphones, as well as other mobile devices.
The authors position Wireframesketcher as a tool for professionals and they have every reason to do so. The application is based on the Eclipse IDE or can be installed as a plug-in to Eclipse, and this provides cross-platform applications (Linux / Mac / Windows) and allows you to use a large arsenal of tools developed for this IDE, including support for various version control systems and other plugins. As for version control, it is easy to implement, since XML text files are used to store project data. Also for Wireframesketcher there is a fairly extensive library of layouts, templates, widgets and icons.
In this article, I want to show an example of how to create a prototype of a simple Web site in Wireframesketcher. In this case, the prototype will be understood as a combination of several linkable interactive so-called. wire page layouts of the website (wireframes). In the future, for simplicity, I will use the “original” name “wireframe” shortened to “frame” in this context.
I chose Wireframesketcher because I use Linux for work and in fact I could not find anything better for this system, and there are sensible analogues only for Mac and Windows.
Suppose you want to create a prototype of the site of some abstract company.
Naturally, I will not describe the creation of all possible pages of such a site, but will show only a few pages to demonstrate the possibilities of Wireframesketcher.
')
So let's get started. If you already have some kind of Eclipse installed (for example, PDT , then you can install Wireframesketcher as a plugin for your IDE version. If you do not have Eclipse installed, then you can download and install Wireframesketcher as a separate application for your operating system. I installed the plugin, respectively, I will describe all further actions for this option, I think that for the application there will be practically no differences.
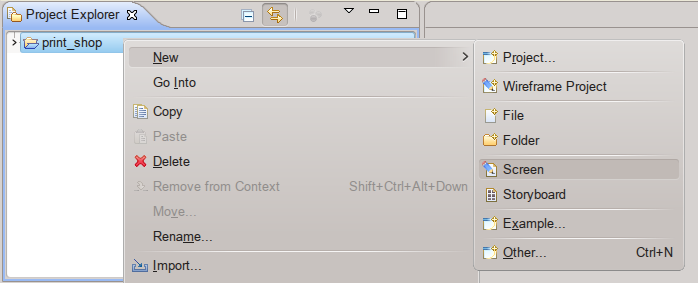
For those who are not familiar with Eclipse, I will provide screenshots of the menu of this IDE, if there is no main menu on this snapshot - this means that the context menu shown by the “right” click on the element under it is shown.
Create a new Wireframe Project, select the Empty Project as the template and name it print_shop (you can choose any other name).

Next, create a screen (hereinafter the screen) for the home page and call it home.
Screen in terms of Wireframesketcher is essentially a kind of virtual screen on which we will create the actual frame of the page, respectively, for each page you need at least one screen, and sometimes several to display different page states in the process of user interaction.
At this stage, you can already create a project repository in any convenient version control system for you.
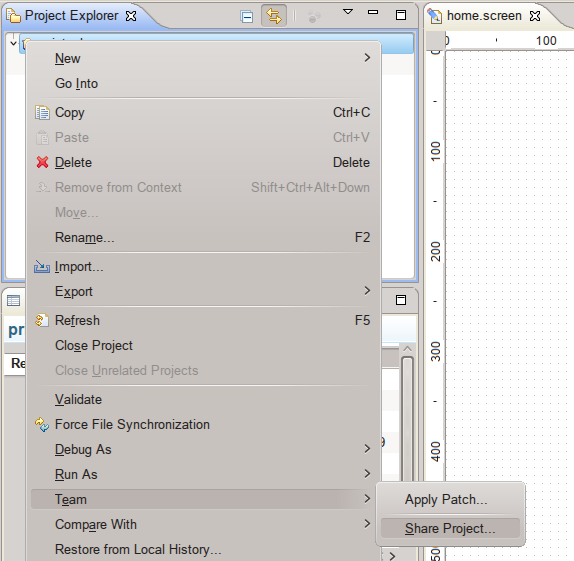
The most convenient way to do this is with the help of the plug-in, which I first need to install , I use EGit , but you can choose any other.
Let's make the first commit

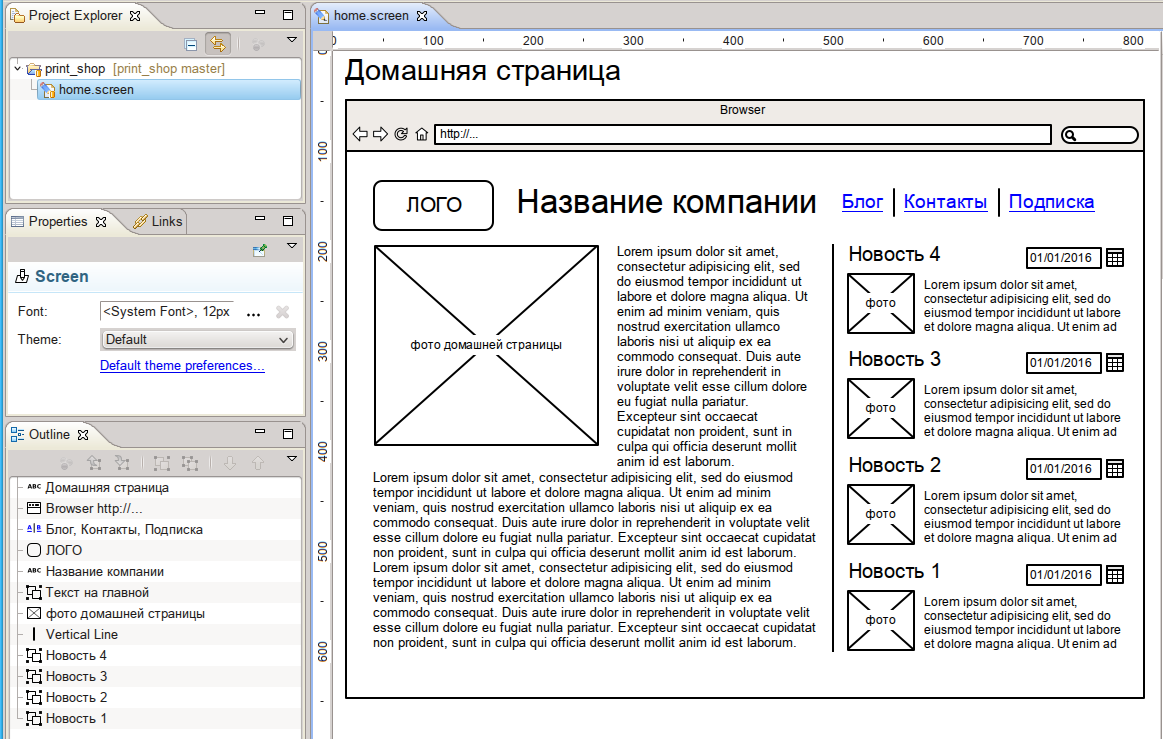
So that when you select a file in the “Project Explorer”, the corresponding screen editing tab opens - I recommend clicking the “Link with Editor” icon. I also recommend turning on the display of the grid and snapping objects to it, for this click on "Default theme preferences" and select the appropriate settings.

And the last thing you can do is choose the display mode “Clean”, then the lines of objects on the screen will be smooth. I like this option more than imitation of a sketch by hand.

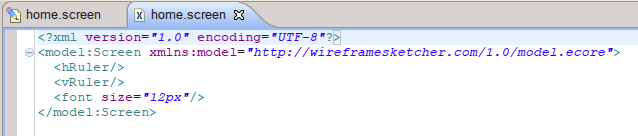
In the XML editor

You can view the contents of the screen home.screen
Let's create a homepage frame. Look again at the screenshot , on the right is the Palette panel with a library of available objects. If you wish, you can add objects of other developers or your own to this library. “Drag” the Title object from the Text folder and the Browser object from the Containers folder to the home page screen and set its display parameters. Since I, creating frame layouts of the site pages, do this only to show exactly what information and controls will be on the page and their approximate position, then at this stage I’m not very concerned about the exact dimensions and position of the objects, only their relative position and alignment, but you can choose your own strategy in this matter. To export the result to PDF format, I recommend choosing the sizes for Browser 800x600px and indentation somewhere 12.48 px as here
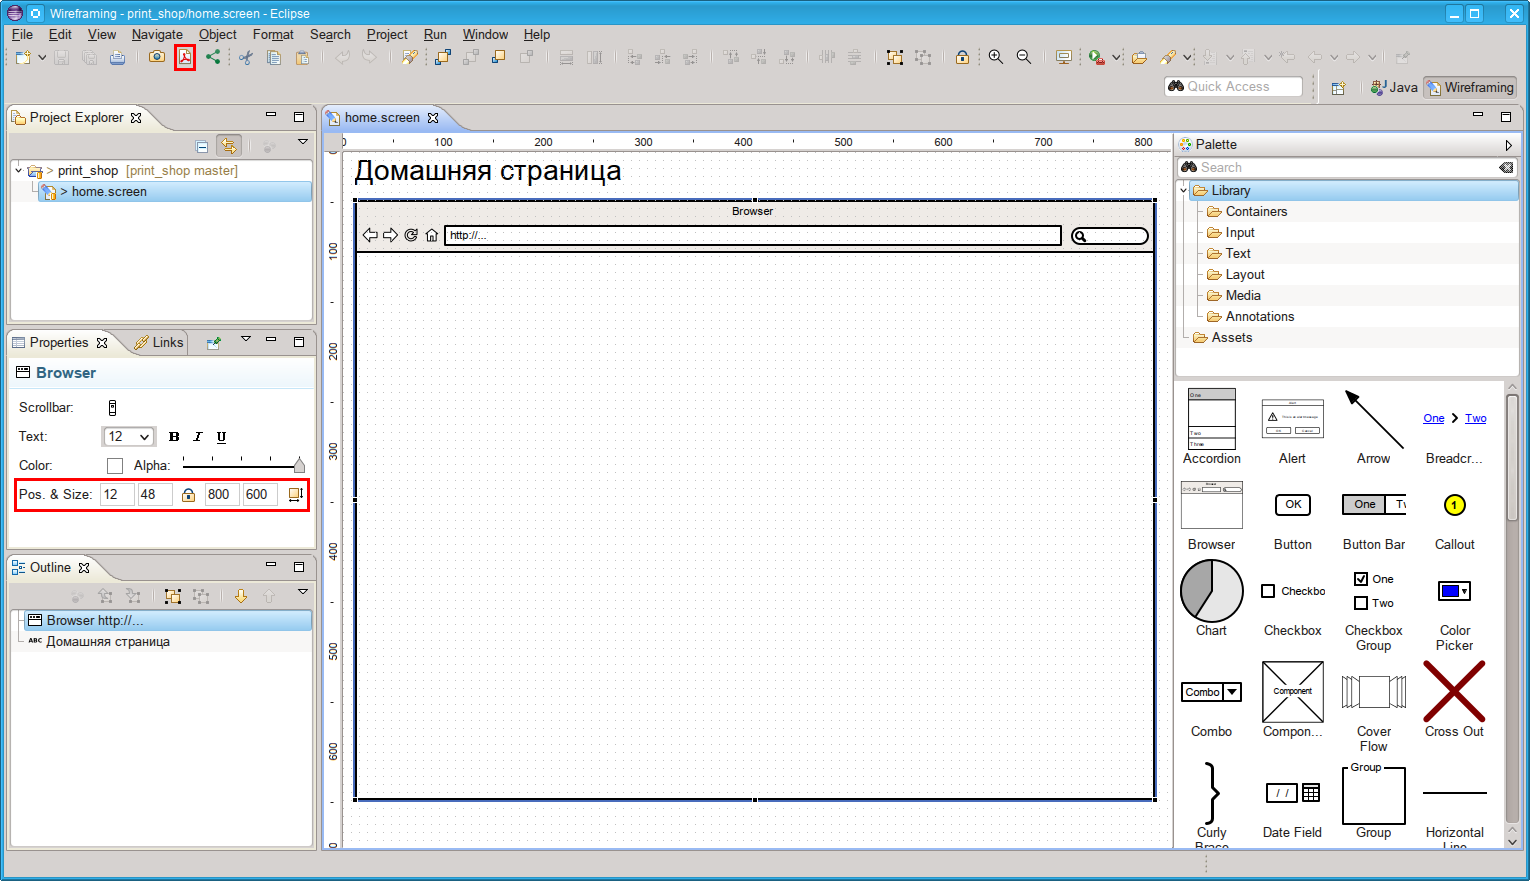
So you will have space on the A4 format for placing headlines and explanations in the margins, if necessary.
Until you buy Wireframesketcher, when exporting to PDF, Trial Version will be displayed.
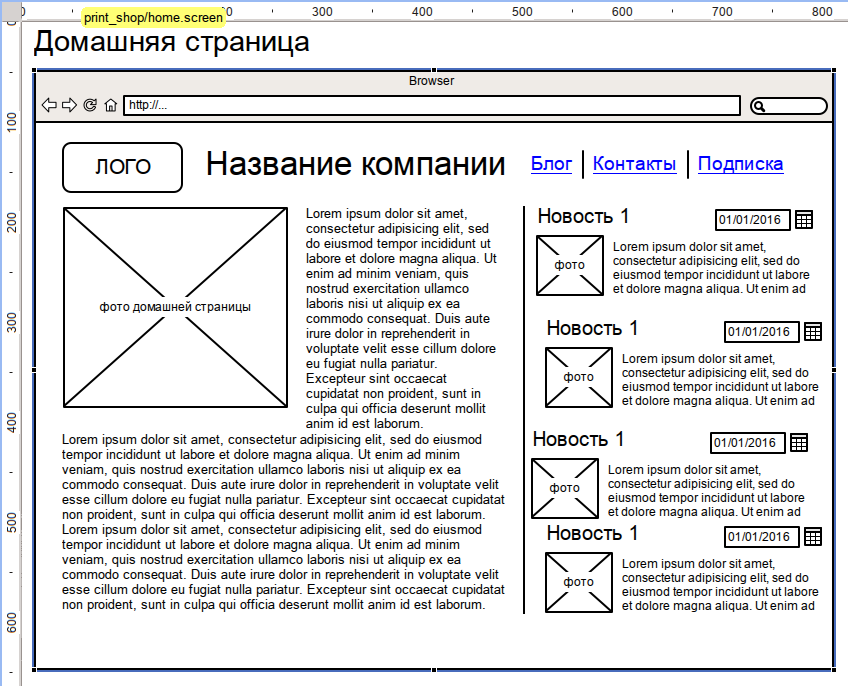
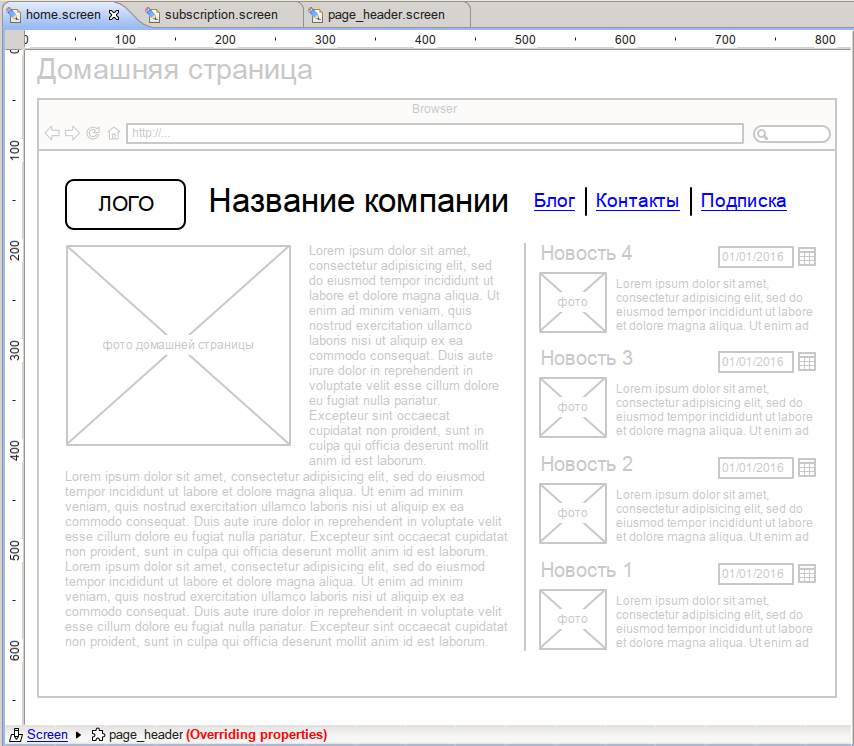
Now let's add to the Browser of the home page the typical objects from the Palette panel: logo, company name, home page photo, text, navigation menu and news feed. Please note that all this is done solely for the purpose of familiarization, without any claims to design and real practical necessity.
The logo can be made from Library / Layout / Shape.
Company name - Library / Text / Title.
Menu - Library / Text / Link Bar, immediately reduce the standard number of menu items: Home, Blog, Forum, About to three: Blog, Contacts, Subscription.
Since we will not put a real image on the page (although there is such an opportunity - you can insert any real image), we will use Library / Layout / Placeholder for it with the corresponding explanation: “home page photo”.
Text - Library / Text / Lorem Ipsum, because At the moment there is no possibility to set a wrap around a picture - we simulate this with the help of two text blocks, and group them for reliability by using either the toolbar icon, the object menu, or the context menu
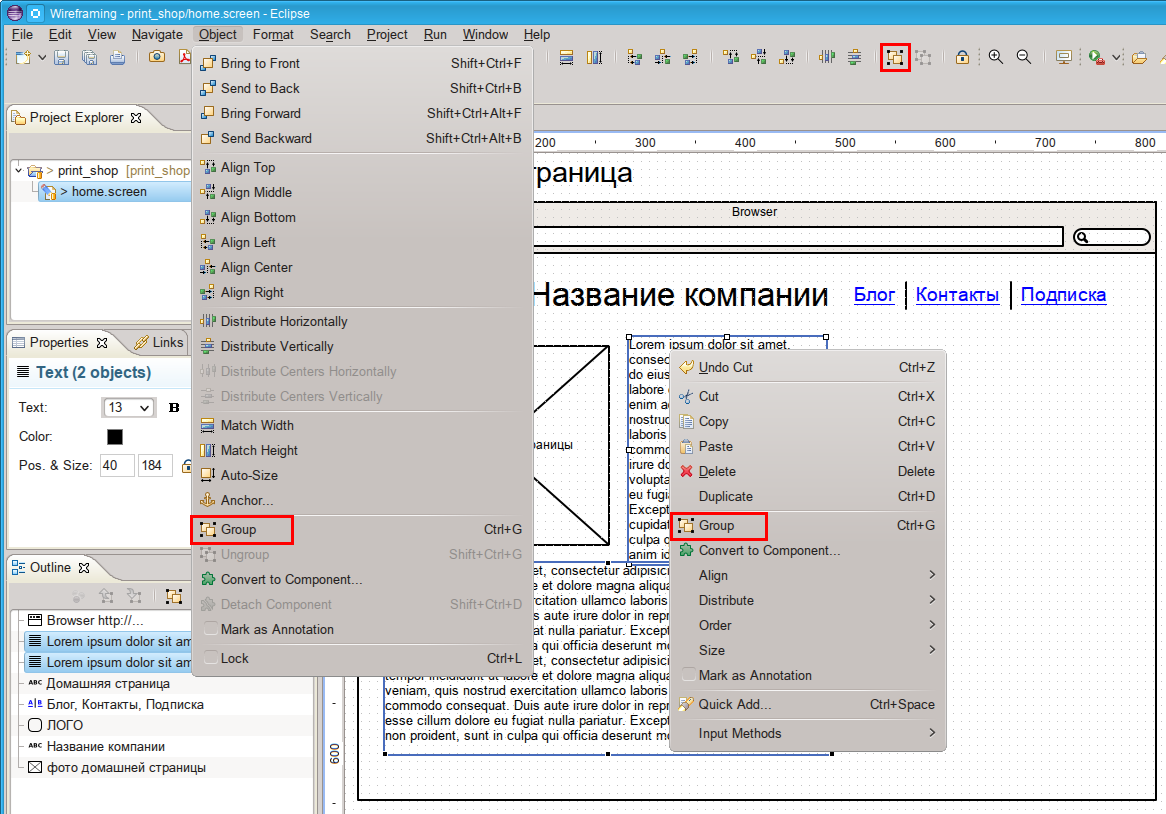
To work with objects in a group, select it with a double click, then the rest of the objects on the screen brighten and you can work with the selected group, for example, change its name or choose to edit any object of the group

To return to screen editing, double-click outside the group.
Separate the news line with a vertical line and create a news announcement.
I think you can figure out how to do it yourself. Those who do not like to work with snapping to the grid can use snapping to guides to facilitate the positioning of objects. To create a guideline, double-click on the corresponding ruler on the edge of the screen editing area. After you group the news items, your screen will look something like this.

I deliberately removed the grid and added (for demonstration) guides to this screen.
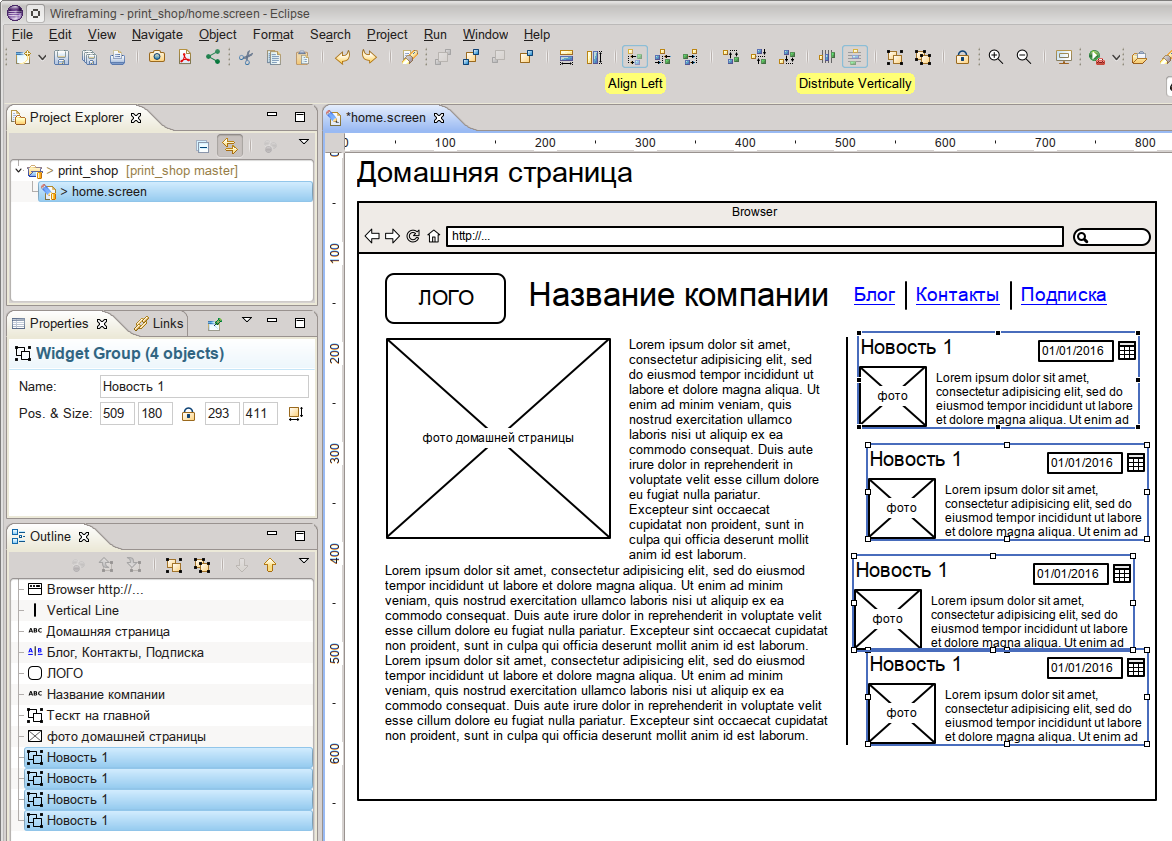
For the final filling of the home page, it remains only to duplicate the news announcement several times. Of course, you can make regular copy + paste, but it is much more convenient to just drag the duplicated object to the right place while holding down the [Ctrl] key, at this moment the + icon appears next to the arrow, which means that you are “pulling” a copy of the object. Suppose that you have disabled the anchor and to the grid and to the guides and you have something similar to
Now, in order to align the objects of announcements to the left and evenly distribute them vertically, you can use the appropriate tools from the toolbar. To do this, select all the objects to be aligned in the required order.
In the end, you should have a home page similar to this one.
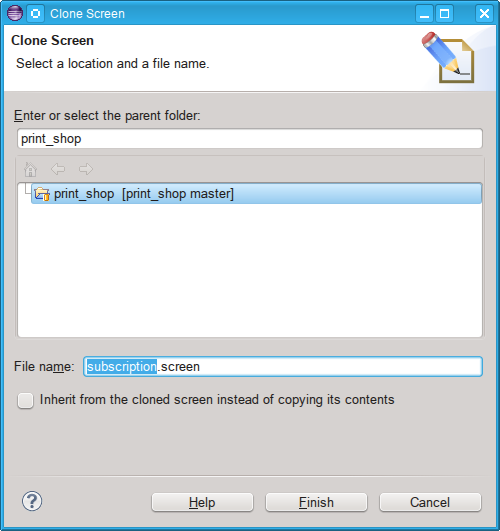
In order to show how the pages are linked, create a subscription page.
To do this, clone the home page screen

In fact, cloning is an analogue of copy + paste in just one action.
Rename new screen to subscription
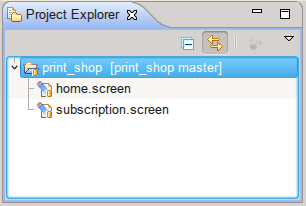
And do not forget to do the commit in time, the version control plugin using icon decoration shows the current status of files in the Project Explorer window, for example, before the commit

and after the commit
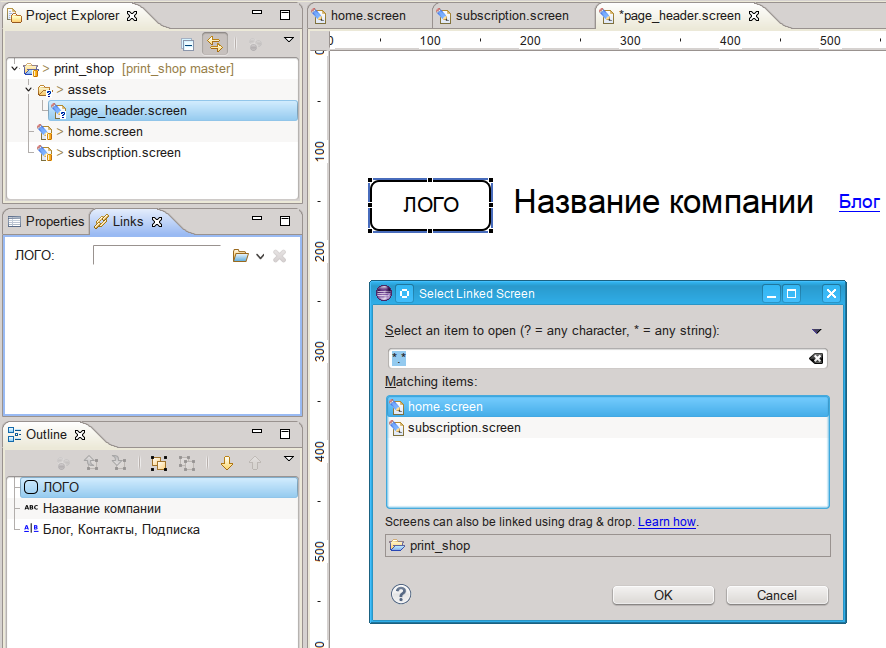
On the subscription screen, we will delete all unnecessary objects except the logo, company name and menu - these objects make up the page title and will be repeated on each page of the site. Rename the general screen title to “Subscription Page”. Now, when we already have two pages, it would be logical to add a link to the homepage to the logo, and a link to the subscription page in the menu item “subscription”. But let's not rush, because if we start doing this right now, then on each screen in the future we will have to repeat such actions. Moreover, if we decide to change these links or for example the name of the company, we will also have to do it on each screen. To simplify working with repeating objects in Wireframesketcher, it is possible to create so-called. component, and already place it on the pages. When changing a component file and saving it, it “automatically” changes on all screens where it is used.
To create a header component, select the logo, name and menu, then use the context menu Convert to Component

let's call this component page_header
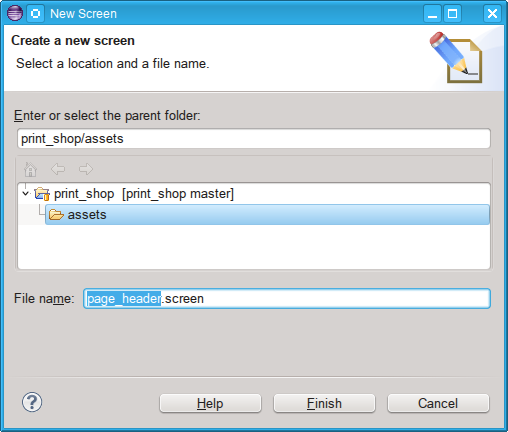
By default, all components are added to the assets project folder and become available in the Library / Assets folder in the Palette panel. Now that we have a new component page_header
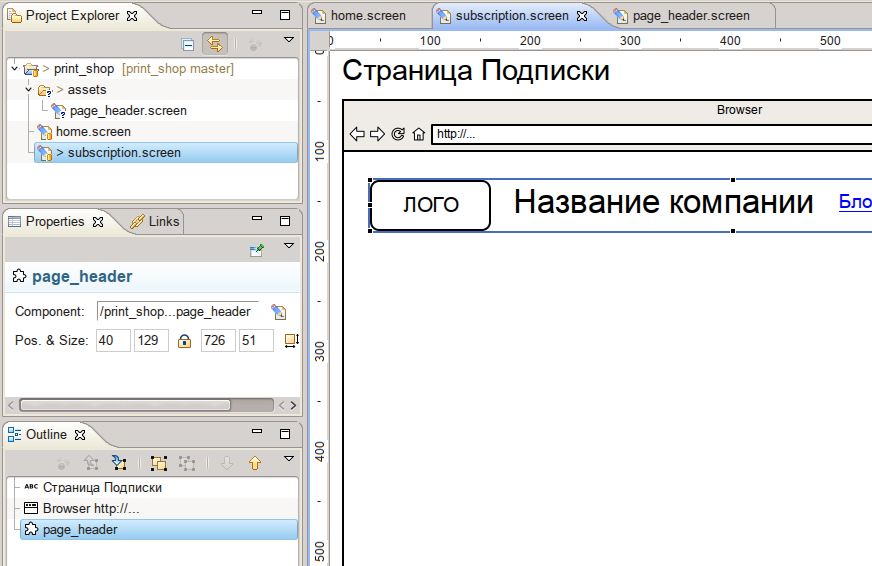
On the home screen, you need to delete the logo objects, the name and the menu, and “pull out” the page_header component from the Library / Assets folder in the Palette panel folder.
If you “pull out” it directly from the project’s assets folder, then such a component will not be displayed correctly on the screen.
The component can be edited directly on the screen where it is located. To do this, you also need to double-click on a component just like for editing a group. But at the same time, the original properties of the component overlap and the next time they change in the component itself, they will not be updated on this screen.
Now let's add a link to the homepage screen in the logo on the component screen, to do this, select the logo and in the Links panel select home.screen
Next, for the sake of clarity, we will change the first menu item from “Blog” to “News” and for the “Subscription” item we will set a link to the subscription screen

then save the page_header component screen and check the changes on the home and subscription screens, we see yellow link icons appearing on the corresponding objects.
If you switch to Presentation view mode by pressing [F5] or selecting the main menu item
then when clicking on these elements we will go to the corresponding screen.
You can exit Presentation mode by pressing [Esc].
Now on the subscription screen, you can add form elements to enter an email address to subscribe to the company's newsletter. In addition, you need to create two more screens, subscription_success and subscription_fail - the first one to display a page with a message about a successful subscription, the second one with an error message when you enter an incorrect email.
To go to the screen with the subscription_fail error next to the “subscribe” button, I usually add a note from the Library / Annotation / Note with the appropriate text and indicate the link for this note to subscription_fail.screen. To view the notes in the Presentation mode, you must disable the Hide Annotation checkbox or press the [A] key

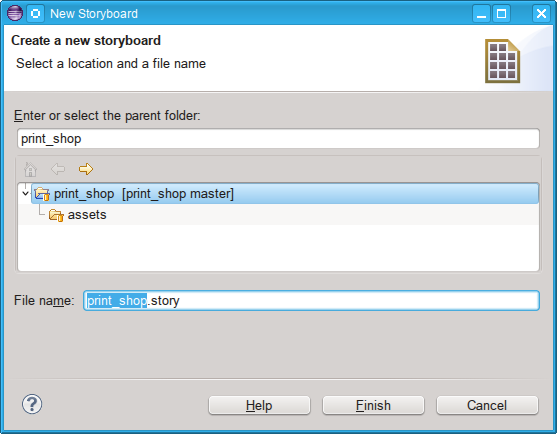
Now let's move on to the most important thing for which everything was started - to create a multi-page PDF presentation with linked pages. To do this, create a so-called. storyboard Storyboard by selecting the appropriate item in the main menu
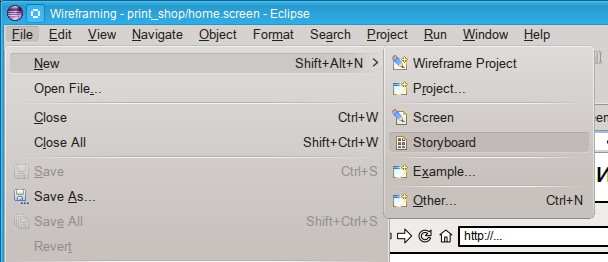
Let's call it print_shop as well as the project.
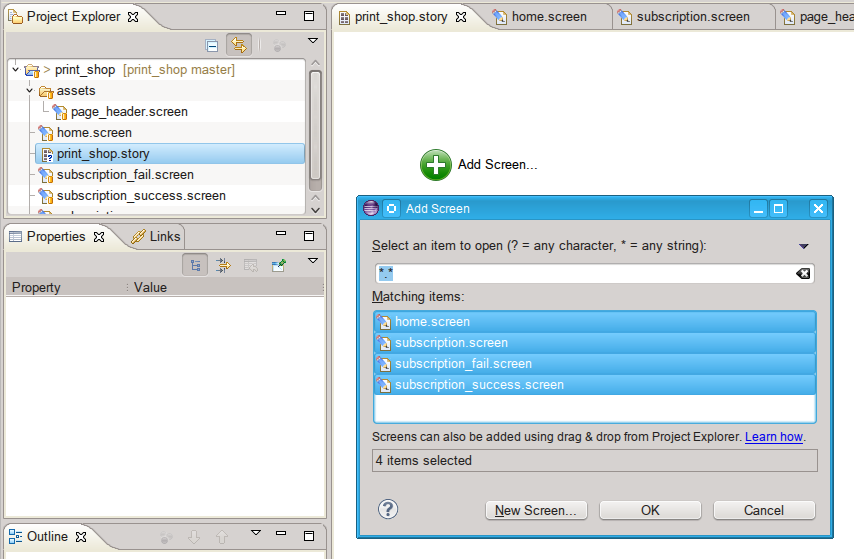
Then click on the green button “Add Screen” and select all of our screens.
and get the finished storyboard

If you wish, you can play with the location of the screens in Screenflow
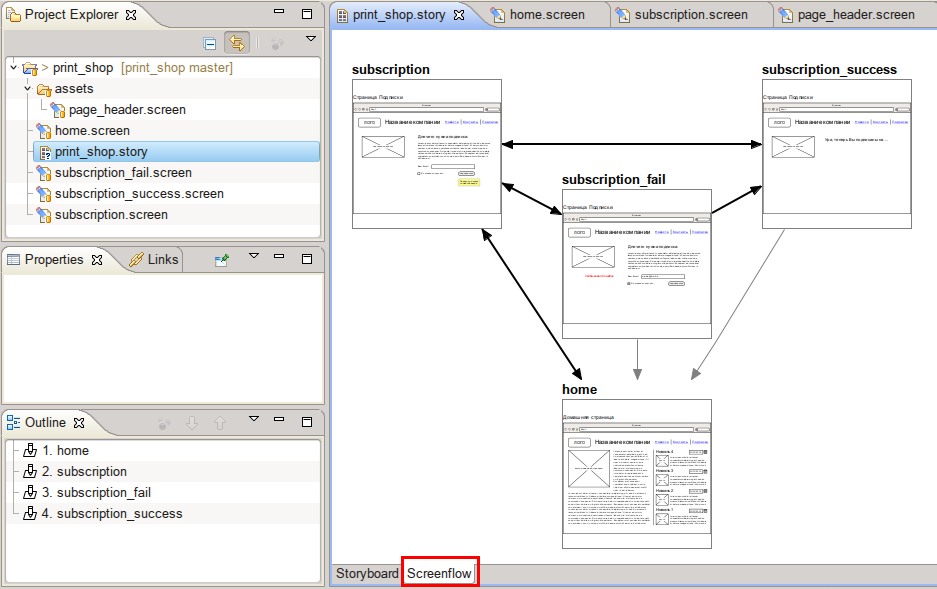
but personally for me it has no practical value, because I’m not going to export this diagram to PDF, especially since if there are several dozen screens in the presentation, this diagram will have a “mess” of arrows, as you don’t move them.
It remains to click on the export to PDF icon and select the export settings, I do as this screenshot

If you have notes with alternate conversion links, be sure to uncheck the “Hide Annotation” checkbox, otherwise these notes will not be visible in the final PDF. Press the button "Export" - voila - our PDF file is ready! Our prototype can be presented to the customer.
See the result can be on the link . Since The PDF viewer of the Google Disk “does not understand” links between pages — I recommend downloading the file and browsing it locally with links.
Let's summarize the results. You can create “wire” layouts in Linux in other ways, for example, Inkscape or LibreOffice Draw can do this even better, but Inkscape out of the box does not know how to make multi-page files, and in LibreOffice Draw I haven’t managed to place links between the pages of one document yet. Wireframesketcher does both, and + has a large library of ready-made objects + works with plug-in version control systems.
Wireframesketcher has many other useful features, for example, you can put the finished result directly from the application into the network, etc. But I will tell about these opportunities in the following publications on this topic, if of course it will be interesting to the audience of Habr.
Source: https://habr.com/ru/post/256415/
All Articles