How to make Xamarin Studio a little better?

So, a year and a half has passed since I started developing mobile applications using Xamarin and C #. During this time, the guys from Xamarin have thoroughly worked on their IDE, so from the bundle iMac-Parallels Desktop-Visual Studio-Android, I gladly refused in favor of iMac-Xamarin-Genymotion. However, Xamarin Studio is still at the level where some actions have to be performed manually, but what if you have to do this 5, 10, 15 or more times a day? The answer is simple - upgrade Xamarin Studio by writing an Add-in that will do all the work for you. In this article I will tell you how to create a simple Add-in and where to go if you need something more serious.
Training
To create an add-in, you will need:
- Xamarin Studio;
- Addin maker
The list is not long. Addin maker is set as follows:
- Open Xamarin Studio and go to the add-ons manager.

- In the Add-ons Manager, select the Gallery tab and drive into the Addin maker search box. As soon as the manager finds an add-in, install it.
')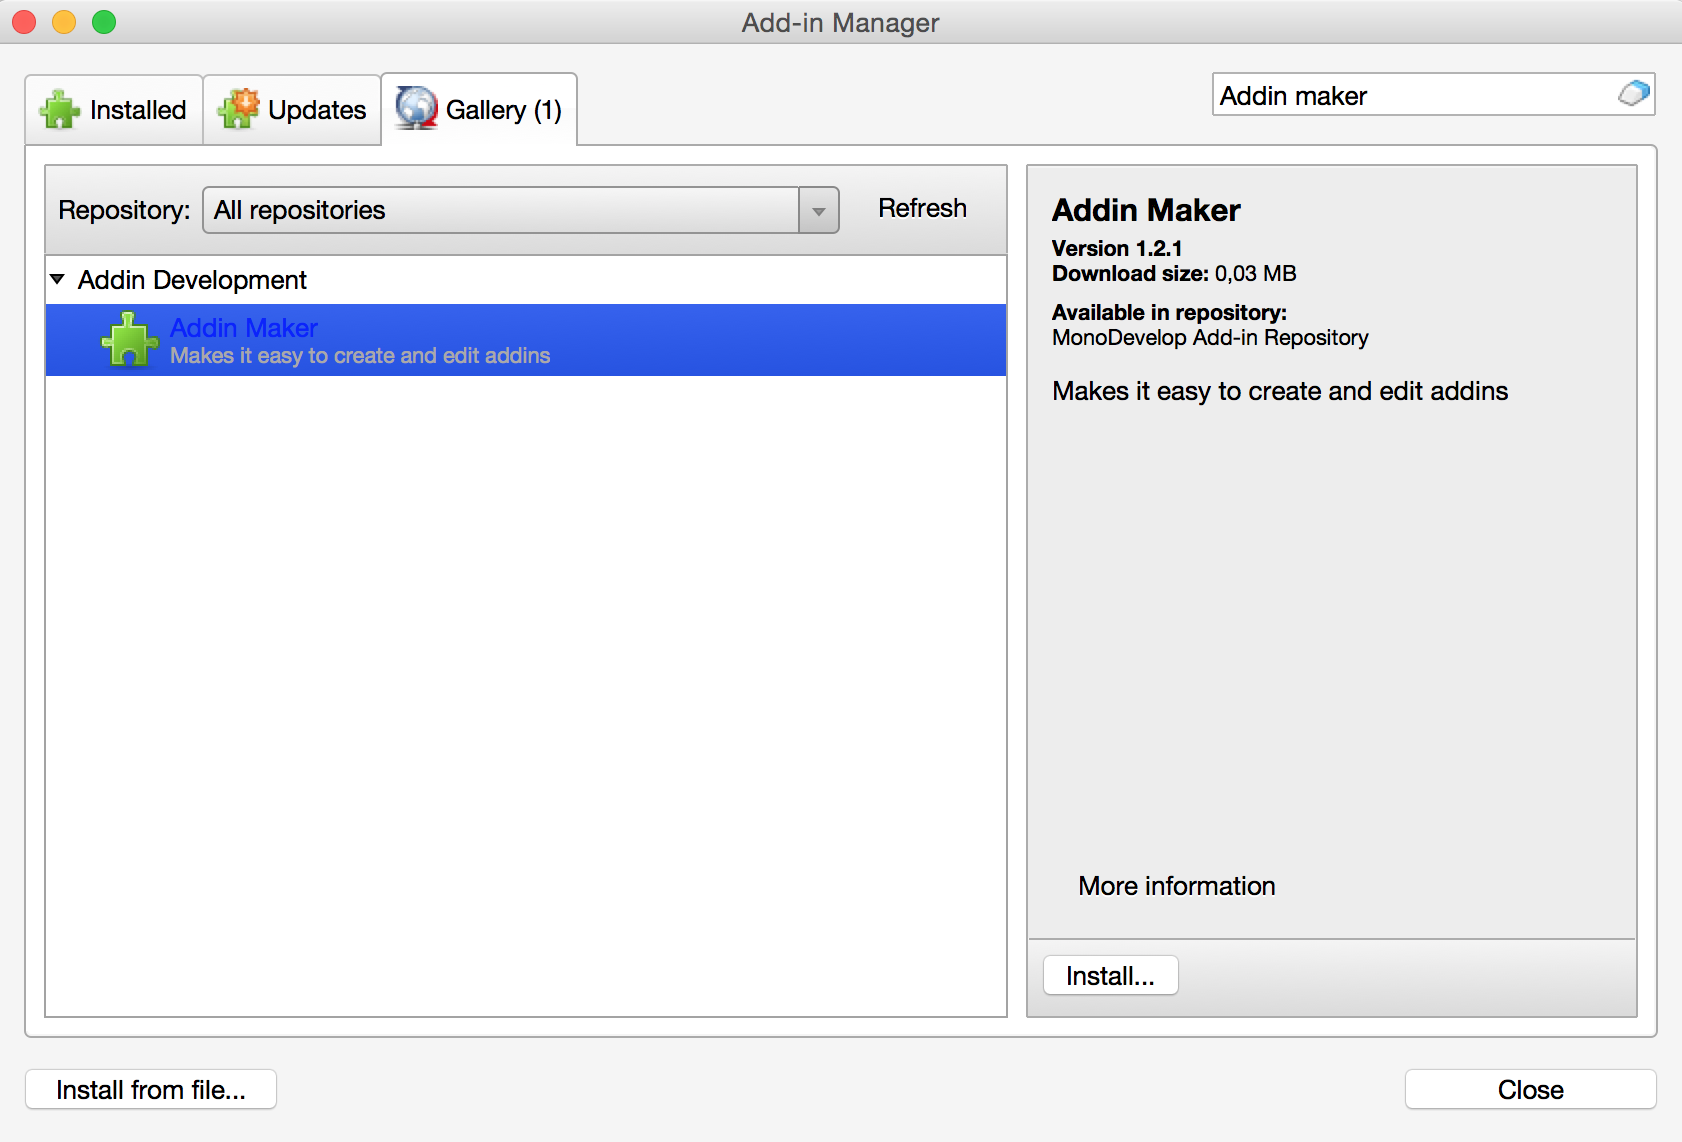
If suddenly the add-ons manager did not find such an add-in, take it here .
After installing Addin Maker, restart Xamarin Studio. Now everything is ready to start.
Goal of Add-in Created
The main and only purpose of the Add-in, the creation of which I will discuss, will be to delete the bin and obj folders in the main project directory by pressing one button. Working with Xamarin Studio on a Mac, such an operation sometimes has to be done several times per hour, regardless of whether the project is debugging for Android or iOS.
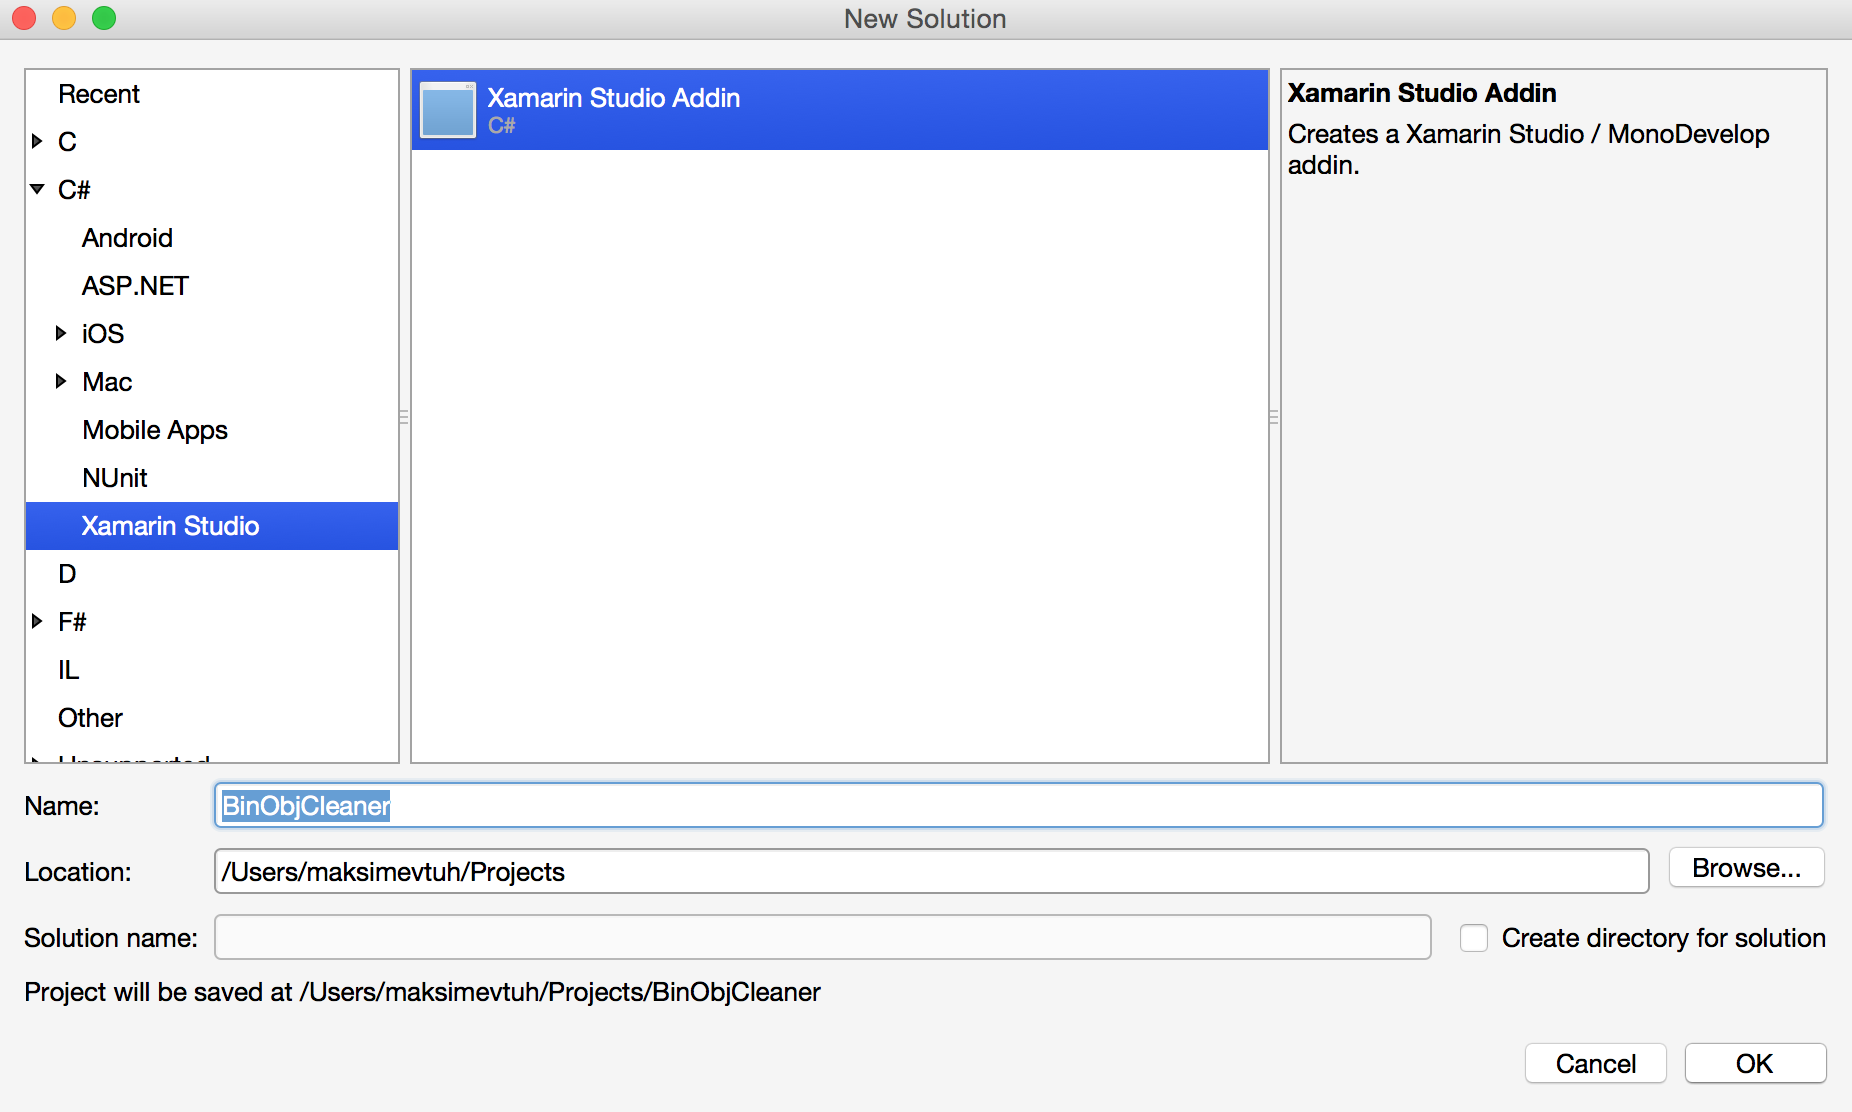
Project creation
To create a project in Xamarin Studio, select New Solution> C #> Xamarin Studio> Xamarin Studio Addin, enter the name and select the location:
After creating a project, its structure should look like this:
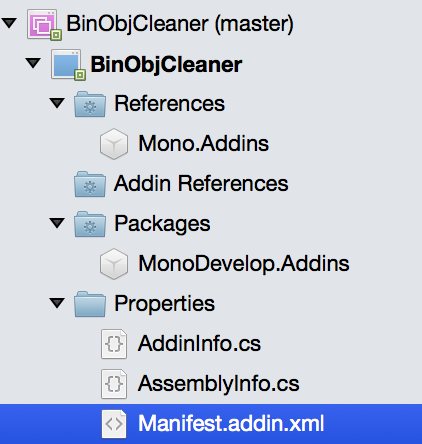
AddinInfo and AssemblyInfo, as the name implies, carry information about the Add-in and assembly, respectively. In Manifest.addin, the model of the created extension is described. Therefore, open it and write the following lines:
<?xml version="1.0" encoding="UTF-8"?> <ExtensionModel> <Extension path = "/MonoDevelop/Ide/Commands"> <Command id = "BinObjCleaner.BinObjCleanerCommands.DeleteBinObj" _label = "Delete bin/obj" _description = "Delete /bin and /obj folders in every solution project" defaultHandler = "BinObjCleaner.DeleteBinObjHandler" /> </Extension> <Extension path = "/MonoDevelop/Ide/MainMenu/Build"> <CommandItem id="BinObjCleaner.BinObjCleanerCommands.DeleteBinObj" /> </Extension> </ExtensionModel> And now in order. Line:
<Extension path = "/MonoDevelop/Ide/Commands"> She talks about which category the Add-in falls into. Since we create a button, the category will be “Commands”, if they created a template for a file, then you would need to specify “FileTemplates” as a category (of course, it is not limited to two categories). Go ahead.
<Command id = "BinObjCleaner.BinObjCleanerCommands.DeleteBinObj" _label = "Delete bin/obj" _description = "Delete /bin and /obj folders in every solution project" defaultHandler = "BinObjCleaner.DeleteBinObjHandler" /> Here is given:
- The button's id is the path (with the namespace specified) to the enum with the button type, i.e. {namespace}. {enum_name}. {enum_type_name};
- label - the text to be displayed;
- description - a description of what the button can do;
- defaultHandler - specify the path to the class, which will contain the logic of the button, {namespace}. {class_name}.
The following lines:
<Extension path = "/MonoDevelop/Ide/MainMenu/Build"> <CommandItem id="BinObjCleaner.BinObjCleanerCommands.DeleteBinObj" /> Determine the location of the Add-in'a (in our case, the button) with a specific id in the IDE. Ie, after launching Add-in, the button should be seen here:

We continue to move towards this goal. You must now create an empty enum (Right-click on the project> Add> New file)
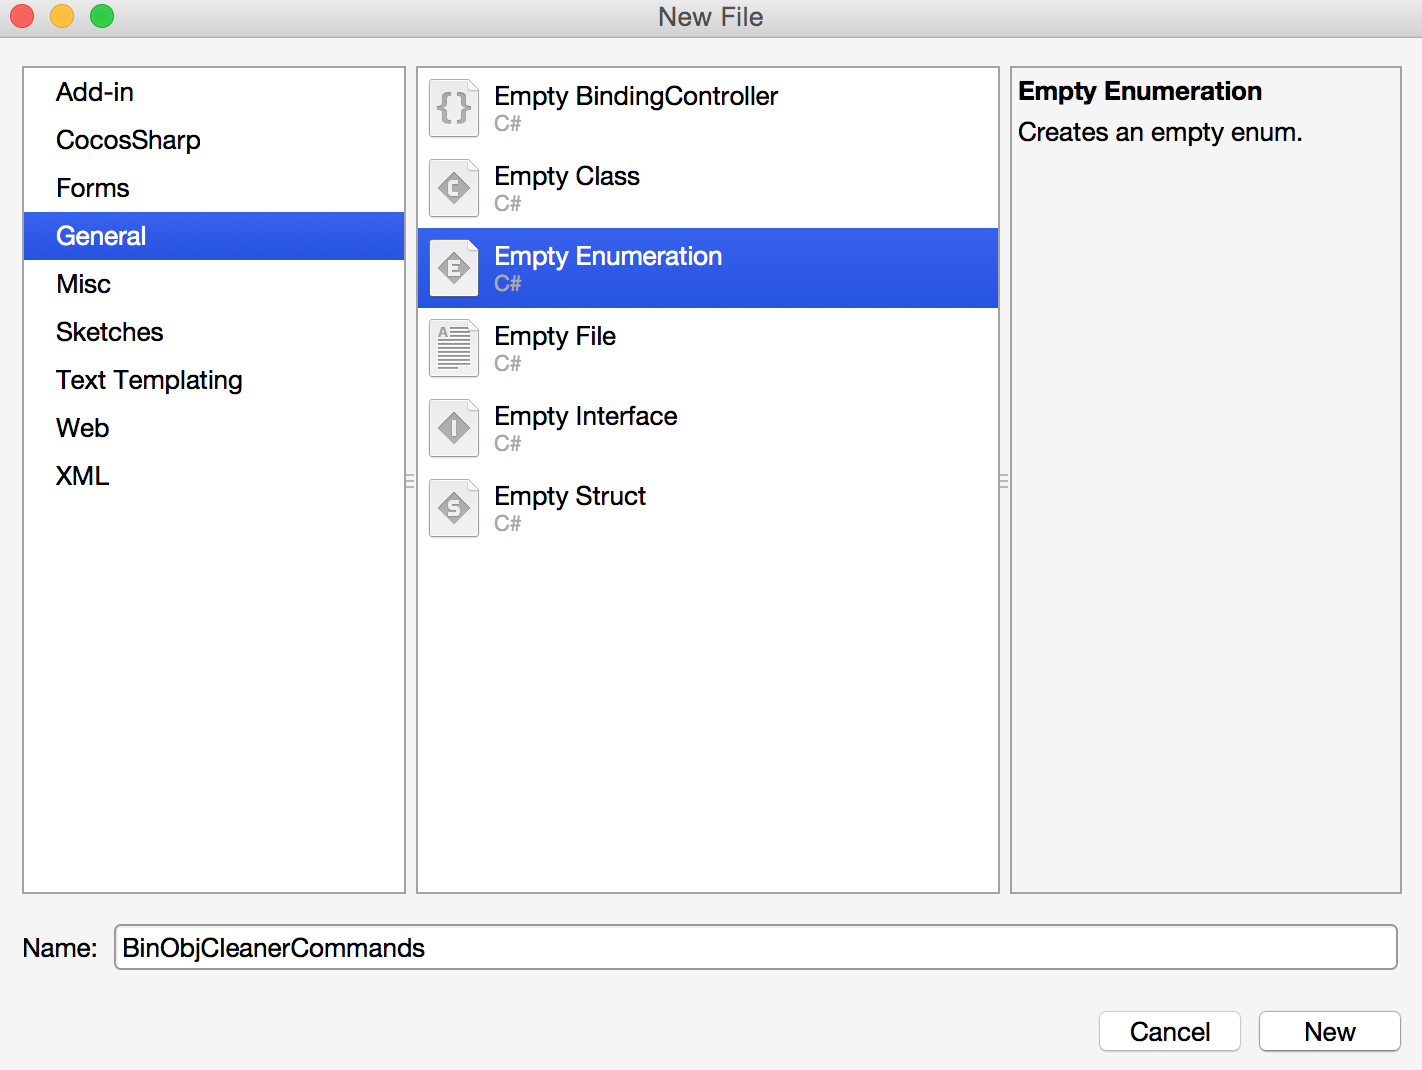
And register in it:
using System; namespace BinObjCleaner { public enum BinObjCleanerCommands { DeleteBinObj } } We added this to the enum project for the following line of Manifest.addin:
<Command id = «BinObjCleaner.BinObjCleanerCommands.DeleteBinObj" Next, create an empty class like enum:

Now we have added a class that was specified in Manifest.addin as a handler for the button:
defaultHandler = "BinObjCleaner.DeleteBinObjHandler" We inherit it from CommandHandler'a and redefine two methods - Run and Update. You should get the following:
using System; using MonoDevelop.Components.Commands; using MonoDevelop.Ide; using MonoDevelop.Core; namespace BinObjCleaner { public class DeleteBinObjHandler : CommandHandler { protected override void Run () { } protected override void Update (CommandInfo info) { } } } Overriding the Update method is necessary to control the visibility of a button, i.e. if no solution is open, the button should not be shown, since then it is not clear which solution exactly needs to delete the bin and obj folders. To do this, add one line to the Update method:
info.Visible = IdeApp.Workspace.IsOpen; Overriding the Run method will contain all the logic involved in deleting the bin and obj folders. This method is called after pressing the button. Before deleting folders, you need to check whether the solution is running or whether its assembly has begun, and also that these operations are completed. Add the following code to the Run method:
var projectOperation = IdeApp.ProjectOperations; var isBuild = projectOperation.IsBuilding (projectOperation.CurrentSelectedSolution); var isRun = projectOperation.IsRunning (projectOperation.CurrentSelectedSolution); if (!isBuild && !isRun && IdeApp.ProjectOperations.CurrentBuildOperation.IsCompleted && IdeApp.ProjectOperations.CurrentRunOperation.IsCompleted) { } Thus, we will get a list of operations that can be performed on the solution, check whether the assembly of the solution has begun / completed, whether the launch of the solution has not been started / completed.
After we have verified that deleting the bin and obj folders will not break anything, you need to get a list of projects included in the solution. To do this, inside the ifa, we add the following line:
var solutionItems = projectOperation.CurrentSelectedSolution.Items; Now that we know the list of projects in the solution, we just have to walk along the path to each project, adding “/ bin” or “/ obj” and deleting these folders, having previously checked their existence:
foreach (var item in solutionItems) { var binPath = item.BaseDirectory.FullPath + "/bin"; if (FileService.IsValidPath (binPath) && FileService.IsDirectory (binPath)) FileService.DeleteDirectory (binPath); var objPath = item.BaseDirectory.FullPath + "/obj"; if (FileService.IsValidPath (objPath) && FileService.IsDirectory (objPath)) FileService.DeleteDirectory (objPath); } As a result, DeleteBinObjHandler should look like this:
using System; using MonoDevelop.Components.Commands; using MonoDevelop.Ide; using MonoDevelop.Core; namespace BinObjCleaner { public class DeleteBinObjHandler : CommandHandler { protected override void Run () { var projectOperation = IdeApp.ProjectOperations; var isBuild = projectOperation.IsBuilding (projectOperation.CurrentSelectedSolution); var isRun = projectOperation.IsRunning (projectOperation.CurrentSelectedSolution); if (!isBuild && !isRun && IdeApp.ProjectOperations.CurrentBuildOperation.IsCompleted && IdeApp.ProjectOperations.CurrentRunOperation.IsCompleted) { IdeApp.Workbench.StatusBar.BeginProgress("Deleting /bin and /obj folders"); var solutionItems = projectOperation.CurrentSelectedSolution.Items; foreach (var item in solutionItems) { var binPath = item.BaseDirectory.FullPath + "/bin"; if (FileService.IsValidPath (binPath) && FileService.IsDirectory (binPath)) FileService.DeleteDirectory (binPath); var objPath = item.BaseDirectory.FullPath + "/obj"; if (FileService.IsValidPath (objPath) && FileService.IsDirectory (objPath)) FileService.DeleteDirectory (objPath); } IdeApp.Workbench.StatusBar.EndProgress (); IdeApp.Workbench.StatusBar.ShowMessage ("Deleted successfully"); } } protected override void Update (CommandInfo info) { info.Visible = IdeApp.Workspace.IsOpen; } } } All that concerns the status of the IDE bar (IdeApp.Workbench.StatusBar) is needed to display a visual notification to the user that the removal process has begun or ended. Looks like that:

With this, with the creation of the project, you can collect the solution, package it in .mpack and publish it in the official repository or distribute it among your colleagues.
Add-in Publishing
If you, like me, create an Add-in for internal use, then it will be enough just to execute the command “mdtool setup pack BinObjCleaner.dll” in the console:

And distribute .mpack (if you collect from a Mac, you will find it in your home folder) among the needy. Installation is done through the Add-ons Manager in Xamarin Studio using Install from File (Xamarin Studio> Add-in Manager> Install from file).
If you decide to upload to the official repository, then I, unfortunately, can only help by reference , since No matter how hard I tried, I didn’t manage to break through the numerous assembly errors.
Where to go next? Instead of conclusion
After writing a simple Add-in, when I realized the possibilities of expanding Xamarin Studio, I decided to write a solution template and project for internal development with additional logic, for example, with automatic registration of controllers when they were created (the most common mistake of our newbies is to forget to register the controller :-)). The sources of this Add-in and Add-in, discussed in the article, can be found on the github here and here .
The following resources helped me a lot in writing both:
- Base articles MonoDevelop www.monodevelop.com/developers/articles
- Description MonoDevelop API www.monodevelop.com/developers/articles/api-overview
- Examples of add-ins on a githaba, for example, github.com/aBothe/Mono-D , contribute most to success.
- Add-in Creation Guide by Xamarin developer.xamarin.com/guides/cross-platform/getting_started/extending_xamarin_studio_with_addins
The possibilities of expanding Xamarin Studio are quite extensive and, perhaps, are limited only by your needs, so do not hesitate to simplify life for yourself and your colleagues.
That's all, I hope the article will be useful to you. Thanks for reading!
Source: https://habr.com/ru/post/256393/
All Articles