Install a free StartSSL SSL certificate on the cloud VPS from Infobox
In this article we will look at how to order a free SSL certificate and install it on the cloud-based VPS from Infobox . Basic SSL certificates are issued free of charge by the StartCom certification authority .
Free StartSSL Class 1 certificates are used to verify domain names and email addresses. As a rule, customer checks are made automatically and require minimal participation from StartCom employees. The verification process confirms that the subscriber owns the domain and a valid email account.

')
Free certificates are designed for websites that need to protect the privacy of personal data and prevent the possibility of listening to Internet connections. Information presented in certificates of this type, except for the domain name and e-mail address, is not confirmed. If you need higher level certification, you can order an SSL certificate in the Infobox control panel on the main page in the “My Services” -> “Order New Service” section. Access to the control panel is provided when ordering any service, such as VPS or cloud VPS .
To ensure the secrecy of the transmitted data of simple sites, StartCom certificates are suitable well.
Free certificates from StartCom are not really completely free. If certificate revocation is required, this procedure costs $ 24 from StartCom.
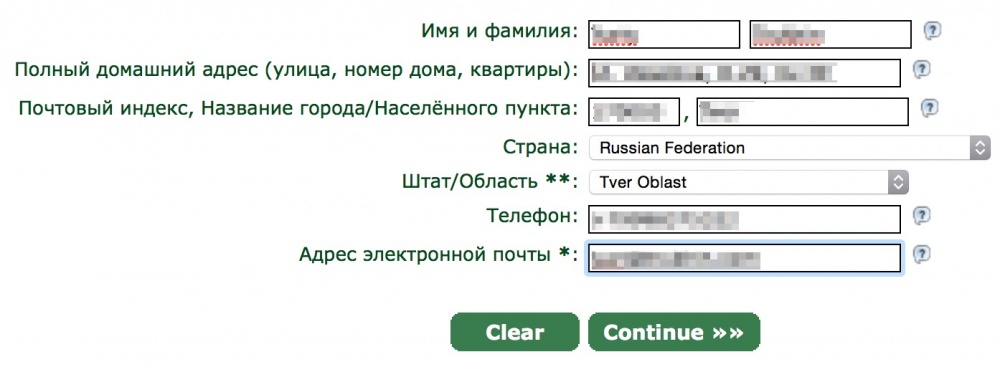
Open the free SSL certificate ordering page . Fill in the information about you (the data must be real, this is very important).
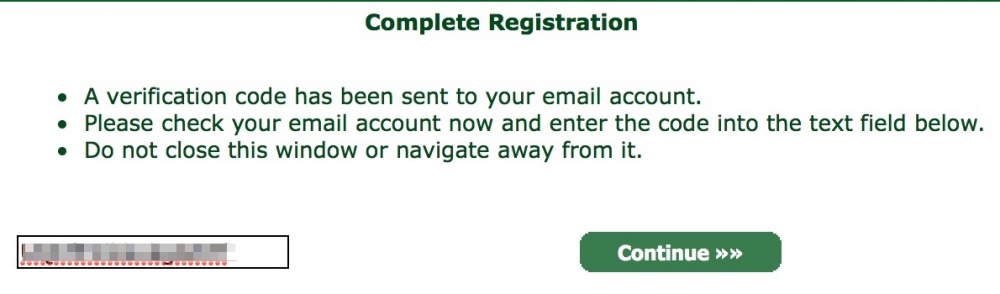
In the next step, you will need a confirmation code sent to the specified email.

Enter the code and click "Continue"
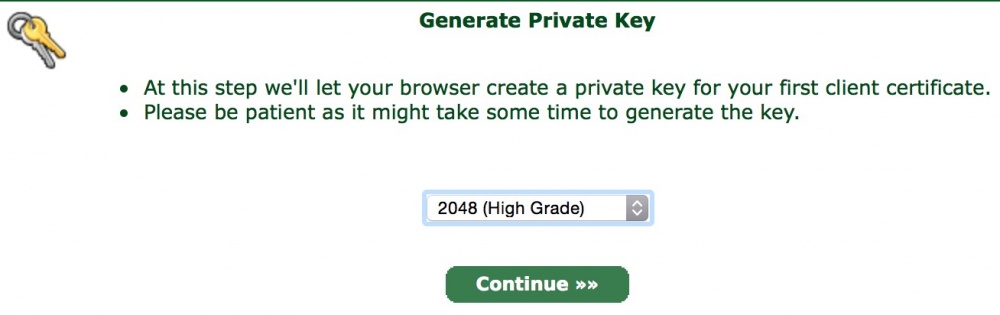
After that, you need to wait for the registration confirmation from StartCom (it can take up to 6 hours, but usually the access link and confirmation code comes much faster). After receiving the letter, enter the code from it using the link indicated in the letter. Next, select the length of the certificate (it is better to choose the maximum).
After that, a certificate will be generated for access to the StartCom certification center. Save it in a safe place and install it into the system by double-clicking on it and clicking “Install”.
You now have access to a certification authority. In the next step, enter the domain name for which you want to receive a certificate.

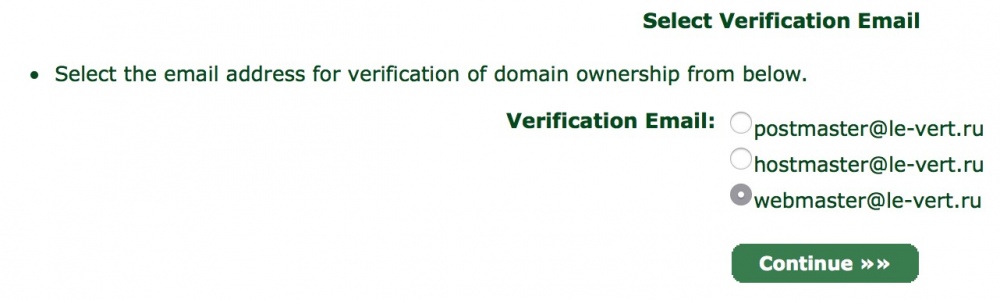
To confirm the domain, you need to create one of three addresses on it:
If you have not yet connected mail for a domain, you can bind the domain to a free Yandex.Mail or use the Office 24 business mail
After creating a mailbox on a domain, select it from StartCom and confirm that you own the domain.
After confirming domain ownership, you can generate a secret key, as shown in the screenshot below:
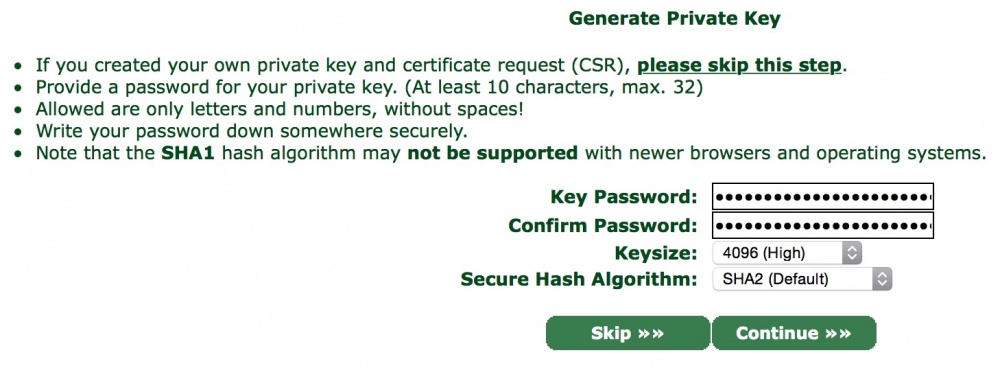
It is recommended to skip this step and generate a CSR on your cloud-based VPS. So the secret key will not be at StartCom.
To generate a CSR, connect to the virtual server via SSH (more details in the next section) and execute the command:
Enter your domain in the FQDN. E-mail address must be in this domain, for example webmaster@domain.com.
After generation, display the contents of the domain.csr file on the console screen:
and paste into the field of the certificate issuing wizard, which will appear after clicking on the Skip window for generating certificates.
Agree with the proposed domain name.
In the next step, add the www subdomain to the certificate.

Complete the process of obtaining ssl.crt and save it.
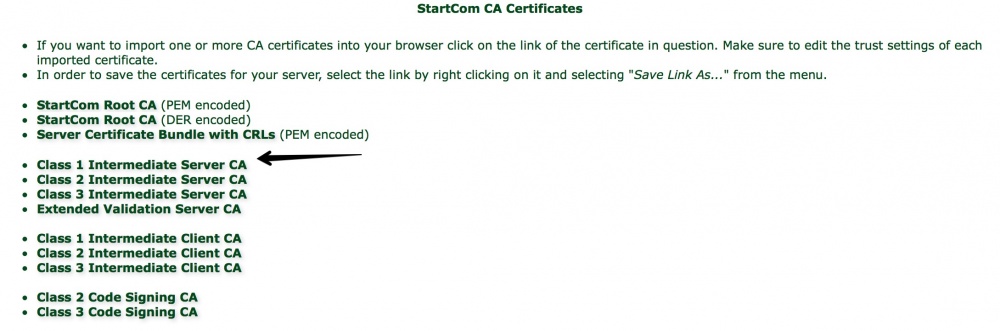
You will need root and intermediate certificates StartCom. To get them, go to Toolbox -> StartCom CA Certificates.
Save files using the link Class 1 Intermediate Server CA (sub.class1.server.ca.pem) and StartCom Root CA (ca.pem).
As a result, the following useful files will be saved on your local computer:
On the server in the / etc / ssl / folder:
Create a server from a Ubuntu 14.04 lamp template in the cloud . The process of creating the server was discussed in the article earlier.
You need to copy ca.pem, sub.class1.server.ca.pem and ssl.crt to the / etc / ssl folder (if not, create it).
This can be done, for example, through Filezilla (the installation of the client is also discussed in the article ). However, the connection method will be different, since you need access not only to the site folder, but also to the entire server.
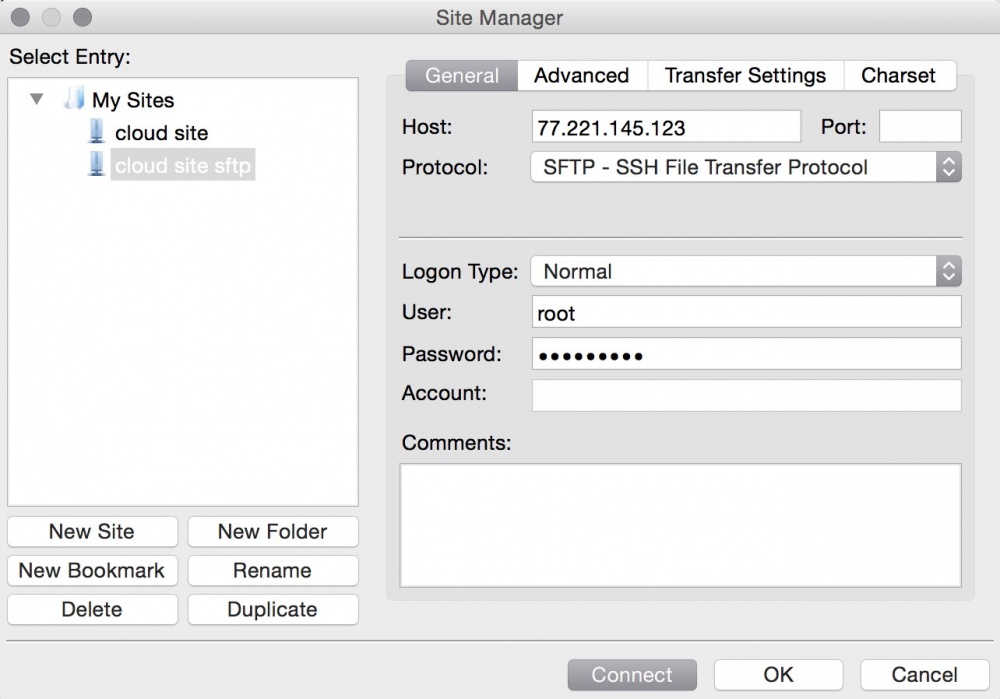
Add a new SFTP connection as shown in the screenshot below. Use the login and password from the server that came to your email after creating the server, as well as the external ip – address of the server.
When connecting, confirm that you are connecting to the server you know by clicking OK.

The connection will be successfully established.

Go to the "/ etc / ssl" folder and copy the ca.pem, sub.class1.server.ca.pem and ssl.crt files there.
Now connect to the server via SSH .
In the LAMP template, you need to configure SSL for NGINX reverse proxy.
If you previously set a password when generating CSR, decrypt the private key with the command:
Combine root and intermediate certificates with the command:
Add your certificate to the pool
Open the result in nano:
Save changes (Ctrl + X, Y, Enter).
Transfer the beginning of each new certificate to a new line after the end of the previous certificate and save the changes.
Now set permissions to access private.key:

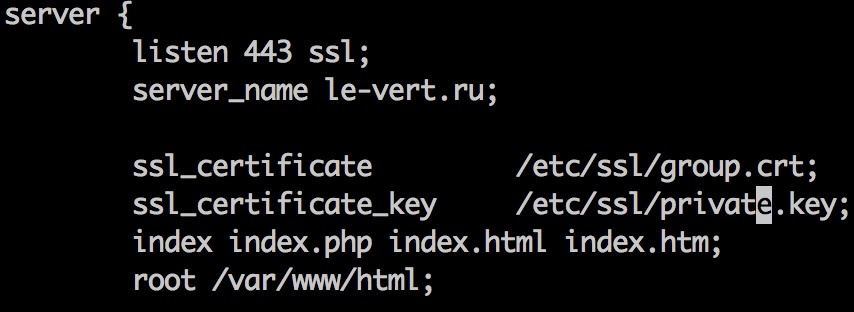
Edit the nginx configuration file:
Make changes as shown in the screenshot below (use your domain instead of le-vert.ru):
Restart NGINX.
If you try to access the site using the ip-address of the HTTPS protocol, you will see a warning that the certificate is not secure.
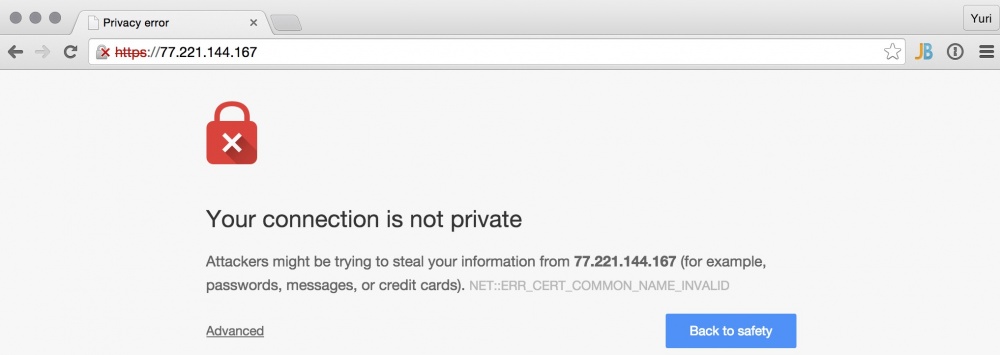
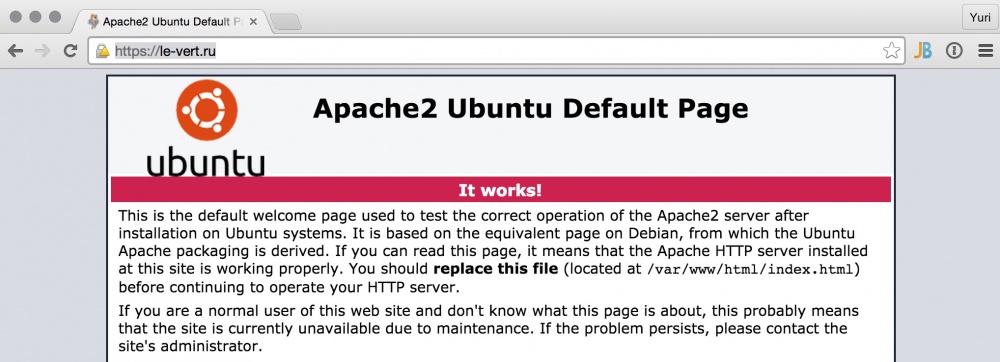
For a secure connection, go to the site by the domain name.
To do this, in the DNS A records for the domain and the www subdomain, specify the ip – address of the site and wait for the DNS update. Or, for testing, write the correspondence of the ip – address of the server and domain in the hosts file of your OS
The only unsafe thing left is the picture on the page is loaded via http. To ensure that the site is trusted, upload images by https.
Successful use of the Infobox !
Free StartSSL Class 1 certificates are used to verify domain names and email addresses. As a rule, customer checks are made automatically and require minimal participation from StartCom employees. The verification process confirms that the subscriber owns the domain and a valid email account.
')
Free certificates are designed for websites that need to protect the privacy of personal data and prevent the possibility of listening to Internet connections. Information presented in certificates of this type, except for the domain name and e-mail address, is not confirmed. If you need higher level certification, you can order an SSL certificate in the Infobox control panel on the main page in the “My Services” -> “Order New Service” section. Access to the control panel is provided when ordering any service, such as VPS or cloud VPS .
To ensure the secrecy of the transmitted data of simple sites, StartCom certificates are suitable well.
Free certificates from StartCom are not really completely free. If certificate revocation is required, this procedure costs $ 24 from StartCom.
Order free SSL certificate
Open the free SSL certificate ordering page . Fill in the information about you (the data must be real, this is very important).
In the next step, you will need a confirmation code sent to the specified email.
Enter the code and click "Continue"
After that, you need to wait for the registration confirmation from StartCom (it can take up to 6 hours, but usually the access link and confirmation code comes much faster). After receiving the letter, enter the code from it using the link indicated in the letter. Next, select the length of the certificate (it is better to choose the maximum).
After that, a certificate will be generated for access to the StartCom certification center. Save it in a safe place and install it into the system by double-clicking on it and clicking “Install”.
You now have access to a certification authority. In the next step, enter the domain name for which you want to receive a certificate.
To confirm the domain, you need to create one of three addresses on it:
- postmaster @ domain
- hostmaster @ domain
- webmaster @ domain
If you have not yet connected mail for a domain, you can bind the domain to a free Yandex.Mail or use the Office 24 business mail
After creating a mailbox on a domain, select it from StartCom and confirm that you own the domain.
After confirming domain ownership, you can generate a secret key, as shown in the screenshot below:
It is recommended to skip this step and generate a CSR on your cloud-based VPS. So the secret key will not be at StartCom.
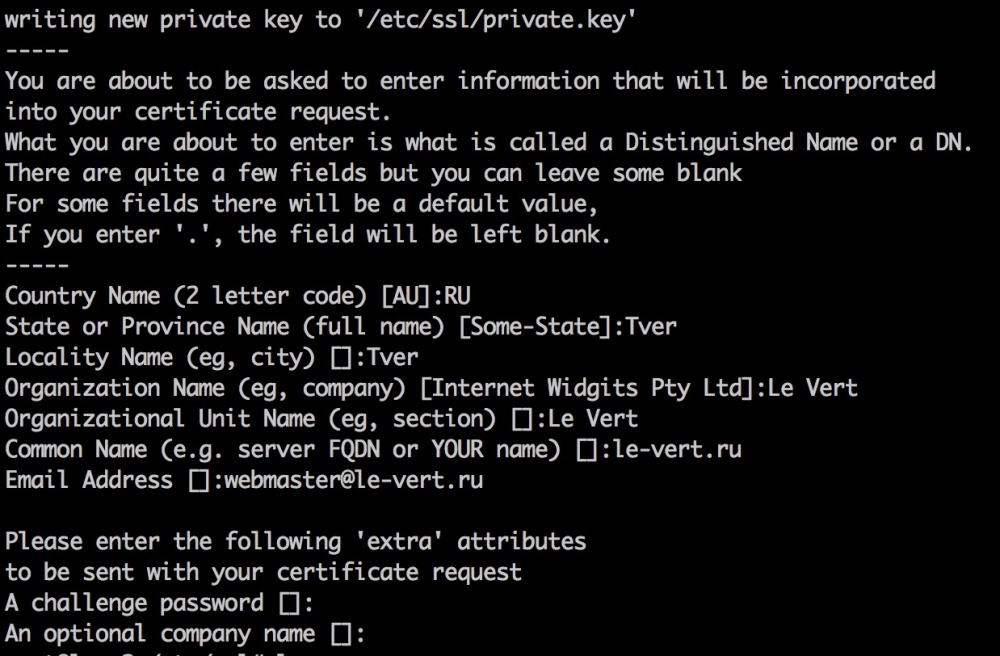
To generate a CSR, connect to the virtual server via SSH (more details in the next section) and execute the command:
openssl req -new -newkey rsa:4096 -nodes -keyout /etc/ssl/private.key -out /etc/ssl/domain.csr Enter your domain in the FQDN. E-mail address must be in this domain, for example webmaster@domain.com.
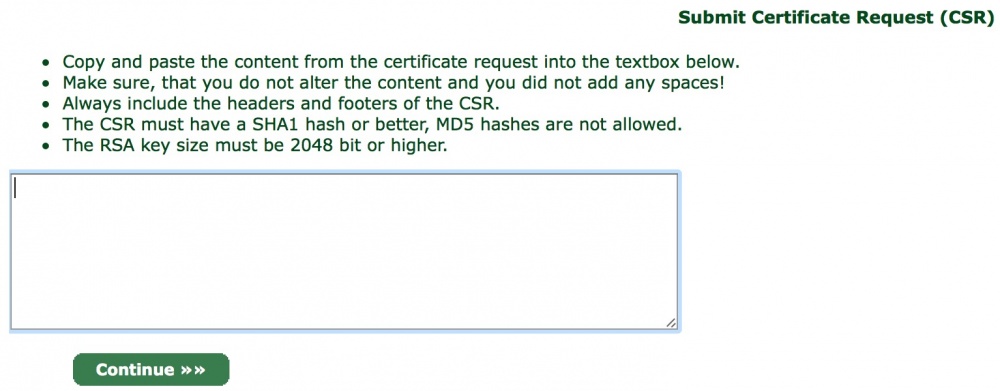
After generation, display the contents of the domain.csr file on the console screen:
cat /etc/ssl/domain.csr and paste into the field of the certificate issuing wizard, which will appear after clicking on the Skip window for generating certificates.
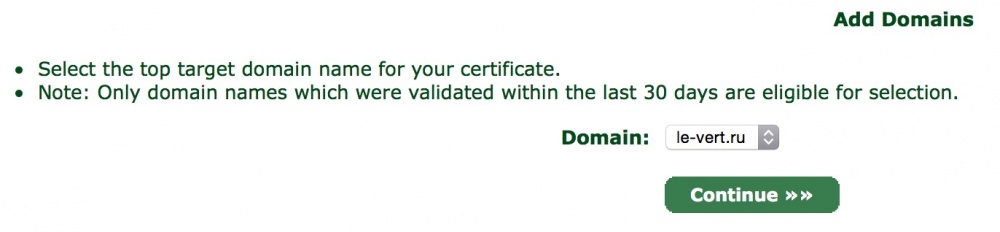
Agree with the proposed domain name.
In the next step, add the www subdomain to the certificate.
Complete the process of obtaining ssl.crt and save it.
You will need root and intermediate certificates StartCom. To get them, go to Toolbox -> StartCom CA Certificates.
Save files using the link Class 1 Intermediate Server CA (sub.class1.server.ca.pem) and StartCom Root CA (ca.pem).
As a result, the following useful files will be saved on your local computer:
- ca.pem
- sub.class1.server.ca.pem
- ssl.crt
On the server in the / etc / ssl / folder:
- private.key
Copy files to server
Create a server from a Ubuntu 14.04 lamp template in the cloud . The process of creating the server was discussed in the article earlier.
You need to copy ca.pem, sub.class1.server.ca.pem and ssl.crt to the / etc / ssl folder (if not, create it).
This can be done, for example, through Filezilla (the installation of the client is also discussed in the article ). However, the connection method will be different, since you need access not only to the site folder, but also to the entire server.
Add a new SFTP connection as shown in the screenshot below. Use the login and password from the server that came to your email after creating the server, as well as the external ip – address of the server.
When connecting, confirm that you are connecting to the server you know by clicking OK.
The connection will be successfully established.
Go to the "/ etc / ssl" folder and copy the ca.pem, sub.class1.server.ca.pem and ssl.crt files there.
Now connect to the server via SSH .
Enable SSL in NGINX
In the LAMP template, you need to configure SSL for NGINX reverse proxy.
If you previously set a password when generating CSR, decrypt the private key with the command:
openssl rsa -in /etc/ssl/ssl.key -out /etc/ssl/private.key Combine root and intermediate certificates with the command:
cat /etc/ssl/sub.class1.server.ca.pem >> /etc/ssl/cau.pem Add your certificate to the pool
cat /etc/ssl/ssl.crt /etc/ssl/cau.pem >> /etc/ssl/group.crt Open the result in nano:
nano /etc/ssl/group.crt Save changes (Ctrl + X, Y, Enter).
Transfer the beginning of each new certificate to a new line after the end of the previous certificate and save the changes.
Now set permissions to access private.key:
chmod 600 /etc/ssl/private.key Edit the nginx configuration file:
nano /etc/nginx/sites-enabled/default Make changes as shown in the screenshot below (use your domain instead of le-vert.ru):
Restart NGINX.
service nginx restart If you try to access the site using the ip-address of the HTTPS protocol, you will see a warning that the certificate is not secure.
For a secure connection, go to the site by the domain name.
To do this, in the DNS A records for the domain and the www subdomain, specify the ip – address of the site and wait for the DNS update. Or, for testing, write the correspondence of the ip – address of the server and domain in the hosts file of your OS
The only unsafe thing left is the picture on the page is loaded via http. To ensure that the site is trusted, upload images by https.
Successful use of the Infobox !
Source: https://habr.com/ru/post/256283/
All Articles